Auto Eye
Auto Eye Material Nodes
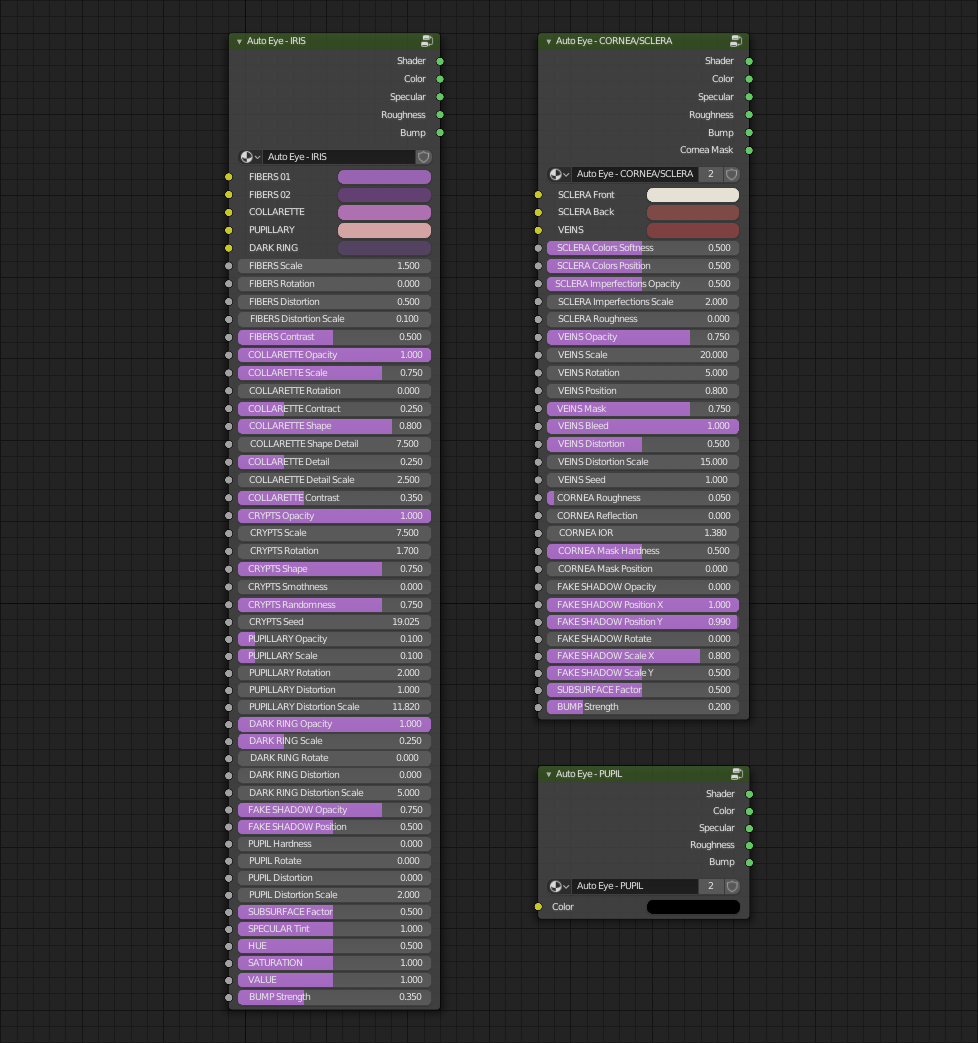
Material Diagram

Node Parameters Diagram

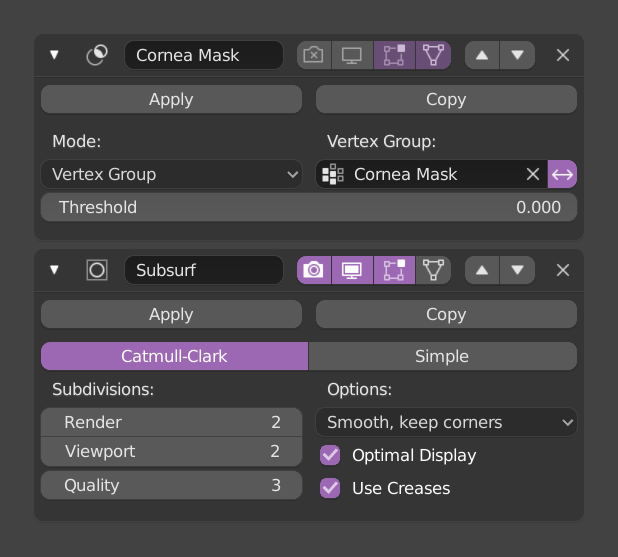
Modifiers
Auto Eye comes with two modifiers, a Subdivision Subsurface and a Mask modifier to turn on and off the cornea visibility.
The Mask modifier is particularly useful to see where your character is looking on the viewport, in Solid mode. Make sure to always leave this modifier turn off for the render and only use the display on viewport option.
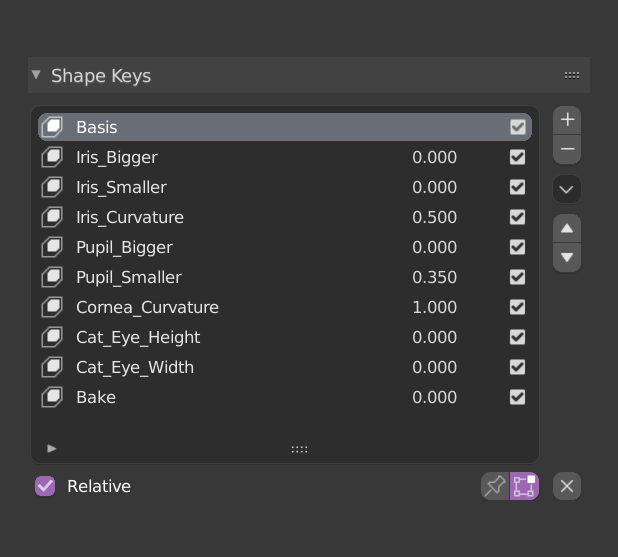
Shape Keys
You find 8 Shape Keys on Auto Eye.
Real time preview in Cycles
To take advantage of the real time preview in Cycles you just need to enter the LookDev mode in Blender 2.8, if the preview don’t look correct you need to setup somethings inside Eevee first.
After change the render engine to Eevee, in the Render tab you need to enable the Screen Space Reflections and the Refraction option inside the same sub menu. Them select the Auto Eye and go the Material tab, select the Cornea-Sclera material and make sure that the Screen Space Refraction option is enable.
Now you can back to Cycles render engine and enter the LookDev mode and the real time preview should works fine.

How to install
Go to Edit > Preferences > Add-ons and click install.
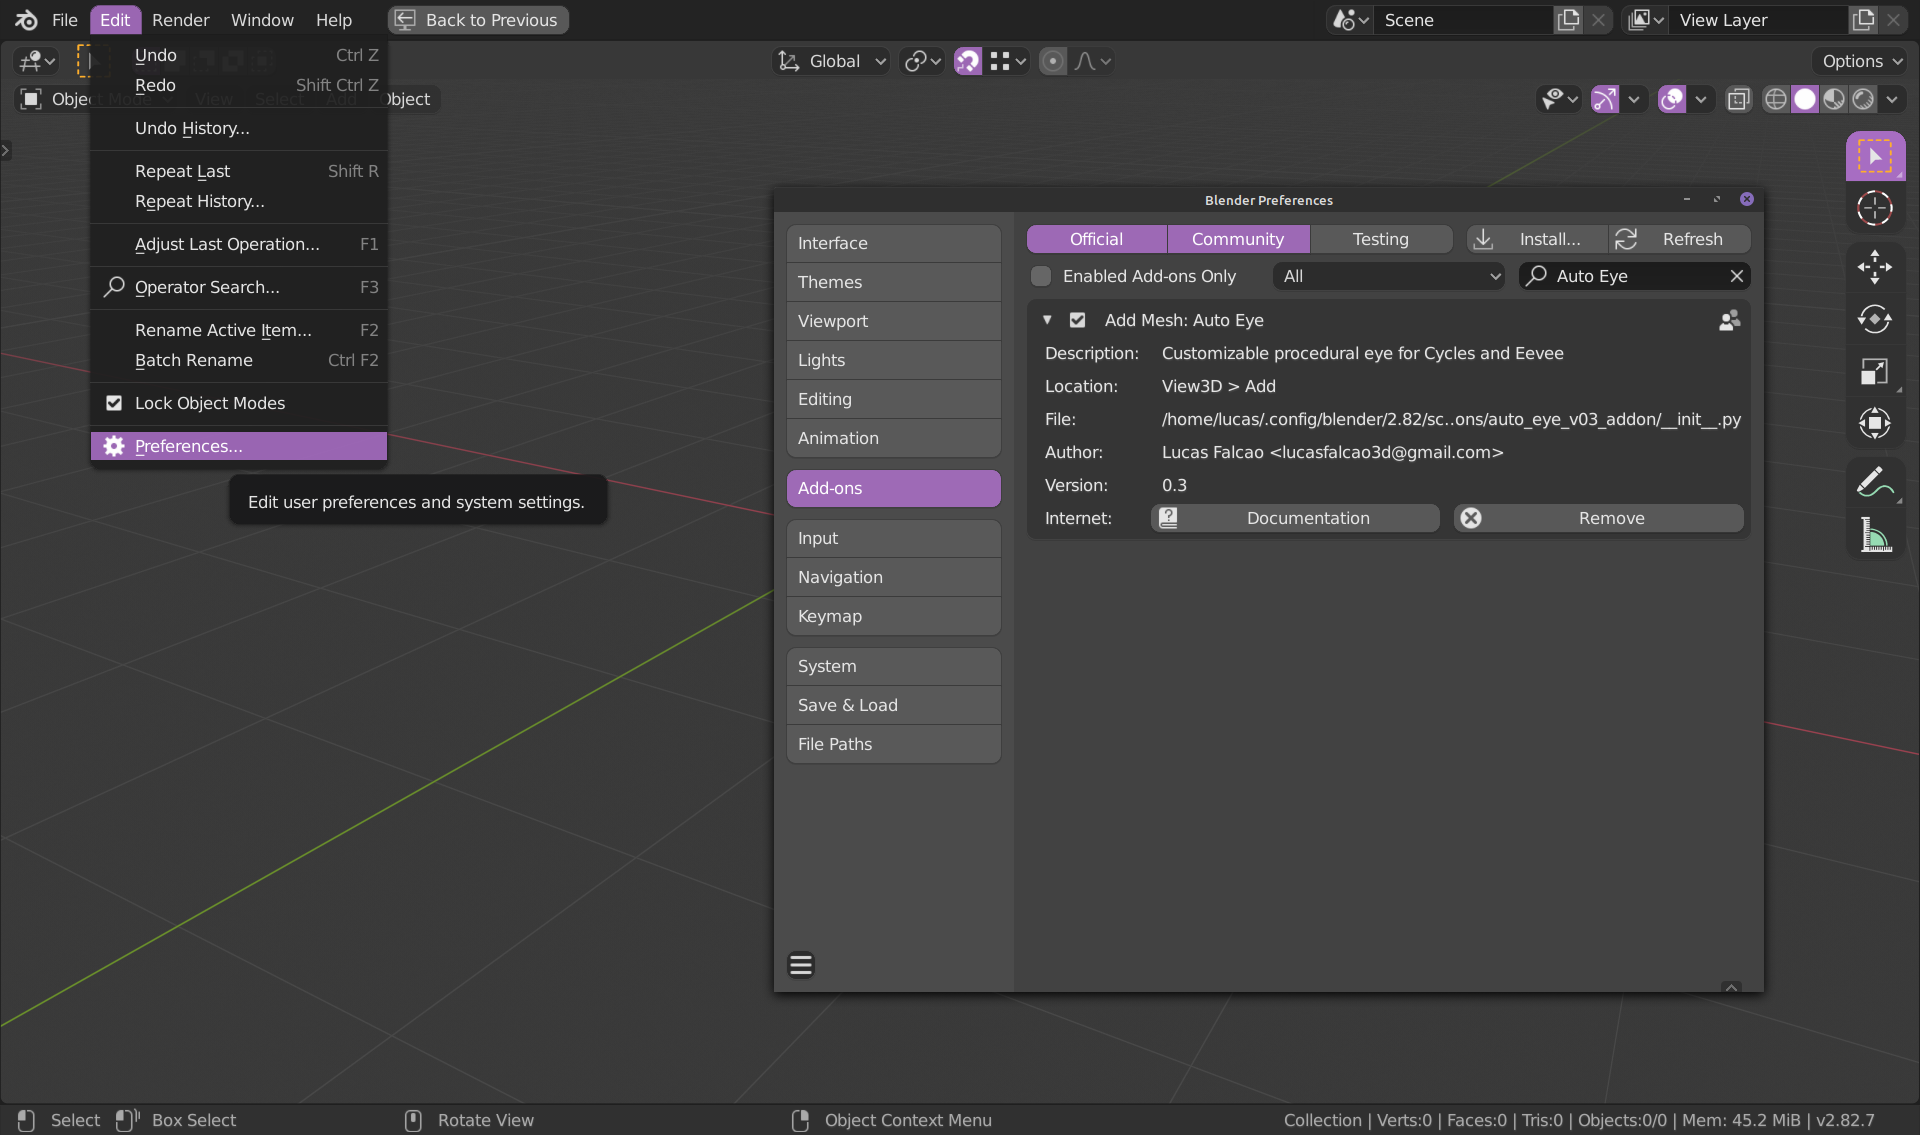
Search for the zip file on the folder you saved.

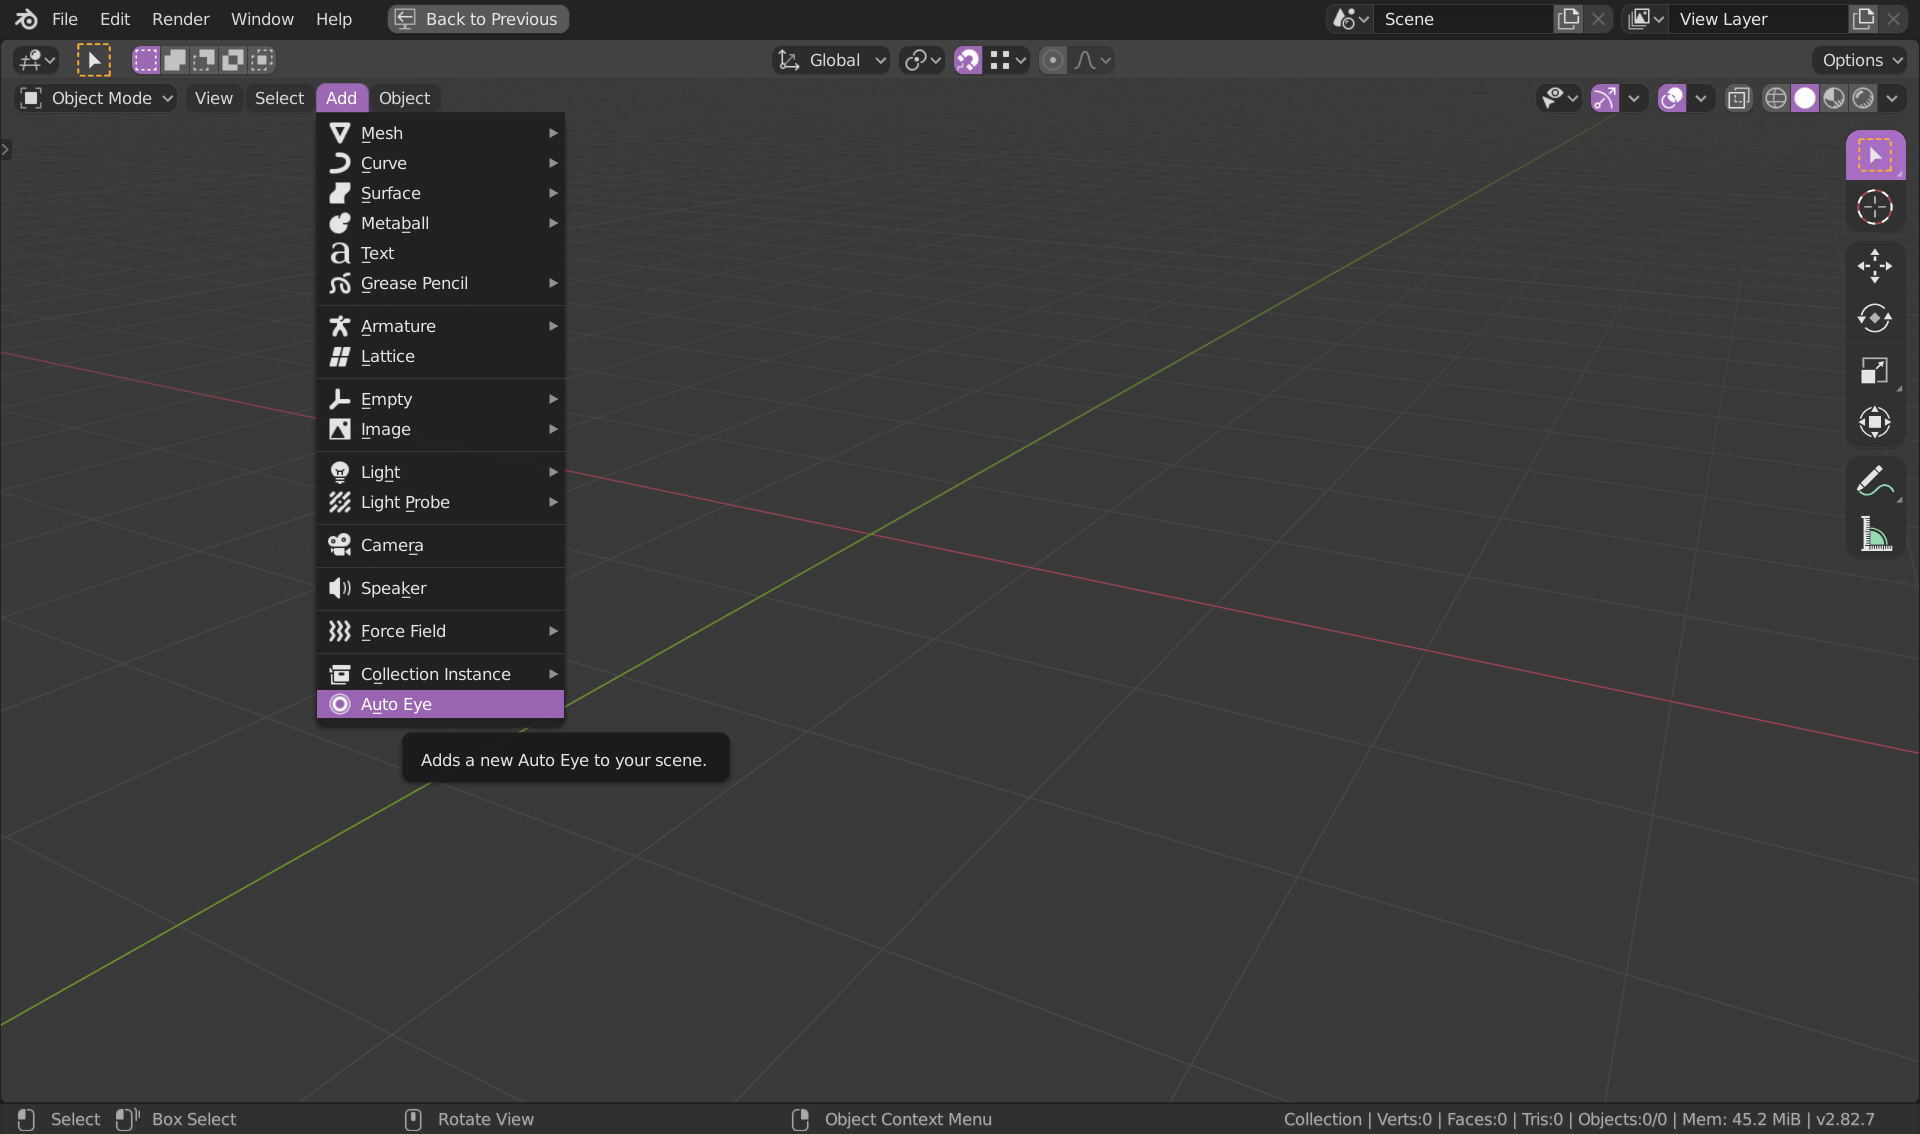
How to use it
The Auto Eye will be available on the Add menu, at the top of the viewport or using the Shift + A shortcut. You will see it at the bottom of the list, just click and it’ll be add to your scene.
IRIS MATERIAL
FIBERS 01 - Color variation 01 of the fibers.
FIBERS 02 - Color variation 02 of the fibers.
COLLARETE - Color of the Collarette.
PUPILLARY - Color of the Pupillary.
DARK RING - Color of the Dark Ring.
FIBERS
Scale - Controls the size of the fibers, higher values will result in more thin lines
and lower values will result in less and thicker lines.
Rotation - Rotates the fibers.
Distortion - Add distortion along the fibers.
Distortion Scale - Controls the size of the distortion, if the detail is small or bigger.
Contrast - Adds more contrast to the fibers colors.
COLLARETTE
Opacity - Controls how transparency the collarette will be.
Scale - Controls the size of the collarette.
Rotation - Rotates the collarette.
Contract - Adds more contrast to the collarette.
Shape - If the collaratte will have a “gear” or a smooth shape.
Shape Detail - How much “teeth” the shape will have.
Detail - Adds more texture detail to the collarette.
Detail Scale - Controls the scale of the detail.
Contrast - Adds more contrast to the collarette colors.
CRYPTS
Opacity - Controls how transparency the crypts will be.
Scale - Controls the size of the crypts.
Rotation - Rotates the crypts.
Shape - Controls if the crypts will be more square or circle.
Smothness - Makes the crypts mix with each other.
Randomness - Randomize the size of the crypts.
Seed - Get a different randomized result on the crypts position.
PUPILLARY
Opacity - Controls how transparency the pupillary will be.
Scale - Controls the size of the pupillary.
Rotation - Rotates the pupillary.
Distortion - Add distortion on the pupillary.
Distortion Scale - Controls the size of the distortion, if the detail is small or bigger.
DARK RING
Opacity - Controls how transparency the dark ring will be.
Scale - Controls the size of the dark ring.
Rotation - Rotates the dark ring.
Distortion - Add distortion on the dark ring.
Distortion Scale - Controls the size of the distortion, if the detail is small or bigger.
FAKE SHADOW
Opacity - Controls how transparency the fake shadow will be.
Position - Move the dark shadow up and down.
PUPIL
Hardness - Defines how hard or soft the border of the pupil will be.
Rotate - Rotates the pupil, effect only visible when it have distortion.
Distortion - Add distortion on the pupil.
Distortion Scale - Controls the size of the distortion, if the detail is small or bigger.
SUBSURFACE
Factor - How much subsurface scattering effect the material will have, 0 is none
and 1 is full subsurface scattering.
SPECULAR
Tint - Saturation of the specular color, 0 is white and 2 will make the specular a
more saturated color based on the diffuse color of the iris.
HUE - This parameter will shift the colors on colors wheel, the default value is 0.5, if you lower the value the colors will shift in a counter clock wise and if you increase the value the colors will shift in clock wise.
SATURATION - This parameter controls the intensity of the color, default value is 1.
VALUE - This parameter controls the lightness and the darkness of the colors, default value is 1.
BUMP Strenght - Controls the intensity of simulated bumps on the surface based on the iris information, no deformation on the geometry of the mesh.
OUTPUTS FOR BAKE
Shader - Will output the full shader, with specular, roughness, subsurface and bump.
Color - Will output the Color Map in flat shading.
Specular - Will output the Specular Map in flat shading.
Roughness - Will output the Roughness Map in flat shading.
Bump - Will output the Bump Map in flat shading.
CORNEA/SCLERA MATERIAL
SCLERA Front - Color of the frontal part of the sclera.
SCLERA Back - Color of the back part of the sclera.
VEINS - Color of the veins.
SCLERA
Colors Softness - Controls the softness of the gradient between the front and
back color.
Colors Position - This parameter brings the gradient forward or backward.
Imperfections Opacity - Controls the transparency of small imperfections.
Imperfections Scale - Controls the scale of small imperfections.
Roughness - Controls the specular reflection, perfect sharp reflection at zero to
almost diffuse at one.
VEINS
Opacity - Controls the transparency of the veins.
Scale - Controls the scale of the veins.
Rotation - Controls the rotation of the veins.
Position – Controls the position of veins on the Y axis.
Mask - It controls the transparency of the veins through a mask in the Y axis.
Bleed - This parameter adds more secondary blurry veins.
Distortion - Adds distortion to the veins.
Distortion Scale – Controls the scale of the distortion.
Position - Will move the veins in the Y axis.Seed - Get a different randomized result on the veins position.
CORNEA
Roughness - Controls the specular reflection, perfect sharp reflection at zero to
almost diffuse at one.
Reflection - It will add a extra reflection to the cornea.
IOR - Index of refraction of the cornea, 1.380 it’s an accurate value for a more
realistic cornea. For stylized or cartoon characters I suggest use 1.300.
Mask Hardness - This parameter makes the border of the cornea more harsh, for
stylized and cartoon characters.
Mask Position - This parameter moves the mask in Y axis, to fix some issues that
may happen in Eevee.
FAKE SHADOW (Use this for static eyes only, render images not animation)
Opacity - Controls the transparency of the fake shadow
Position X - Move the fake shadow on the X axis.
Position Y - Move the fake shadow on the Y axis.
Rotate - Rotate the fake shadow.
Scale X - Scale the fake shadow on the X axis.
Scale Y - Scale the fake shadow on the Y axis.
SUBSURFACE
Factor - How much subsurface scattering effect the material will have, 0 is none
and 1 is full subsurface scattering.
BUMP Strength - Controls the intensity of simulated bumps on the surface based on the
veins information, no deformation on the geometry of the mesh.
OUTPUTS FOR BAKE
Shader - Will output the full shader, with specular, roughness, subsurface and bump.
Color - Will output the Color Map in flat shading.
Specular - Will output the Specular Map in flat shading.
Roughness - Will output the Roughness Map in flat shading.
Bump - Will output the Bump Map in flat shading.
Discover more products like this
bfcm24 procedural shader Iris spring24 Eye auto loveblender auto eye summer24 winter24 procedural