Wrap Gen - Generate Fully Customisable/Procedural Wraps
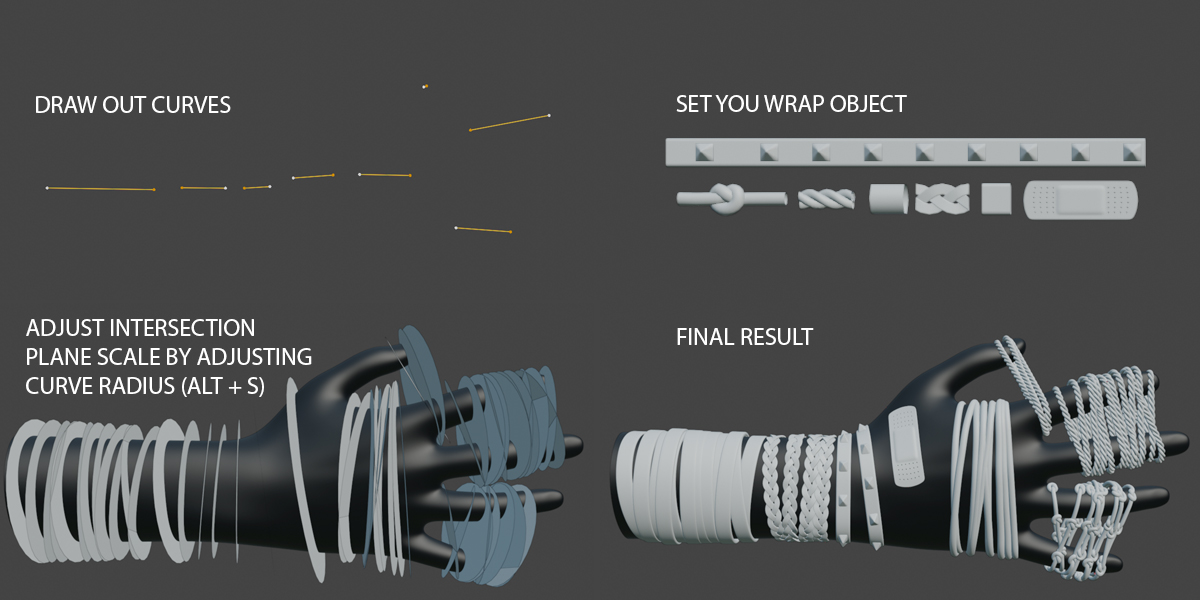
Here are the fastest ways to make poly curves:
1)
create any object, a plane/cube is ideal, enter edit mode, select all
the vertices, merge all vertices to the center (hotkey M for merge).
Start extruding and edge then convert mesh to curve (object > convert
mesh to curve)
2) You can also install the "extra mesh
objects" extension directly within blender which will allow you to
create a single poly point under the create menu. Enter edit mode and
start extruding an edge then convert mesh to curve (object > convert
mesh to curve)
An important thing to note is that curves and
edges are interchangeable in blender. You can convert a curve to a mesh
or mesh to a curve. You could easily just extrude any edge and when you
are happy, convert to a curve. This is fundamental to blender so don't
get caught up in the specifics of custom menus in my demo.

NOTE: If you have not assigned a wrap Mesh then it use "Default Wrap Settings" to wrap tubes around the target mesh.
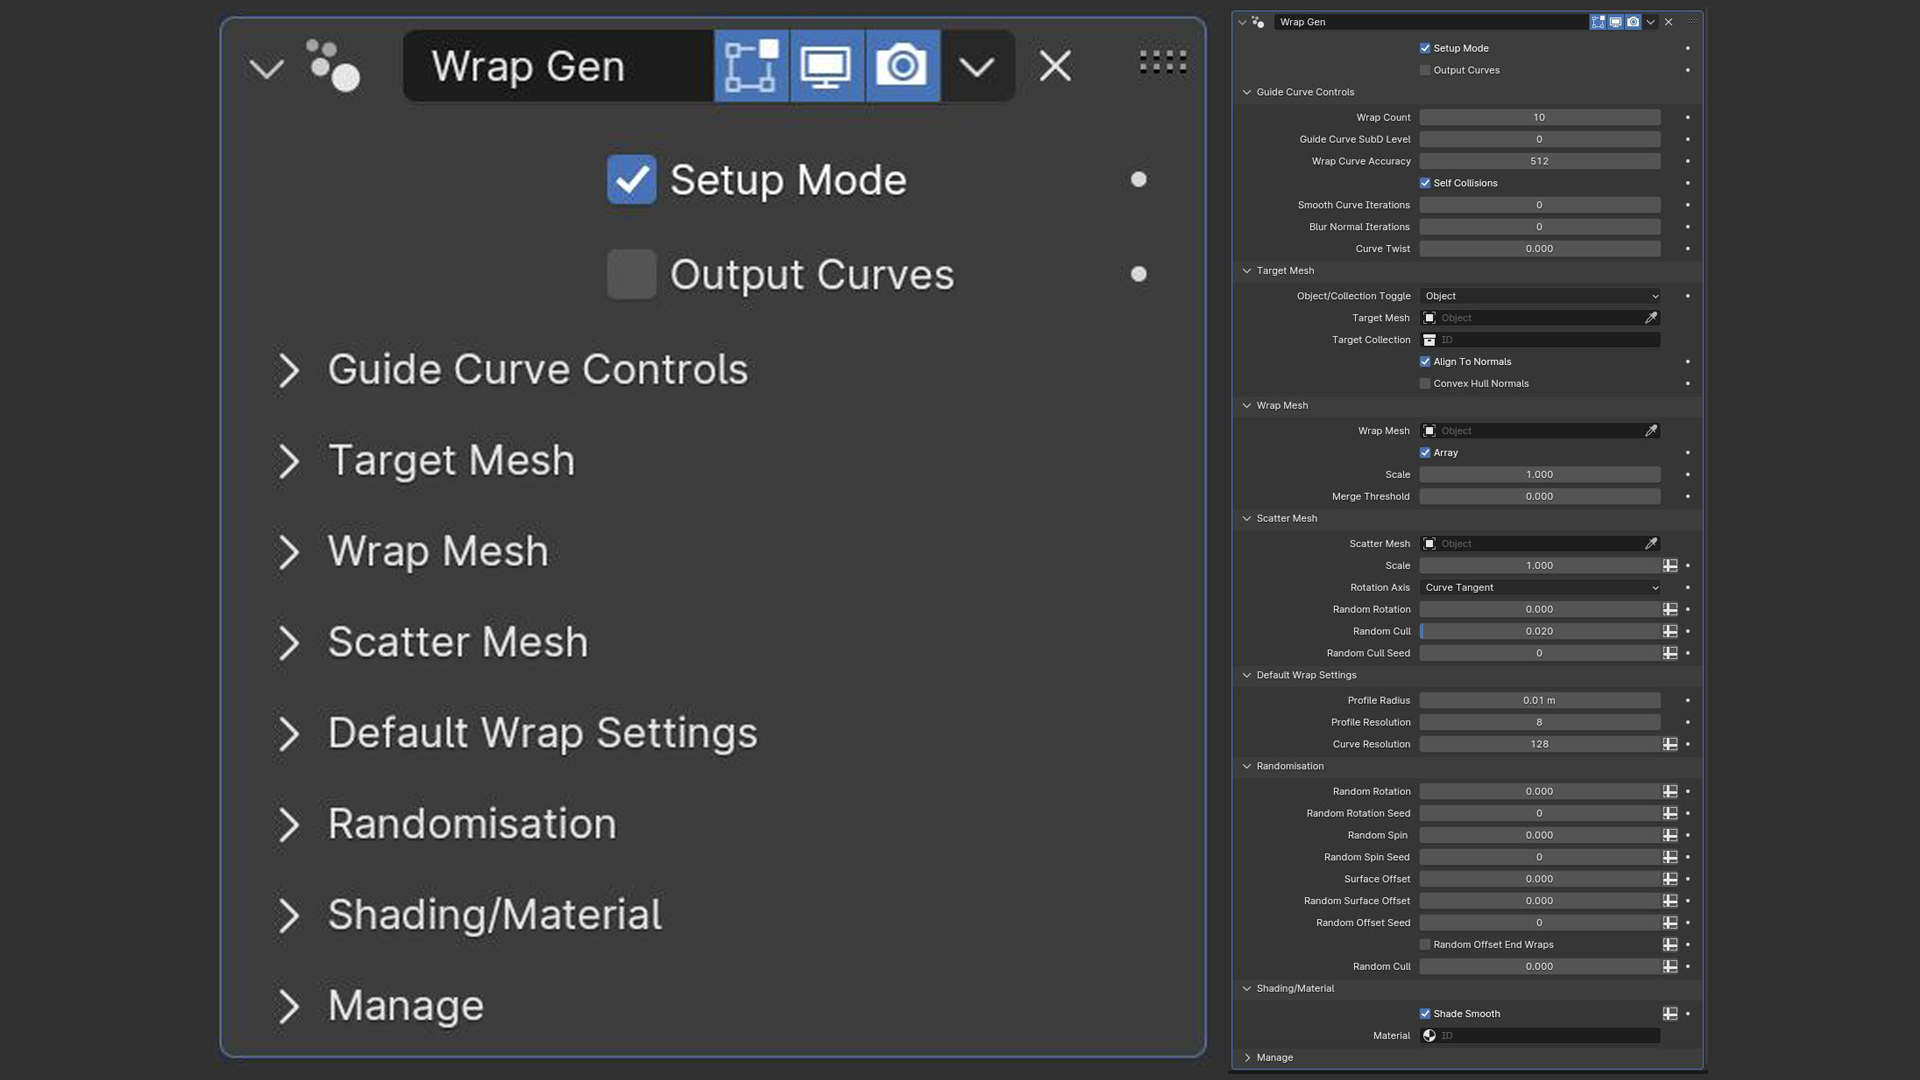
TOP LEVEL CONTROLS:
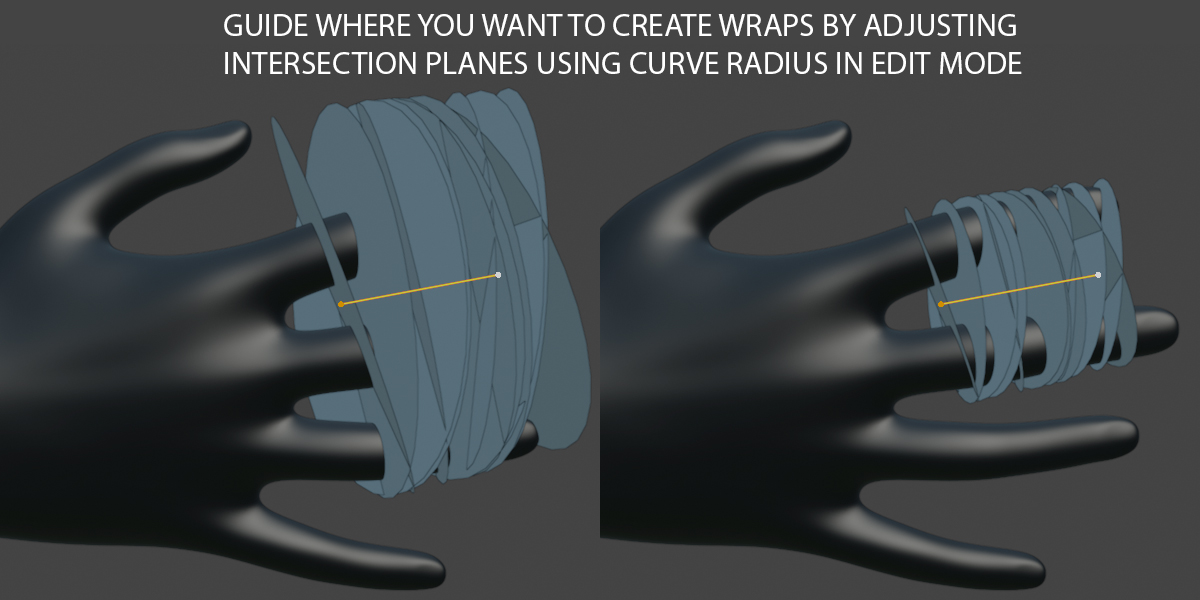
Setup Mode - Enter setup mode to dial in your intersection planes to choose where your wraps are placed. Enter edit mode of curve, select your point/s and hit alt+S to increase/decrease radius.Output Curves - Output only guide curves
GUIDE CURVE CONTROLS:
Wrap Count - Controls the number of wraps.Guide Curve SubD Level - when using poly curves, this setting is used to smooth/subD the curve for a smoother result.
Wrap Curve Accuracy - This controls the amount of segments used to shrinkwrap curves onto the target mesh. Higher values generate more accurate results.
Self Collisions - This will make the wraps self aware of each other so they collide and overlap in a physically accurate way.
Smooth Curve Iterations - Softens out the curves (useful for when using self collisions).
Blur Normal Iterations - This setting blurs/softens the normals of the target mesh. If you are wrapping to a target object with lots of surface detail and your straps orientations are noisy, increase this value.
Curve Twist - Twists all of the curves in degrees.
TARGET MESH:
Object/Collection Toggle - Toggle between wrapping around a collection of objects or a single objectTarget Mesh - This is the object your want to wrap around.
Target Collection - Set target collection here. This is how you wrap around multiple separate objects.
Align To Normals - Tick this option on if you want your wraps to align to the normals of your set target mesh. This is best used when creating non uniform things like straps that need to be oriented to the target mesh surface. Turn this setting off if you are creating basic circular wraps like ropes.
Convex Hull Normals - Converts target mesh to a convex hull to sample normals from.
WRAP MESH:
Wrap Mesh - The mesh that will be curve deformed to create your wraps.Fit To Curve - This settings controls if the wrap mesh encompasses the target mesh or if it maintains its scale/aspect ratio. Turn this setting off if you for example want to wrap a label around an object and dont want it to wrap around entirely. (Use CTRL + T) to spin the label around to place it accordingly.
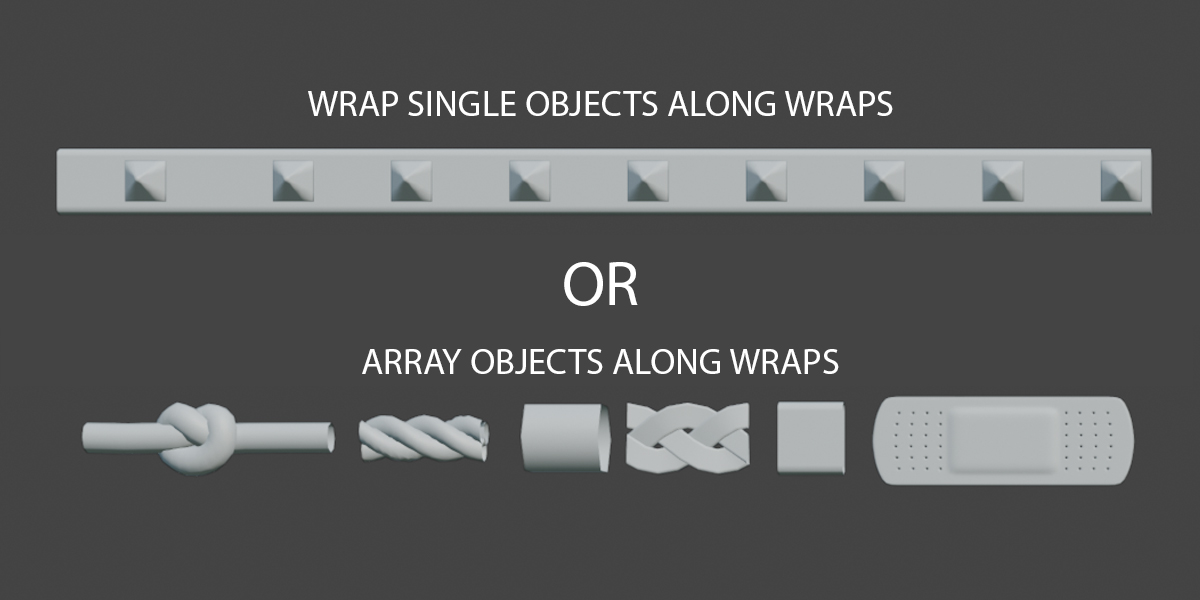
Array - This setting controls if you want to array an object along the curve or if you want to curve deform a single object along the length of the wrap curves.
Scale - Controls the scale/size of your wraps.
Merge Threshold - Increase/Decrease this value to merge the verts of your wrap mesh after it has been curve deformed.
SCATTER MESH:
Scatter Mesh - Set your scatter mesh here.Scale - Set scale of scatter mesh.
Rotation Axis - Set the axis you want to randomly rotate around. All axis (X/Y/Z) or around curve tangent.
Random Rotation - Amount of random rotation in degrees.
Random Cull - Randomly removed scattered objects to add breakup and variation.
Random Cull Seed - change seed to test out different scatter patterns.
DEFAULT WRAP SETTINGS:
Profile Radius - Adjusts the default circle profile radius size.Profile Resolution - Adjust the default circle profile resolution.
Curve Resolution - Sets the amount of segments along the tube length.
RANDOMISATION:
Random Rotation - Adds random rotations to the wraps.Random Rotation Seed - Change the seed to randomize the random rotations so you get a different result.
Random Spin - This setting will rotate/spin the guide curves randomly around the wrap object to add organic breakup. Great for breaking up repetition when wrapping hero geometry that contains unique details.
Random Spin Seed - Change the seed for the curve random rotate to experiment with variation.
Surface Offset - Lifts the wraps off the surface of the mesh based on the target mesh normals.
Random Surface Offset - Adds random offsets to each of the wraps to add variation and randomness.
Surface Offset Seed - Change the seed to randomize the random rotations so you get a different result.
Random Offset End Wraps - This setting controls if the end wraps are affected by the random offset. This is useful so you don't see a gap on either side of the wraps when adding random offsets for breakup.
Random Cull - Randomly removed wraps to add breakup and variation.
SHADING/MATERIAL:
Shade Smooth - Toggles smooth shading.Material - Assign material here.


