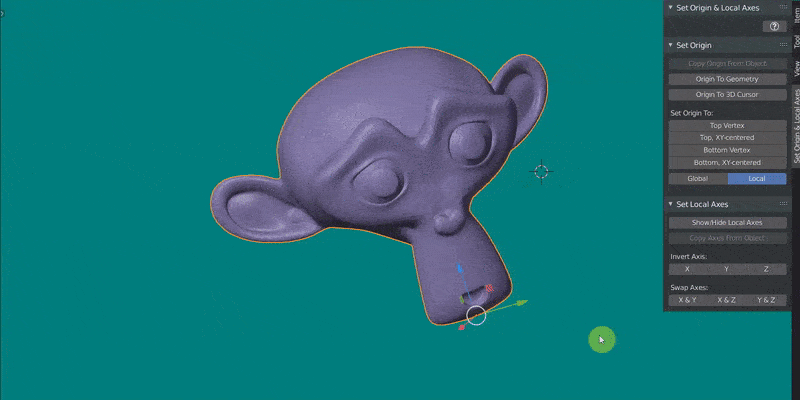
Set Origin & Local Axes
 3D OPERATORS
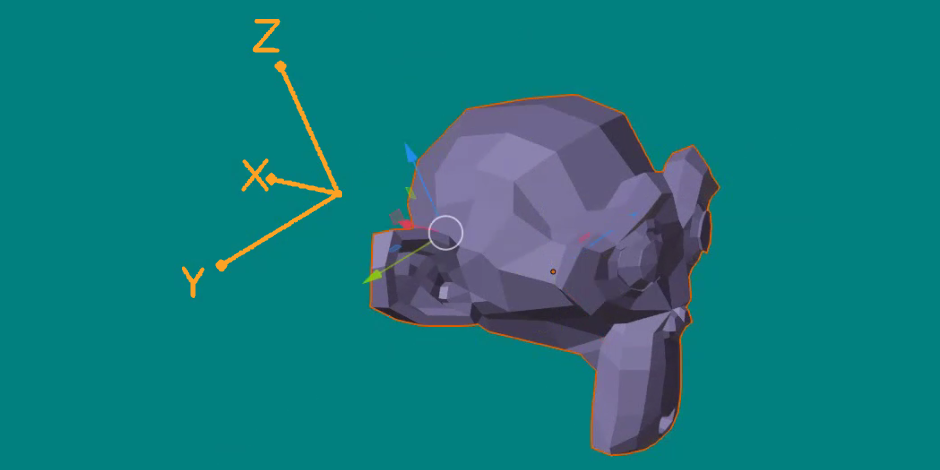

HOW TO INSTALL
Start by downloading the .py file. In Blender, go to Edit > Preferences > Add-ons. Click Install in the top bar, search for the .py file and click Install add-on from file. Then, type "Set Local Axes" in the search bar. Enable the addon and click Save preferences. You are now able to use the addon!
READ ME
The Set Origin & Local Axes addon is visible in the Sidebar (hotkey N) > Set Origin & Local Axes, in both Object Mode and Edit Mode. The origin of an object can be set the following ways:
* COPY ORIGIN FROM OBJECT (Object Mode)
Select two or more objects, and this method copies the origin of the active (last selected object) object to the other selected objects.
* ORIGIN TO SELECTION (Edit Mode)
Sets the origin of the object(s) to the average of its selected vertices, for each selected object separately.
* ORIGIN TO GEOMETRY (Object and Edit Mode)
Sets the origin of each selected object(s) to the center of its geometry, for each selected object separately.
* ORIGIN TO 3D CURSOR (Object and Edit Mode)
Sets the origin of each selected object(s) to the location of the 3D cursor.
* SET ORIGIN TO: (Object and Edit Mode)
These options set the origin to the top or the bottom of the select object(s), for each selected object separately. The Global/Local switch makes it possible to use either the global (world) or local (object) coordinate system to define "top" and "bottom". "Top Vertex" sets the origin to the uppermost vertex. "Top, XY-centered" sets the origin to the uppermost Z-location, but centered in the XY-plane (bounding box). "Bottom Vertex" sets the origin to the lowermost vertex. "Bottom, XY-centered" sets the origin to the lowermost Z-location, but centered in the XY-plane (bounding box).
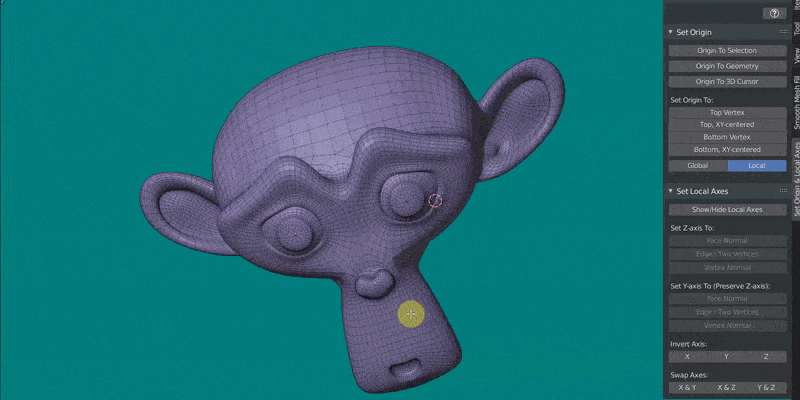
Show or hide the local axes of a selected object using the "Show/Hide Local Axes" botton. The local axes of an object can be set in the following ways:
* COPY AXES FROM OBJECT (Object Mode)
Select two or more objects, and this method copies the local axes of the active (last selected object) object to the other selected objects. The active object can be a mesh object, but also an empty such as a Plain Axes or an Arrows object.
* SET Z-AXIS TO: (Edit Mode)
There are three options to redefine the local Z-axis: parallel to Face Normal, parallel to Edge / Two Vertices, or parallel to Vertex Normal. Start by selecting one object in Object Mode and selecting the corresponding data in Edit Mode: one face for the option Face Normal, one edge or two vertices for the option Edge / Two Vertices, or one vertex for the option Vertex Normal. Then, press the desired option. The Y-axis and X-axis are chosen semi-randomly to create an orthogonal axes system.
* SET Y-AXIS TO (PRESERVE Z-AXIS): (Edit Mode)
Optionally, the local Y-axis can be redefined as well. The current Z-axis will be preserved in this case, but only if the new Y-axis is perpendicular to the Z-axis. If not, pressing "Set Y-axis" will produce an error message (proceeding would lead to a mesh deformation). If the current Z-axis and new Y-axis are perpendicular, the X-axis is automatically calculated to form an orthogonal axes system.
* INVERT AXIS (Object and Edit Mode)
Inverts the respective local axis (X to -X for example).
* SWAP AXES (Object and Edit Mode)
Swaps two local axes (X and Y for example).
Have questions about this product?
Login to message
Discover more products like this
Y-axis local axis Z-axis axis system local X-axis coordinate system reset orientation origin local axes mesh Object