 Orange Turbine


Render Better Colors
Render Raw provides a simple yet powerful interface for perfecting colors in Blender.
❤️ Orange Turbine, a project of Autotroph, contributes to Blender development through Autotroph’s Corporate Gold sponsorship of the Blender Development Fund. Your support of Orange Turbine helps make this possible!
The advanced color workflow in Blender is far from straightforward or intuitive, which leaves some artists unsatisfied with their results. Read on to discover why this is the case and how Render Raw will save you hours of work and can get you better-looking renders with just a few clicks.

How to Get Vibrant Colors with Blender
You can render incredible colors directly in Blender, and the secret to it is the mysterious Raw view transform that most people ignore.
A view transform is how Blender can display your render correctly on your screen. A 3D scene can have arbitrarily bright lights, but your monitor or phone screen can only get so bright, so the values of the colors in your render need to be transformed to fit within the constraints of the display.
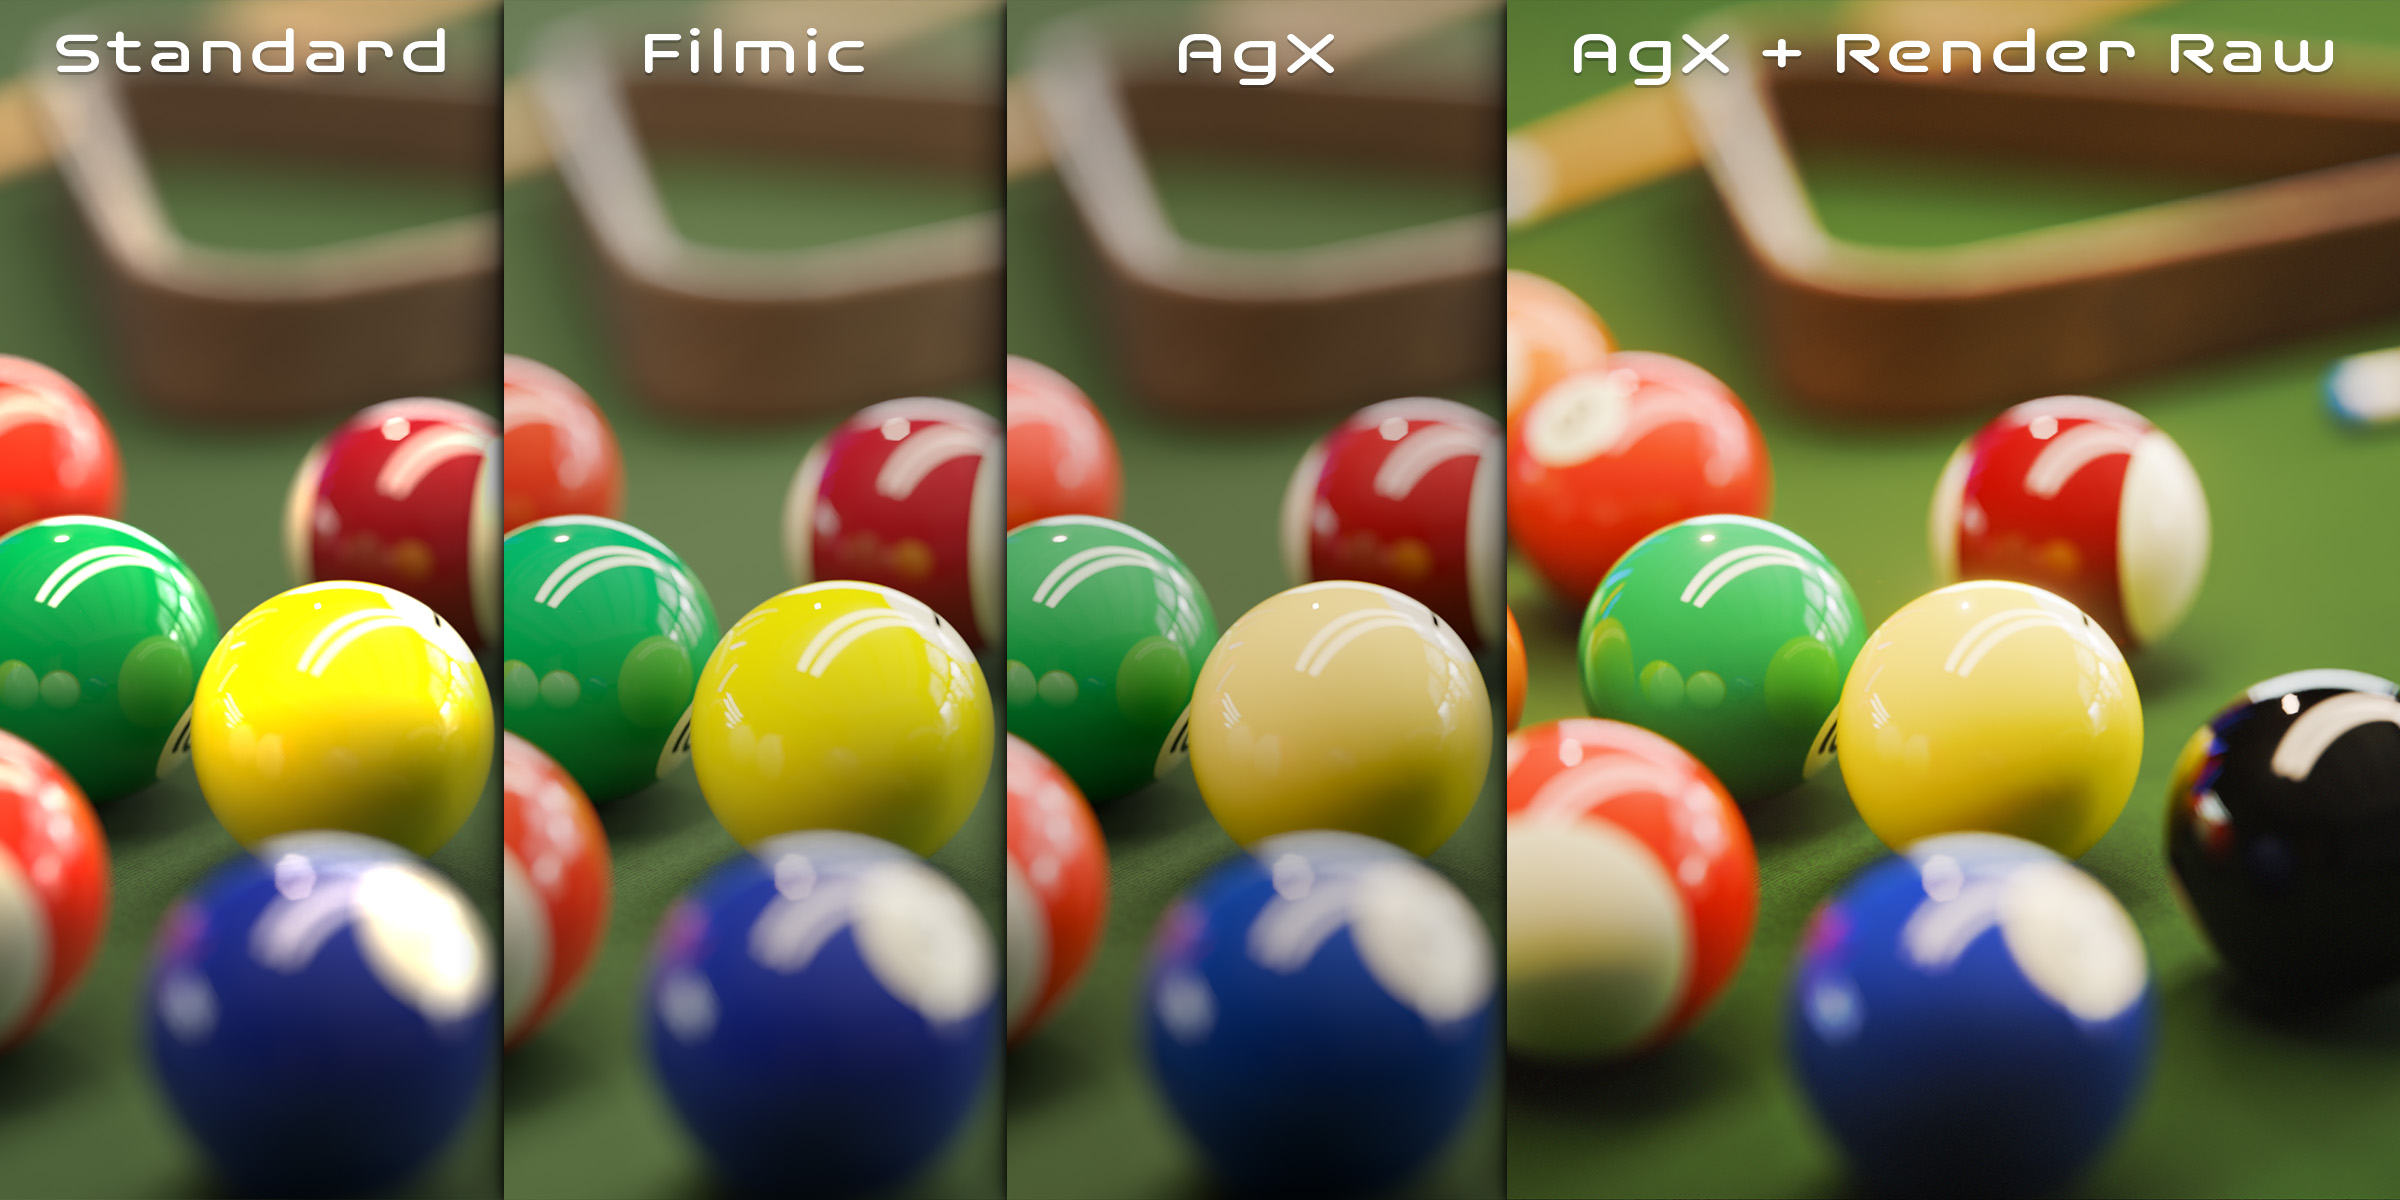
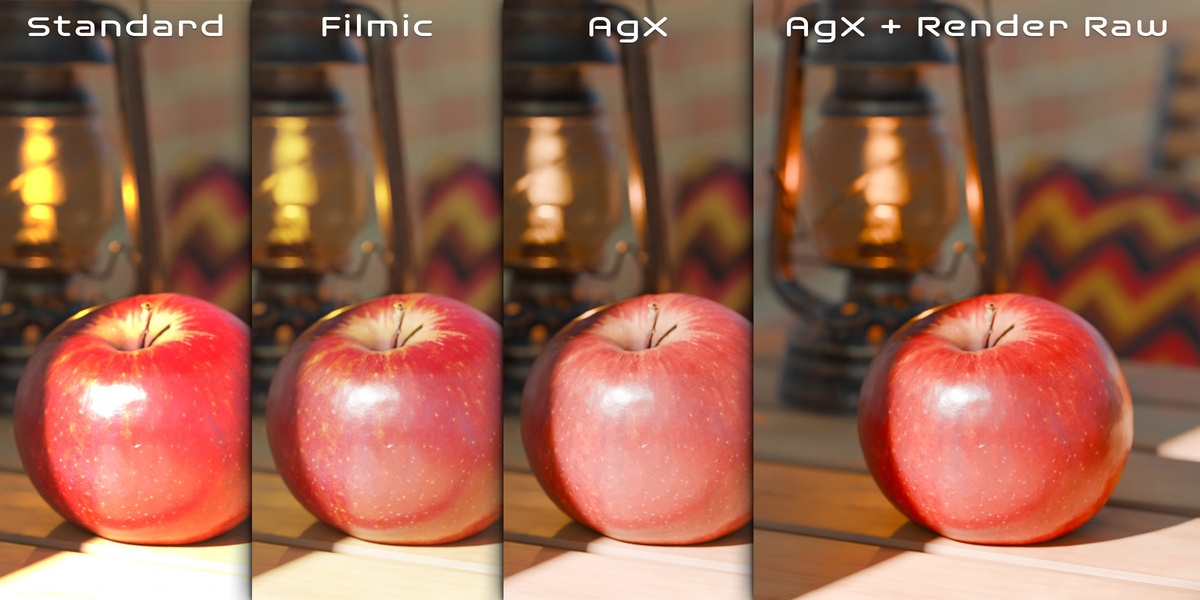
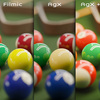
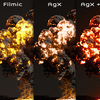
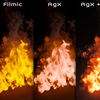
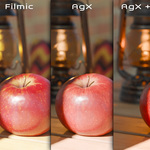
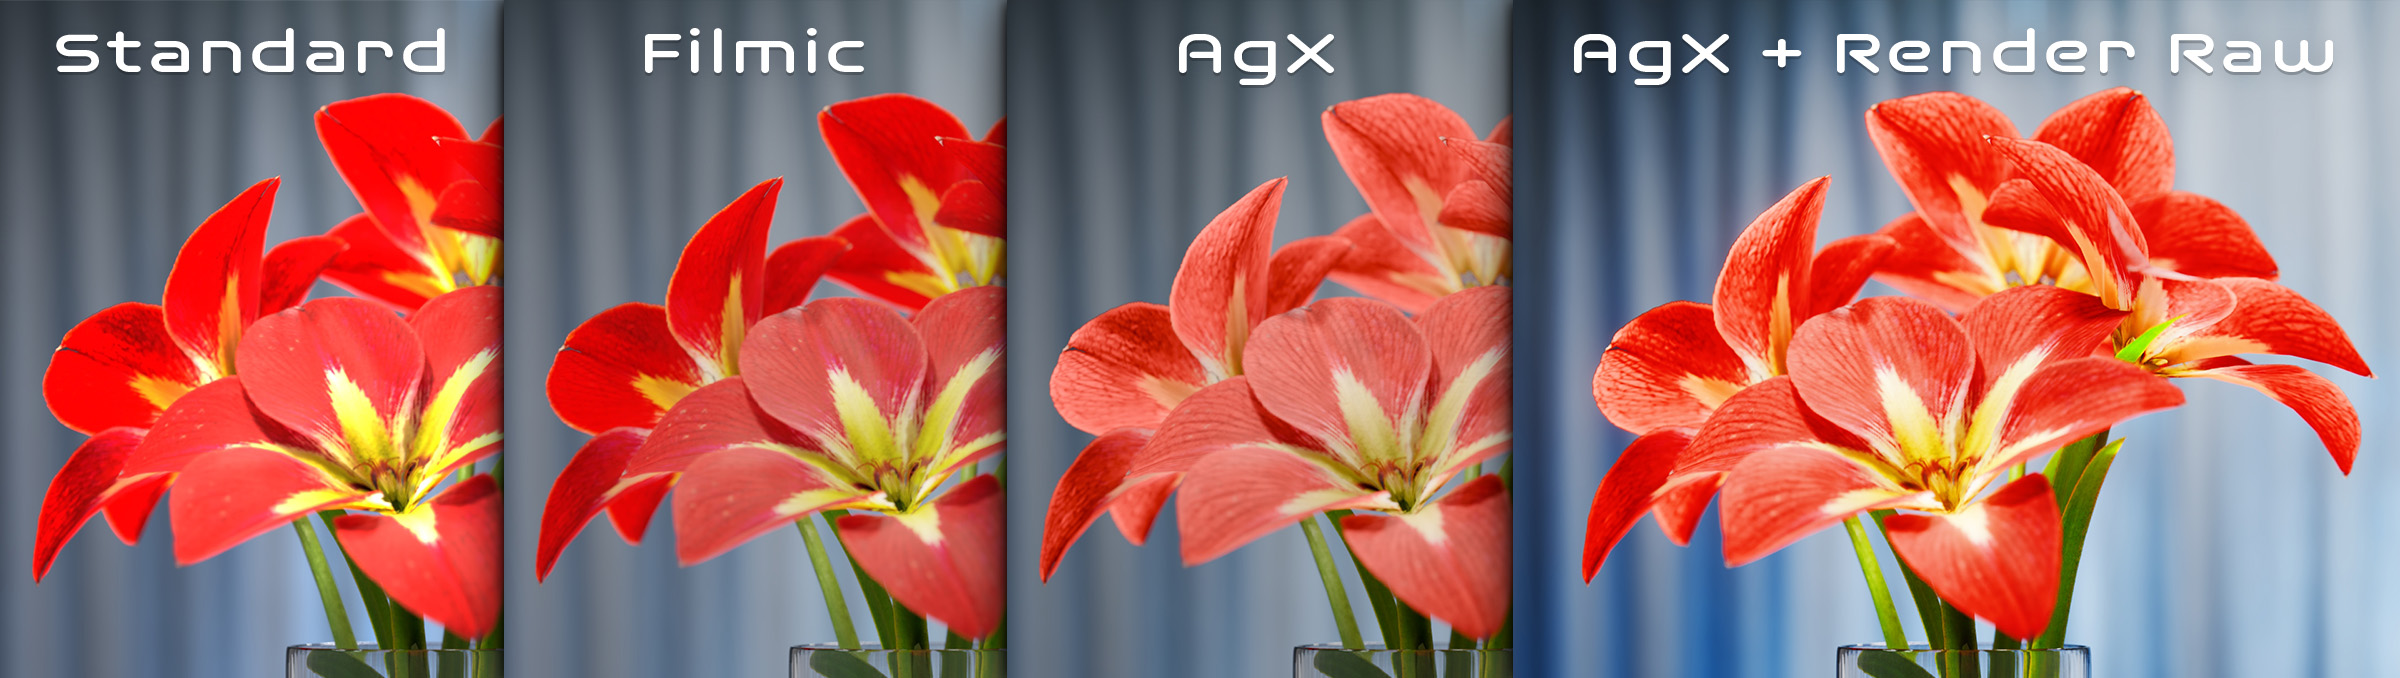
AgX is Blender's newest view transform for rendering and it's incredible at preserving details on brightly lit and / or highly saturated surfaces. However, many find AgX (and its predecessor, Filmic) to appear too dull, washed out, or desaturated.
The reason for this is that the result of AgX or Filmic is not necessarily the final step in the production of the image. What you get out of Blender when rendering with AgX is a bit like what you get out of a nice camera when shooting in a detail preserving format. Some editing is required.

But I don't want to open up another program every time I render. I want to hit F12, save, and be finished!
The solution is setting the view transform to Raw, which lets you manage the color yourself in Blender's compositor and make adjustments before as well as after the transform. There are dozens of nodes for even just the basic operations, many custom node groups are needed, and they all need to be connected in just the right order.

That's too much to deal with on a daily basis, and I don't want to think about any of it while I'm in my creative flow. So, I've created Render Raw, which handles the entire setup for me and allows me to make color adjustments incredibly quickly using simple, Lightroomesque sliders right in the Properties Editor or 3D Viewport.
Features
Render Raw currently supports the following adjustments:
Values

Of course, you'll have access to Exposure, Gamma, and Contrast just like before, but with Render Raw you'll also find sliders for fine tuning the White, Highlight, Shadow, and Black levels. Details can be brought out of the values using Sharpening, Texture, and Clarity controls. There is also a panel for Curves, and they behave as expected (mapped to the 0-1 range) unlike Blender's default AgX curves (mapped from 0 - infinity).
Colors

In the colors panel, you'll find Temperature, Tint, Color Boost, & Saturation controls, as well as adjustments for Hue per Hue, Saturation per Hue, Value per Hue, & Saturation per Value, and a panel for coloring Highlights, Midtones, and Shadows using any blend mode.
Effects

I couldn't resist also adding some fun effects that I use all the time! To help emulate a real camera, Render Raw offers quick access to Lens Distortion, Dispersion, Vignetting, Glare, and Film Grain. The film grain is a big improvement over most apps' implementations since it's applied in proportion to the amount of light and the Accurate method displaces the image to fit the grain rather than just overlay a texture. The bloom is also custom built so that it supports transparency and what you see in the viewport actually matches what you get in the render.
Create Your Own Presets
Easily add, remove, share, or apply any of the above settings across files with Render Raw's preset system.
Known Issues
- Viewport compositing must be enabled in order for the rendered or material preview shading modes to look correct. Render Raw can turn that on automatically for existing editors, but newly created editors will need to have it set. Also, the little previews in the material and lights panel do not use compositing and will look incorrect.
- Changing Blender's View Transform, Look, or Exposure settings via python while Render Raw is enabled will break the resulting colors. If this happens, you can simply toggle the Enable checkbox off and then on again. Better support for other add-ons changing the exposure is planned but will take time to implement.