Realistic Eyeballs For Blender 2.8 Eevee & Cycles
***Video of usage overview of all 3 versions at the bottom!***
There is 3 versions and a bundle of all 3 of this product to choose from. This documentation covers all 3 different setup, so please read carefully to make sure you follow the appropriate workflow for the version you chose.
Version 1 contains only the two different eyeballs with a materials and fairly complex node setups to edit and some shape keys. The file is called JL_Customizable_Realistic_Eyeballs.blend
Version 2 contains the two eyeballs with all the same customizations then version one, but with a neat side NPanel to edit as opposed to editing the nodes themselves or the shape keys. The file is called JL_Customizable_Realistic_Eyeballs_NPanel.blend
Version 3 contains the two eyeballs fully rigged with a very friendly rig. They also feature the same neat NPanel to control the materials and the shape keys. The file is called JL_Customizable_Realistic_Eyeballs_Rigged.blend
Version 1:
1. In your scene choose File then Append:
2. Browse to the .blend of the version you want to use and go to collection then select the collection that best suit your character (Big or small eyeball):
3. From there click append from library:
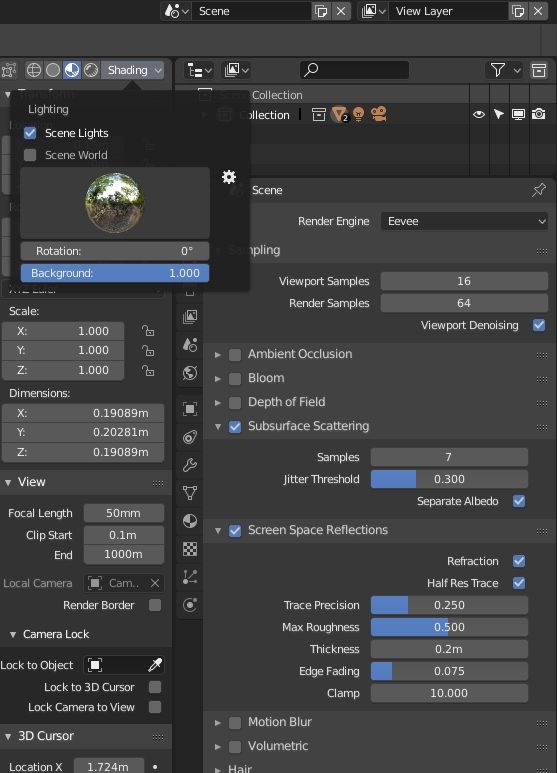
4. Set the viewport to material view, choose an HDRI from the list, put the background on and select scene lights (you can also plug an HDRI in the scene world and check that). Also make sure to set Subsurface Scattering on with Separate Albedo checked as well as Screen Space Reflection with Refraction checked:
5. From there you can move, rotate, scale & duplicate the eyeball to your heart's desire (if you have a rig you can simply parent the eyeballs to the desired armature designated eye bones and they will follow):

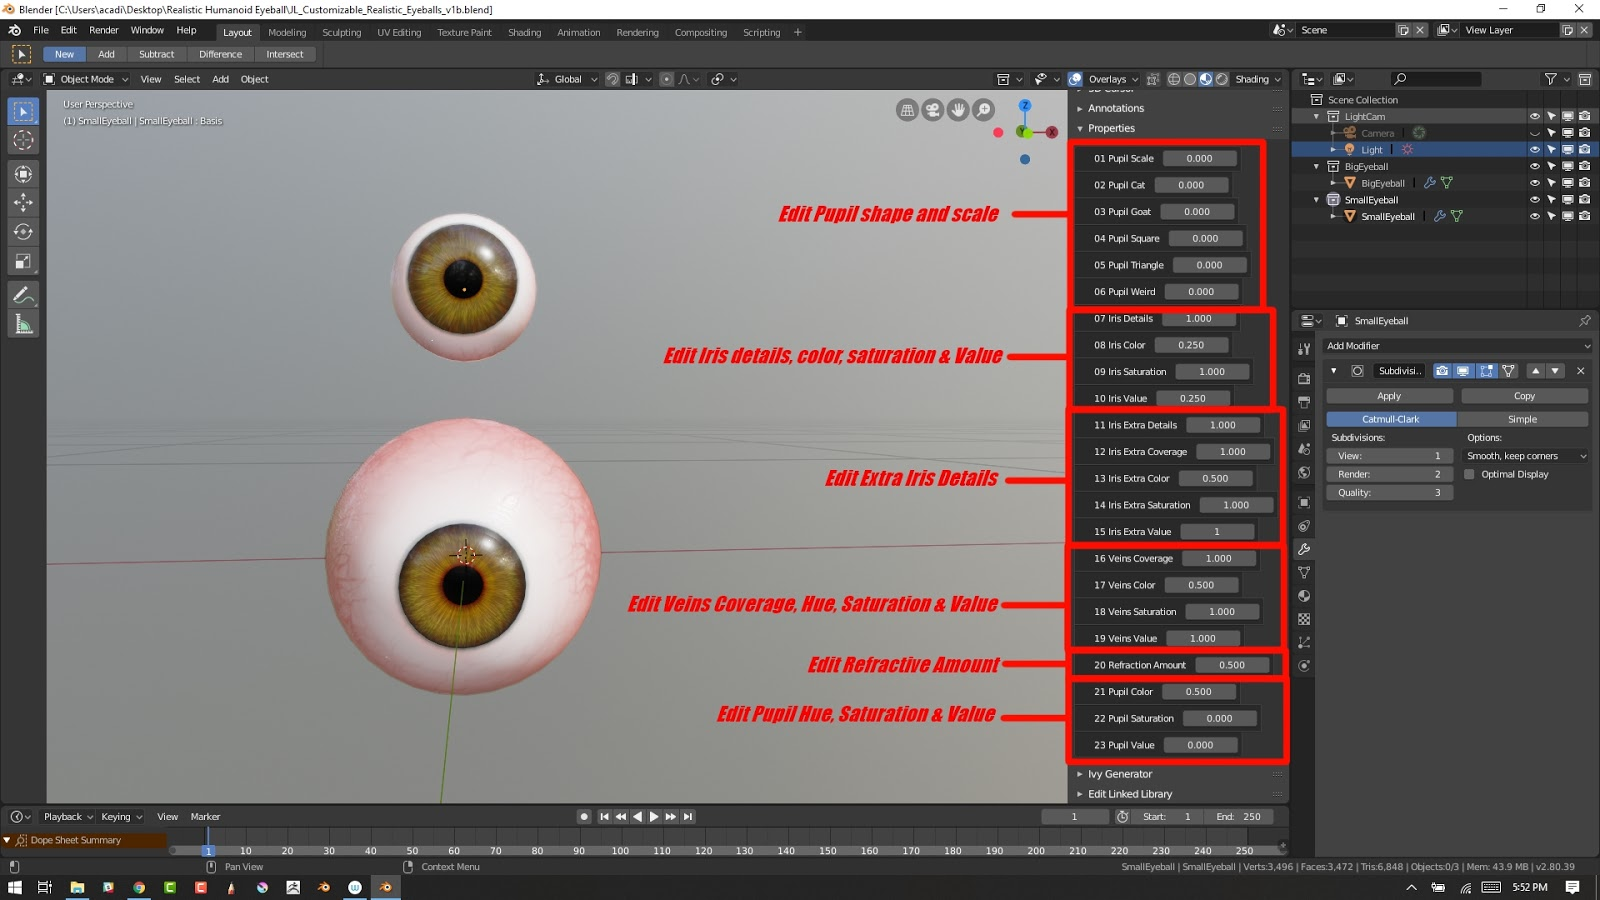
6. There is 4 material you can edit (humanoid materials are prefixed with H and animal materials are prefixed with A):
7. Each materials have their own settings you can edit (both the humanoid and animal eyeballs have the same exact setup):
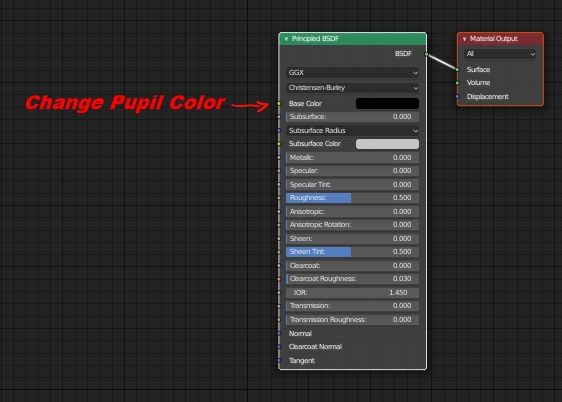
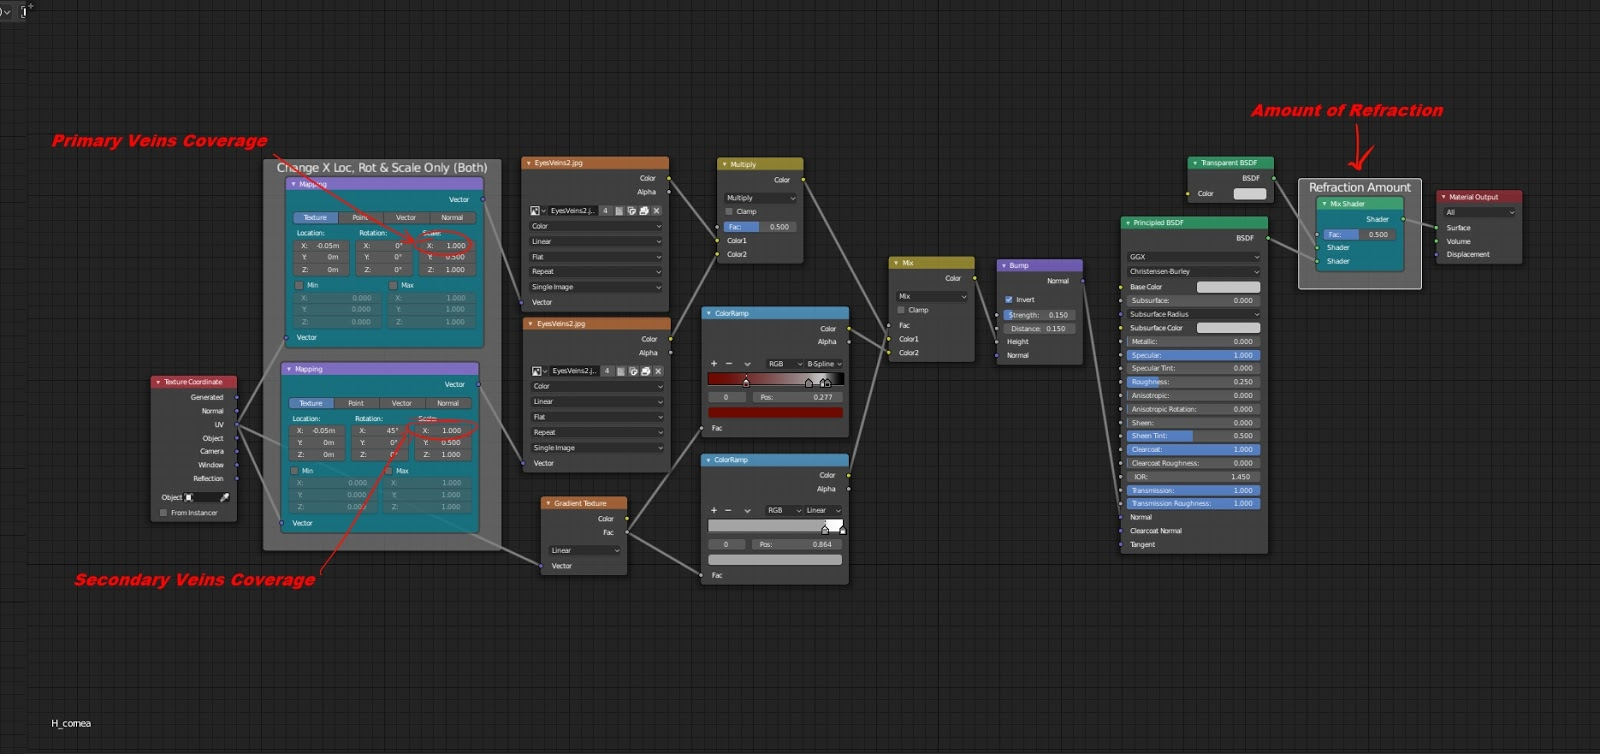
7a. Pupil:
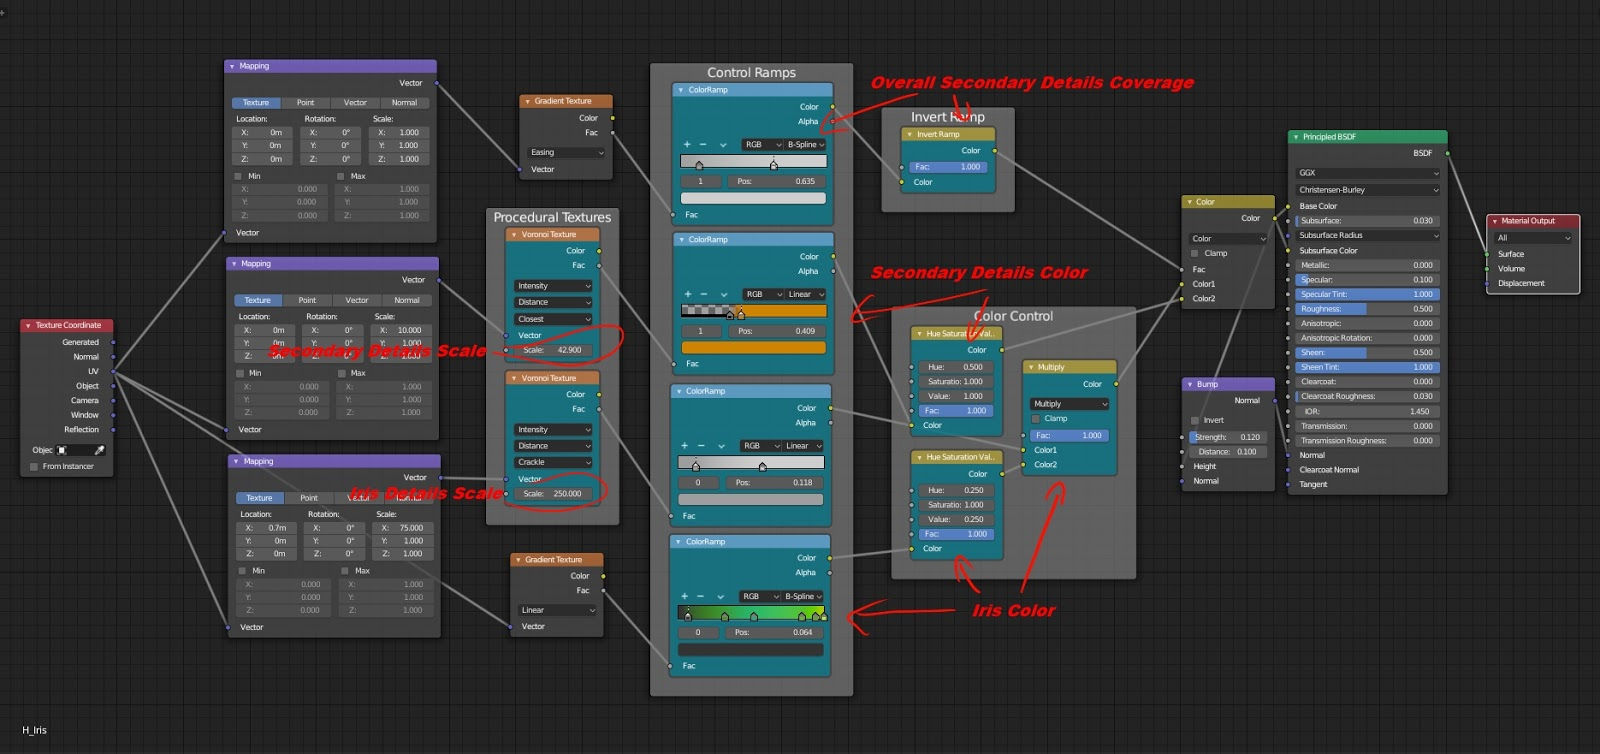
7b. Iris:
7c. Eyeball:
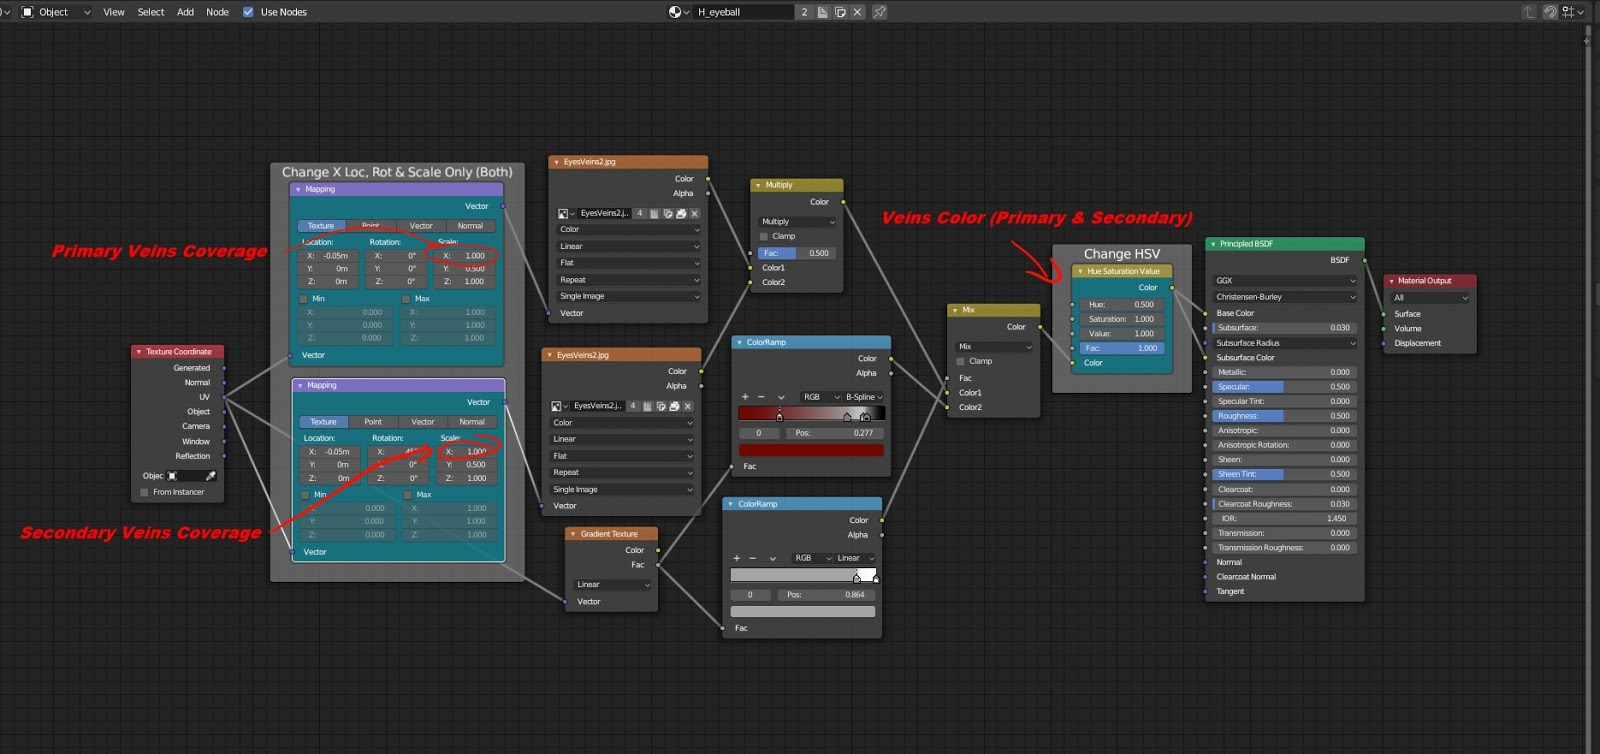
7d. Cornea (if you edit the Eyeballs Veins Coverage, best to change these ones too):
8. You can also change the shape and size of the Iris by using the shape keys:
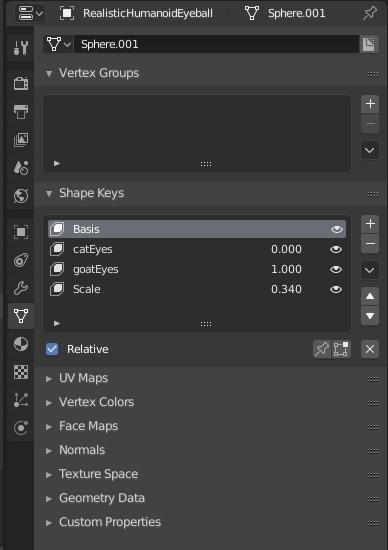
9. If you have more then one eyeball, you need to set the shape keys for both otherwise you'll end up with different eyes (unless its the desired effect of course):

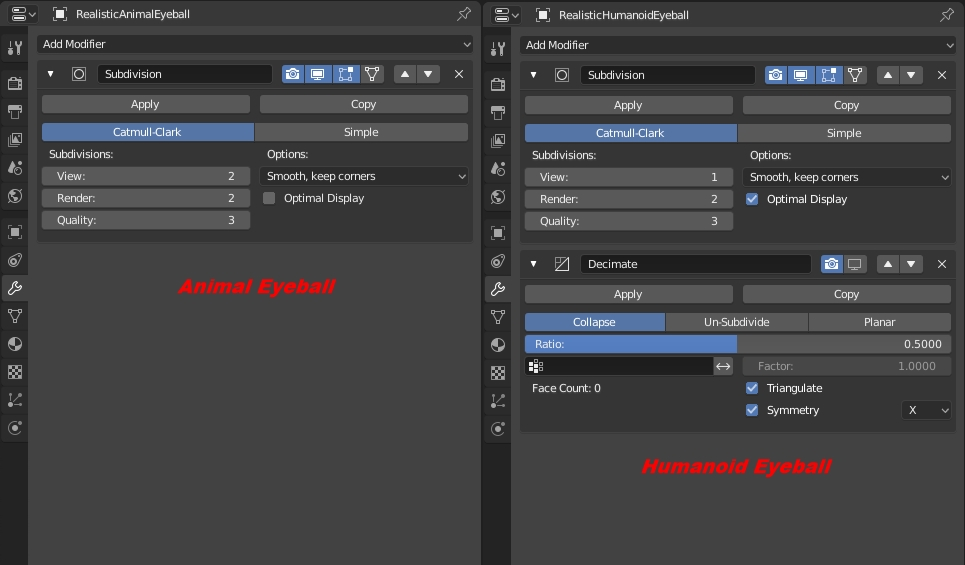
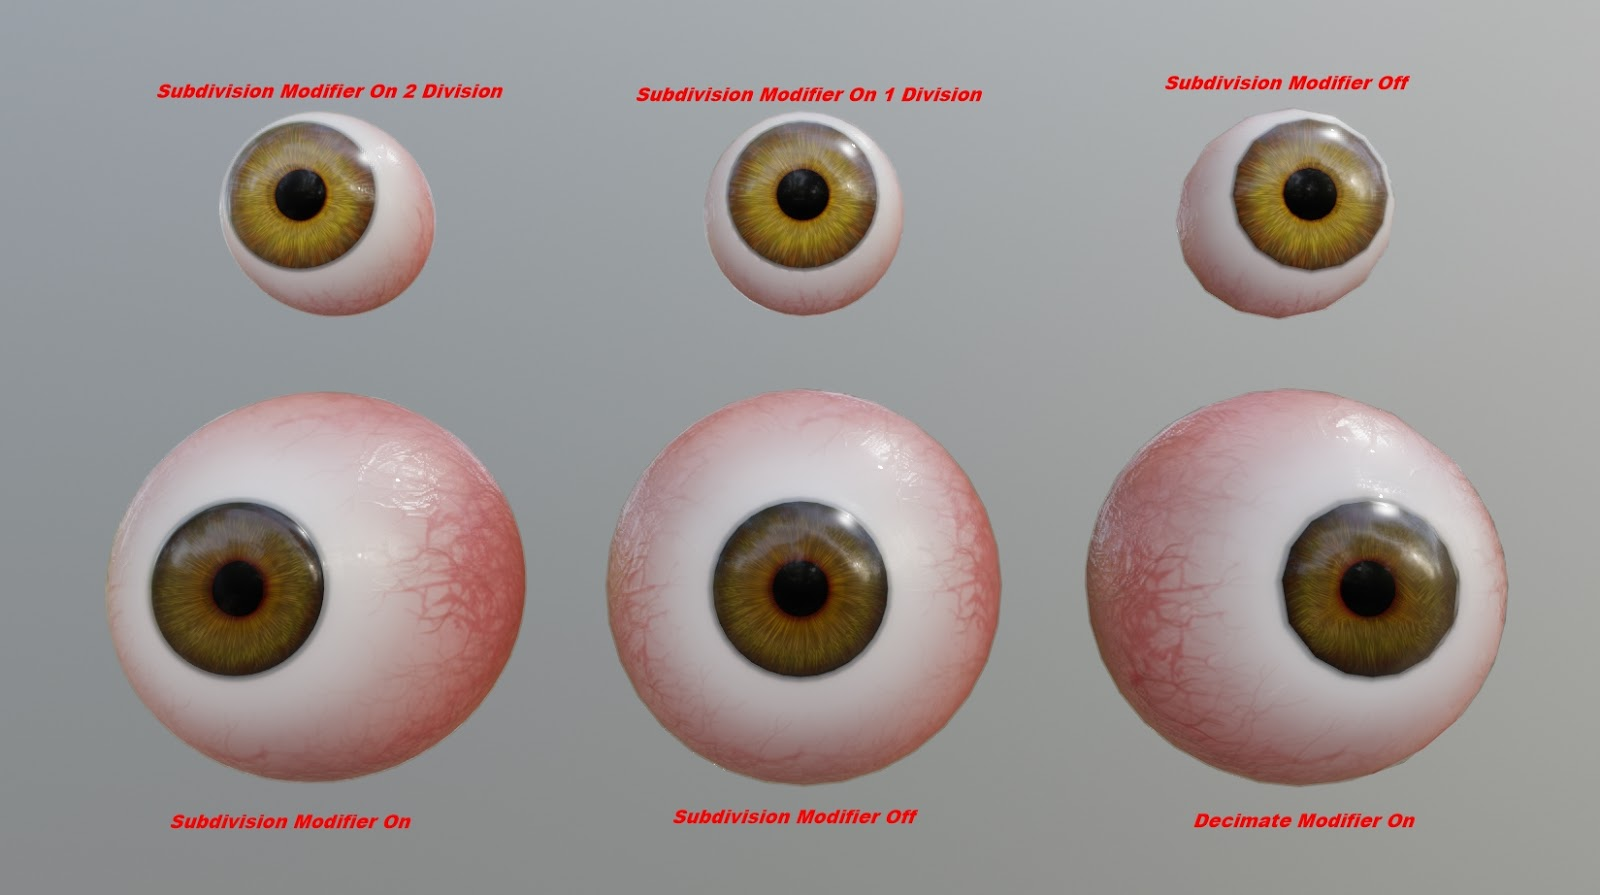
10. Both eyeballs have subdivision modifiers for higher resolutions, simply tune them down or off for lower resolution. In the case of the humanoid eyeball you can also turn on decimate to get an even lower resolution model. (The animal model is lower already so no need for decimation):
Version 2:
This version works a bit differently then the other version in the sense that you do not need to go edit any of the materials nor the shape keys. I've added a convenient N Panel properties setup that allows to tweak everything directly in the panel. You can simply follow step 1, 2, 3, 4 & 10 from version 1, then you only need to press N to open up the side panel, with the eyeball selected open up the Properties and edit away using the reference above. The only thing you need to edit manually is the subdivision modifier &/or the decimate modifier on the bigger eyeball.
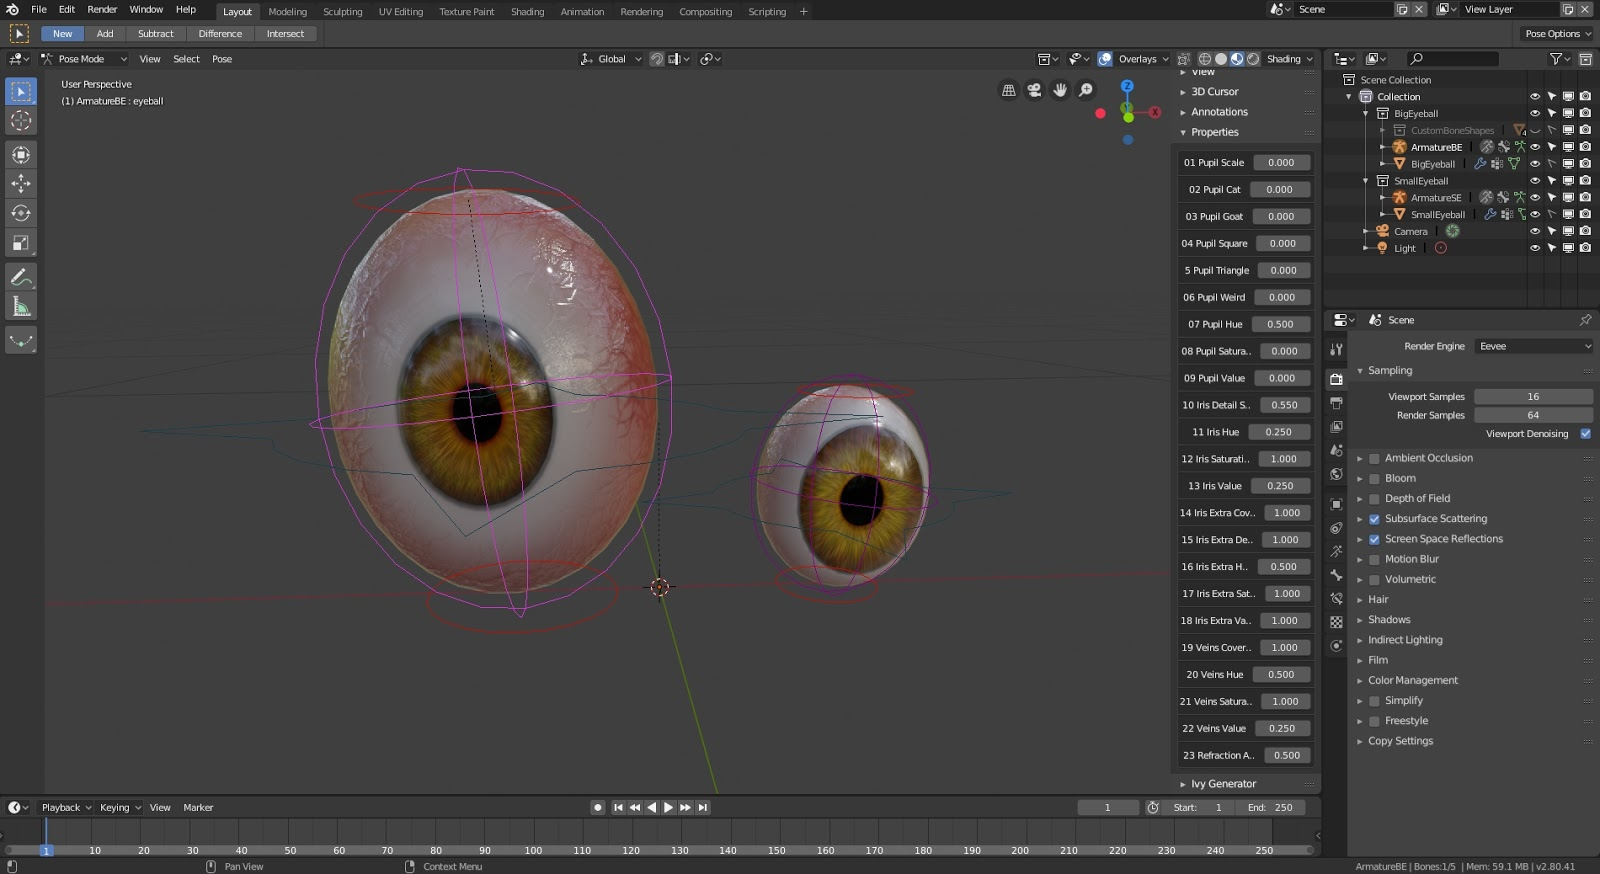
Version 3:
This version works a bit differently then the other version as well in the sense that its rigged and also has a N Panel to control the materials & shape keys. You can simply follow step 1, 2, 3, 4 & 10 from version 1, and then you have the rigs. The top and bottom red circular handles control the squash & stretch. The purple sphere handle around the eyeball is the body and it controls the rotation of the eyeball as well as the N Panel, simply select body bone, press N and the same properties then version 2 appears in the side N Panel ready to edit. The blue handle is the root bone. You can use it for placement, animation, you can parent that bone to another armature. Let say you want a squashed eyeball for a cartoon character, just parent the armature object to the head bone and voila, you have an eyeball that has a rig and full control over the material properties as well as the shape keys, you can squash it, stretch it and even make it pop out and fall on the floor.
Here is a 11 minutes video showcasing how to use all 3 versions on Suzanne monkey. Basically showing the advantages and disadvantages of all 3 versions.
And that is pretty much how it all works!
If you have any questions regarding this asset, please send me a direct message on the Blender Market and I will answer as fast as I possibly can.
Sincerely
Jeannot Landry