 Kenneth
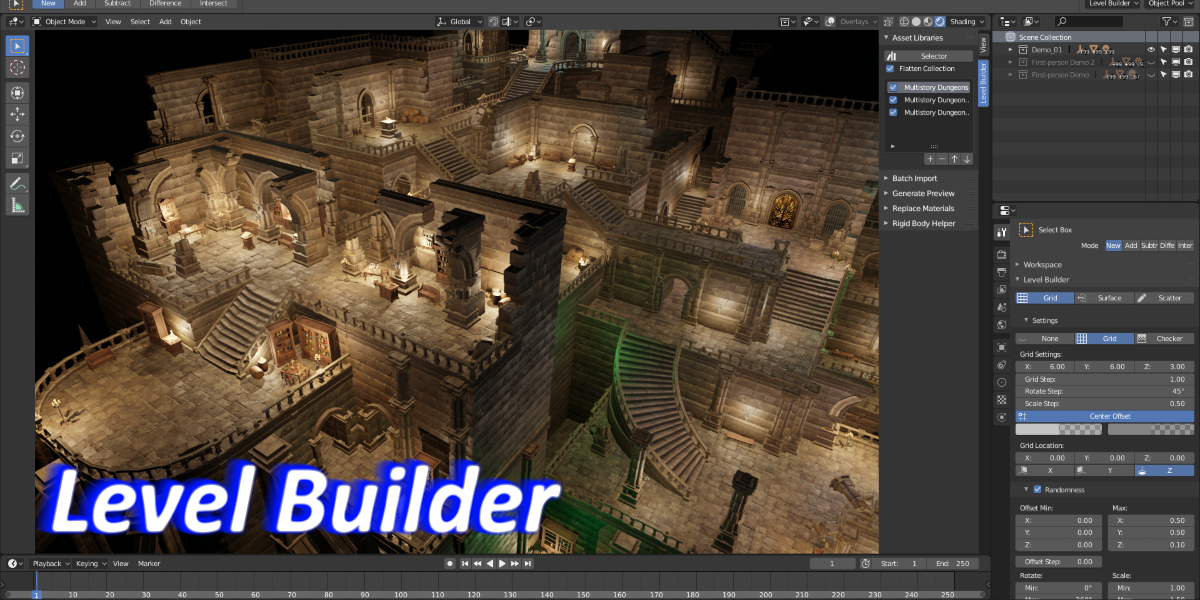
Install
To install the Level Builder, you can do this by going to File > User Preferences > Add-ons > Install from File then choose the level_builder.zip. (No need to unpack it)

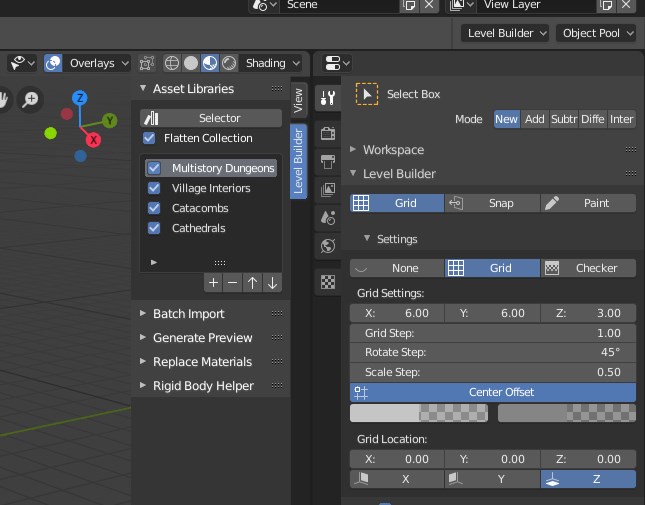
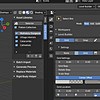
After install and enable the addon, a new “Level Builder” tab is added to N-panel in 3D view, and a new “Level Builder” panel is added to “Active Tool” tab in Properties.
You can use the +/- button to add / remove blend file to the libraries list. Press the Selector button to open the asset selector. You can also use default hotkey Shift + Enter.
Batch Import
You can batch import all assets (fbx, obj, 3ds, blend) in a folder with “Batch Import” panel. All subfolders is also imported to sub collections.

Rename Object |
Rename the object with the file name. |
Rename Mesh |
Rename the mesh data with the object name. |
Override Transform |
Change the rotation and scale after import. |
Apply Transform |
Apply rotation and scale after import. |
Align to grid |
Align each asset row by row and column by column. |
Row |
Asset number for each column. |
Adjust Location |
Place the asset using bounds center. |
Adjust Size |
Resize the asset to fit one unit cube. |
Restart Collection |
Restart on each collection. |
Rearrange |
Rearrange exist assets in active collection. |
Generate Preview
To has preview in asset selector, you need to generate preview in the blend library. The image is saved with the same name as the object and packed in blend file.
PNG / JPG |
The image file format. |
Size |
The size of image. |
Use scene world |
Use the world in current scene; otherwise, a simple world with single color is used. |
Use Alpha |
Save with alpha in image. |
Replace Materials
Help you batch replace materials assigned to objects. Select the material you want to replace to. Enter pattern (Regex) of materials name to replace with. All materials name match the pattern is replaced to the selected material.
Rigid Body Helper
Help you to create the rigid body proxy objects and settings. Most game assets pivot point is not in the center, and may contain children objects. Using that object with physics has wield result. “Rigid Body Helper” creates a proxy object join with all children and set the origin to center of mass. After simulation, the proxy data is transferred back to original objects.
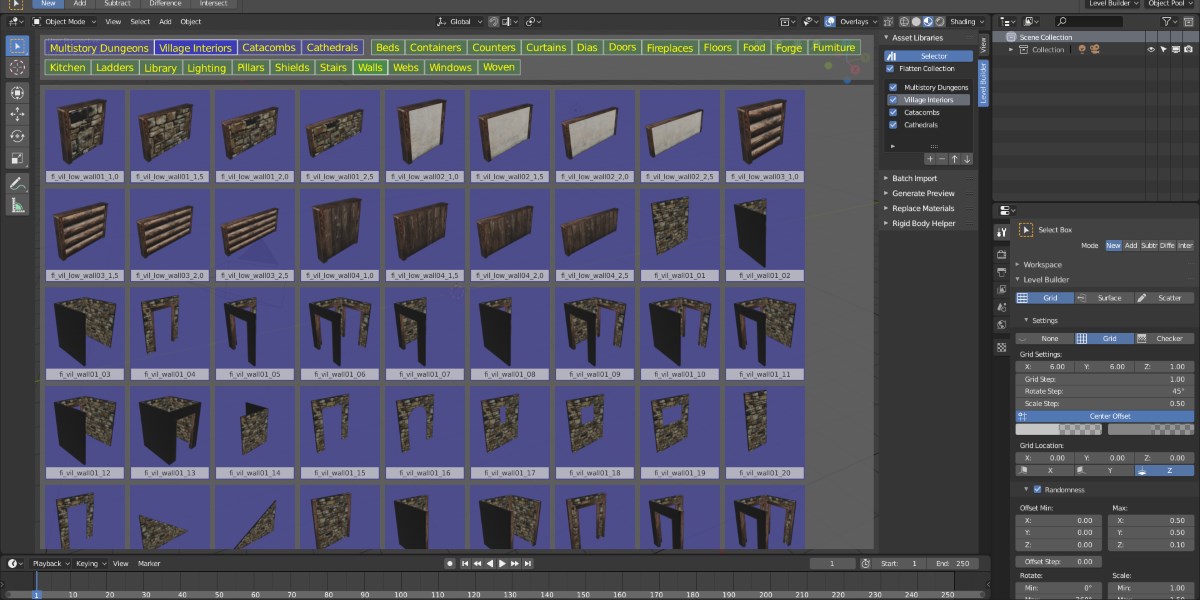
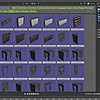
Asset Selector
Asset Selector allows you to select asset and place the asset to the scene. Only objects without parent is shown in selector, all children of object is grouped as a single asset. The image with the same name as the object is shown as preview.

Flattened Collection |
Show all collections and sub collections together. |
Flattened Collection Off
![]()
Flattened Collection On
![]()
Click |
Select the asset and enter placement mode. |
Shift + Click |
Select multiple assets. |
Shift + Mouse Wheel |
Scroll up / down faster. |
Ctrl + Mouse Wheel |
Increase / decrease preview size. |
Grid Mode
Place the asset using grid snapping. Press 1 to activate.


Grid Step |
The step to change the grid size when using hotkey. |
Rotate Step |
The step to rotate the object when using hotkey. |
Scale Step |
The step to scale the object when using hotkey. |
Center Offset |
Add half size offset to grid. |
Grid Location |
The grid plane origin location. |
Grid Orientation |
The grid plane normal direction. |
X / Y / Z |
Select the grid orientation. |
Up / Down |
Move the origin location of grid plane. |
|
Left / Right |
Rotate the object with rotate step. Hold Shift / Ctrl to rotate on other two axis. |
Insert / Delete |
Scale the object with scale step. |
Numpad + / - |
Change the grid size with grid step. Hold Shift / Ctrl / Alt to change X / Y / Z axis only. |
Shift |
Hold Shift and move mouse to fill object within the grid area. |
Ctrl |
Hold Ctrl to place object at half offset. |
Surface Mode
Place the asset using surface snapping. Press 2 to activate.


Align Object |
Select how the object align to the target. Align object local direction to target normal or custom direction. |
Offset Step |
The step to change offset when using hotkey. |
Rotate Step |
The step to rotate the object when using hotkey. |
Scale Step |
The step to scale the object when using hotkey. |
Snap Ground |
Snap to ground if no surface detected. |
Distance |
The distance to place object if no surface and ground detected. |
X / Y / Z |
Select the object align vector. Hold Shift to use -X / -Y / -Z |
Up / Down |
Change the offset with offset step. |
Left / Right |
Rotate the object with rotate step. |
Insert / Delete |
Scale the object with scale step. |
Shift |
Hold Shift and move mouse to change offset. |
Alt |
Hold Alt and move mouse to rotate object. |
Ctrl |
Hold Ctrl and move mouse to scale object. |
Scatter Mode
Place the asset using scatter mode. Press 3 to activate.


Radius |
The radius to scatter objects. |
Density |
The number of object to scatter. |
Interval Scale |
The ratio of radius that the minimum distance to scatter new objects. |
Interval Min |
The minimum distance to scatter new objects. |
Sphere |
Spawn objects in sphere before projection, otherwise in circle. |
Uniform |
Spawn objects uniformly. |
Project |
Scatter objects using projection. |
Nearest |
Scatter objects on nearest surface. |
Project Normal |
The projection direction when using project method. |
Align Object |
Select how the object align to the target. Align object local direction to target normal or custom direction. |
Mouse Wheel |
Change the radius. |
Shift + Wheel |
Change the density. |
X / Y / Z |
Select the object align vector. Hold Shift to use -X / -Y / -Z |
S |
Toggle sphere. |
U |
Toggle uniform. |
Object Pool
All selected objects are shown in object pool.

Select Object Randomly |
Spawn object randomly or sequentially. |
Order |
Custom order when using sequential, fill with the index with comma. You can use -1 to skip one step. |
Slider |
The weight of the object when choose randomly. |
Three Dots |
Press it to override object randomness. |
Randomness
There are three randomness settings for grid mode, surface mode and scatter mode.

Global Hotkeys
Enter / Left Click |
Place object. |
Esc / Right Click |
Exit Level Builder. |
Space |
Reselect object. |
R |
Reset offset / rotation / scale. |
N |
Use new randomness to spawn objects. |
Mouse Wheel |
Reselect object randomly or next object for sequential. |
P |
Hold P to select custom pivot point. Alt P to restore original pivot point. Shift P to apply custom pivot point to all object pool objects. |
\ |
Hold \ to suspend Level Builder ui. You can change camera location and angle. |
Custom Pivot Point
When selecting custom pivot point, you can use mouse wheel to change different selection mode. 1) edge / face center of the bounds. 2) project original pivot point to bounds. 3) same as 1 but exclude (0,0,0) in bounds. 4) same as 2 but exclude (0,0,0) in bounds.


Have questions about this product?
Login to message
| Sales | 200+ |
| Rating | 15 ratings |
| Dev Fund Contributor | |
| Published | about 6 years ago |
| Software Version | 2.8 |
| License | GPL |
Discover more products like this
grid snapping asset spring19 leveldesign scatter asset management