Handy Weight Edit
Handy Weight Edit is an alternative weight painting method in Edit mode.
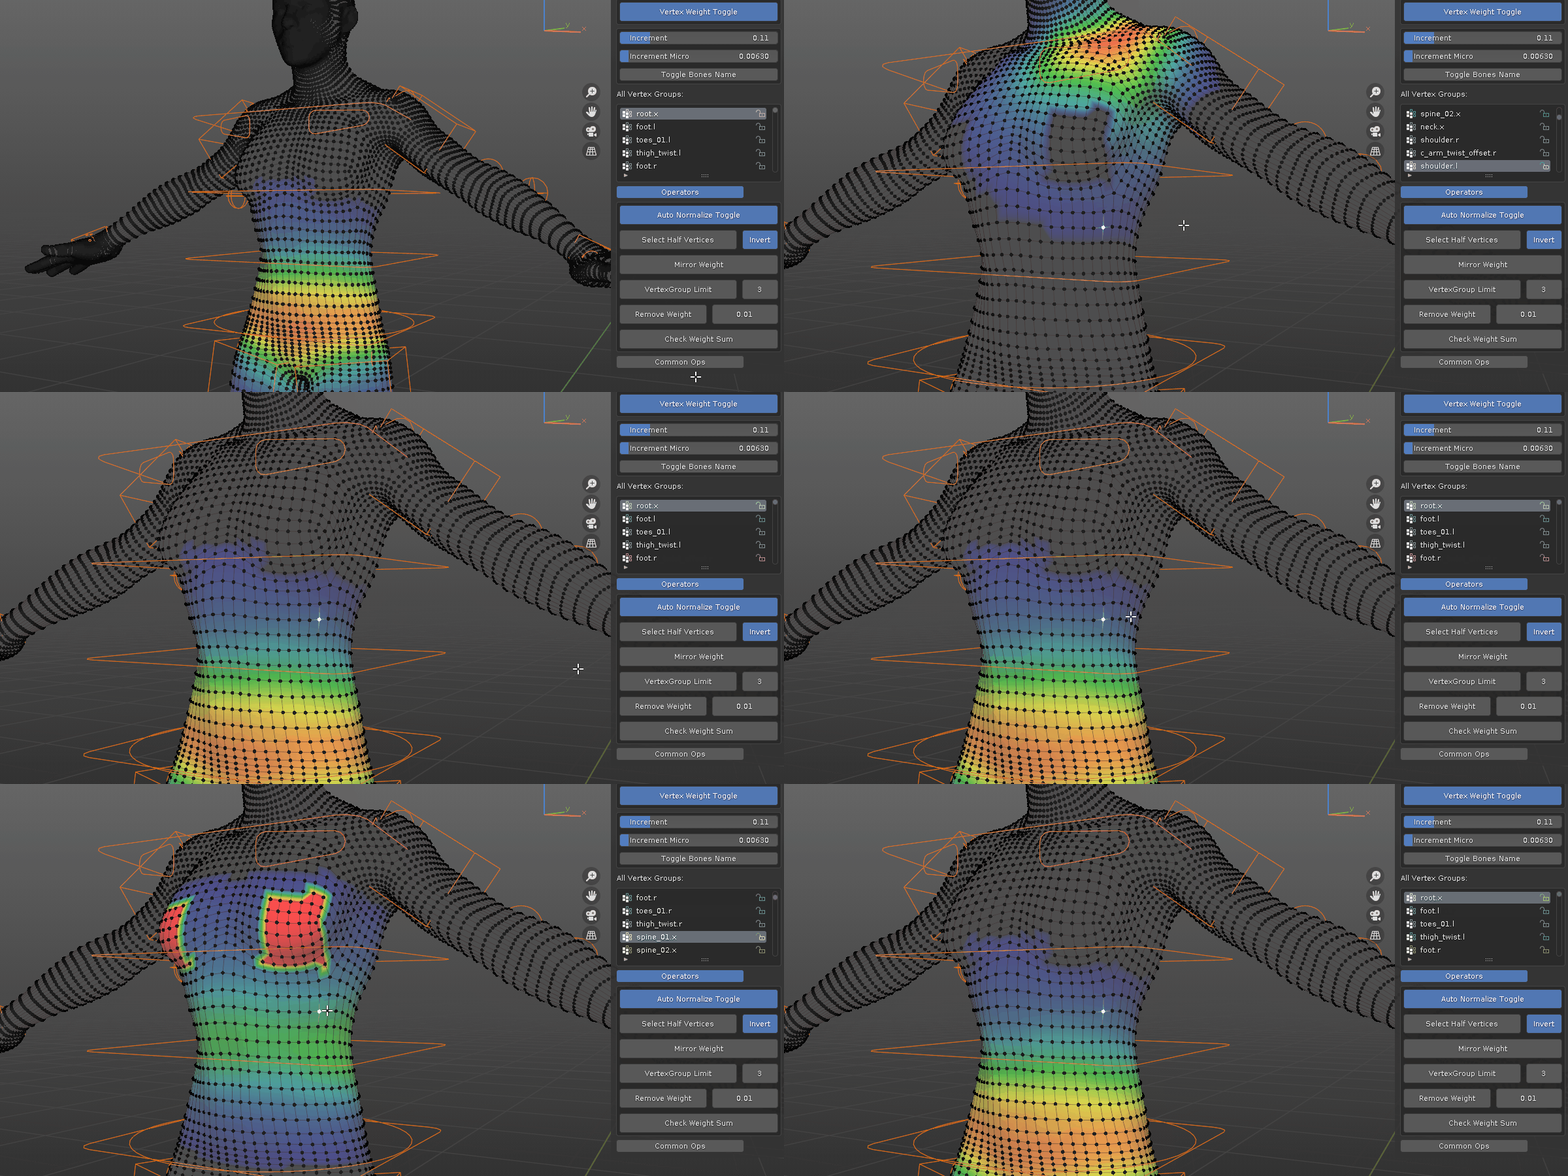
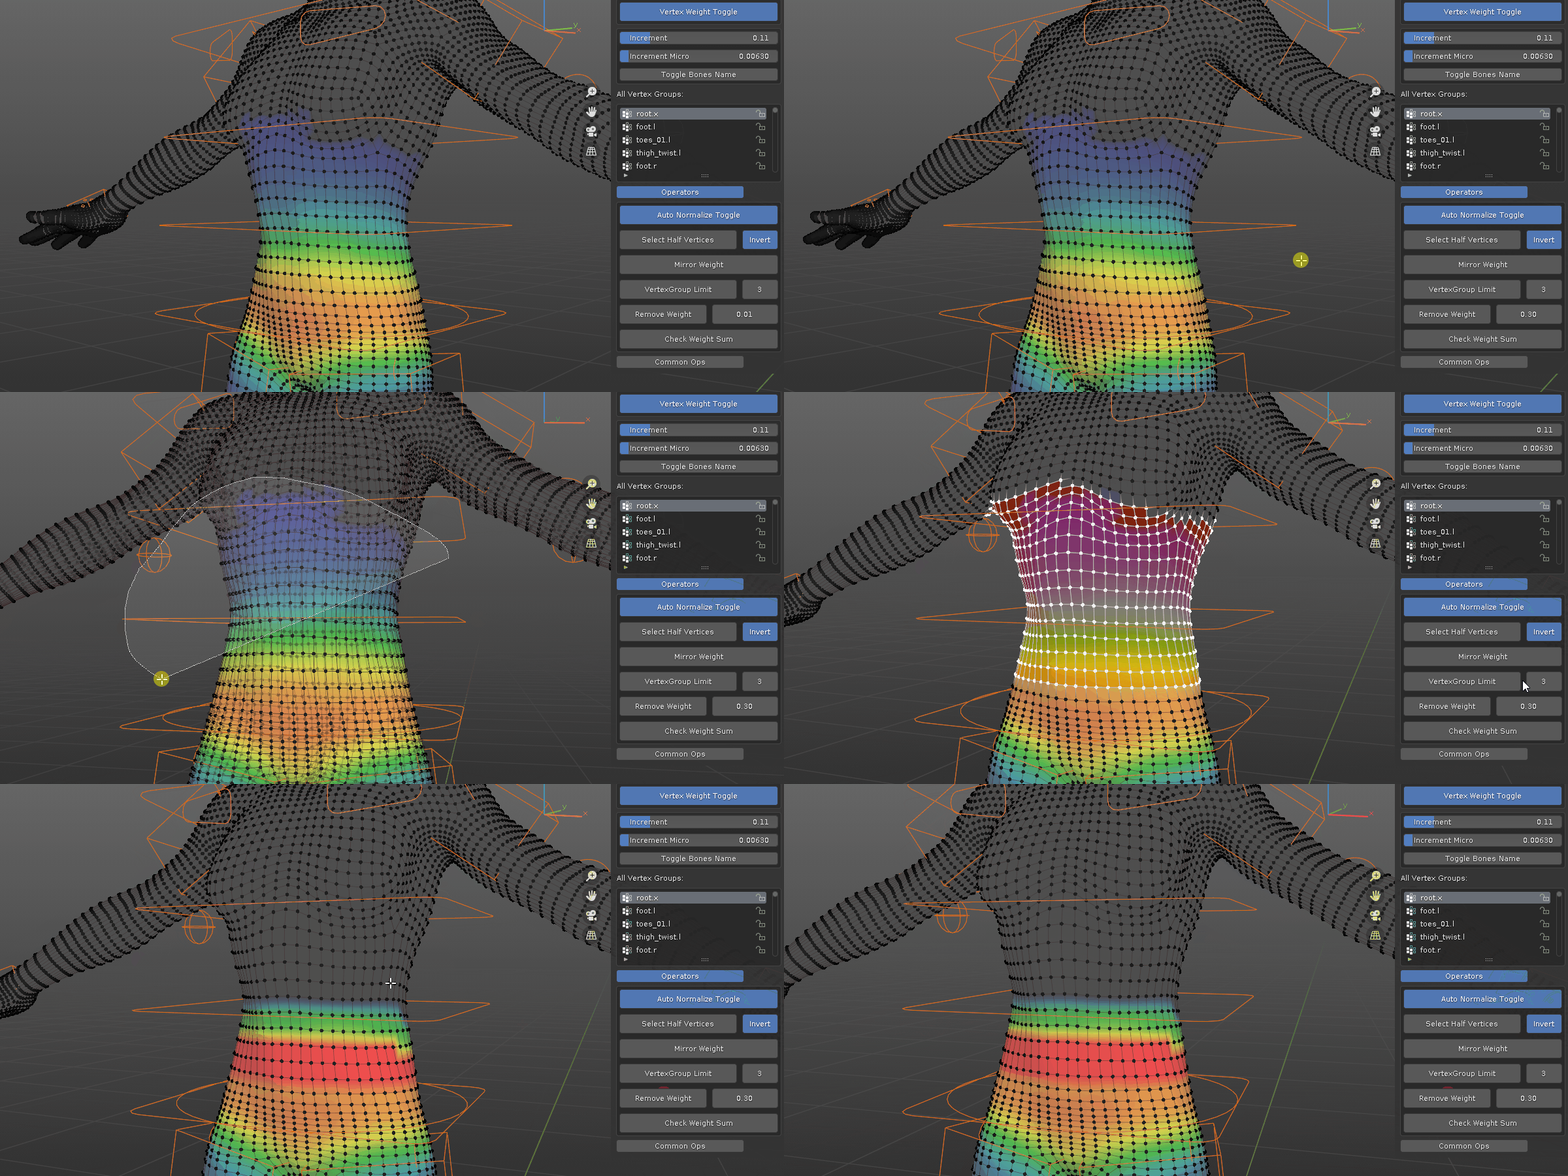
It offers precise control where and how weight is distributed. Instead of painting in hard to get areas with brushes, you can now select individual vertex and adjust the weight value. Along with all the familiar tools in edit mode like loop select, xray, lasso select, hide/unhide elements, it is never easier to modify weight values during character skinning process.
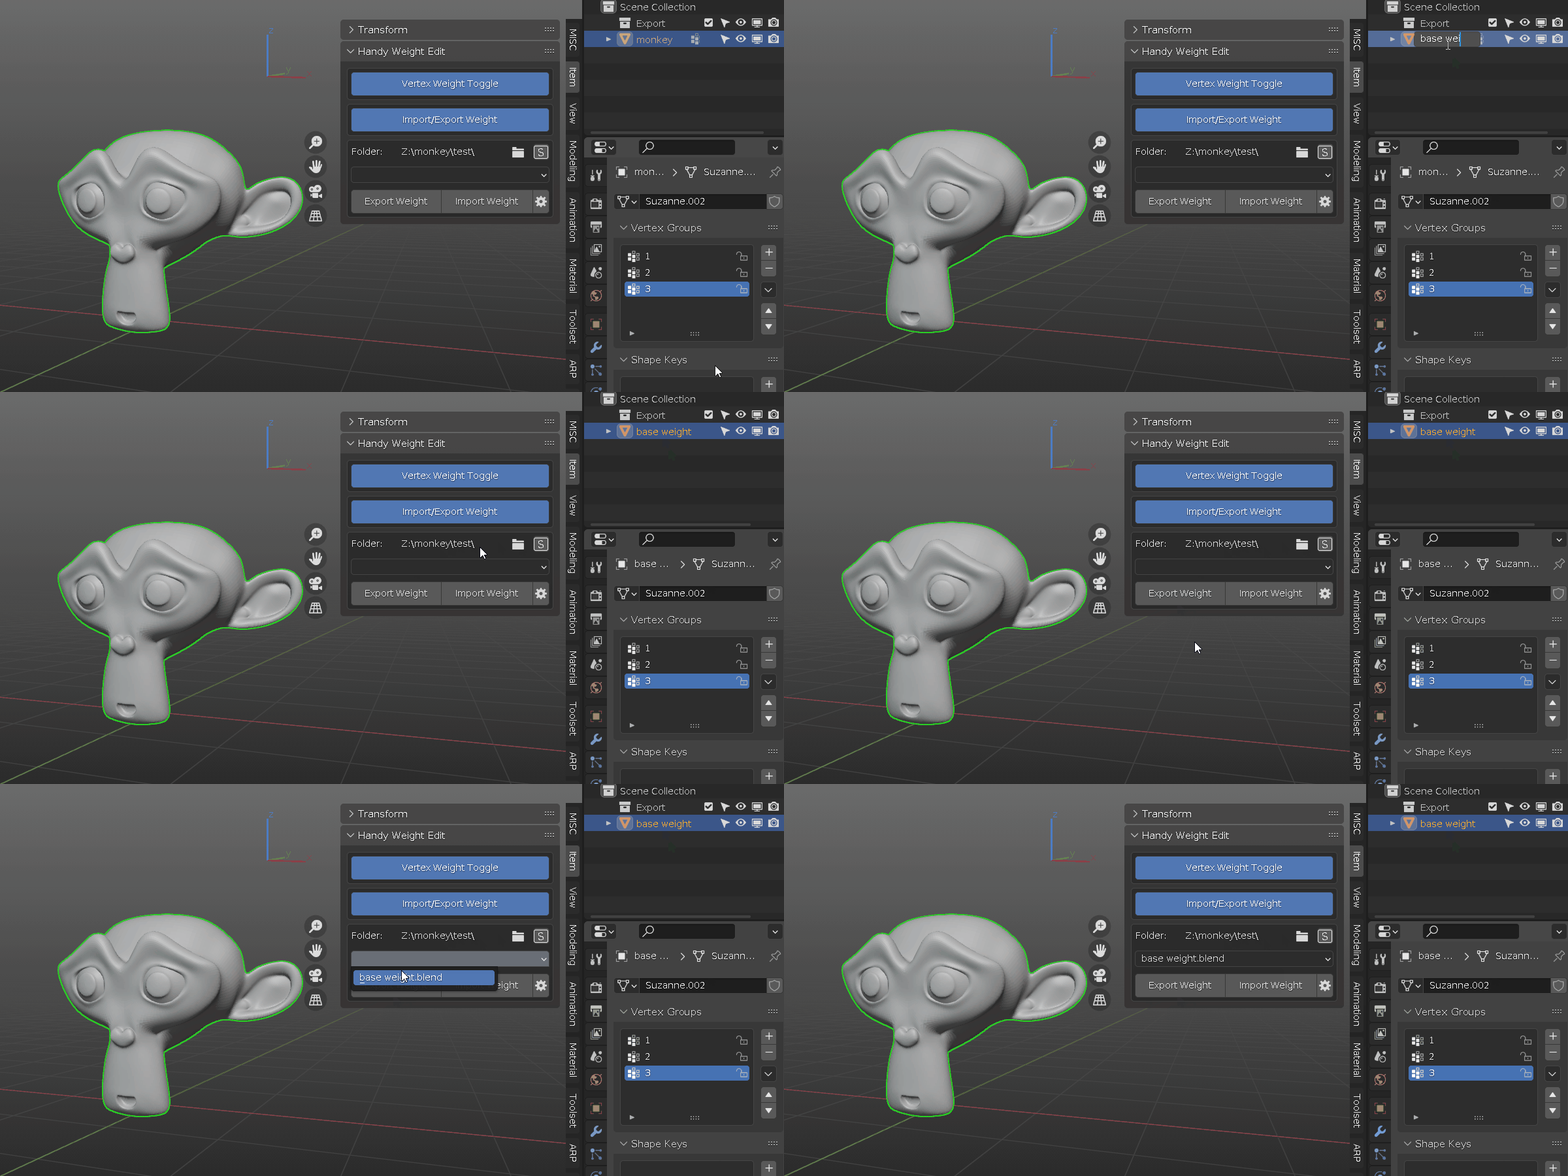
you can also backup your character skinning progress using the Import/Export Weight feature.
if you are new to weight painting, take a look at FAQ for some general guide. documentation has more detailed explanation of each operator.
After binding to an armature, select a single mesh object and enter edit mode, then use various tools to modify the weight value:
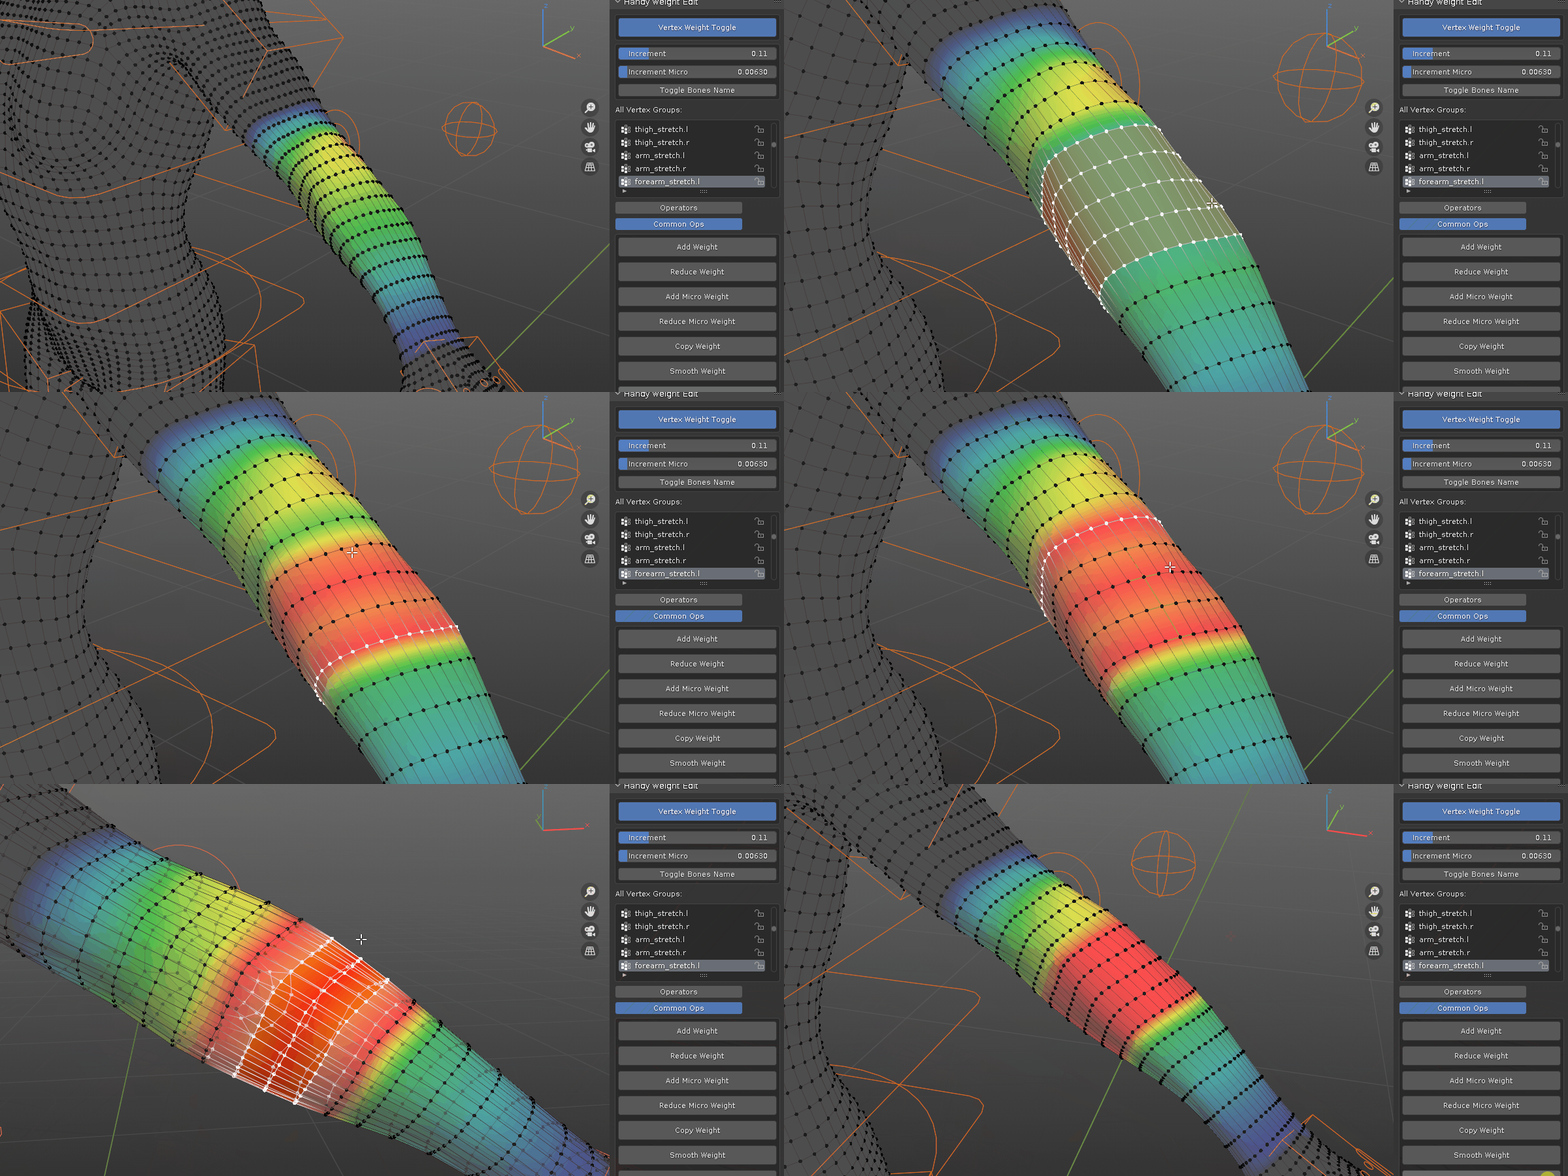
Increase or Decrease Weight value with mouse wheel on selected vertices (hotkeys can be customized)
method one: uniformly modify weight value to selected vertices. useful to fill large portion of area with same value.

method two: vertex weight value is modified on a per vertex level, in a gradient manner. useful to fine tune borders where multiple bone influence groups meet.
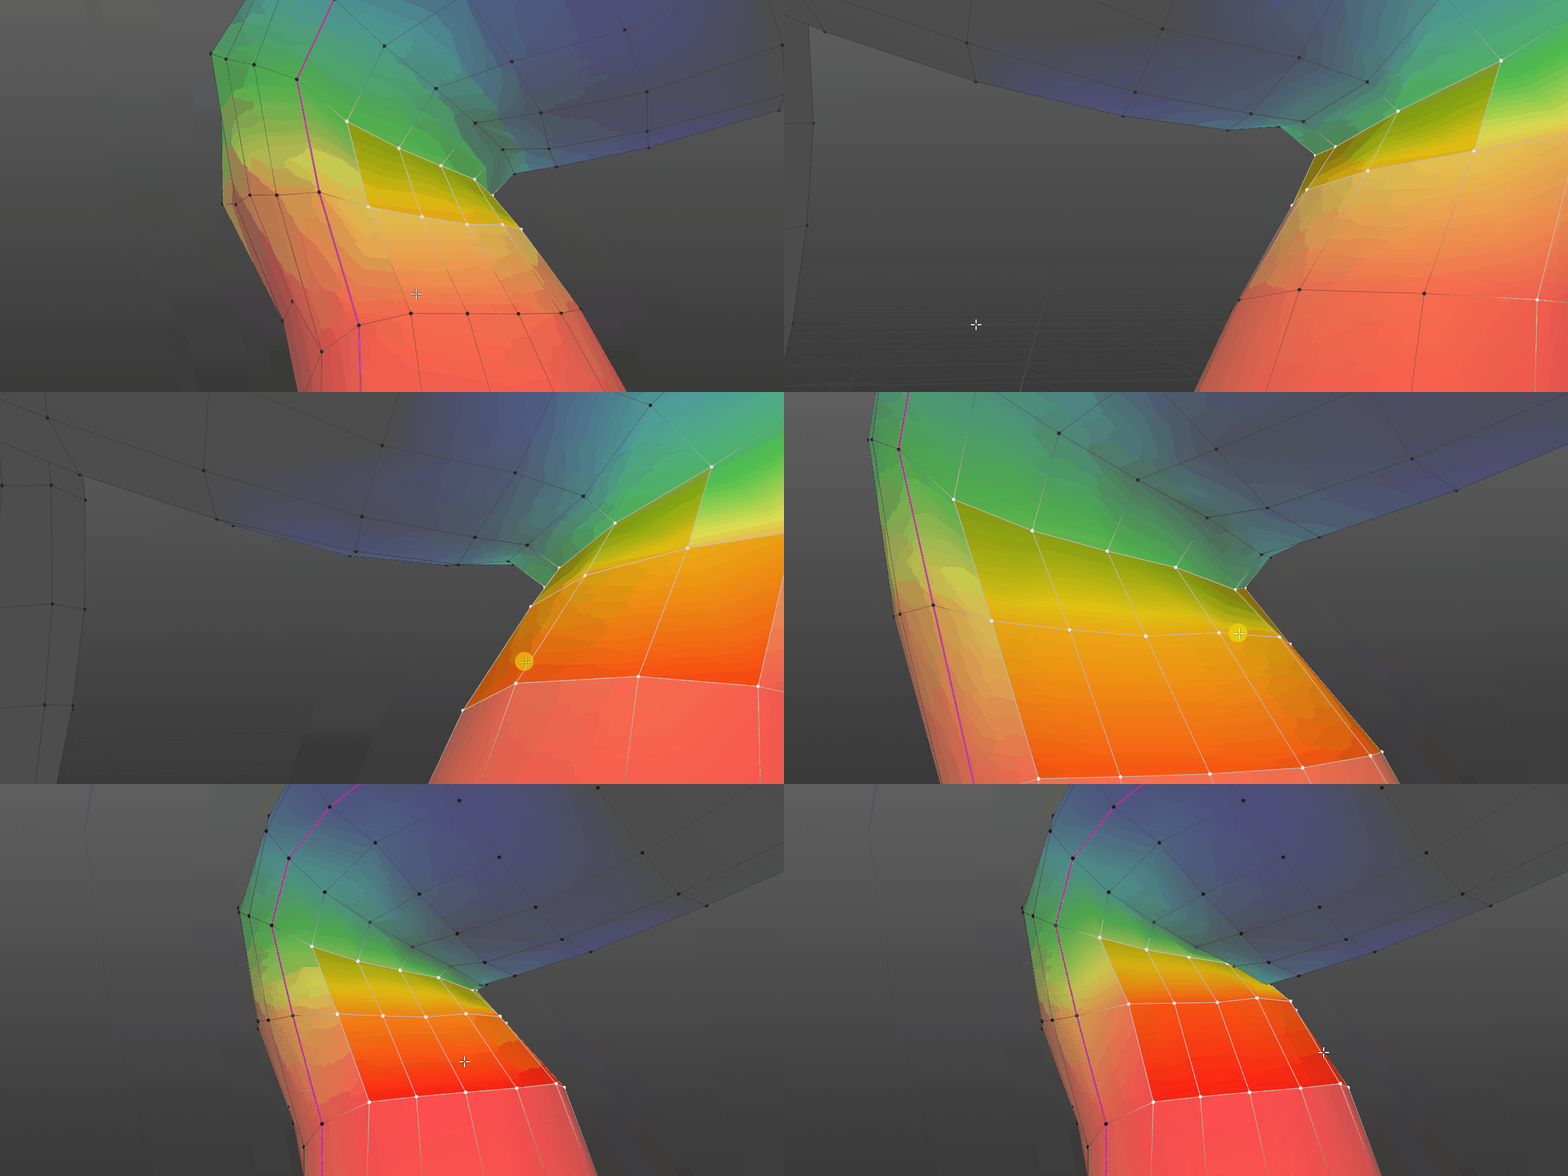
Smooth Weight on selected vertices. please note, if you have symmetry turn on, it will affect the symmetric part on the other side, which usually is not intended.
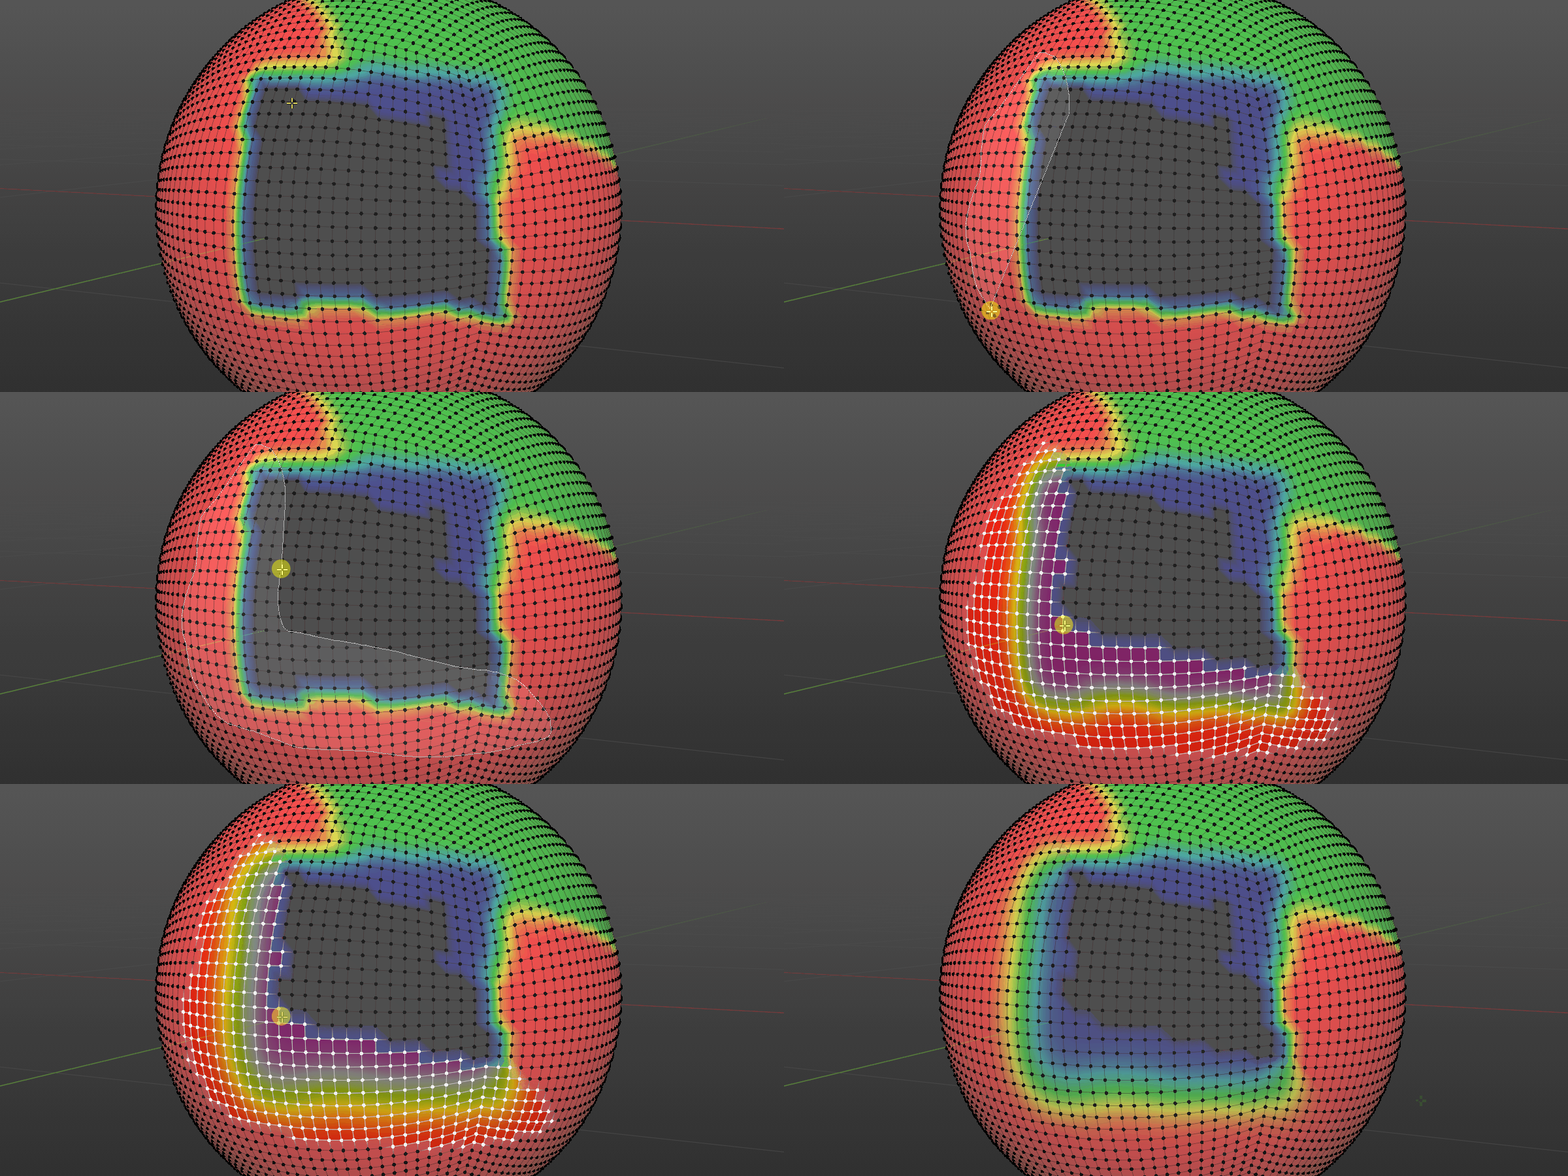
Copy Weight value as last selected vertex.
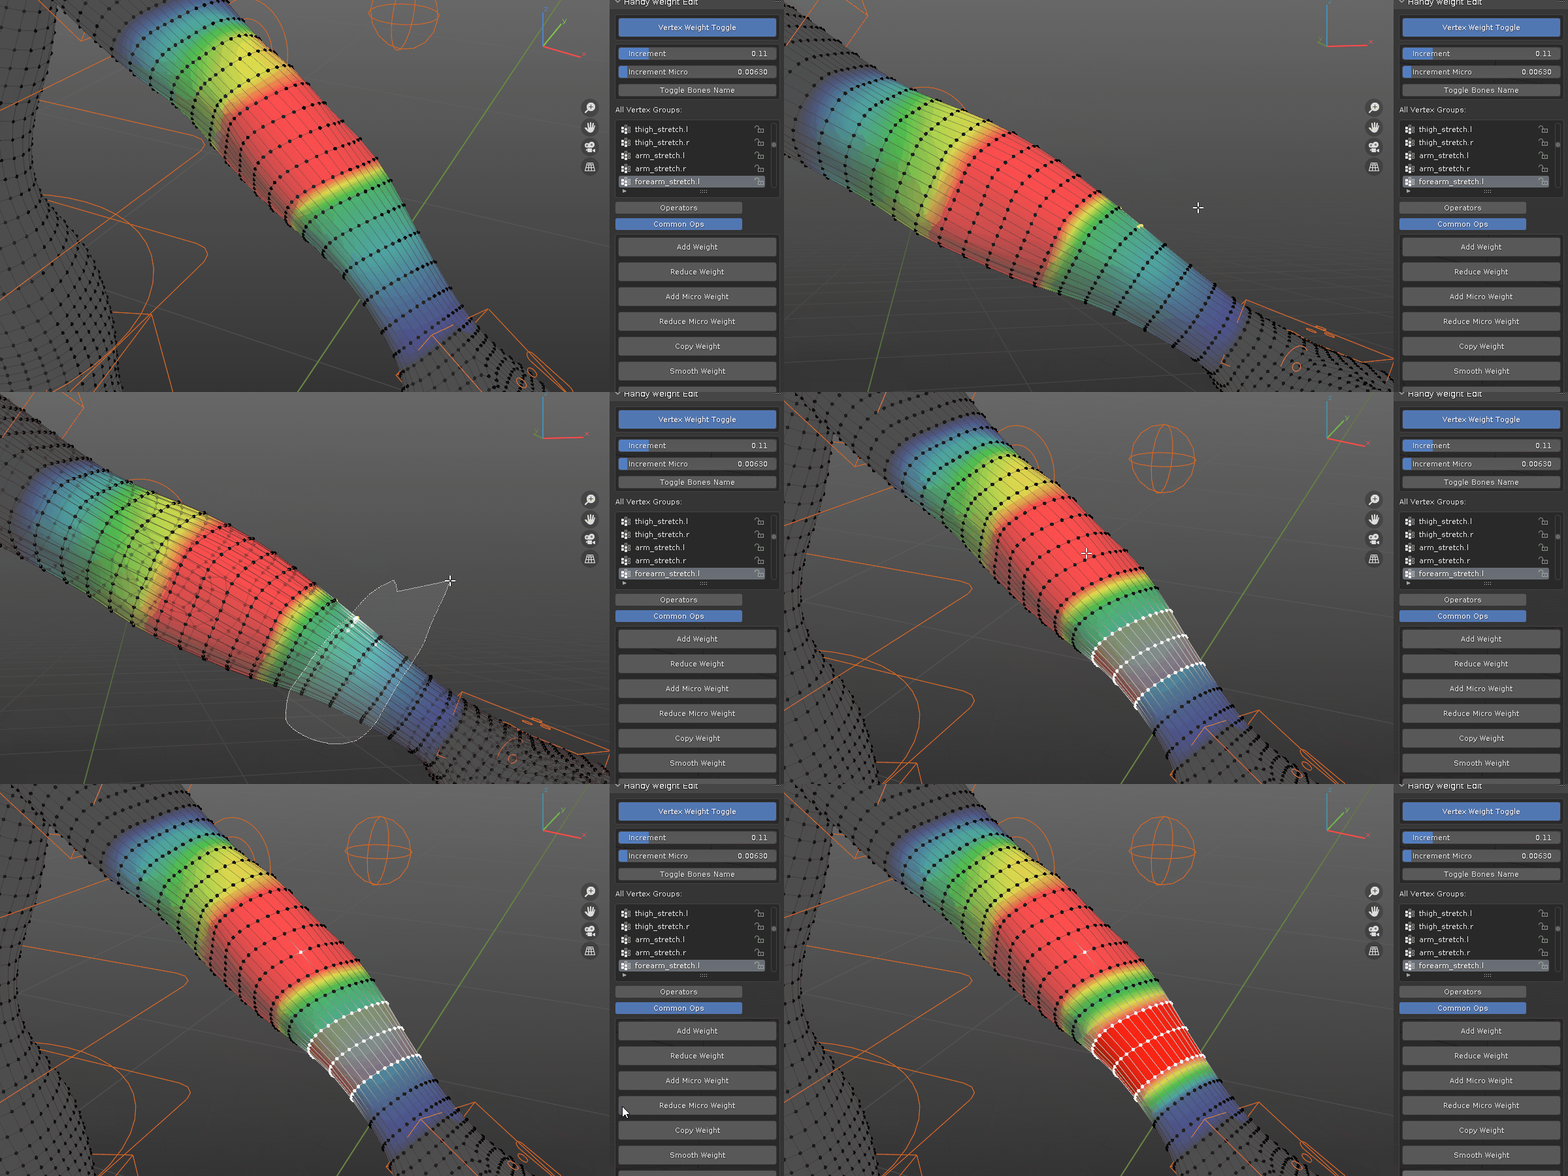
Mirror Weight (symmetric): mirror the weight of selected vertices from relevant mirrored bone. proper bone suffix naming is recommended. or mirror the weight value of selected vertices of the same bone as shown below. only works on symmetrical mesh part.
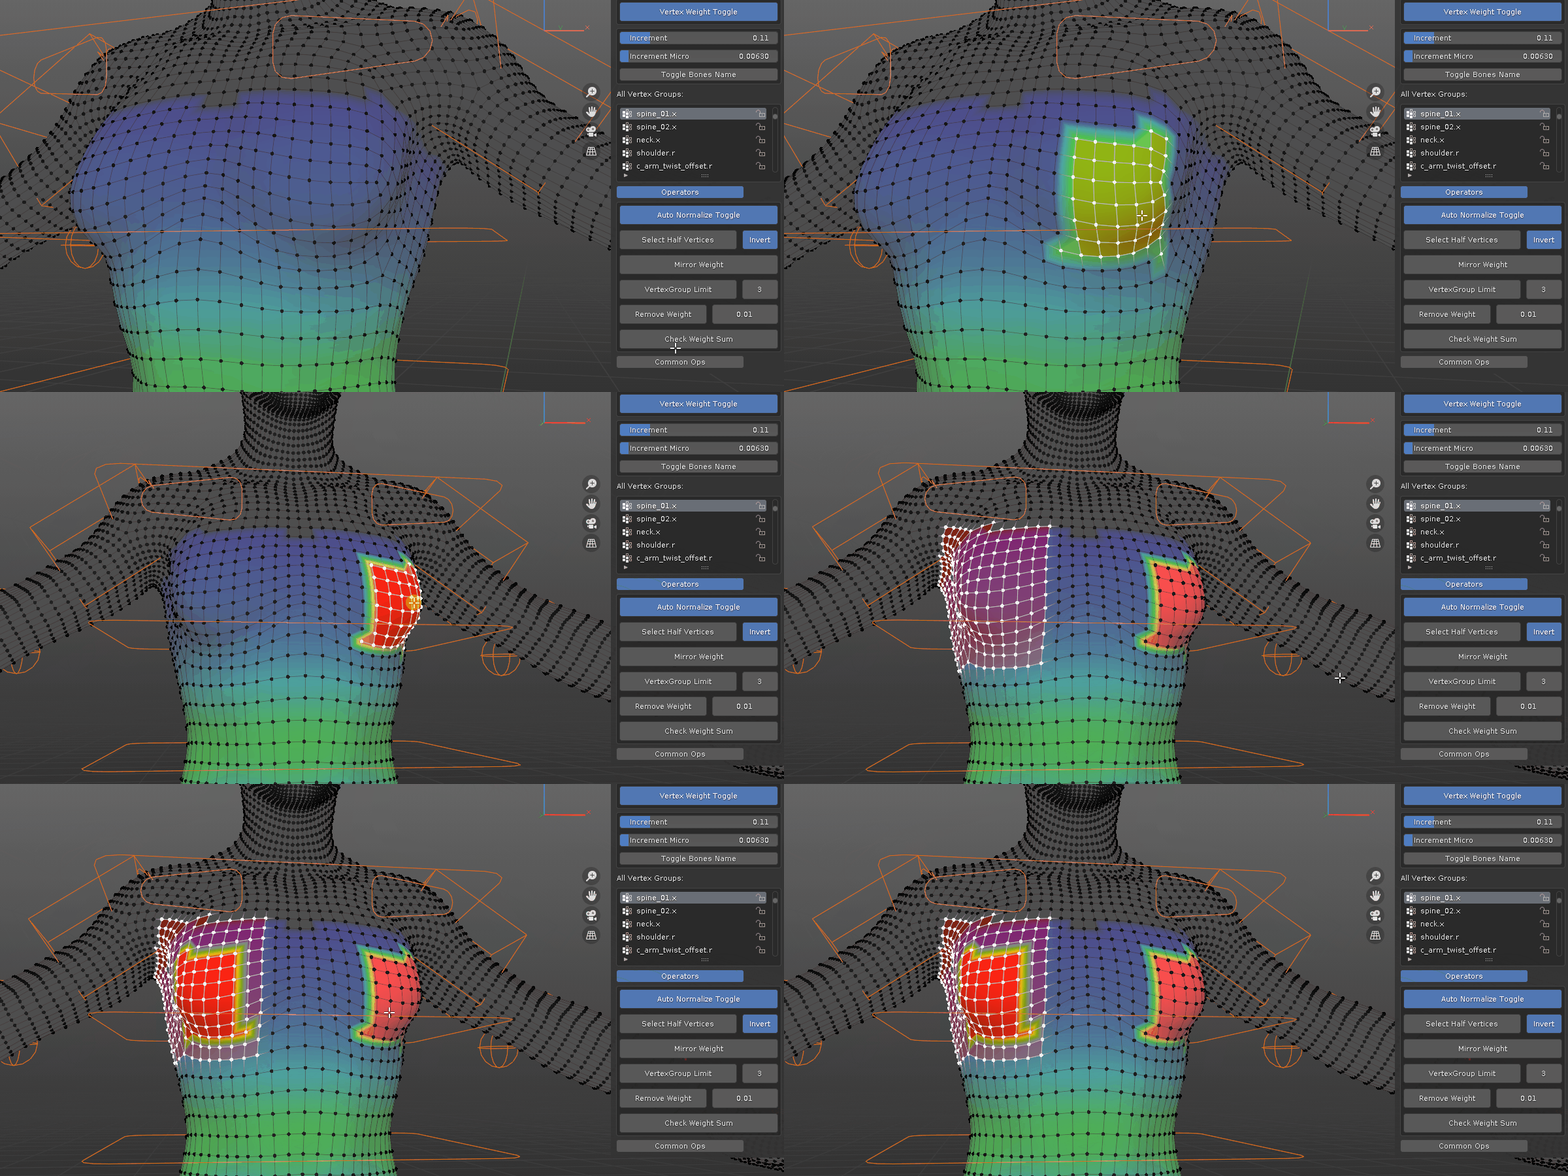
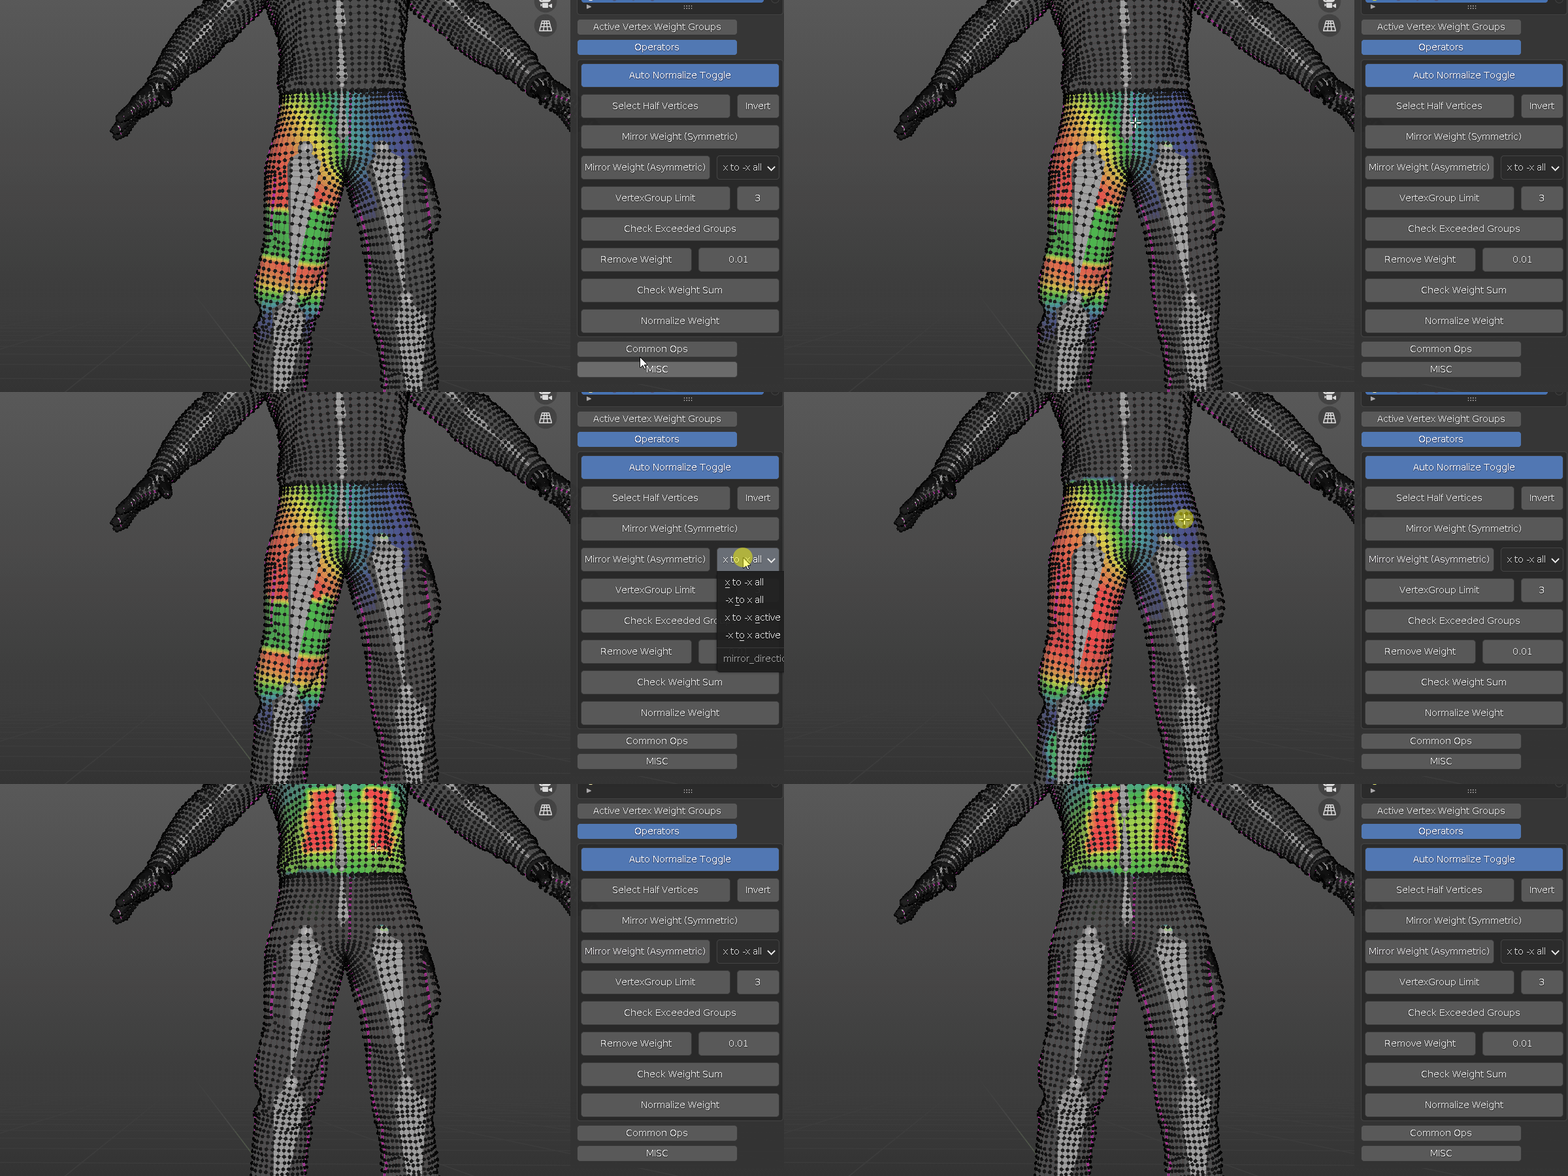
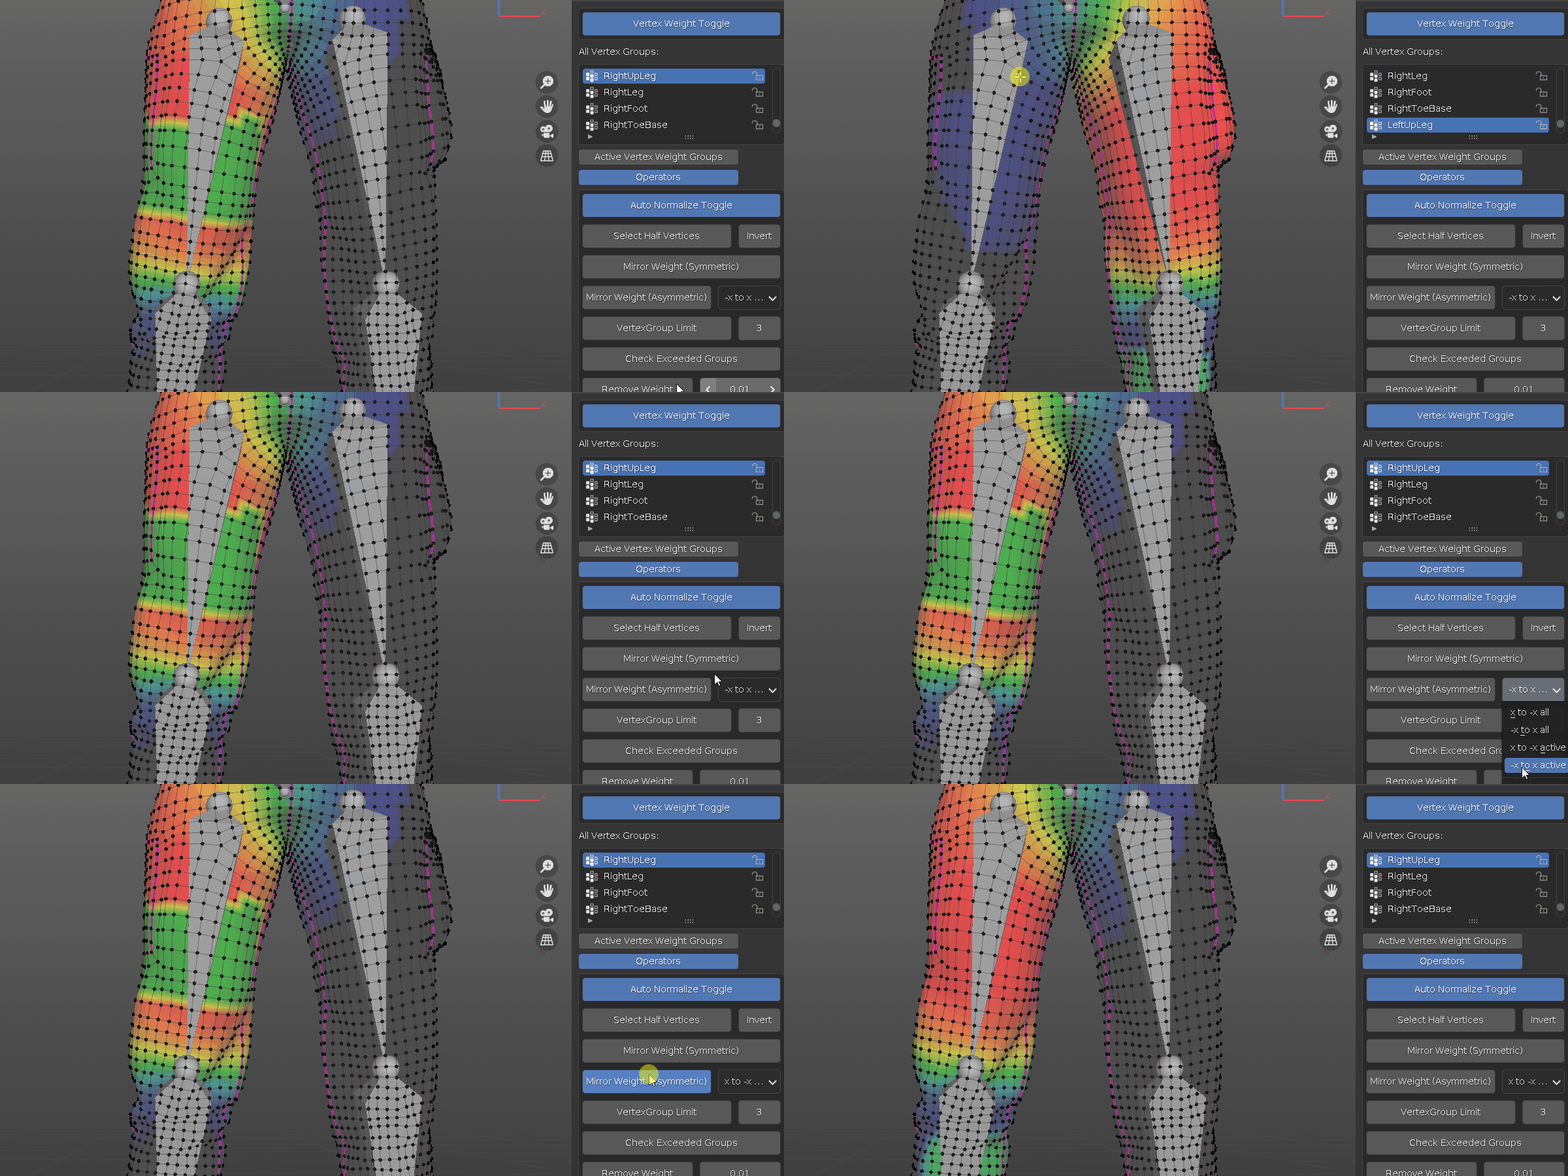
Mirror Weight (asymmetric): either mirror all vertices from one side to the other, or only active bone from one side to the other. take a look at this Video or Doc page for more info.
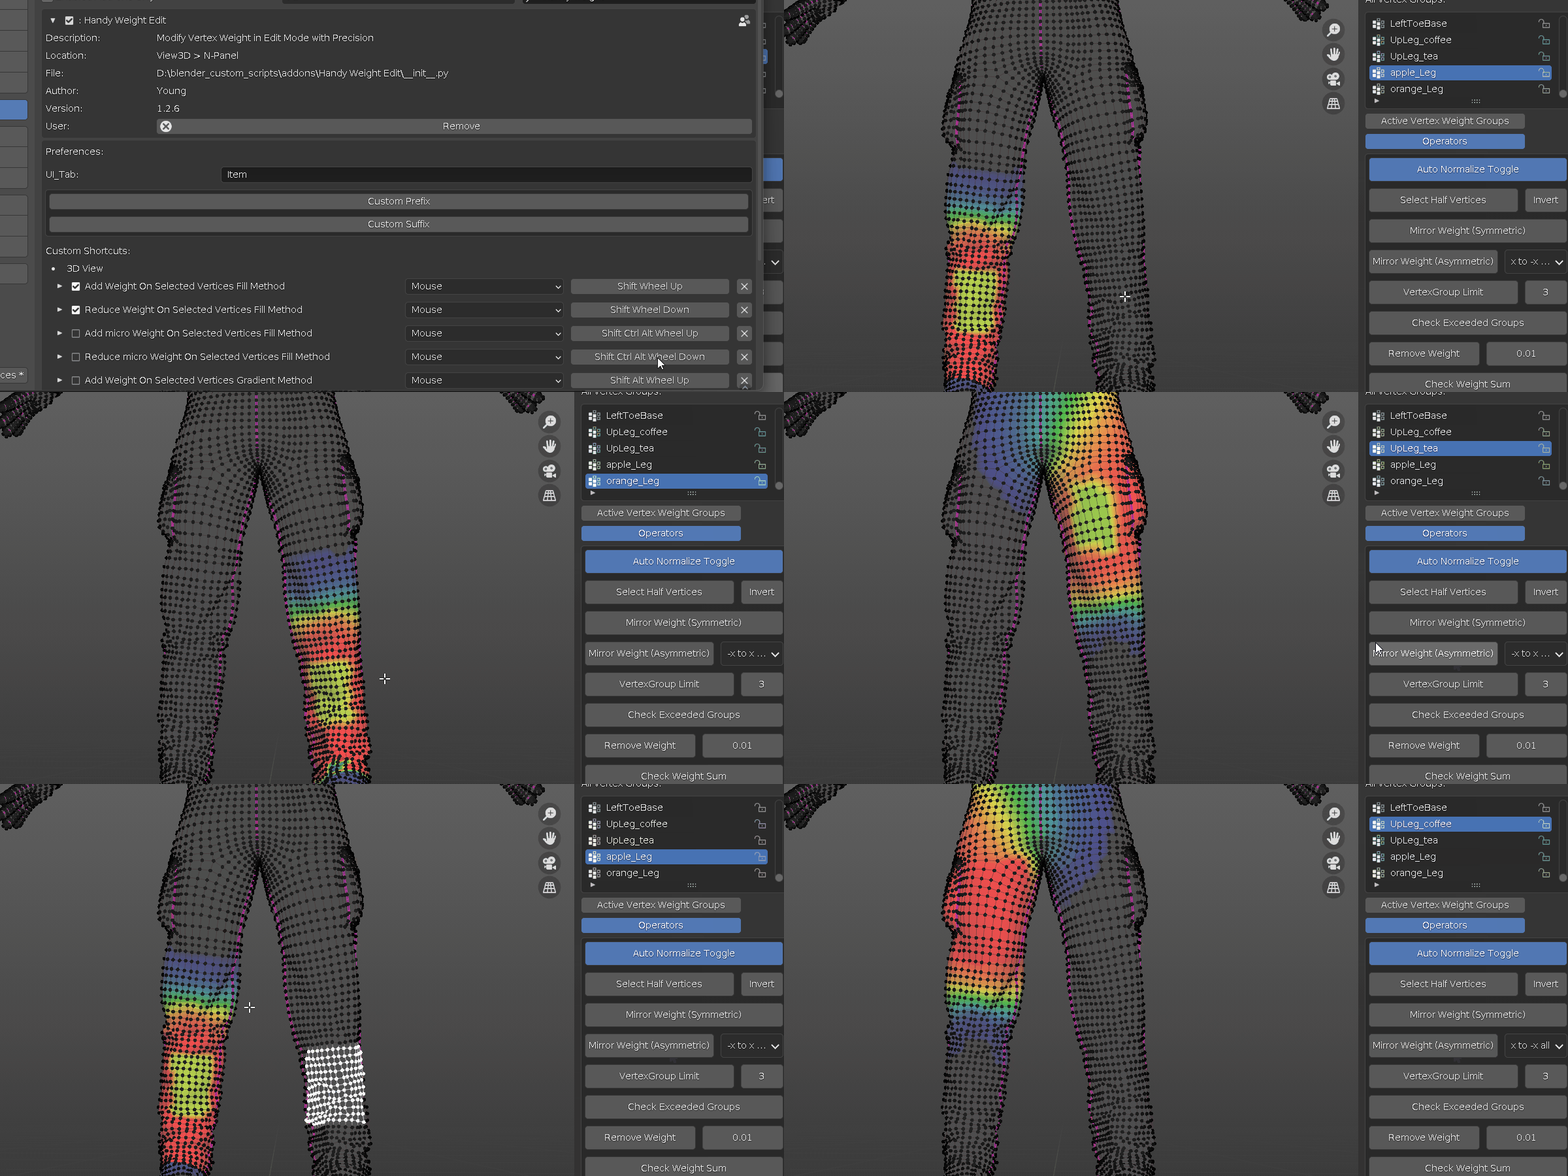
Custom Prefix, Suffix for mirror weight:
Switch Bone Influenced Groups: take a look at FAQ for more info.
case 1: if a single vertex is selected, cycle through all influenced weight groups that include the vertex. useful where multiple vertex groups intersect.
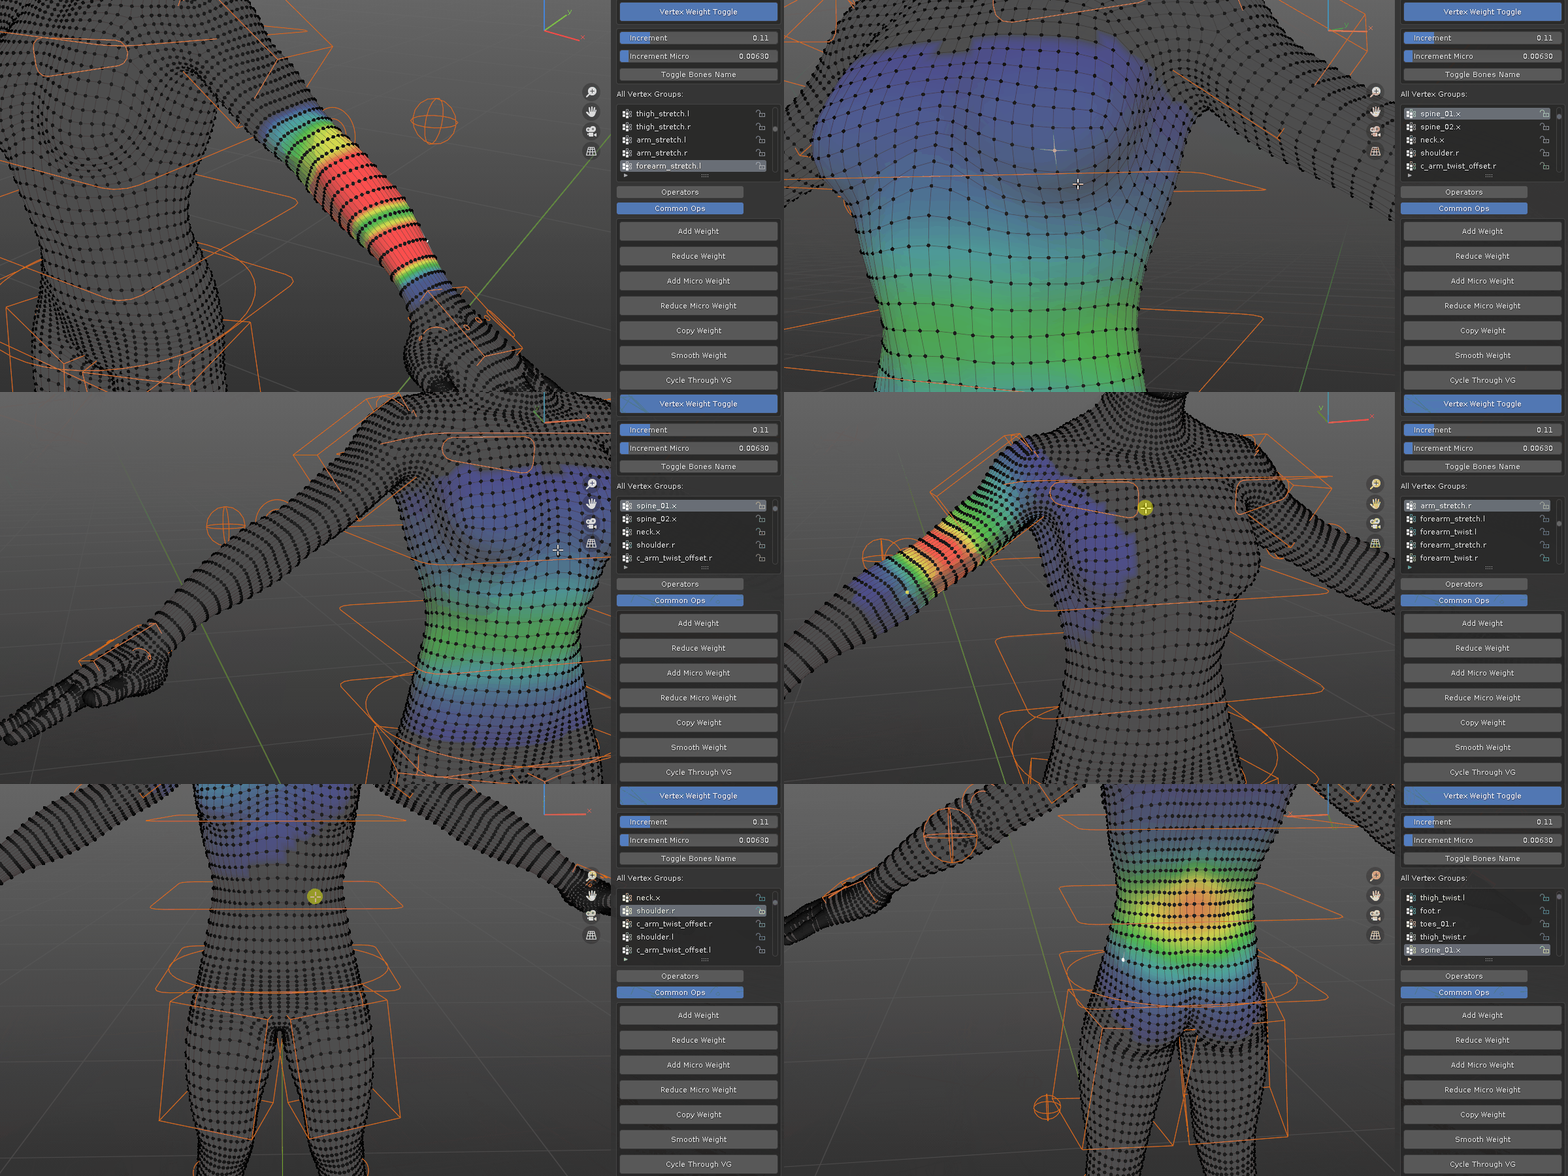
case 2: if more than 1 vertex is selected or nothing is selected, switch bone influenced group under mouse cursor. useful where a precise selection is made and you want to switch bone influence group.
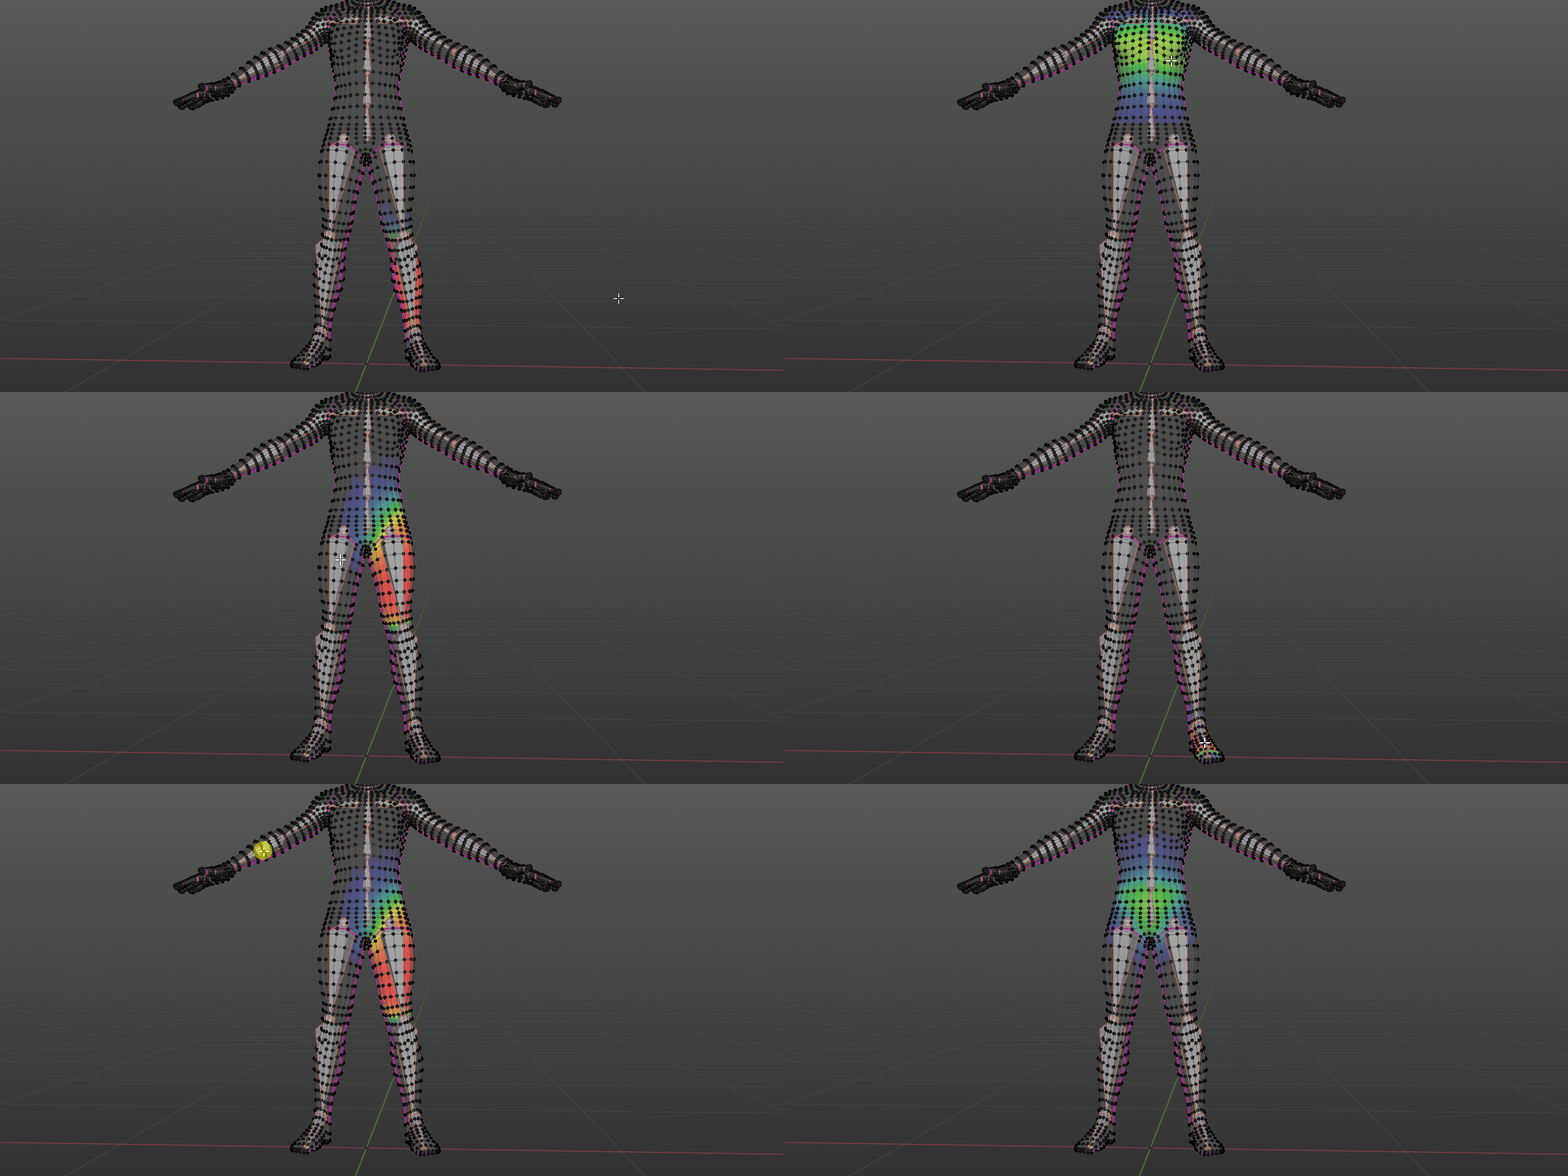
case 3: if you bind with empty groups, switch active bone based on its distance from mouse cursor
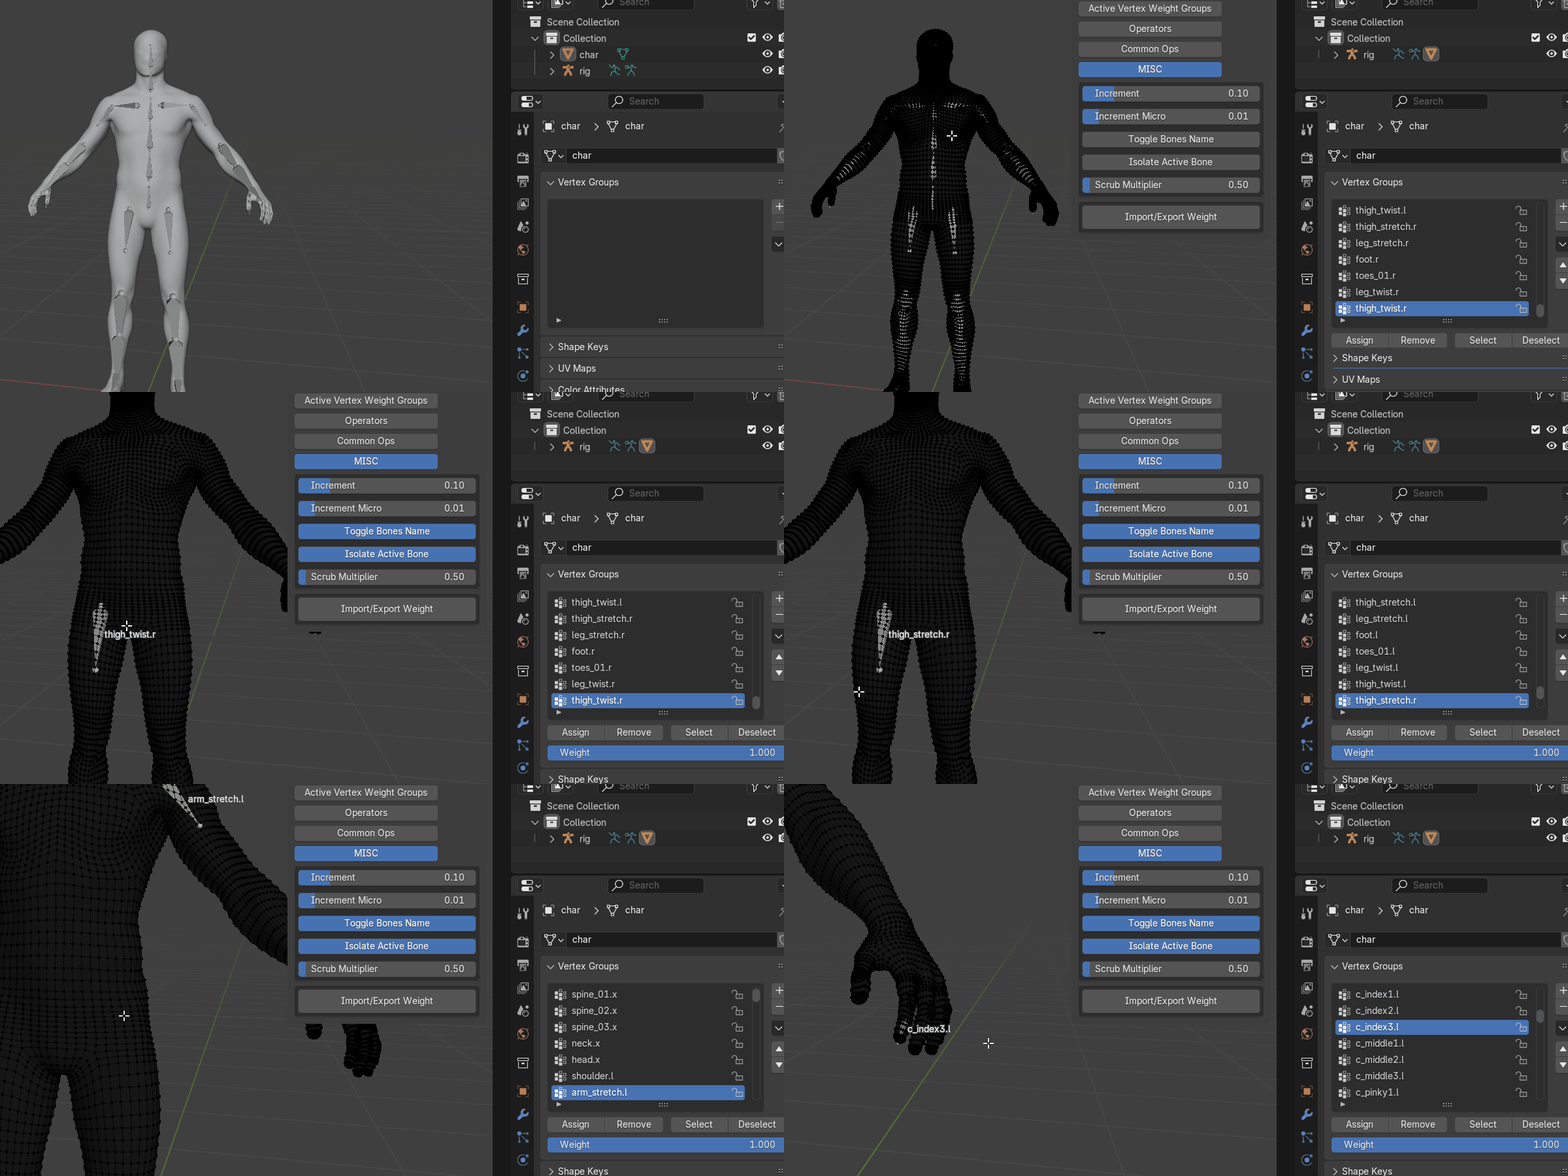
Isolate Active Bone. while adjusting different vertex groups, use the toggle to only show the corresponding bone, so that you would never modify the wrong bone influence. ( toggle relevant deform bone layer on in blender 3.x, if you use rigify [layer29] or autorigpro [layer 31] )
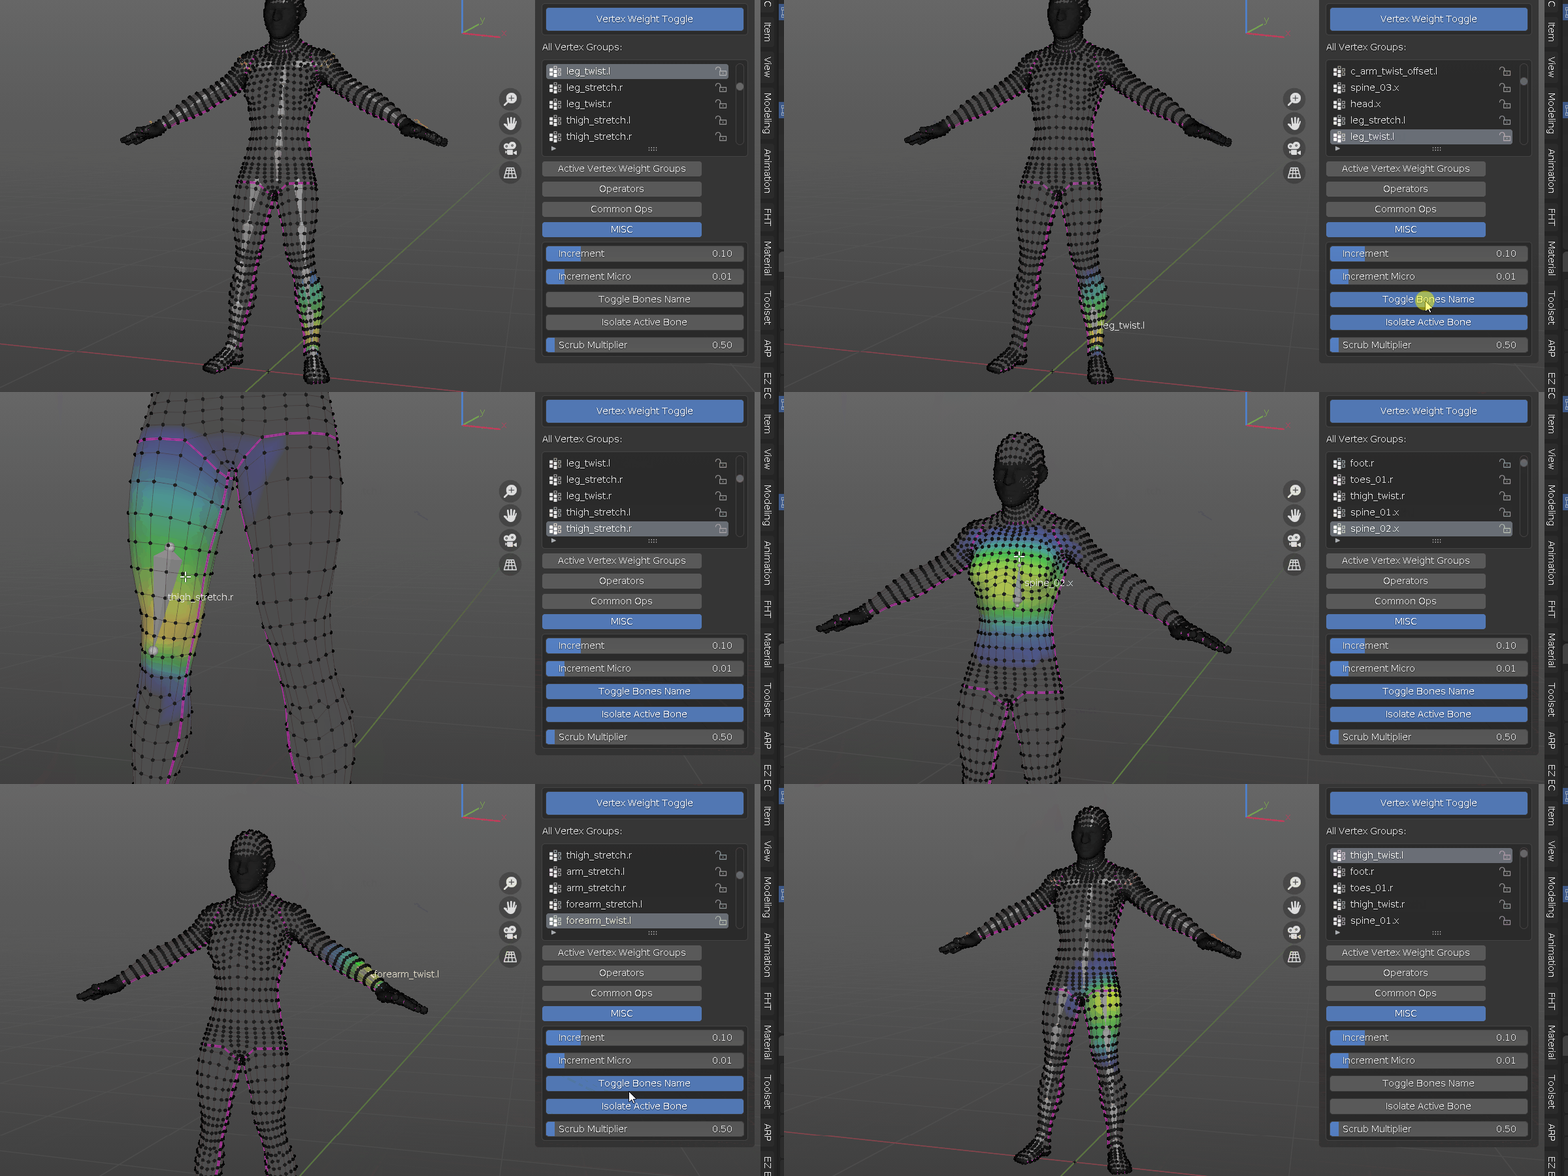
Limit Max weight groups. to increase lower end platform performance, a set of max bone number influence is a must.

Remove Weight below set threshold. optimize performance by removing small influenced values.

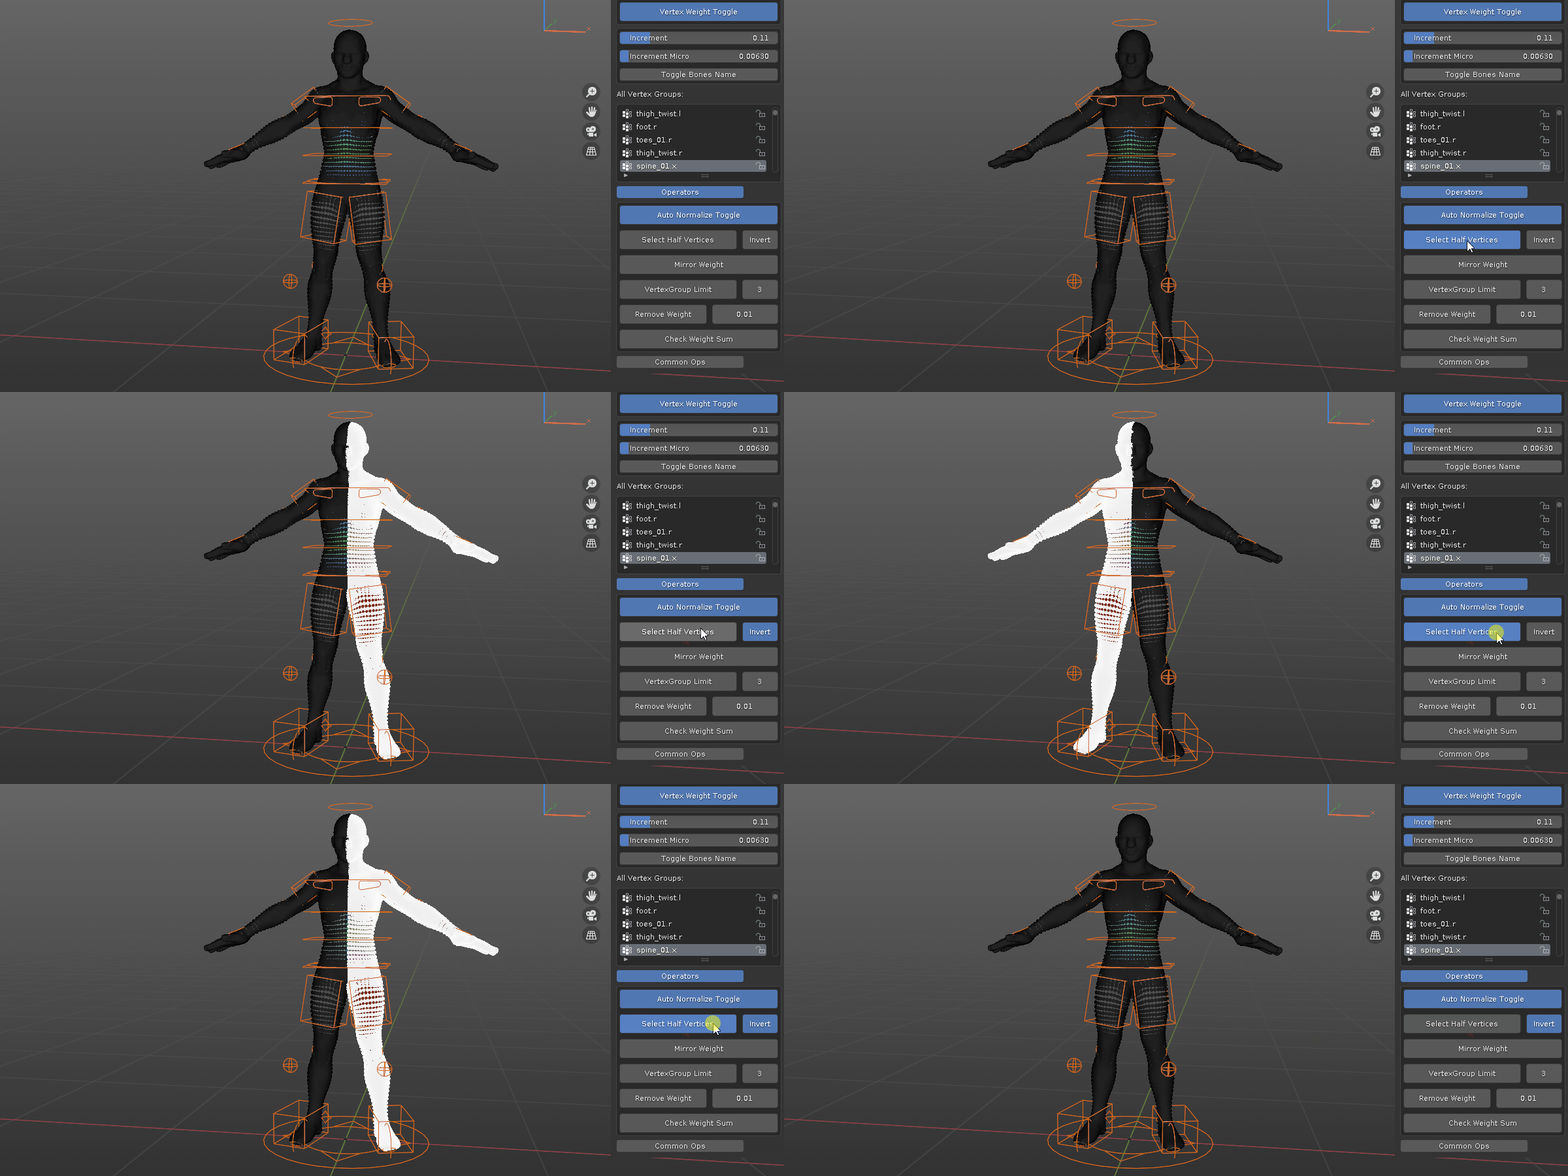
Select Half of the mesh for mirror weight.
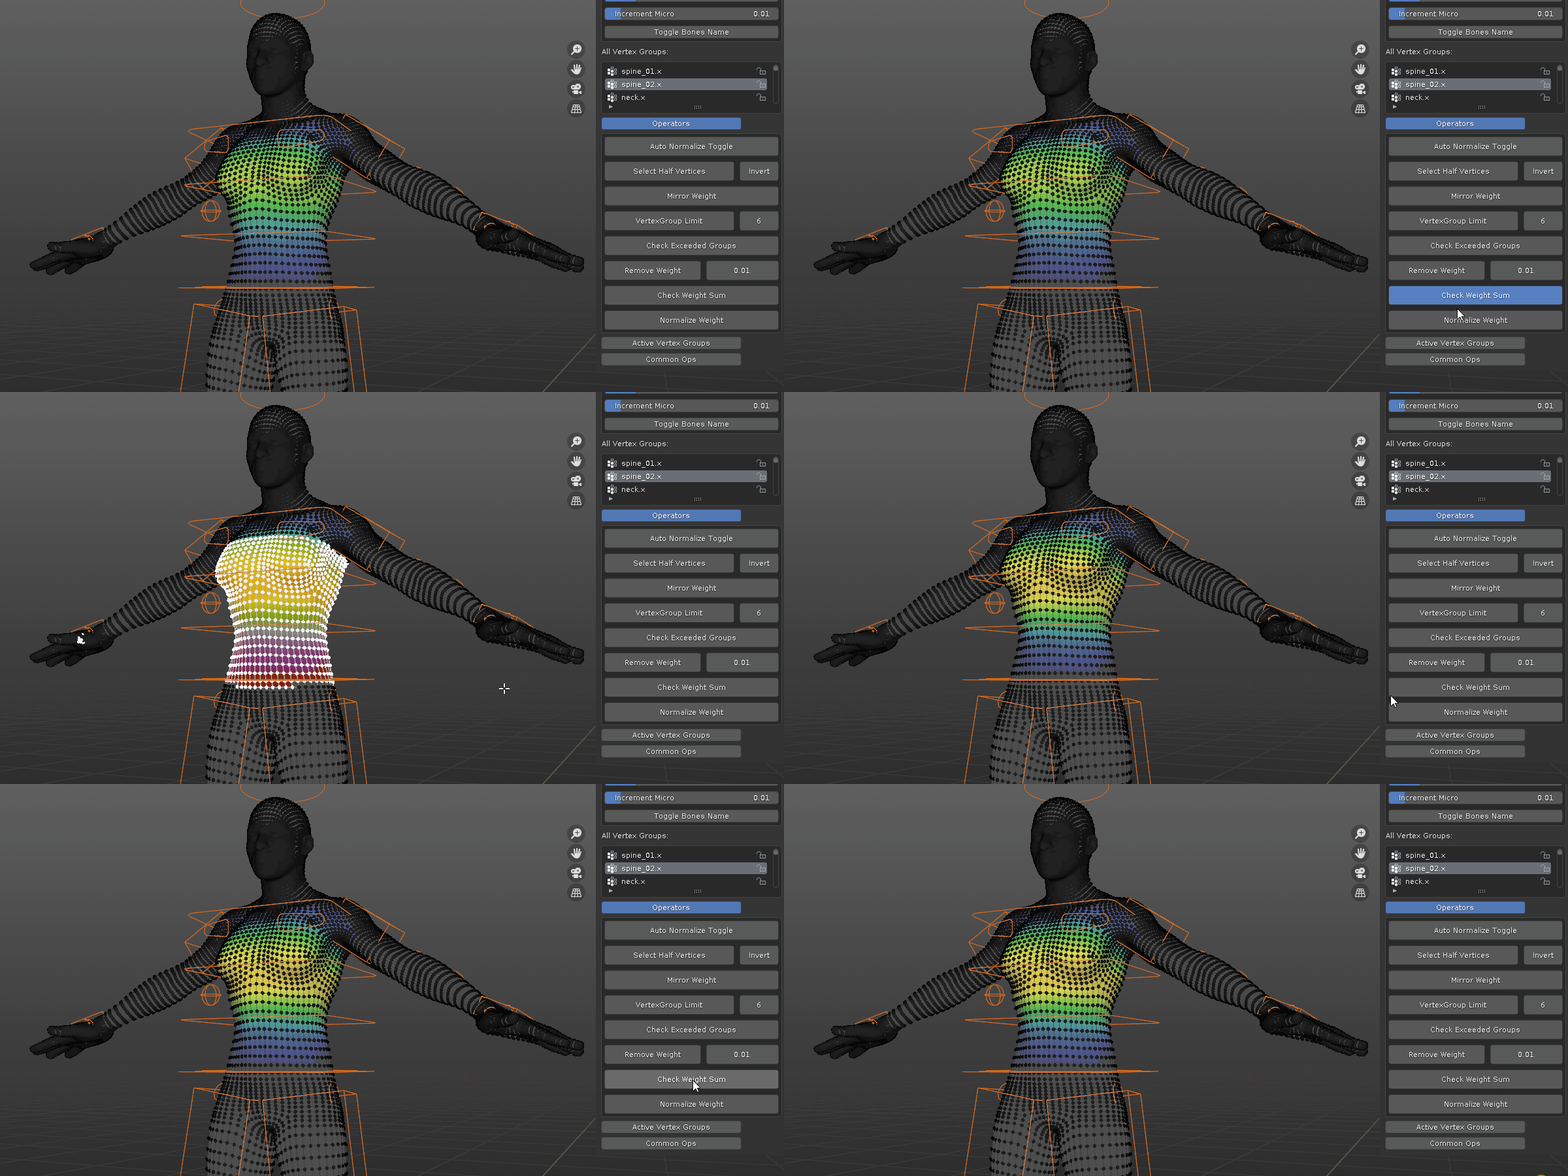
Check if total Weight value equal to one. for usage in game engines, many prefer each vertex total weight value is one. this operator will pick out the abnormal ones.
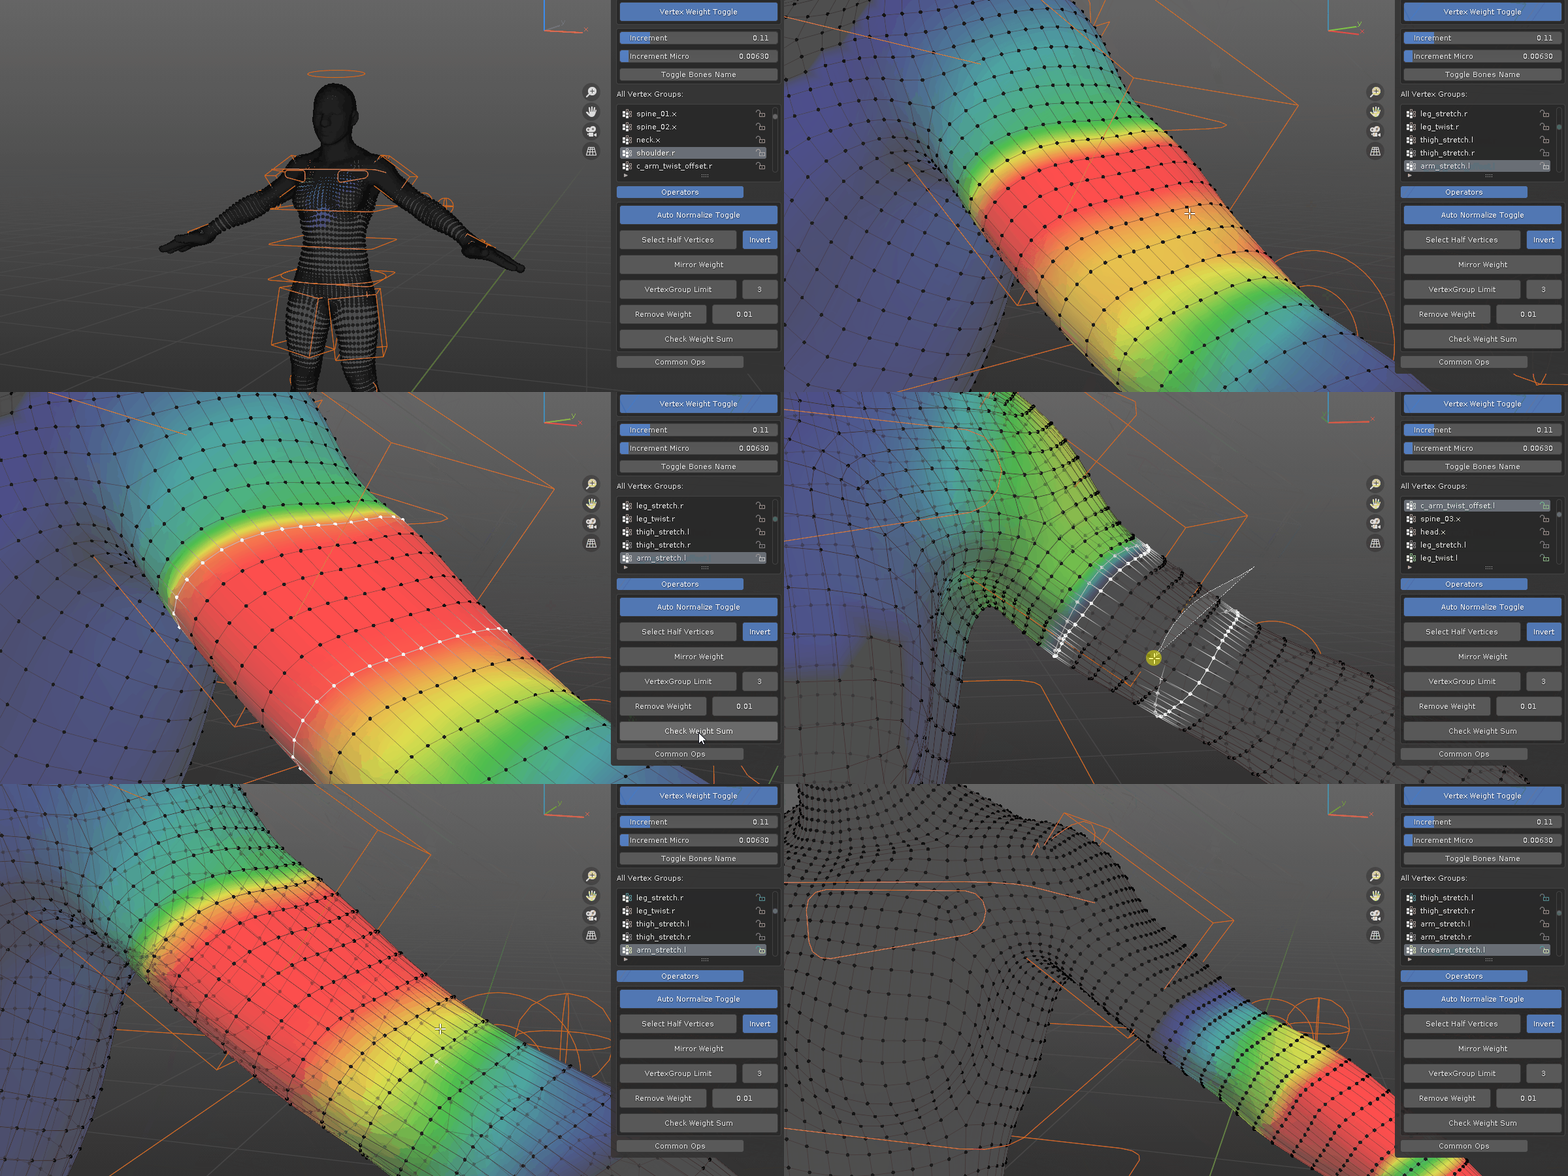
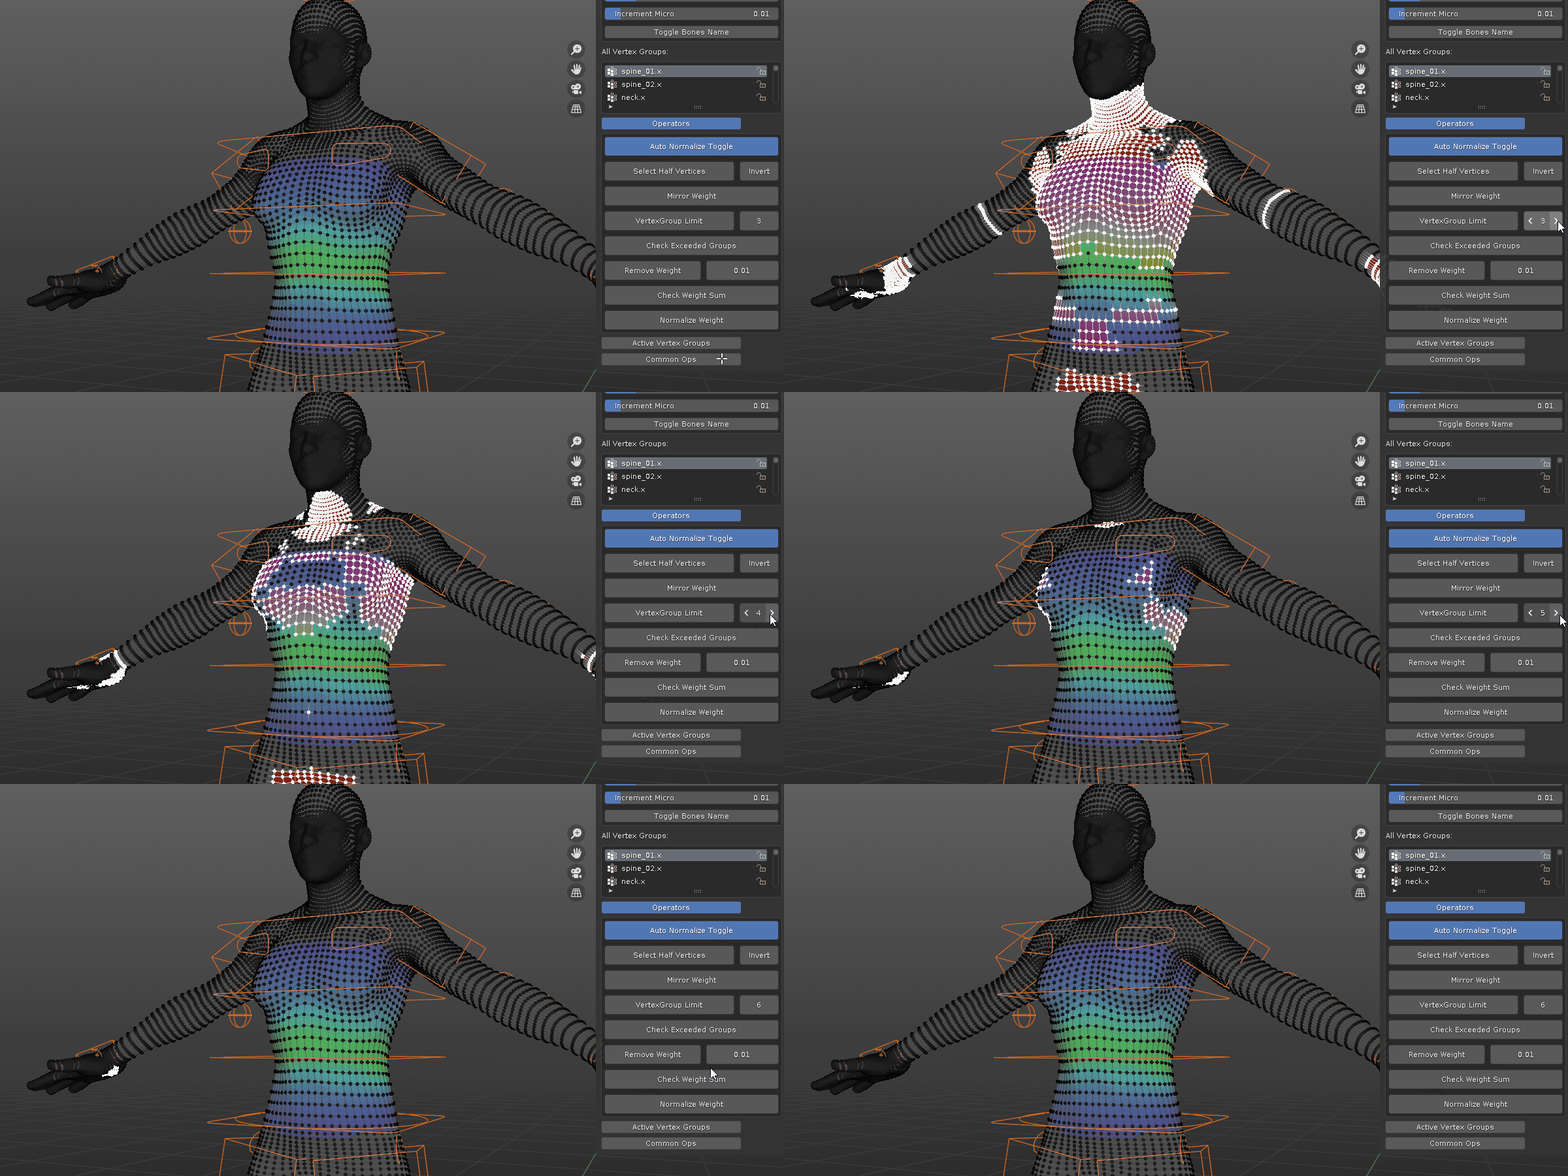
Some platform have Max Limit of how many bones a vertex can be influenced. This operator will check if there is any vertex that has exceeded set max weight group limit. for example, if the max is set to 3, this operator will pick out any vertex that have more than 3 vertex group influences.
basic Normalize. simply make sure selected vertices have total max weight value equal to one
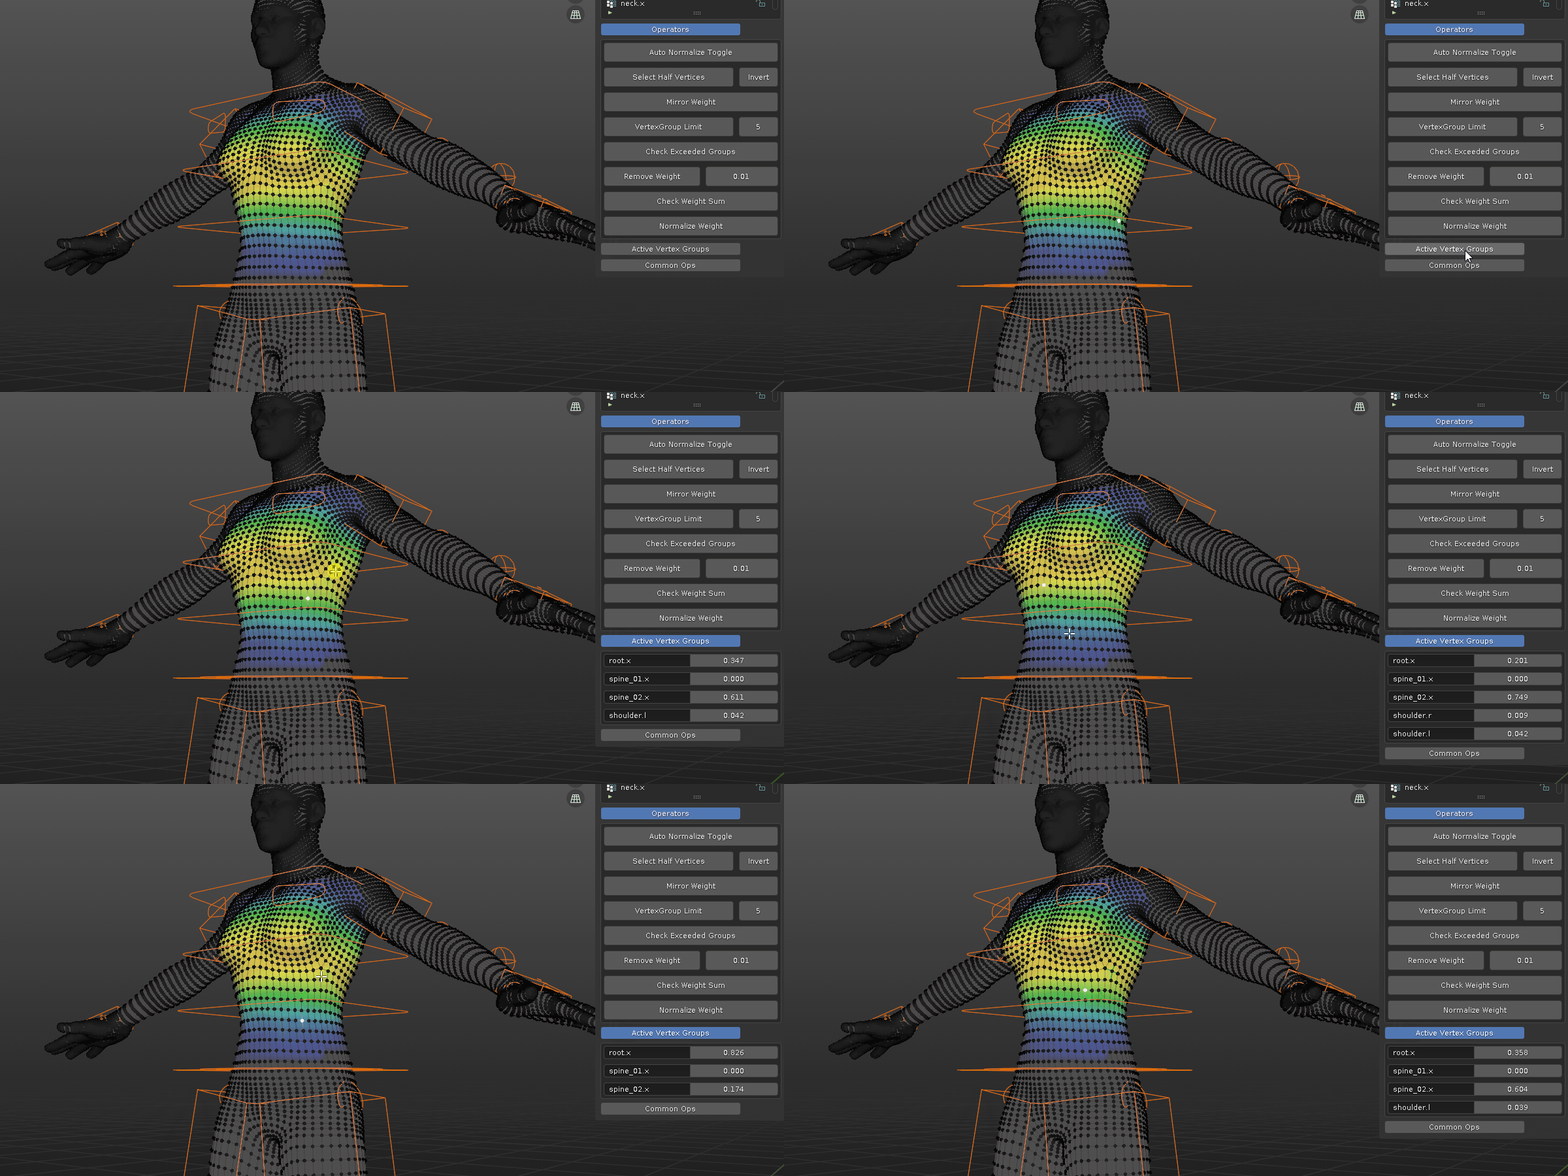
show Active single vertex's weight groups. Although spreadsheet is very powerful, for complex rigging, it is more convenient to show only influenced weight groups of a selected vertex.
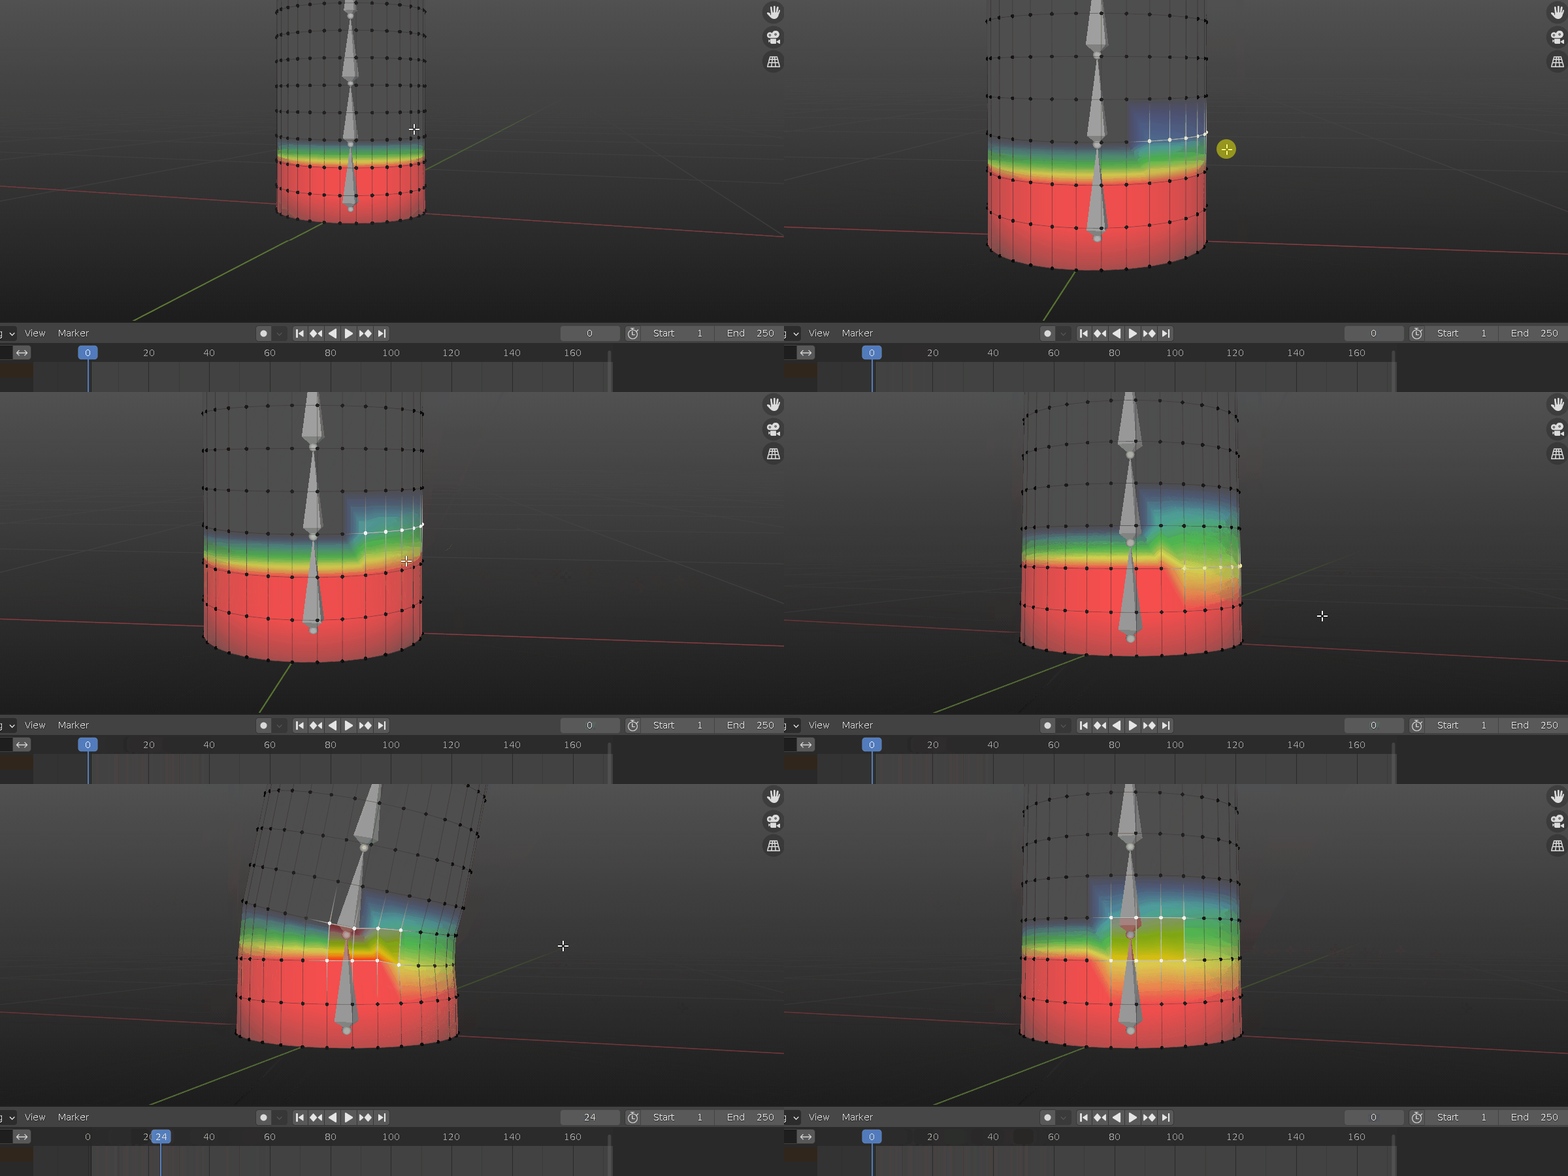
Scrub Timeline. hold default "J" key and move mouse left right to scrub timeline. it is faster to spot problem area and make finer adjustment. take a look at doc page for more detail
Import/Export Weight. take a look at doc page or this short video for more details

***************** Update **************************
update 1.4.1:
added: new method to switch active bone.
previous method rely on vertex group weight value (greater than 0) to switch between different bones. when binding mesh to armature with automatic weights, there are some initial weight values, so it works as intended. However, for some who bind with empty groups, a clean slate is what they prefer. the new method use closest bone distance to mouse cursor to switch between them.

update 1.4:
added: support for Blender 4.2
update 1.3.2:
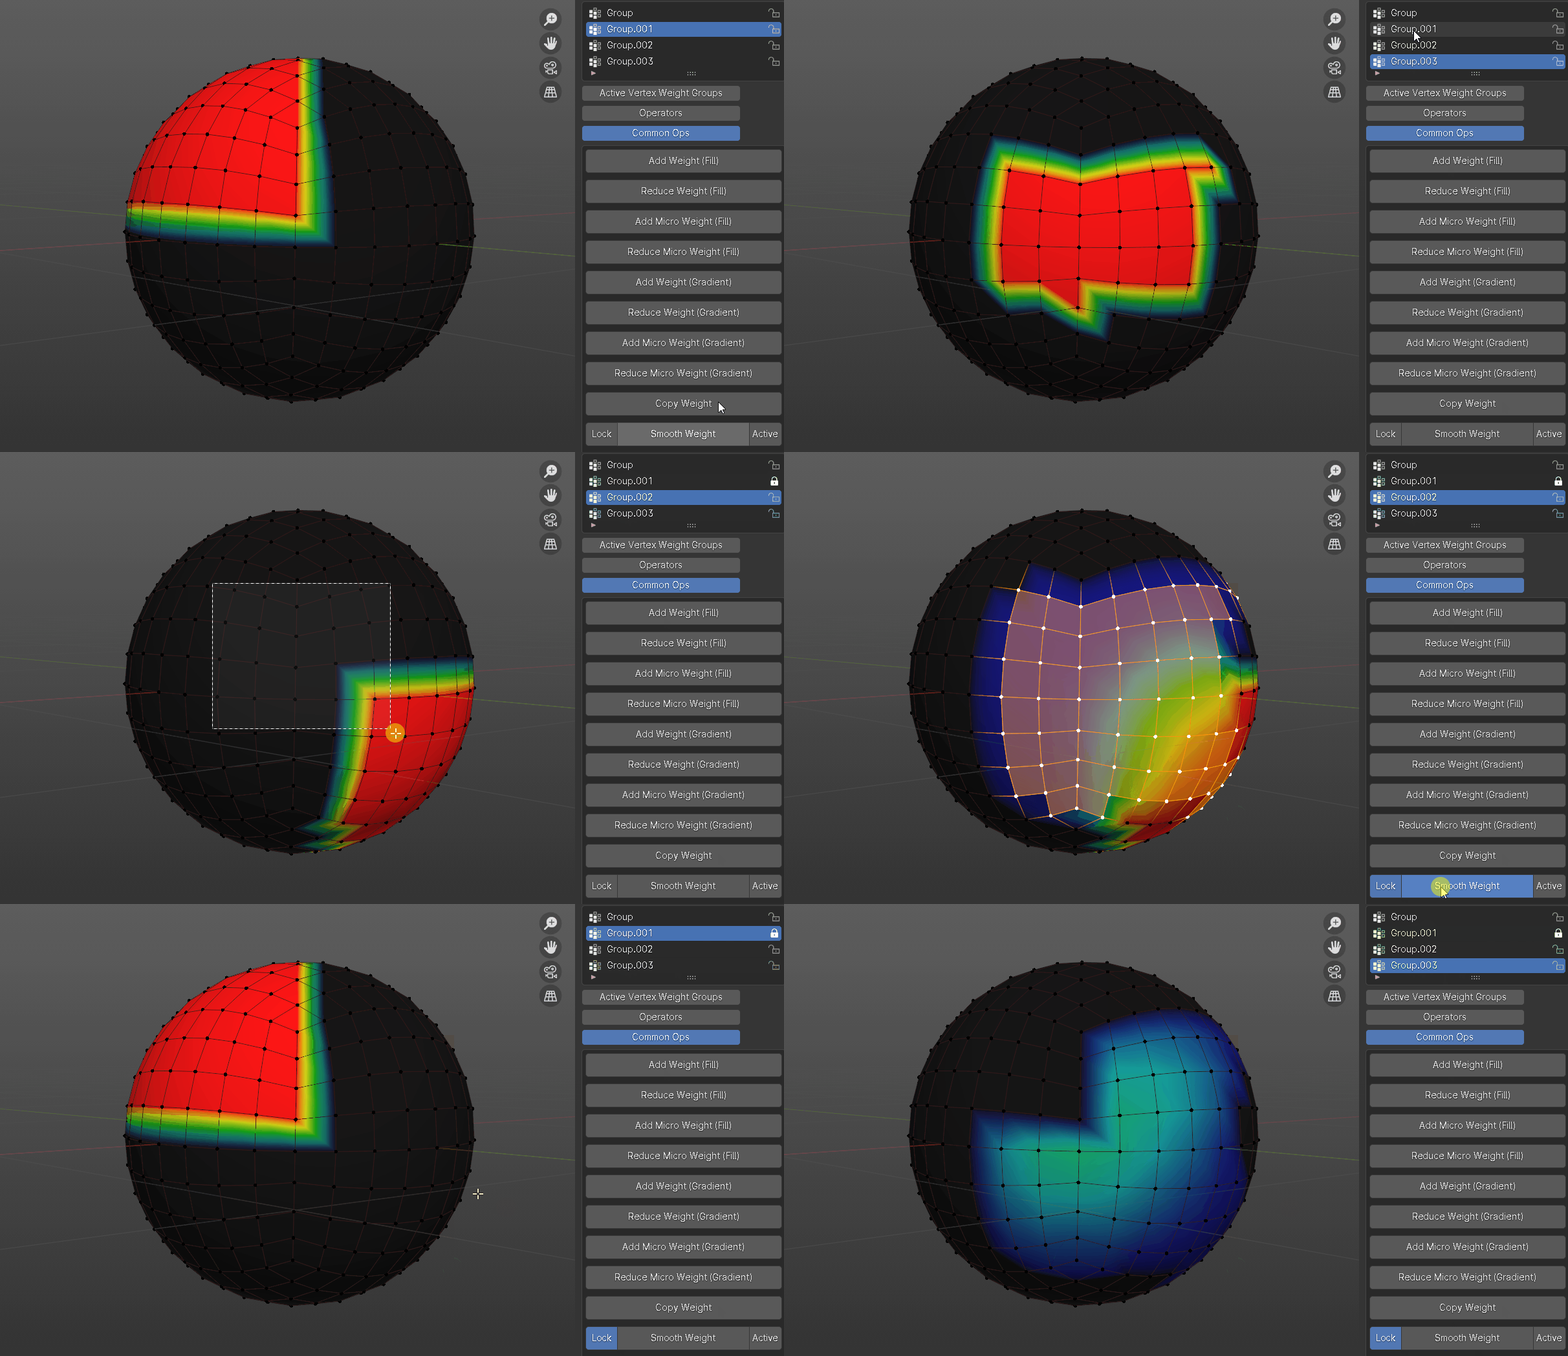
new: locked vertex group state support
added: locked vertex group toggle in addon preference and the addon side panel. the auto normalize toggle and smooth active toggle also present in the addon preference.
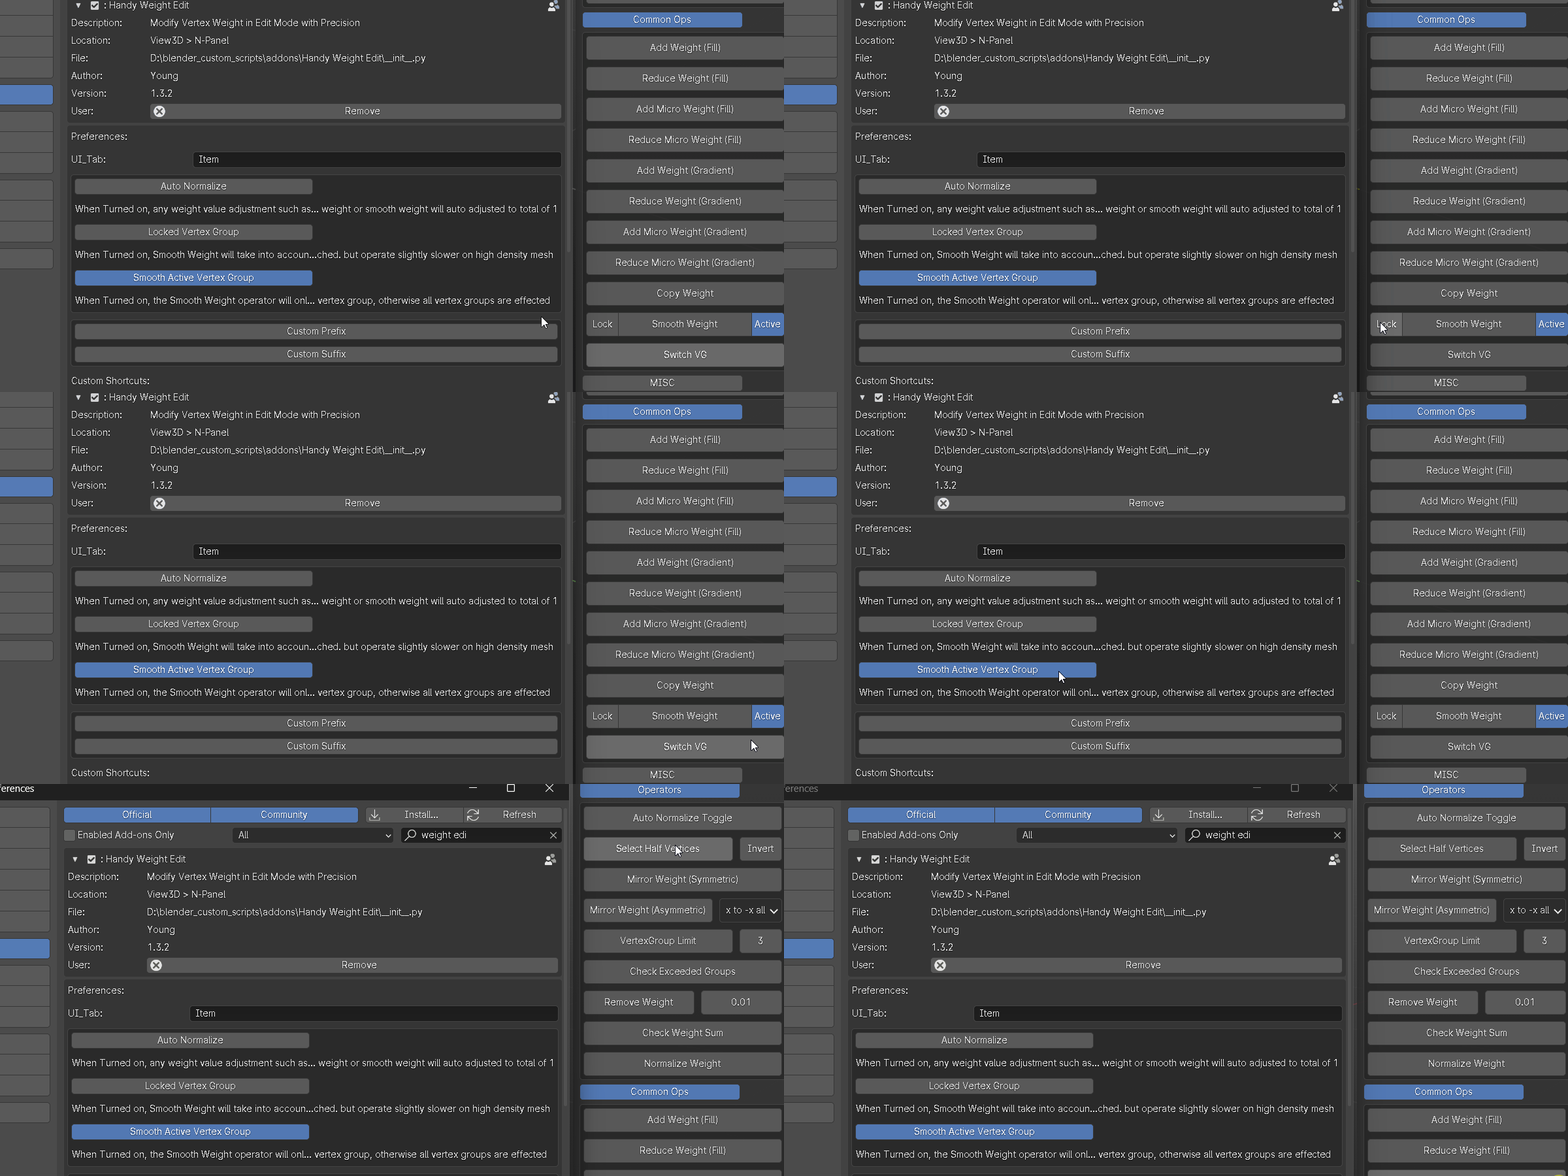
if the locked vertex group toggle is turned on, when use smooth weight operator, any locked vertex group is taken into account and not modified.
update 1.3.1:
changes: auto normalize toggle is turned off by default, easier to visualize weights for beginners.
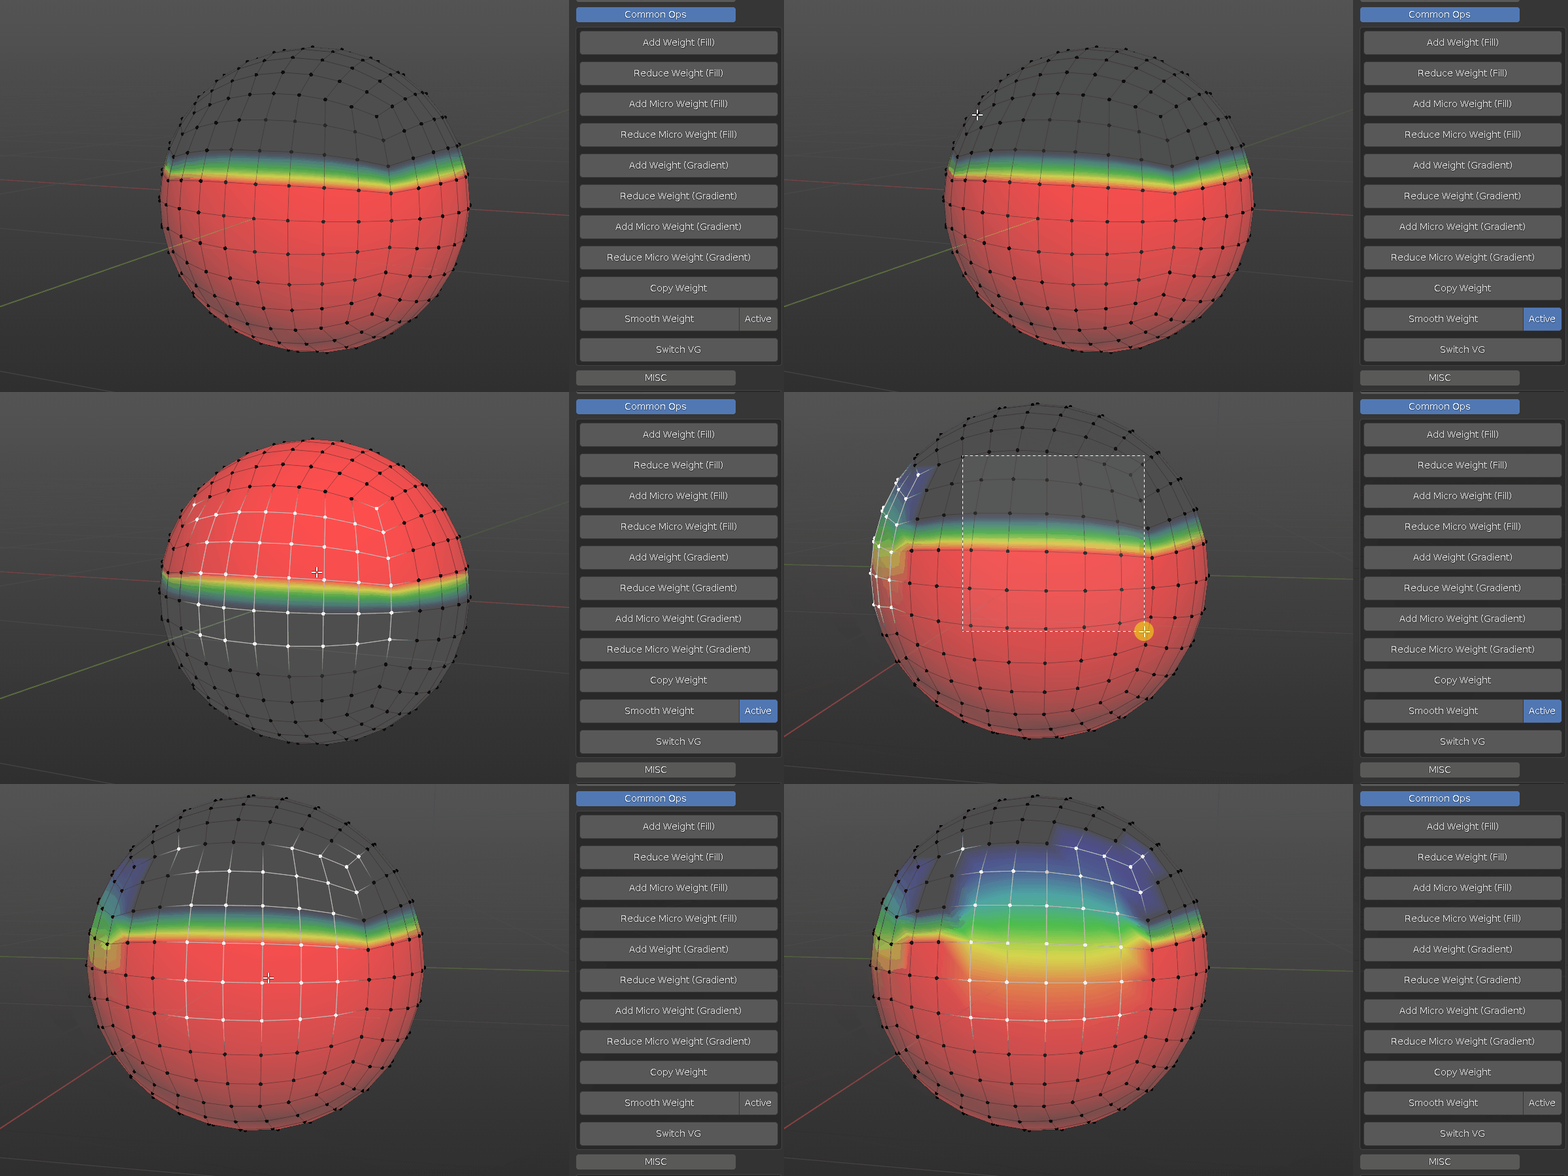
added: smooth active toggle. by default it is on, when smoothing selected vertices, it only affects active vertex group. if it is turned off, all vertex groups on selected vertices will be effected.
those default settings are tailored toward beginners, you may save preference/start up file to better suit your weight painting habit.
update 1.3:
Import/Export Weight feature is added. take a look at doc page for more details

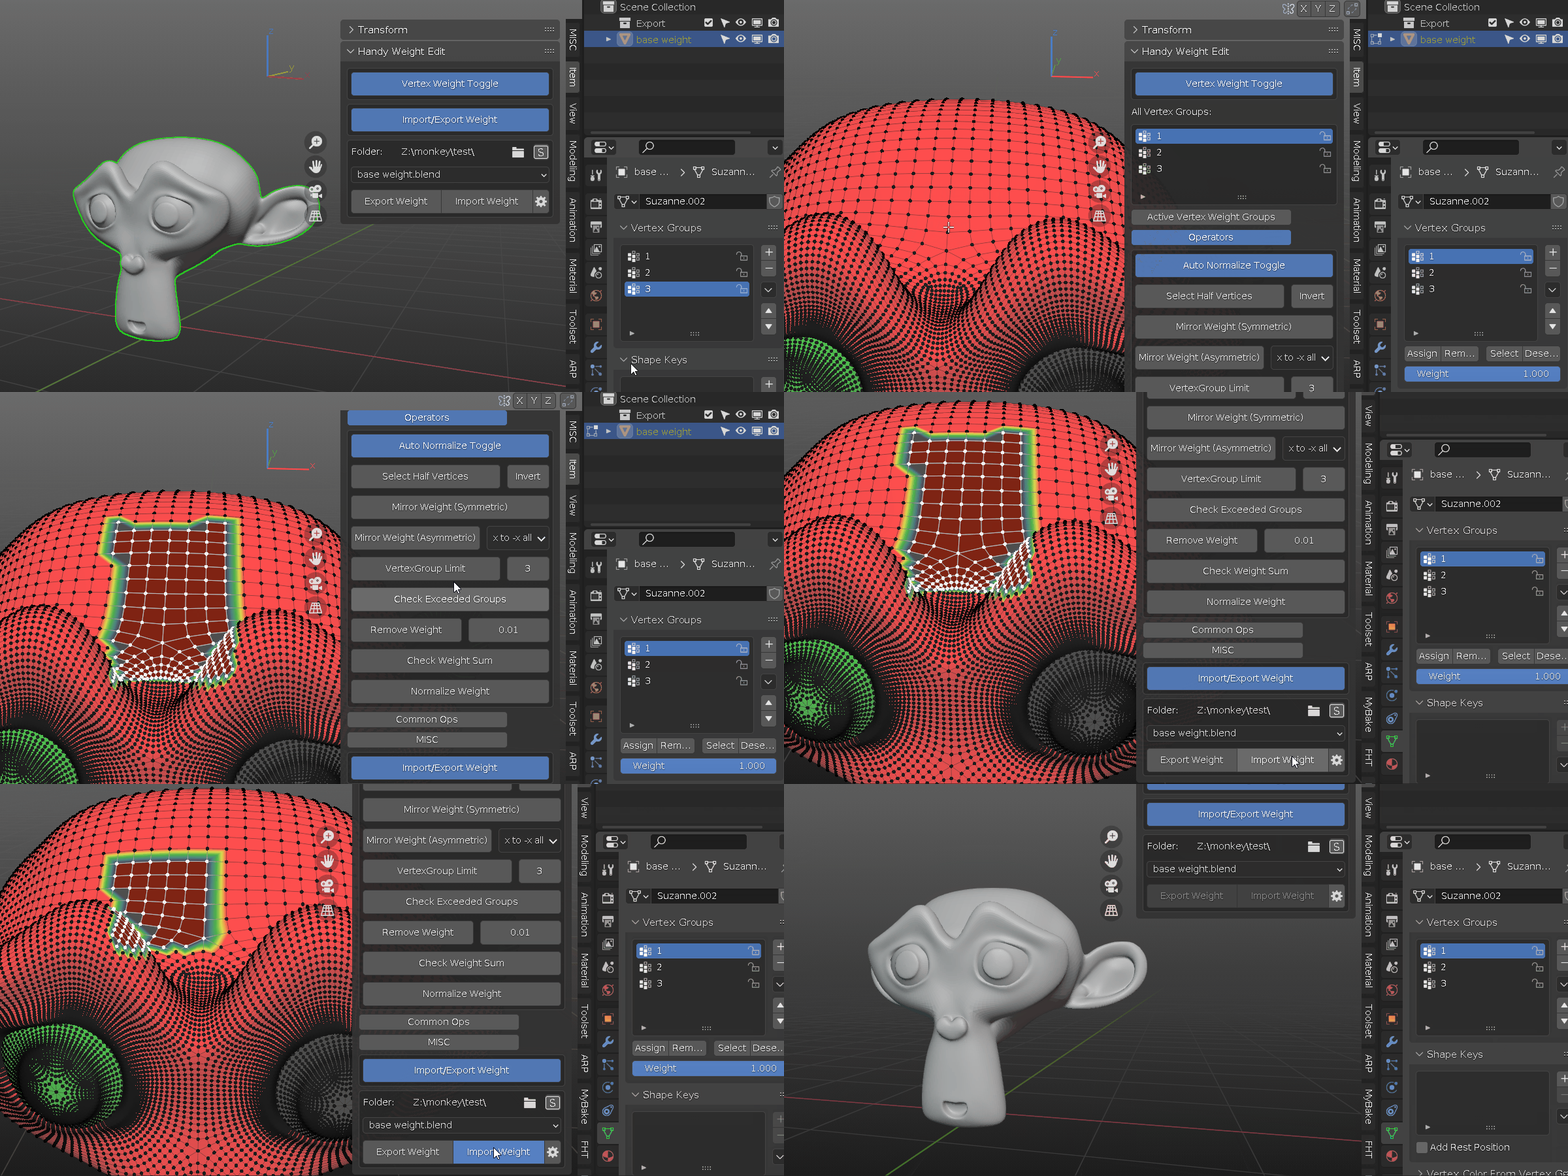
update 1.2.6:
added user defined prefix, suffix for mirror weight (located in addon preference): Generally, it is best to follow common naming convention for pair of bones, such as l.bone and r.bone, or l_bone and r_bone or bone.l and bone.r. sometimes, user may unintentionally use lbone and rbone, other times it may be required to use different naming convention that Blender does not recognize.
now you can manually set custom prefix and suffix to mirror weight. below is an extreme example: using "apple_" and "orange_" as custom prefix, at the same time, "_tea" and "_coffee" as custom suffix. you can mirror weight regardless.

update 1.2.5:
rename previous "Mirror Weight" to "Mirror Weight (symmetric)" since it only works on symmetrical mesh part.
added new operator "Mirror Weight (asymmetric)".
make sure the mesh has center pivot and is symmetrical proportion wise.
"x to -x all": this will mirror all vertices weight from positive x to negative x.

"-x to x all": this will mirror all vertices weight from negative x to positive x.
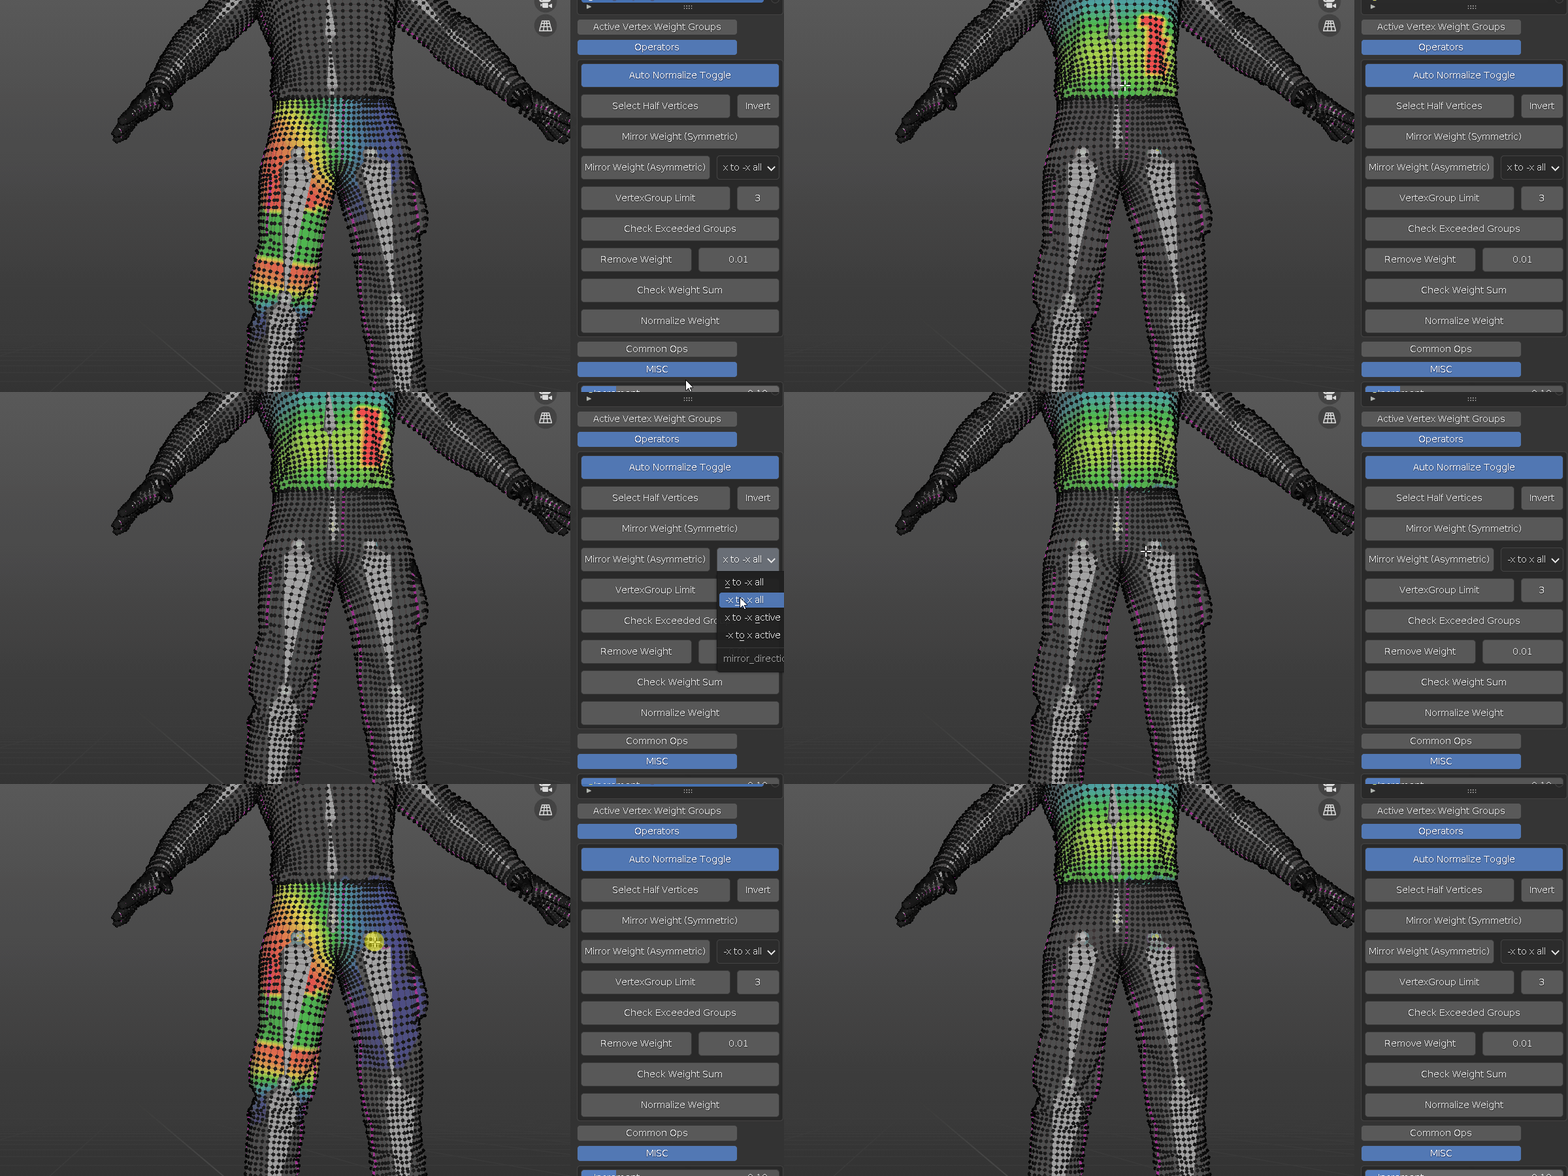
"x to -x active" and "-x to x active" for bones that does not have corresponding left and right set. such as spline bone. this will mirror only what the active bone influence, other bones are not effected.
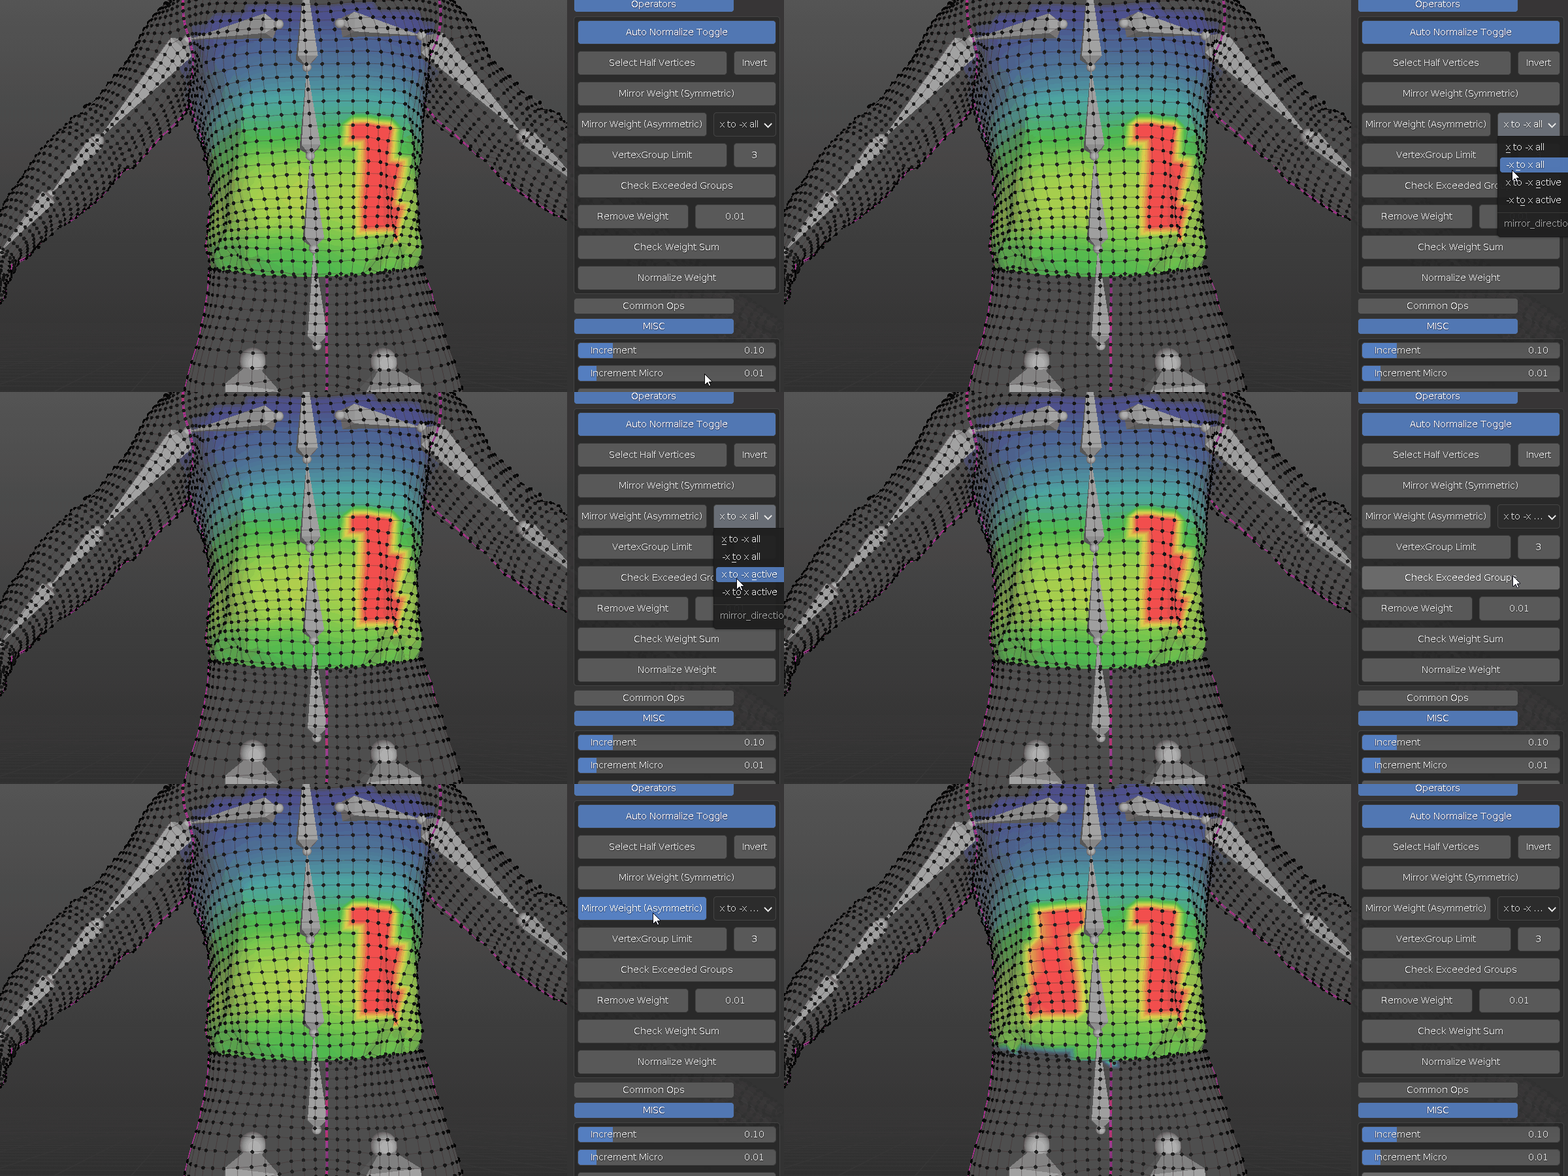
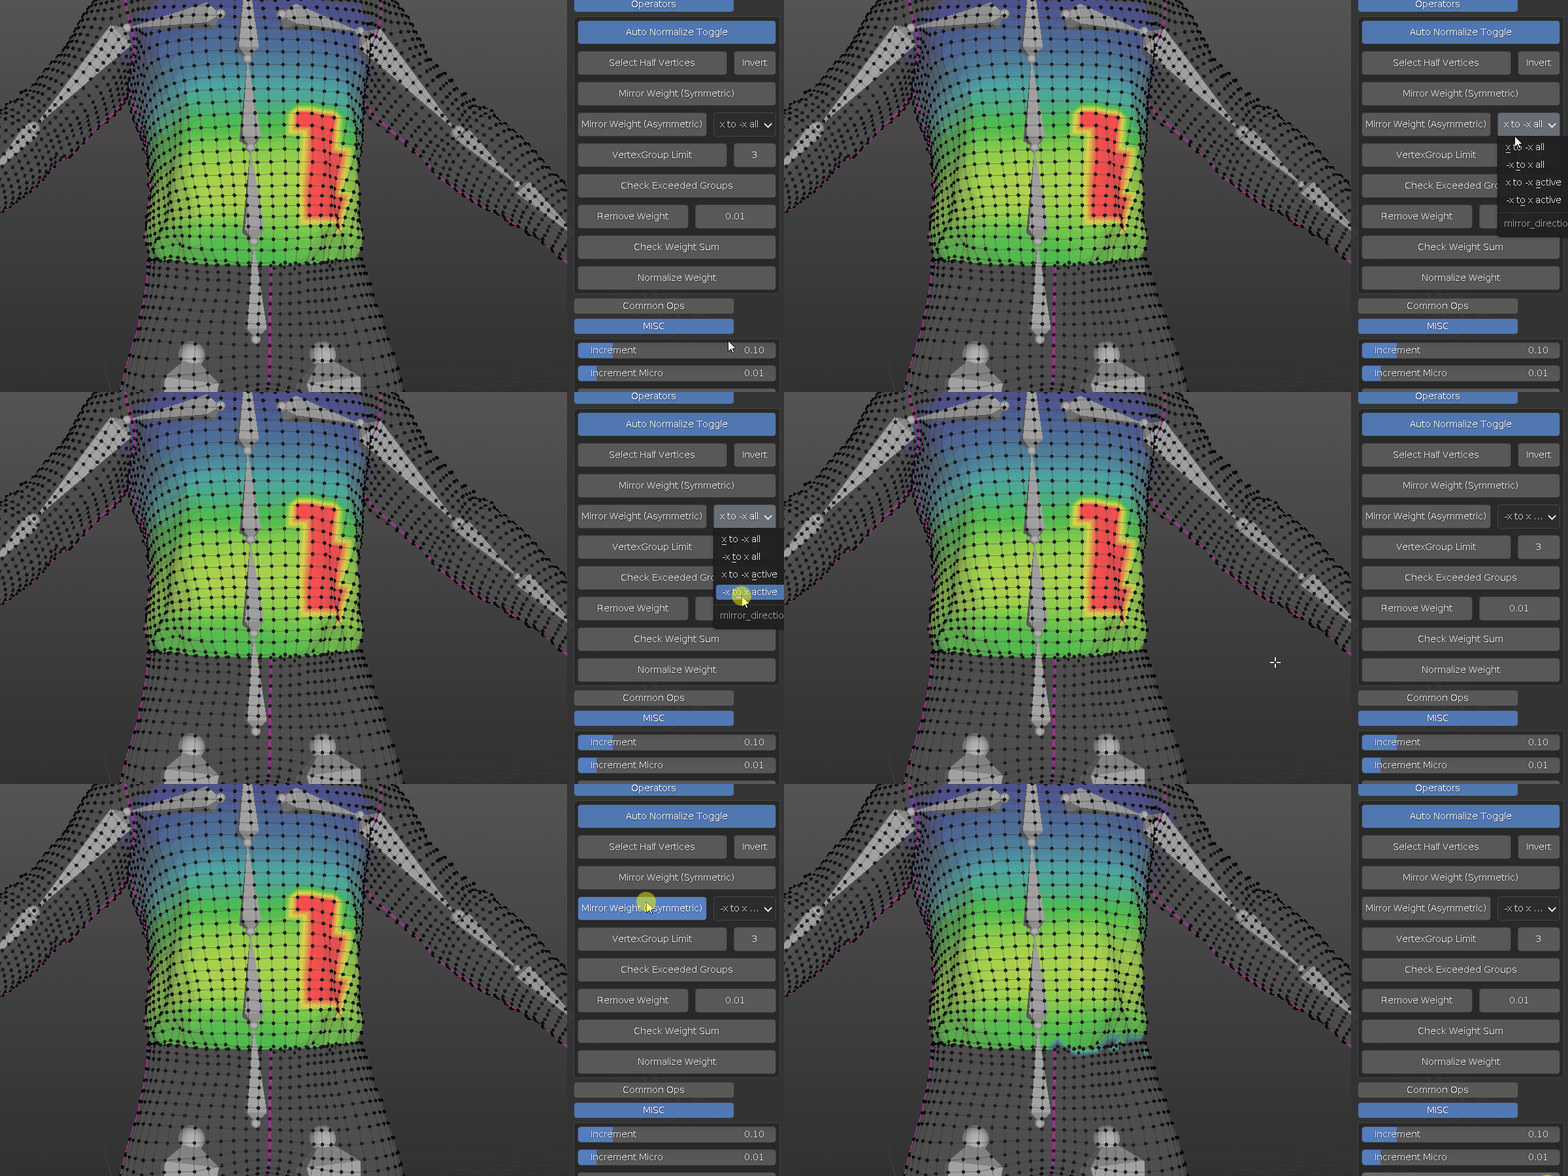
"x to -x active" and "-x to x active" for bones that have corresponding left and right set. such as arm, leg, finger, it also takes into account which side the active bone at.
take LeftUpLeg and RightUpLeg for example, the RightUpLeg is toward negative x direction, whereas LeftUpLeg is toward positive x direction. when select LeftUpLeg as active, it is toward positive x, so choose "-x to x active" and mirror weight.
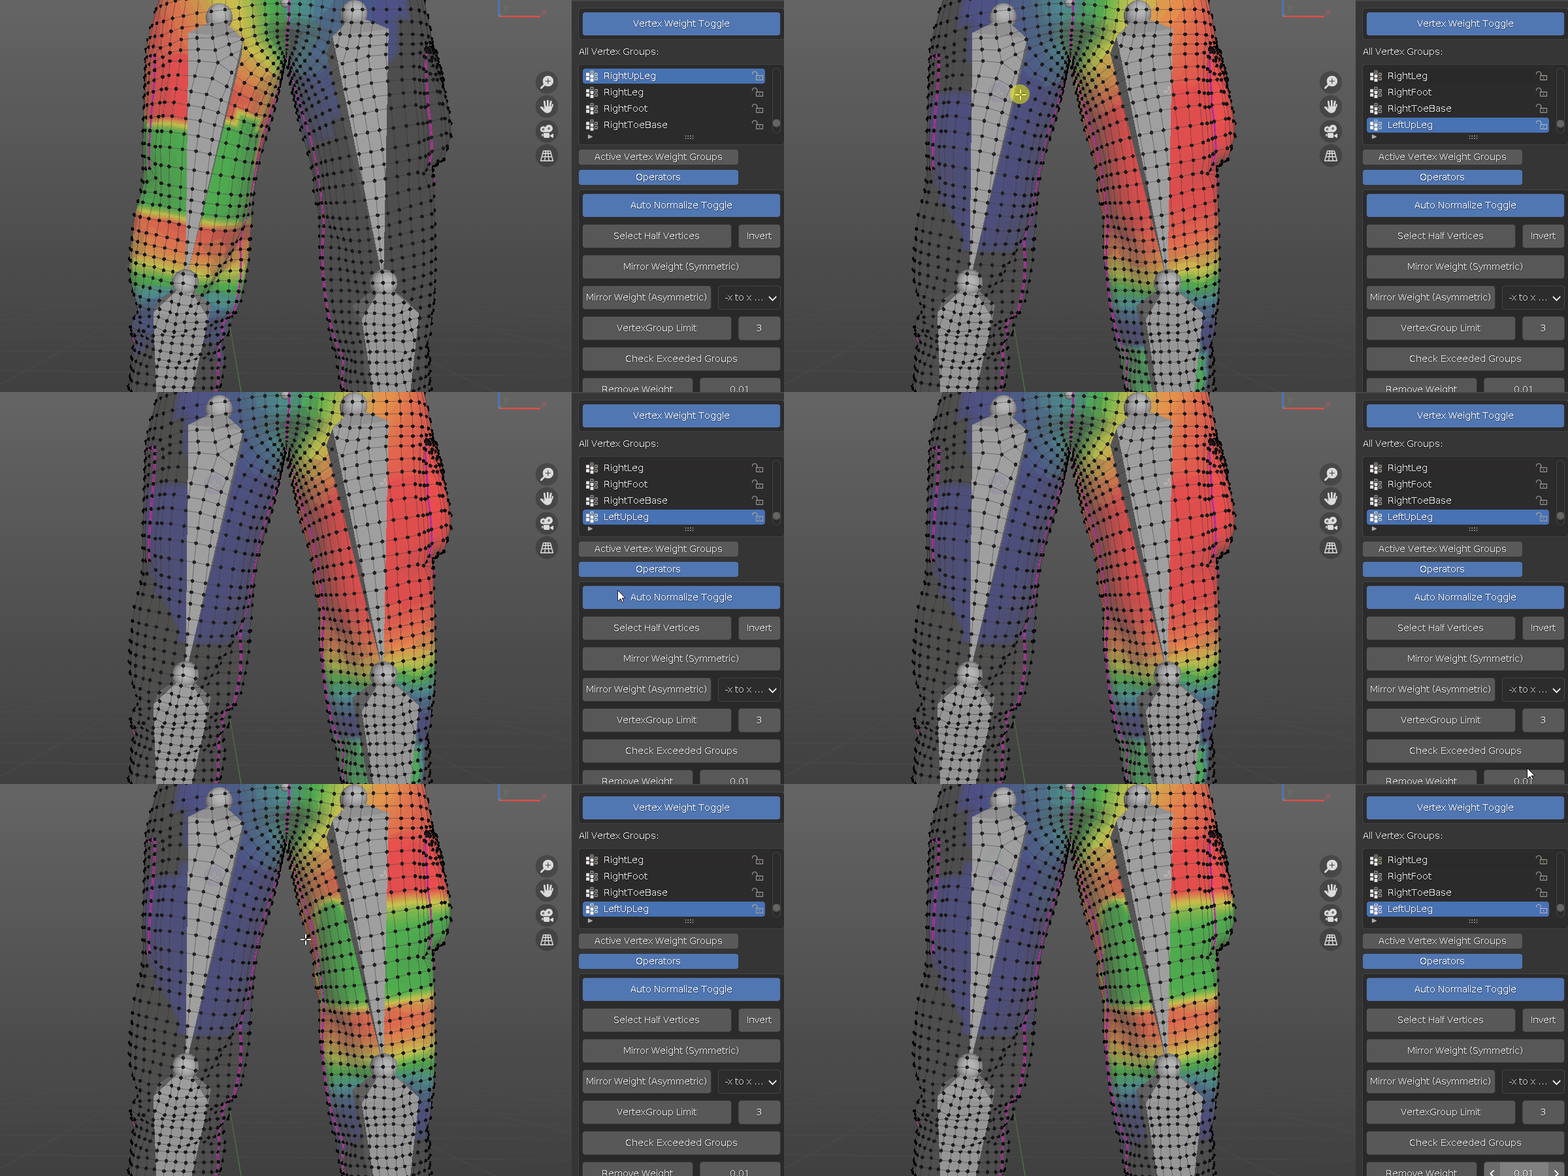
when select RightUpLeg as active, it is toward negative x, so choose "x to -x active" and mirror weight. in short. when dealing with pair of bones, whichever direction it is toward, choose the "to direction active" to mirror weight
update 1.2.4:
added: Isolate Active Bone. while adjusting different vertex groups, use the toggle to only show the corresponding bone, so that you would never modify the wrong bone influence.

update 1.2.3:
add new modal operator: Scrub Timeline. rather than have a dedicated timeline window and drag it, hold "J" and move mouse left right to scrub the timeline. take a look at doc page for more detail
UI changes: move both increment sliders to a MISC tab, add scrub multiplier slider to control the scrub speed
and some other minor changes.
update 1.2.2:
minor operators condition check fix
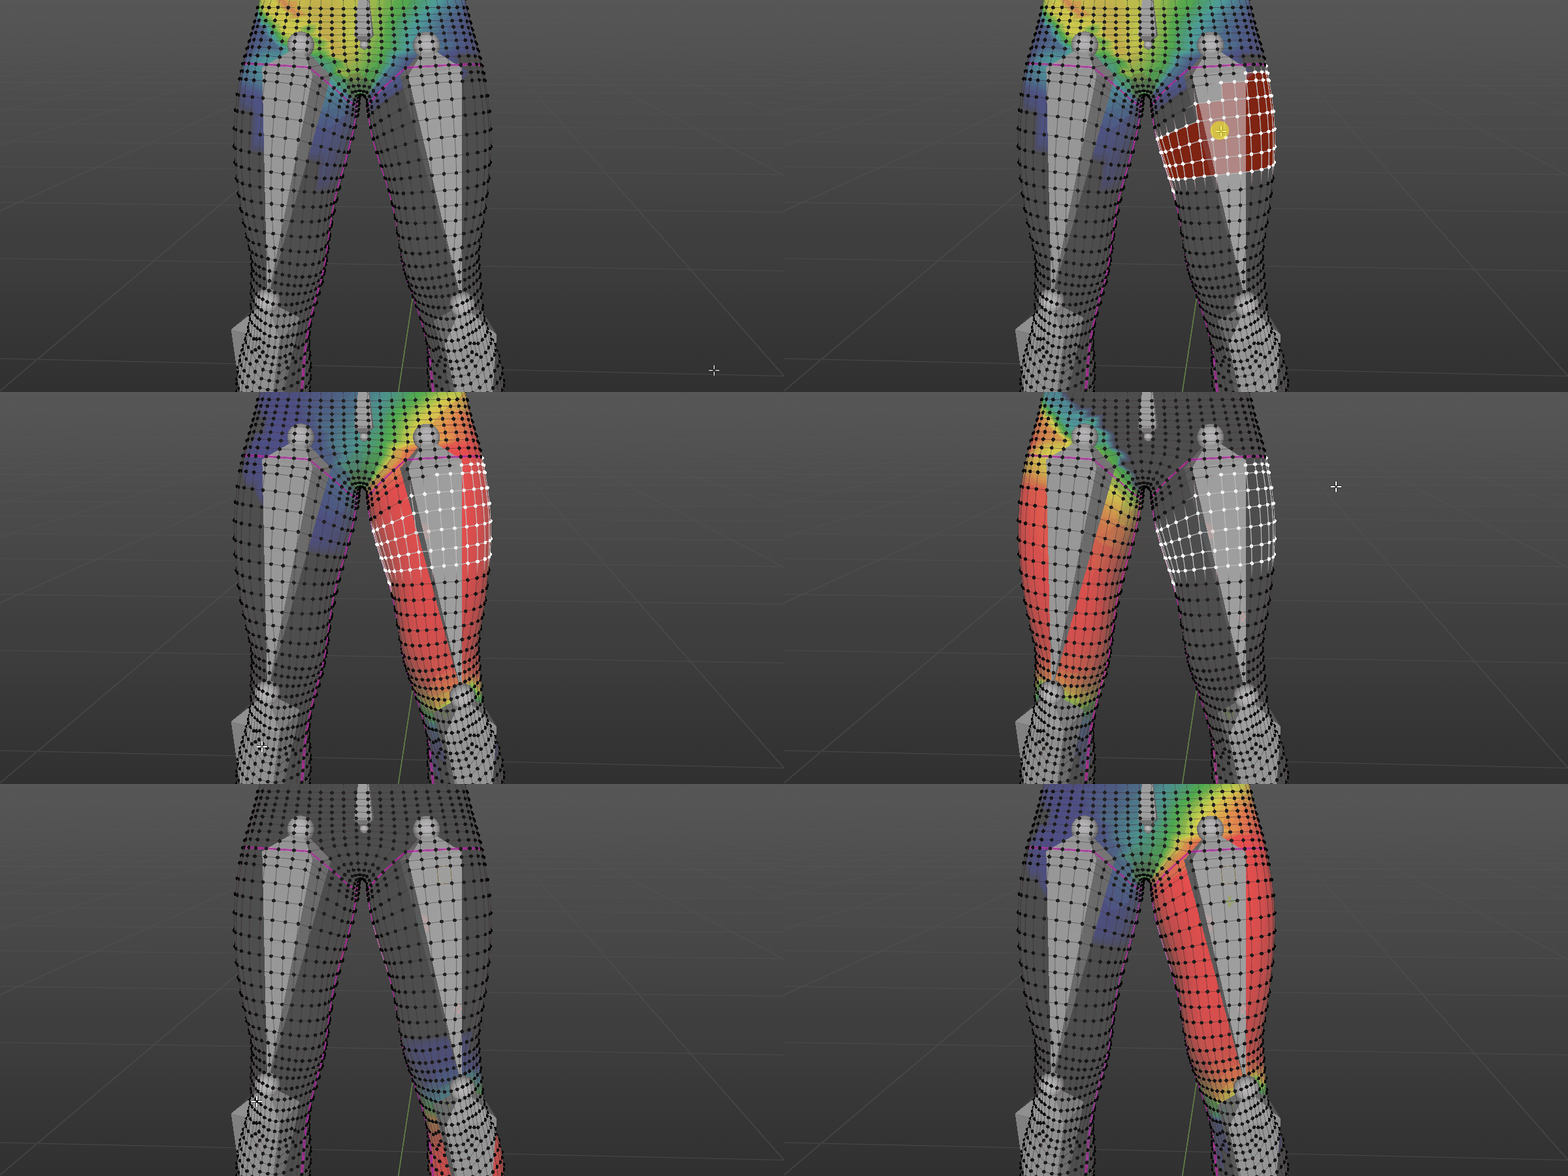
added: new method to switch bone influenced group.
changed: Operator previously called "Cycle Through VG" is now "Switch VG".
with the same operator, if a single vertex is selected, it will cycle through all its relevant vertex groups as it used to be. meanwhile, if more than 1 vertex is selected or nothing is selected, it will change active vertex group to what is under the mouse cursor.
update 1.2.1:
the new way to modify vertex weight in version 1.2 is re-written, the result is a lot faster on high poly meshes. on mid or low poly mesh, there is little speed difference. update is recommended.
update 1.2:
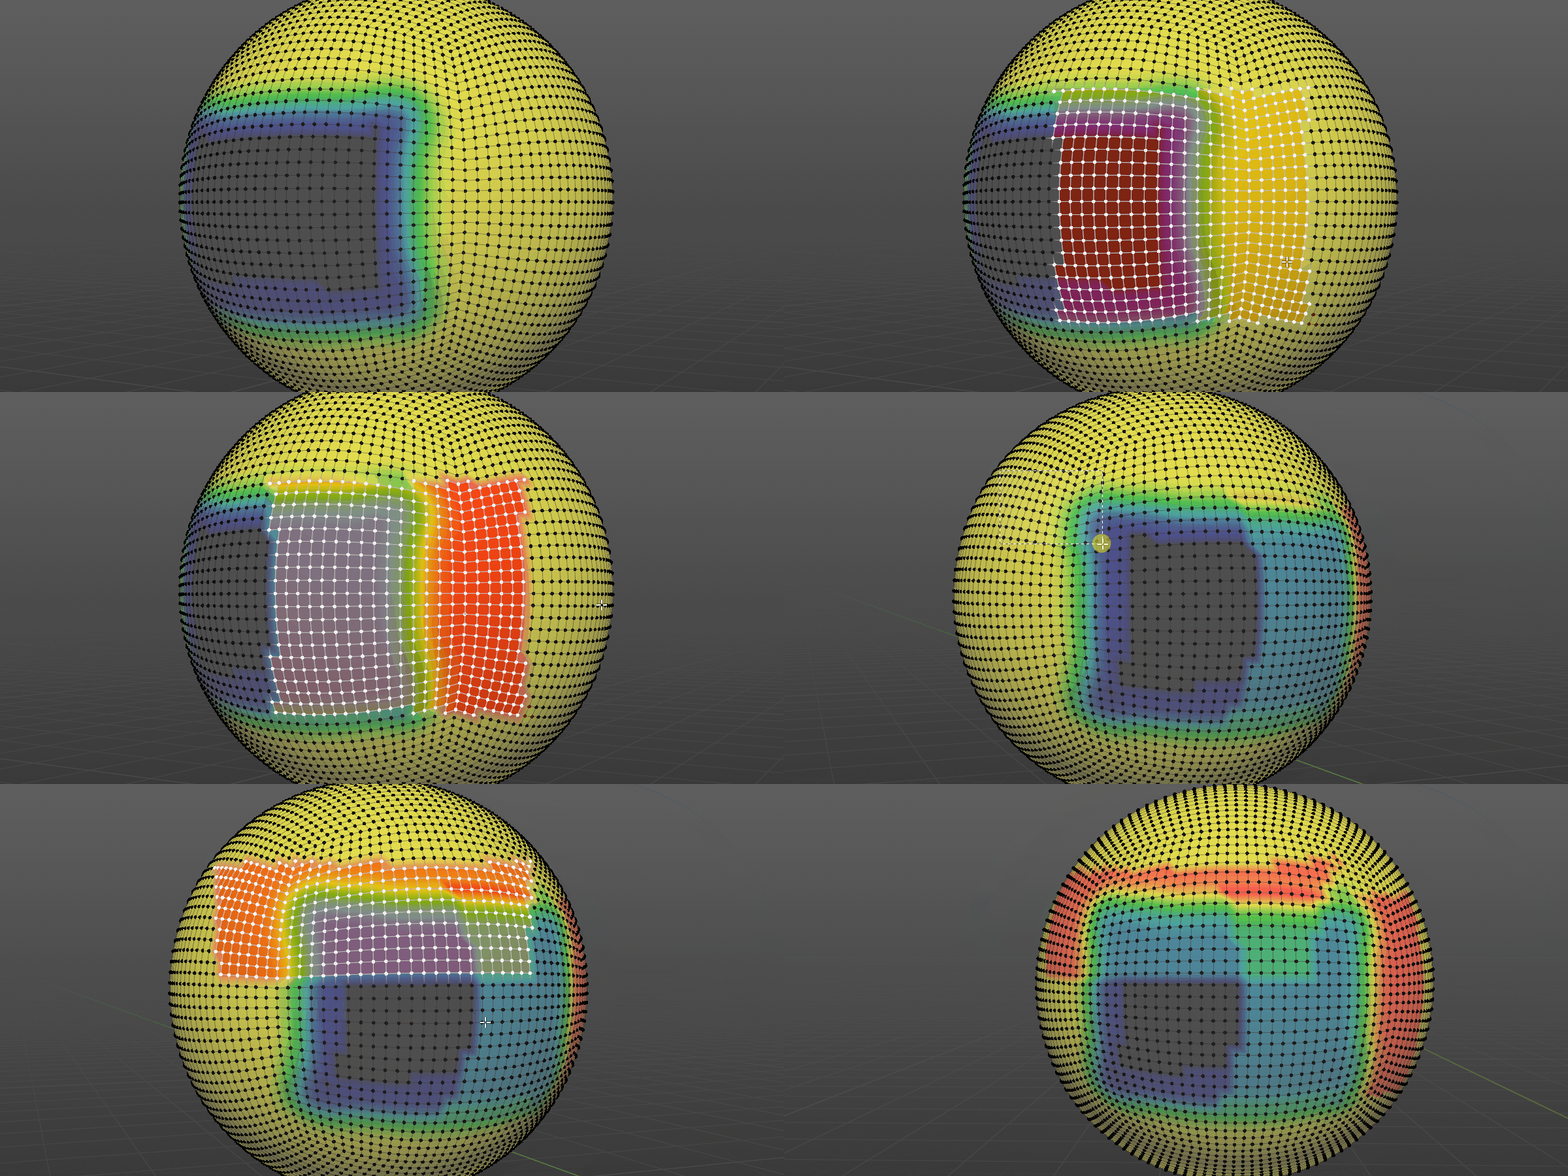
added new way to modify weight value: vertices weight value are modified on a per vert level. easier to fine tune transition areas
update 1.1.1:
made the "Active Vertex Weight Groups" read only to avoid flickering issue when mouse over the numbers.
update 1.1:
added: Normalize Weight: basic normalize selected vertices.
added: Check Exceeded Groups: pick out any vertex that exceed set max weight groups
added: A Panel shows single vertex's influence weight groups. easier to diagnose.
Discover more products like this
painting armature summer24 skinning bfcm24 rigging loveblender weight painting vertex weight addon Character rigging skin weight paints vertex group weight winter24 tool spring24 weight paint handy
