 young
young
0 Installation.
after you download the addon zip file, open Blender, go to Edit - Preference - Install the zip file.

for blender 4.2 or above, click the arrow to expand more options and choose "install from disk"

the UI_Tab is where you will find the addon panel, you can freely rename it, for example, I have named several addons' tab to "Modeling", so that all of them show up in Modeling side panel, making the blender interface neatly organized. restart blender to take effect.

"Refresh Preview" will refresh image preview list. if hair asset is manually copied to folder, use it to refresh, otherwise it is automatic with the save hair function.
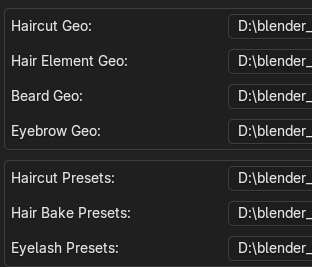
you can set your own path for hair assets (make sure it is a valid full path such as "D:\Facial Hair Assets\HairCut", not relative path such as "\\Hair Assets\HairCut" or other invalid path like " ".), if left untouched, it uses default addon path.
in Blender 4.2, if you want to install addons in custom folder, here is how:
1. go to "Get extension" tab, click drop down "Repositories", you can modify existing "User Default" or add a new one by click plus icon on the right.
2. click "Advanced" below, check "Custom Directory" then set up folder path on the right.
3. now when you install addon and choose the modified directory, addon will always install in the custom folder


1 Bring in Hair Assets
1-1 Import Hair Assets: by default, you can find addon panel "FHT Geo" on the right side of 3d viewport. click "Import Hair Assets", a window will pop up, where you can choose to import haircut, eyebrow, beard. if nothing is toggle on, none is imported.

one thing to notice is the scale. default blender unit scale is 1 and default cube is 2x2x2 meters.

the default monkey head is 2.7 x 1.7 x 2 meters. whereas average human head is around 0.2 x 0.22 x 0.2 meters. so scale you custom mesh accordingly

also, for custom mesh with shapekeys, it is best to apply the shapekeys or disable them before doing operations related to it, such as transfer hair or combine hairs. otherwise, error may occur.
1-2 Draw Quick Eyelash: haircut, eyebrow, beard are pre-made assets. eyelash is created using "Draw Quick Eyelash". select a mesh to enter draw eyelash modal mode, W or S to rotate, A or D to adjust guide hair density, R to randomize hair distribution, T to toggle upper or lower eyelash. Space Bar or Enter to confirm, Right Mouse Button or Esc to cancel.

1-3 Add New Hair: if you want to add additional hairs, you can use the add new hair button. first select a mesh then choose a hair type, then start to add hair and use the pre-defined geometry nodes setup. the type only effects which side panel the newly added hair appears in.
1-4 Add Mod: if you already have a curves object, for example, convert mesh edges to curves, and you want to add the geometry nodes setup to it, you can first select the base mesh then the hair curves and press add mod. it is all set then.
1-5 Combine Hairs: it will combine two or more hair curves together. generally used after transfer hair to a custom mesh.
the newly combined hair is at same level as others. you can unhide others by first enable the monitor icon and unhide the rest
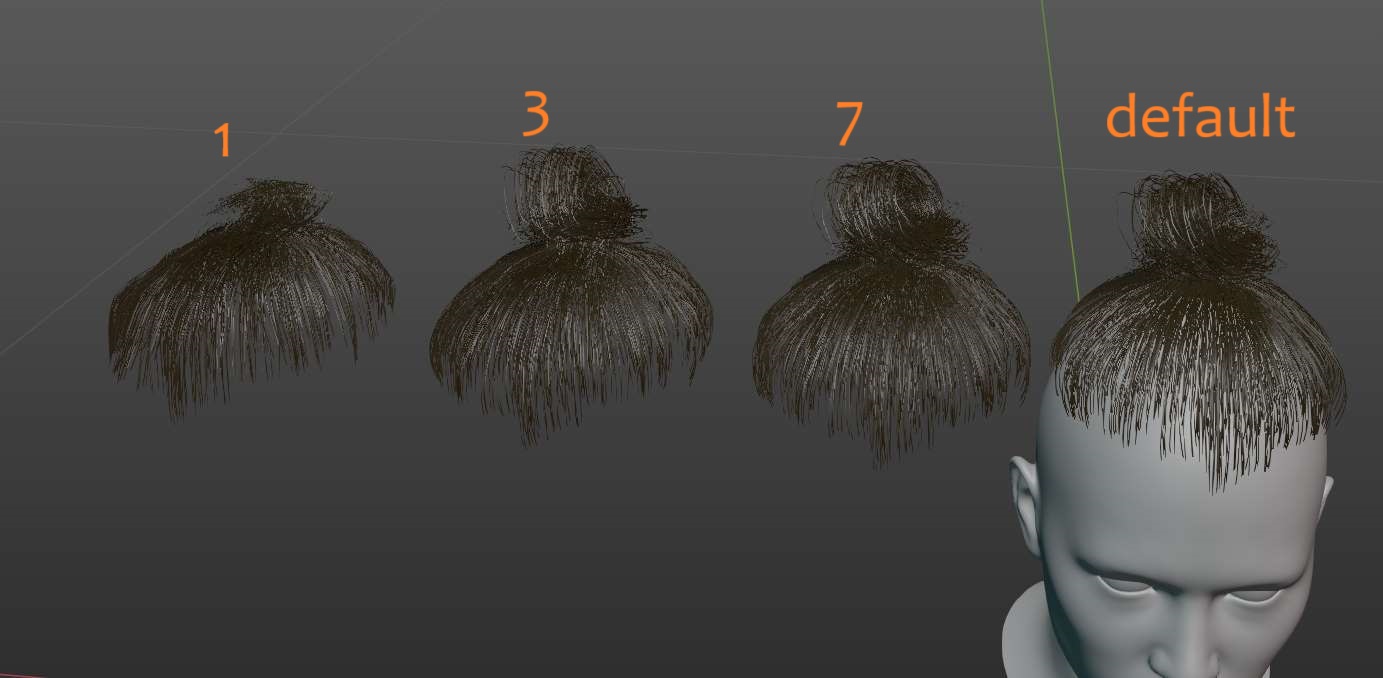
for simple hairs, default value of 3 will do, set hair resolution higher if it is complex like braided hair. you can see the difference below on the hair bun.
2 Modify Hair Assets
Each hair asset is made of a parent mesh and the actual hair curves.

2-1 Base Mesh Shrinkwrap: when the parent mesh is select, you can pick the shrinkwrap target, and optionally surface bind to target head mesh, so that the hair asset deforms with the custom head mesh. when you move and scale, do select the parent base mesh and modify it rather than the actual hair curves. otherwise there might be unexpected result due to the parent child relation of the two objects.

2-2 Hairs Asset Panel: select the actual hair curves, go to corresponding panel to start adjust the look. select a preview image and switch the style. please note: if you create hair asset in later version of Blender such as 4.2 and try to switch hair in early version of Blender such as 3.6, it will not work due to loss of data.

2-3 Hair Element: the difference between switch haircut and hair element is that the switch haircut will replace all current hair curves, the hair element will add selected element

2-4 Hair Geometry Nodes Setup: the interpolate nodes is set up with vertex group, when it turns on, by default it has blank vertex group, so it has no where to distribute. click "Edit Mask" to paint some area for hair to grow on.

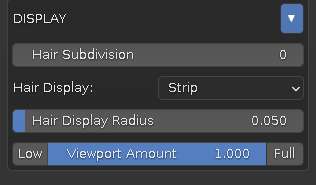
in the Display sub-panel, hair subdivision slider will adjust how smooth the hair looks. when hair display is set to strip, a Hair Radius slider shows, you can adjust how thick a hair looks. drag Viewport Amount slider to adjust total hair amount shown, low will show only 10% of full hair amount, full to show all. toggle between them for faster hair sculpt and final look.
for the NodeGroup Controls subpanel, it is best for you to play with them to get the hang of it, they use blender default hair asset node groups. for the interpolate node group control, press "Edit Mask" will directly bring you to weight paint mode of the parent mesh, where the hair density is controlled by corresponding vertex group. when done, toggle back to object mode and select the hair curves to continue editing. the sliders only control existing hair node groups, you can add new one in the node editor for complex look. when save as hair asset and switch to it at later time, everything is intact.
2.5 preset: the Preset subpanel offers some pre defined hair shape. you can adjust your own shape in the NodeGroup Controls panel and save it as a preset. please note, it only works with the existing hair nodegroups, any newly added nodegroup is not saved.
2.6 additional controls: for the beard asset, there are bend angle 1 and 2 controls for the beard parent mesh. adjust them to better fit head shape.

the rest of the controls are pretty much the same for all hair assets with the exception of mirror eyebrow and eyelash. for eyebrow, there is a preview mirror eyebrow:

for eyelash, the mirror is at the bottom of the NodeGroup Controls:

2.7 Transfer Hair: when you are happy with the look of the hairs. you can transfer the hair to custom mesh. first select the custom head mesh and then the hair curves. go to corresponding hair panel and press transfer hair. please note: if there are shapekeys on the mesh, it could effect the transfer result. disable them before doing the transfer, then re-enable the shapekeys afterward.

for eyebrow assets, when transferring hairs you may want to toggle mirror on.

for eyelash, before transfer hair, make sure it has mirrored part by toggle mirror at the bottom of nodegroup control subpanel.
after the hair transfer. new hair curves are created and they are child object of the custom head mesh. the original hair assets are hidden. at any point if you want to go back and edit hair, you can. simply delete the transferred hair, show the hidden hair asset, modify the look and transfer to custom mesh again.
if the transferred hair has multiple parts, you may combine them together with combine hair function mentioned in 1-5
2-8 save hair: when you have a hair asset you want to keep for future use. select the hair asset and press save hair, it will be saved in the corresponding folder. it captures 3d viewport as screenshot. you can change to other jpg image, as long as it is correctly named.
3 Create Hair Cards
3-1 generated hair cards: often in game engines, hair cards are used for in game characters. you can turn hair curves into hair cards

the generated hair cards are automatically align to target surface normal. Influence Range will limit the auto surface align. at 0, the hair card does not align, for long hairs, you may limit the auto align to certain point. target is where the hair cards auto align to. you can change to different mesh surface so that hair card has different align direction. right next to it is a wireframe toggle.

Embed Root control how deep the starting point of hair cards into the target surface.
Rotation will uniformly rotate the hair. it is available when influence range is greater than 0.
Width controls the width of the hair cards. Resolution control the mesh resolution. when resolution width is greater than 0.5, bend option shows, it controls the bend of added edge loop in the middle.
for most cases, the hair cards will use double sided material in game. for some case, use Dual Mesh to avoid double sided material. in this case, when dual mesh is on, another layer of the same mesh is created with inverted normal. another useful case for dual mesh is to create bigger hair volume. turn the dual mesh toggle on and adjust the offset and rotations to avoid the flat hair look.
3-2 convert to curve: you can convert them to simple curve and modify individual hair, tilt or duplicate it.
3-3 convert to mesh: you can convert them into actual mesh. if the Random Flip UV is on, some of the mesh will have flipped UV. if Transfer Normal is on, the final mesh will have custom normal info from target surface normal.
3-4 UV grid preview: when switch to viewport material preview, depends on the UV gird setup in Hair Texture Baking. click the corresponding number to set the UV preview area.

when update the preview mat, make sure to click the gear icon and uncheck Relative Path
3-5 custom hair mesh: instead of generated hair cards, you can also use custom mesh shape to replace the hair cards. After click "Hair Curves to HairCards", the new function is located at the top. switch between hair cards and custom hair mesh depends on your need.
one useful case is that you can manually place several hair cards together to form a hair volume instead of flat shape and distribute it on curves. make sure the custom mesh has proper size, applied scale and vertically placed.
influence range and embed root have same effect as mentioned in 3-1
adjust the source mesh shape will effect the look
convert to regular curve for additional tweak. you can then use "Radius" and "Tilt" tools from the left side toolbar to adjust the looks. reset them with clear tilt and clear radius buttons.
finally, you can also convert to mesh. whenever you convert the hair to a different type, a backup is automatically created, in the outliner, enable additional display toggle and you can unhide original hair curves

3-6 draw hair cards: you can also draw hair cards when you select a mesh base. it has similar controls as 3-1. with one additional "surface offset" as shown below
3-7 add/update preview mat: when working with generated hair cards, select a baked hair texture and use this to update the texture set as mentioned in 3-4. it can also set the material of mesh object. for example, for custom hair mesh, you can set its material and then distribute on hair curves in 3-5
4 Hair Texture Baking
in the Bake Hair Card panel, click "Open Bake Scene", a new scene is created within the same blend file. you can switch back and forth from the top right drop down list.

in the bake scene, you can import sample hairs by pressing Regular, Clump, Curl button.
first select a desired UV grid layout, depends on long hairs or short hair or mix hair texture with eyebrow, eyelash and beard. then click various numbers to position the hair curves. fine tune them using geometry nodes controls or Convert generated hair for manual sculpt.

when it comes to bake hair textures, toggle the type of textures, select a folder (make sure to click the gear icon and uncheck Relative Path) choose size, format and quality, then click bake textures.

5 Hair Simulation with particle hair system
until Blender natively support geometry node physics, you may choose to convert geo hair to particle hair for hair simulation.
step1. select geo hair, most likely there are various geometry modifiers, go to "Object - Convert - Curves" this will apply those geo modifiers and make the hair individual strands instead of generated ones.

step2. go to object data tab, under surface-surface, use the eyedropper to select the target head mesh.

step3. go to "Object - Convert - Particle System", now you have particle hairs on the target head mesh, you may need to adjust the hair strand shape and/or decimate(rekey) hair strand point count for faster sim.

step4. set hair vertex weight. higher the amount, less the physics effect. at 1 (red), physics does not have any effect. adjust various physics parameters and make dynamic hair simulation.

if you have any questions, please send me a message.
-
$55
Suitable for Freelancer
-
$160
Suitable for Team
Have questions about this product?
Login to message
| Sales | 400+ |
| Rating | 15 ratings |
| Published | almost 4 years ago |
| Software Version | 4.4, 4.3, 4.2, 4.1, 4.0, 3.6, 3.5, 3.4, 3.3, 3.2, 3.1, 3.0, 2.93 |
| License | Royalty Free |
Discover more products like this
loveblender character hair Haircards spring24 haircard male hair hair cards Human facial 3d kitbash asset character hair blender modeling asset pack eyelashes hairstyles Beard hair hair texture bake blender presets winter24 summer24 particle system female-hair hair texture eyebrow bfcm24