Colormaster
 John Roper
in Addons
John Roper
in Addons


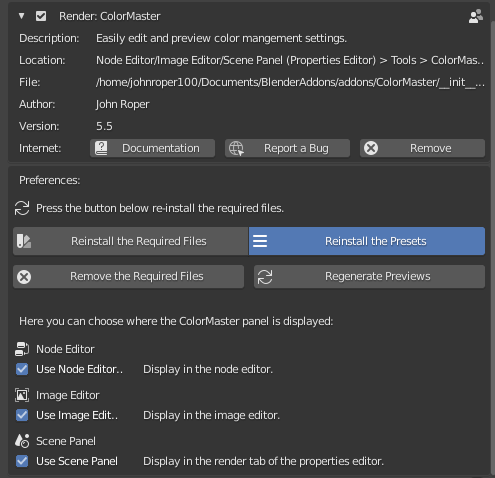


Installation
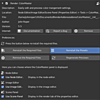
The installation is done exactly the same way as any other add-on in Blender:
- Open Blender's User Preferences (from the File menu or using Ctrl+Alt+U)
- In the Addons tab, click the Install from File button at the bottom and select the .zip file you already downloaded
- You should now see the ColorMaster add-on, so simply check the box to the right of the add-on name. If you don't see the ColorMaster add-on, you already had it installed - just search for it's name and it'll show up
- To make sure the add-on stays enabled the next time you run Blender, click the Save User Settings button at the bottom left
- Choose which look set you want to use (Blender or Filmic Blender)
- Then, click the button that says Add Required Files
- After they have installed, follow the prompts and restart Blender
If you want, after the required files have been installed, you can re-install them or uninstall them by using the buttons in the interface.
$12
Have questions about this product?
Login to message
Discover more products like this
rendering filmic_blender spring18 spi1d bconf16 spring20 color LUT bcon17 spi3d cyber16 icio spring17 grading filmic blender color management anniversary Render look filmic cube Open Color IO import opencolorio management