 VFX Grace
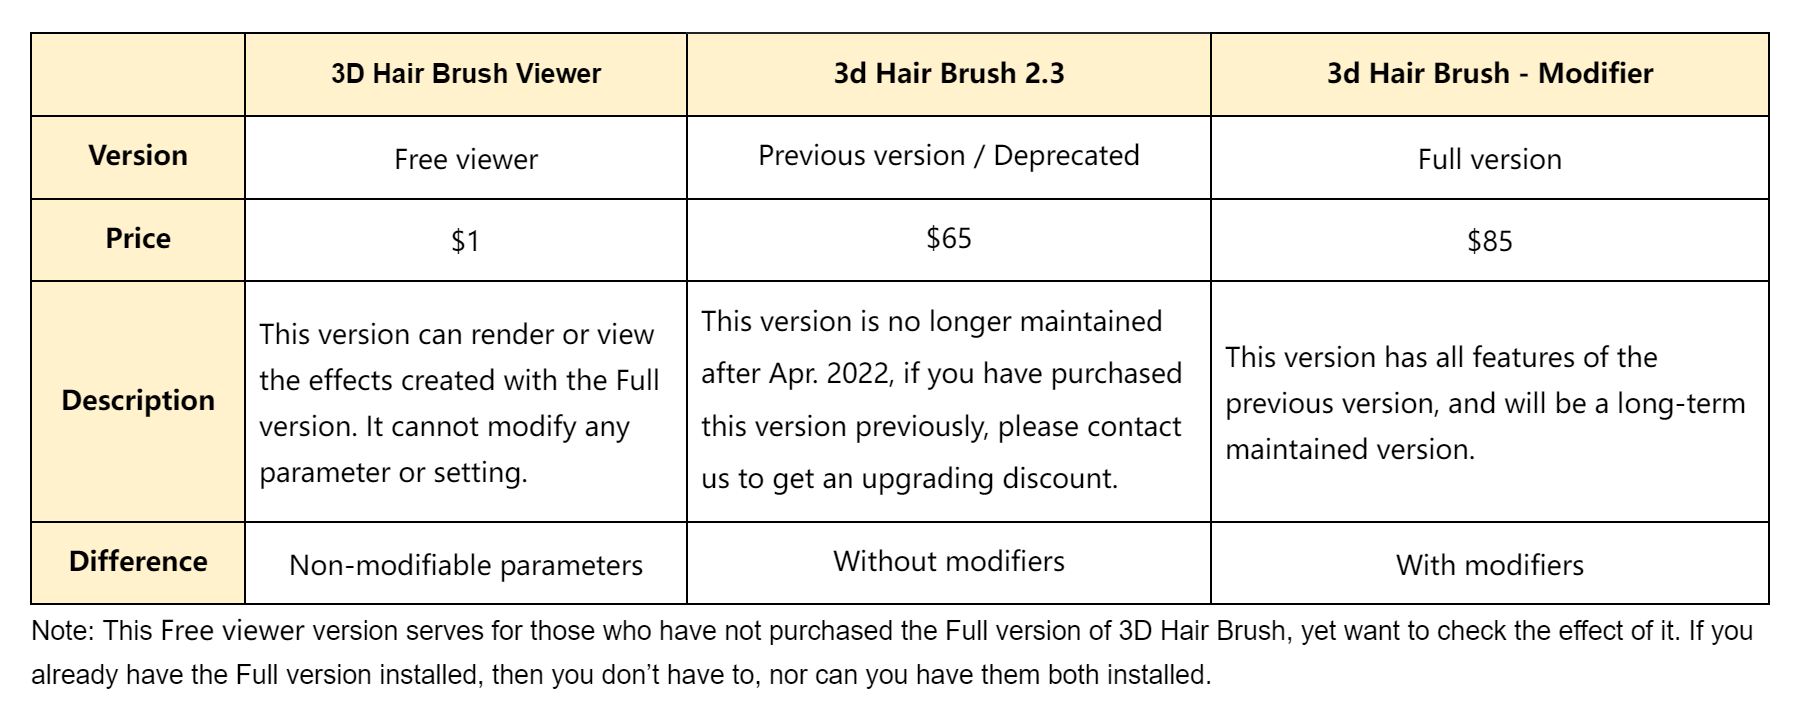
Free viewer:
4 well-made human hair presets for free! Only Blender 3.1 or above is supported.
Download 3D Hair Brush Free Viewer and get free hairstyles! Load with one click, it’s so easy to use.
This add-on is just a viewer of 3D Hair Brush, if you want more hairstyles and more features, please purchase the full version to unlock all features
Full version
Introduction
3D Hair Brush is a powerful hair grooming tool that fully supports the new hair system, allowing users to easily achieve stunning hairstyles and animal fur effects. The addon offers a variety of hair brushes, children modifiers, preset libraries, CyclesHair Render, and efficient hair grooming tools. With its user-friendly interface and diverse functionalities, even beginners can easily use this tool. Using this addon can enhance the efficiency of hair grooming and styling adjustments in Blender, while achieving a professional level of quality. 3D Hair Brush is undoubtedly the productivity tool for 3D artists.
Features
1. 3D Brushes
Get rid of traditional 2D brushes and bring users brand-new 3D brushes that perfectly support the new hair system. Multiple new hair brushes are provided for both the old and new hair systems, making hair grooming more efficient.
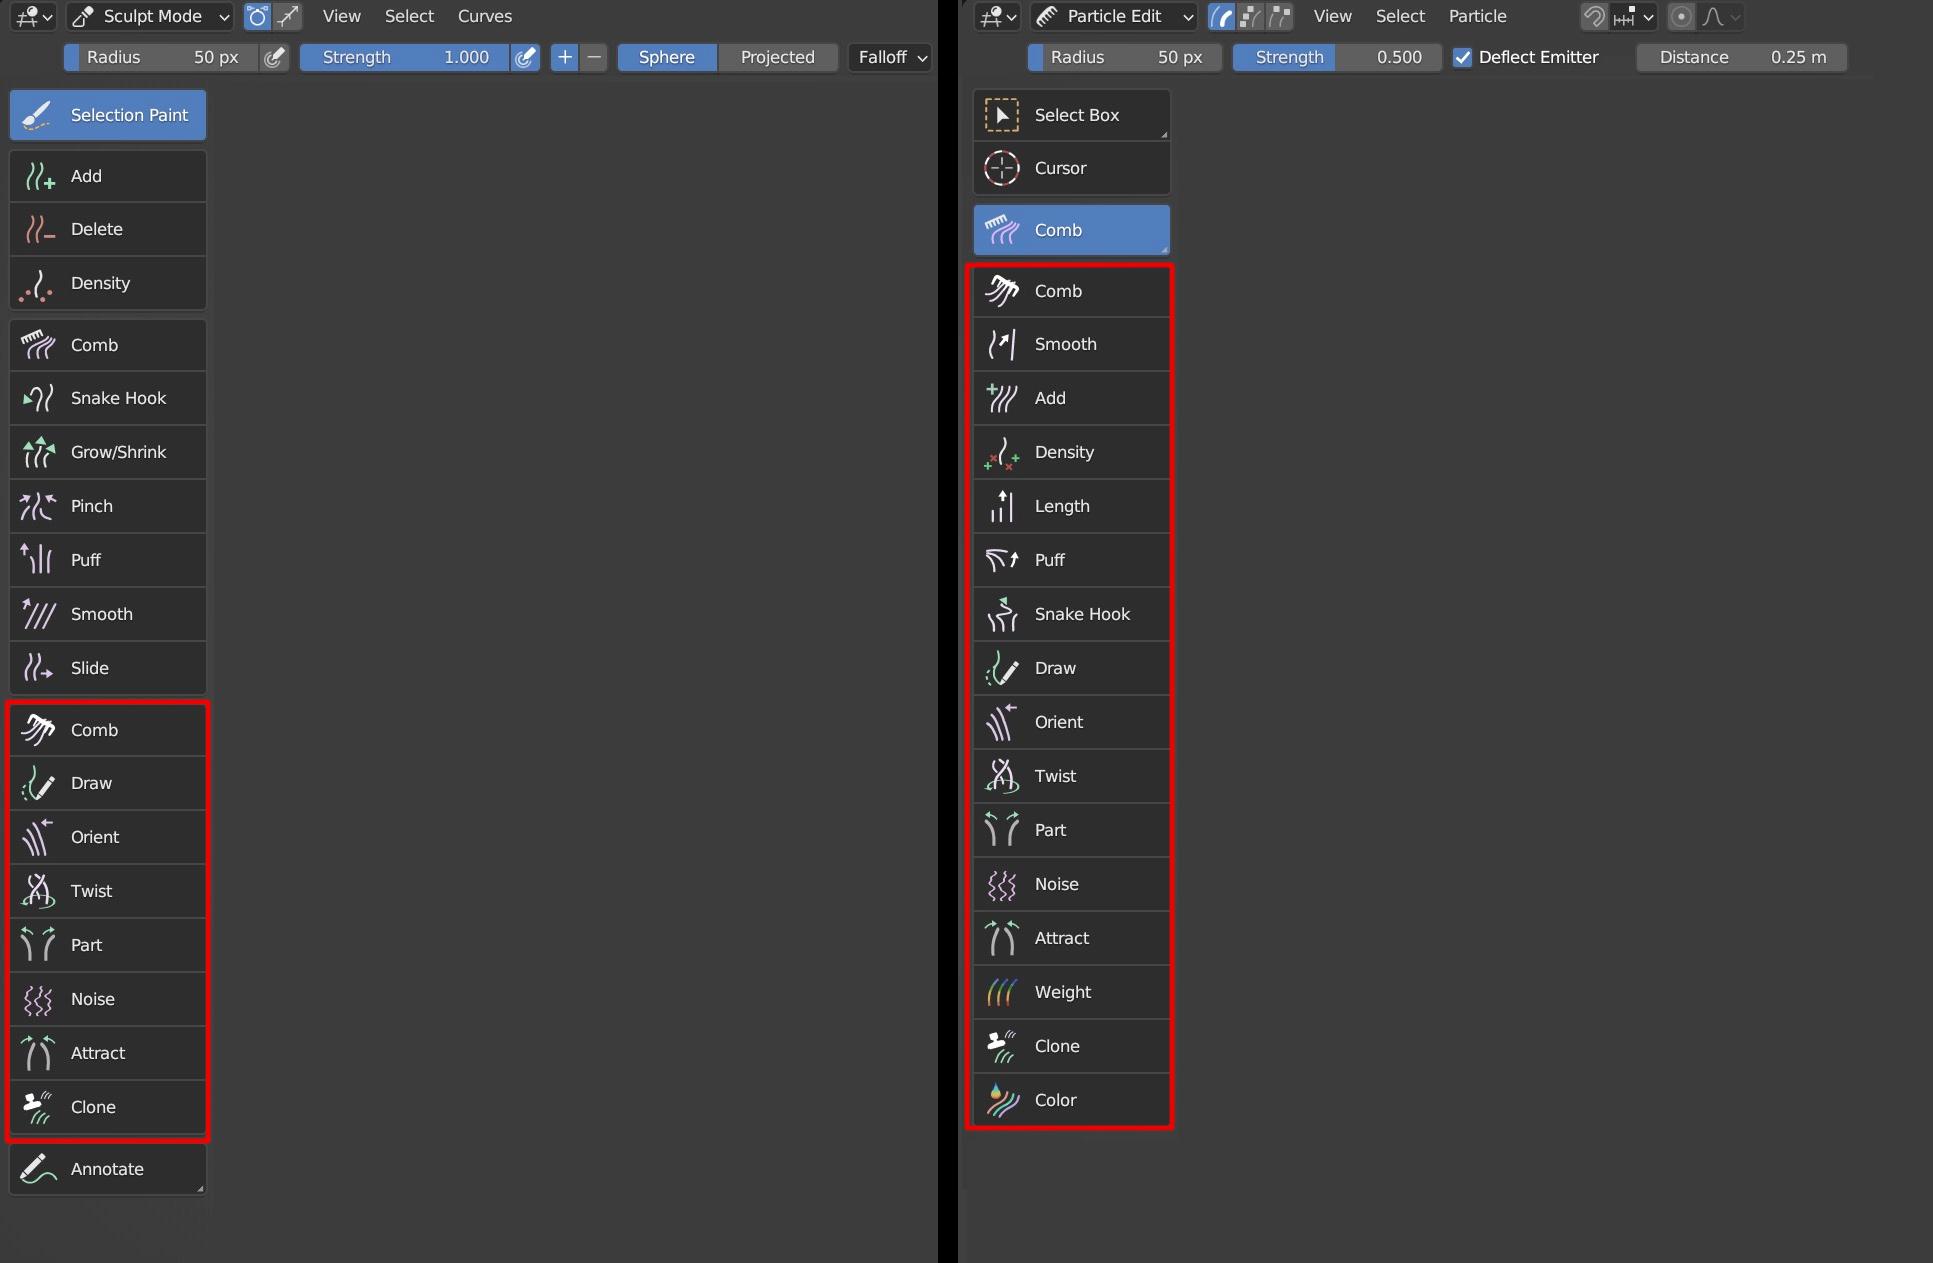
New hair system brush tutorial
Old hair particle system brush tutorial
User Manual
https://docs.vfxgrace.com/3d-brush/3-1-brush.html
2. Modifiers
This feature provides users with the ability to modify the shape of hair children using modifiers such as Length, Noise and Clump. The modifier is managed in a hierarchical mode that is non-destructive and reversible, allowing users to modify all parameters according to the desired effect and making hair styling more flexible and controllable.
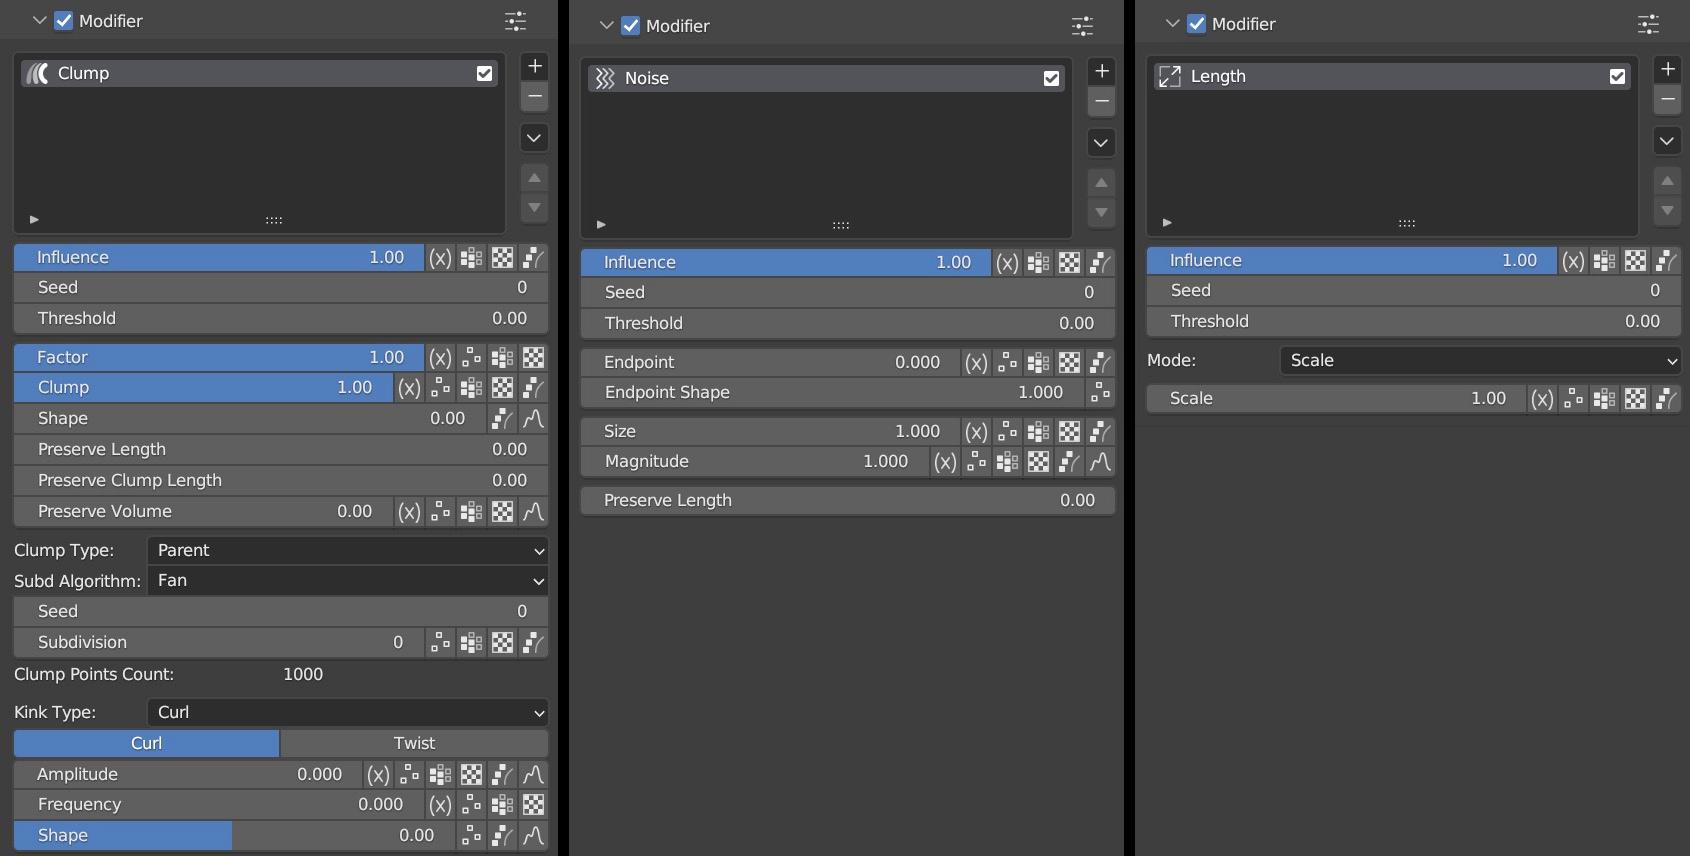
tutorial
User Manual
https://docs.vfxgrace.com/3d-brush/4-1-modifier.html
3. Preset Library
The preset library provides users with 32 high-quality hairstyle presets for both male and female characters, each with complete materials and particle systems. Various features are also provided to help users quickly switch between different hairstyles for their characters. Users can also create their own preset libraries using the preset panel.
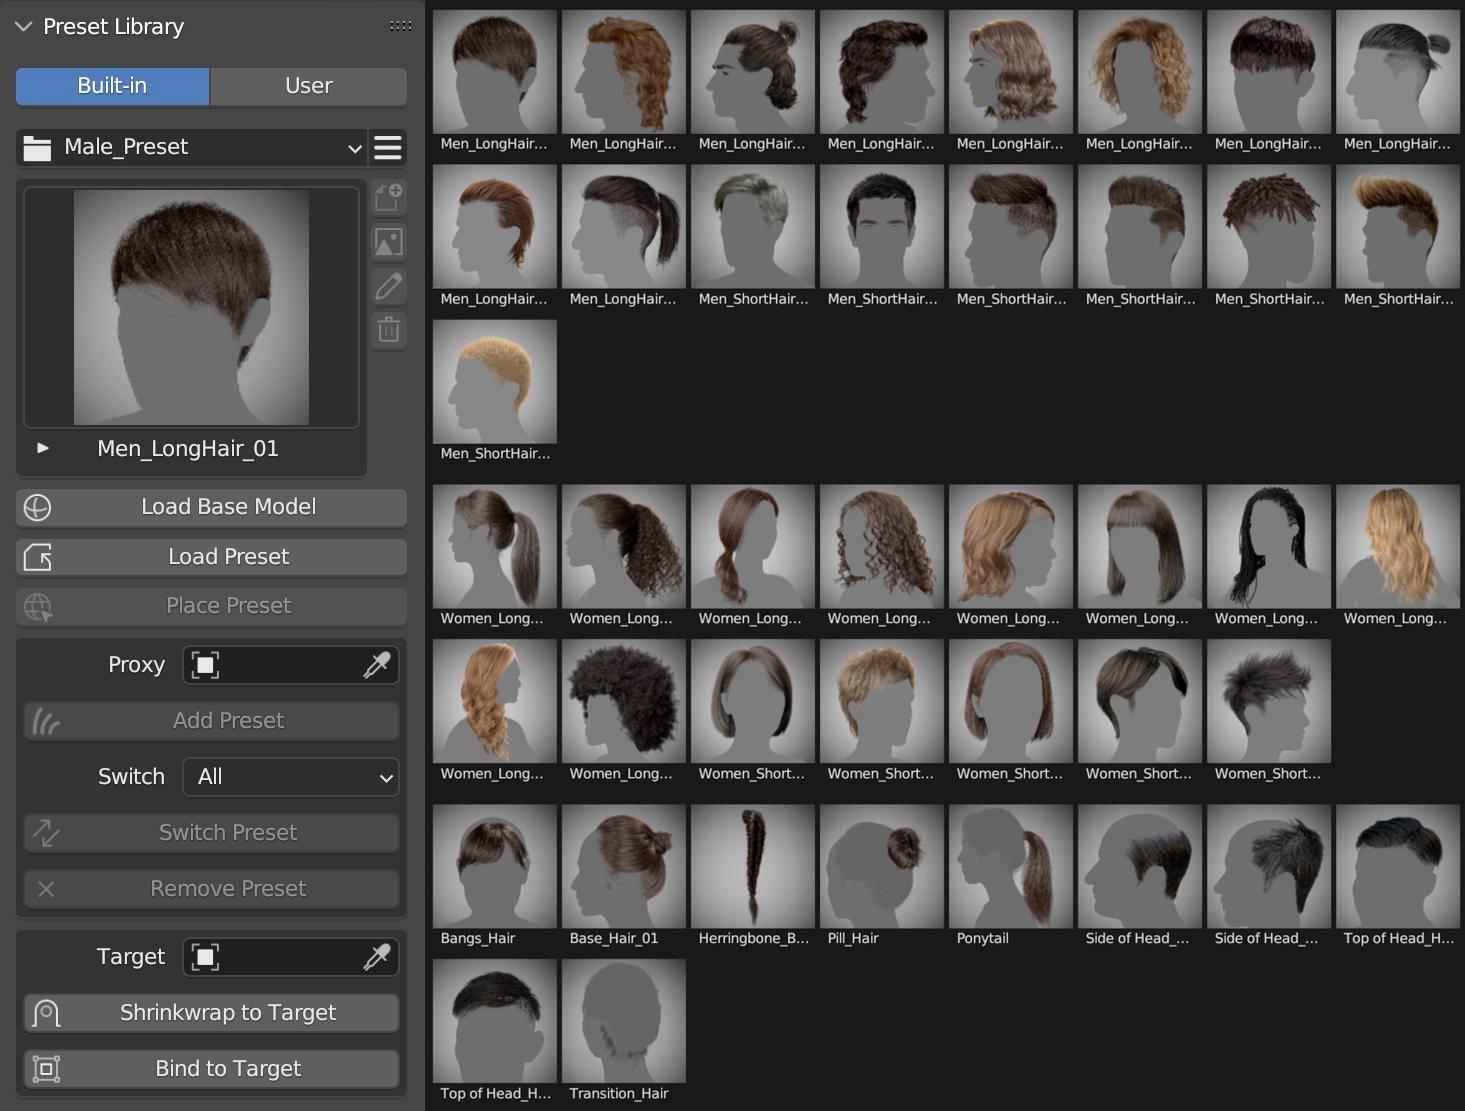
Tutorial
3D Hair Brush is a powerful hair tool, including 3D brushes with Pie Menu, Use Radius Curve, Use Diameter Random, and Hair Modifier
3D brushes can distinguish complex muscle surfaces of models and provide artists with a wonderful experience of grooming hairstyles in Blender; With multiple well-designed brushes presets, it gives efficient solutions to making varying hairstyles;
Using Radius Curve makes it convenient for us to control hair shape;
Using Diameter Random makes it possible to randomize the thickness of hair in just one particle system.
Modifier gives us an opportunity to add modifiers layer by layer until we get a good result and it doesn't destroy any hair shape we created before.
https://docs.vfxgrace.com/3d-brush/5-preset-library.html
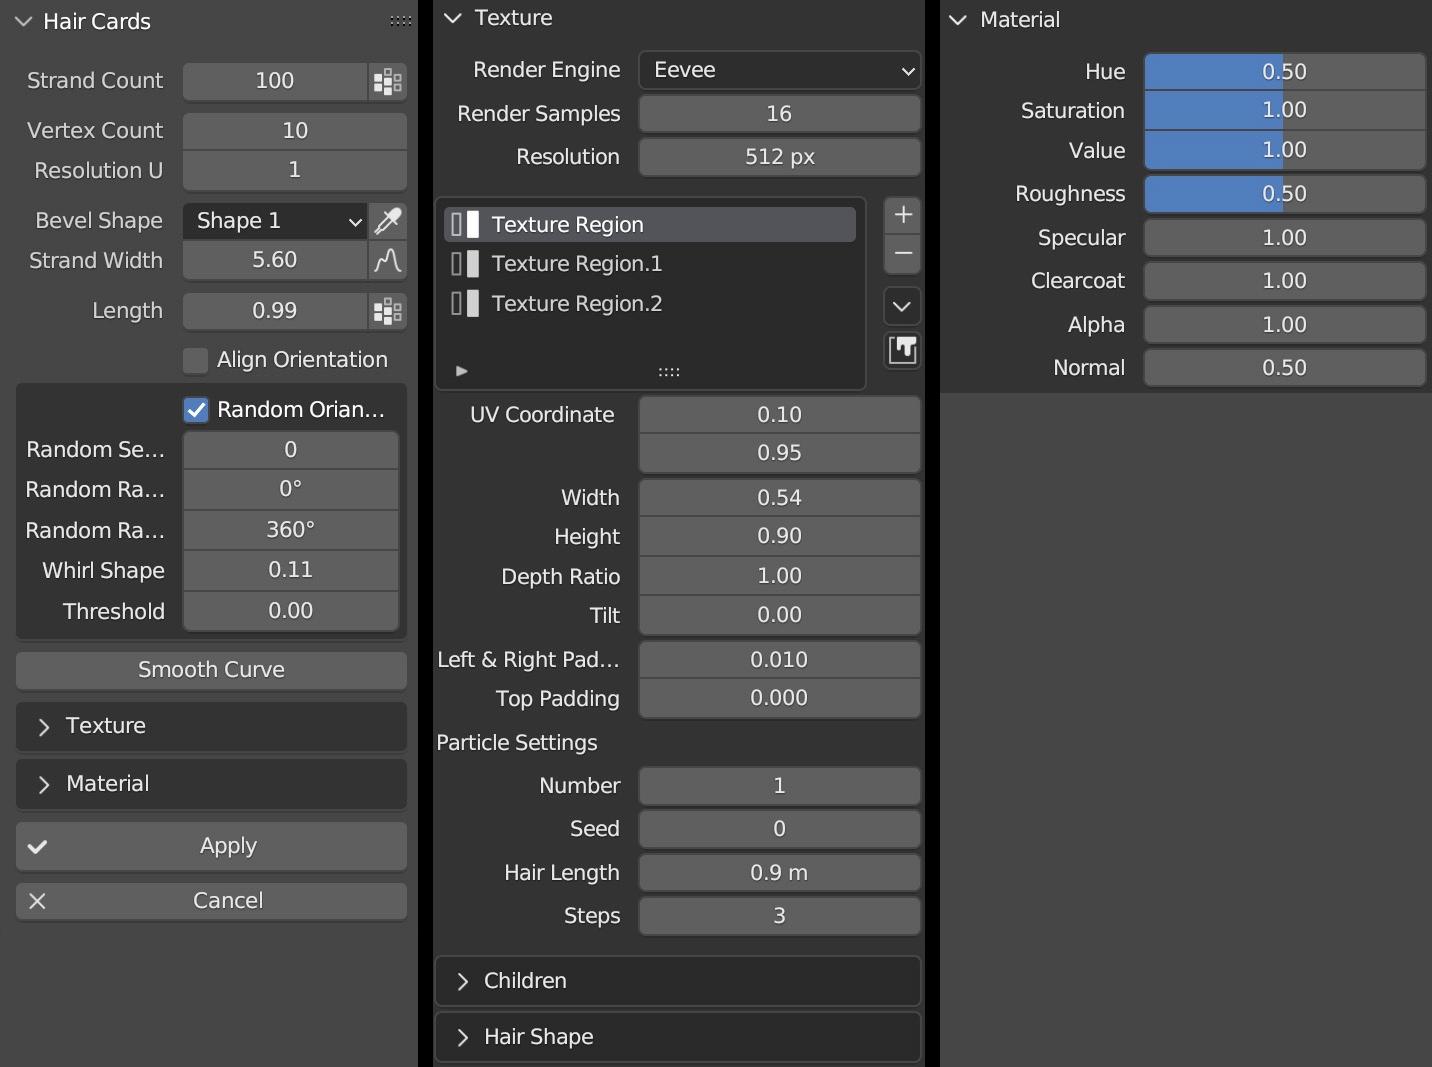
4. Hair to Hair Cards
This feature enables users to quickly convert particle hair to hair cards. Based on Eevee and Cycles renderers, hair texture can be adjusted in real time, and the shape of hair in the texture can be modified directly via hair modifiers. This intuitive and fast conversion method opens up new possibilities for creating hair in Blender.
Tutorial
User Manual
https://docs.vfxgrace.com/3d-brush/6-5-hair-cards.html
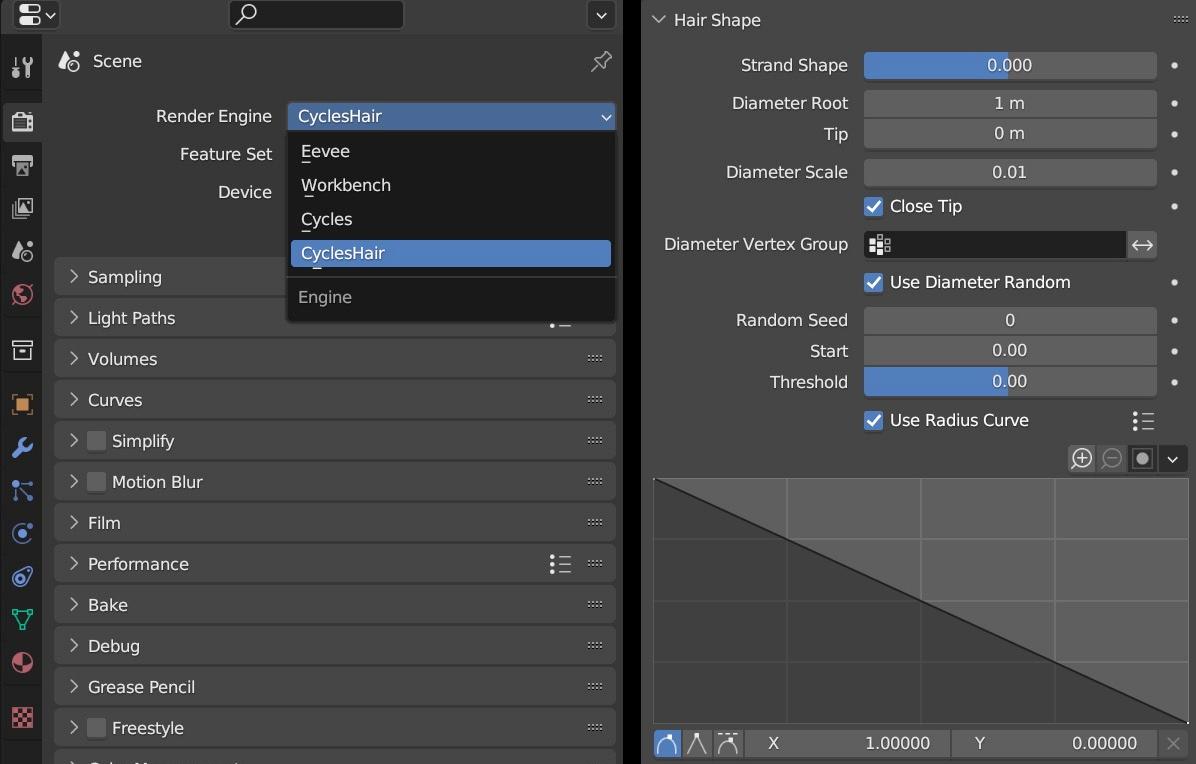
5. CyclesHair Render
Cycles Hair Renderer is a rendering engine developed based on the Cycles renderer. It is fully compatible with the Cycles renderer and provides users with functions such as Use Radius Curve, Use Diameter Random, change hair thickness by weight, and real-time display of color groups.
User Manual
https://docs.vfxgrace.com/3d-brush/6-4-cycles-hair-render.html
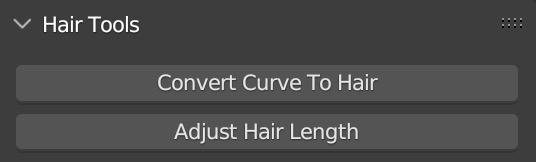
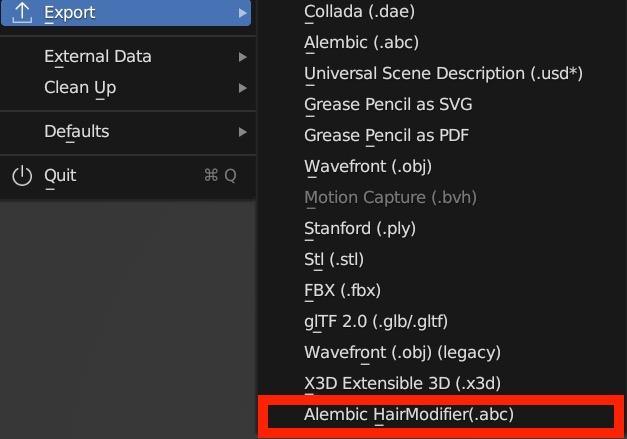
6. Hair Tools
The hair tools that come with the addon can quickly convert curves to hair and modify the overall hair length. It also provides an option to export abc files, allowing you to perfectly export hair effects created with modifiers.
User Manual
https://docs.vfxgrace.com/3d-brush/6-2-convert-curve-to-hair.html
https://docs.vfxgrace.com/3d-brush/6-3-export-abc.html
Installation
Click Edit -> Preferences -> Add-ons -> Install, select the Zip file, and hit Install Add-on.
Uninstallation
Disable this add-on.
Save Preference settings, which is done automatically by default.
Restart Blender, and then remove this add-on.
Changelog
Version: 3D Hair Brush 4.7
Updated on 2024-11-24
Supported Blender 4.3
Hair Manager
▪️Added support for new hair dynamics.
▪️Added support for instancing objects and collections for the new hair system.
▪️Introduced Simulate Hair node.
▪️Added an option Even Thickness to Simple hair children
▪️Random number generation in the Resample Modifier now produces integer values.
Convert Hair to Cards
▪️Added support for merging multiple hairs into a single hair card.
▪️Introduced two new bevel shapes.
▪️Added a random color option to the base color texture of the texture region.
▪️Provided an automatic layout option when removing texture regions.
▪️Added anisotropic effects and shadow adjustment options to card materials.
▪️Hair curves and hair cards now support modifiers from the Hair Manager.
▪️Optimized the conversion of hair effects managed through the Hair Manager panel into hair card effects.
▪️Added an option to crop textures when merging; if not cropped, provided a UV alignment option.
▪️Fixed an issue where the submenu failed to appear when clicking to add a modifier to curve-based hair or texture-based hair for the first time.
3D Brush
▪️Fixed an issue with the color brush where the corresponding color group could not be selected after painting with a sampled color.
Hair Modifier
▪️Fixed an error that modifiers don't work on the hair in linked collection or instanced collection.
Hair Presets
▪️Fixed an error that occurred when trying to remove unused materials while saving presets.
Hair Tools
▪️Added a function to even out the length of hair curves.
Cycles Hair
▪️Material Preview mode now supports the Vultan backend.
▪️Material Preview mode now supports display of instanced models and hair.
▪️Fixed an error that hair thickness has no effect when rendering hair instance.