Render Negative Frames/Selected Cameras Bundle
 alexdepario
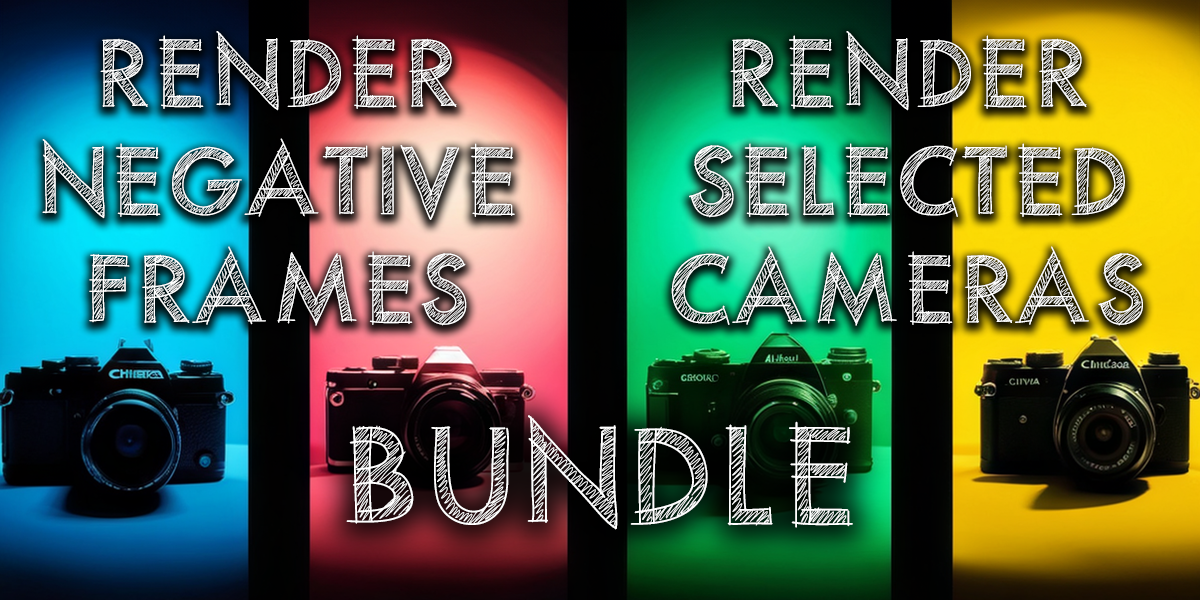
Render Selected Cameras Blender Add-on Documentation
Overview
Render Selected Cameras is a powerful Blender add-on developed by alexdepario. It simplifies the process of rendering frames from multiple selected cameras at once, taking into account the keyframes enabled for rendering. This add-on enhances your workflow by streamlining the rendering process, saving you time and effort in Blender.
Installation
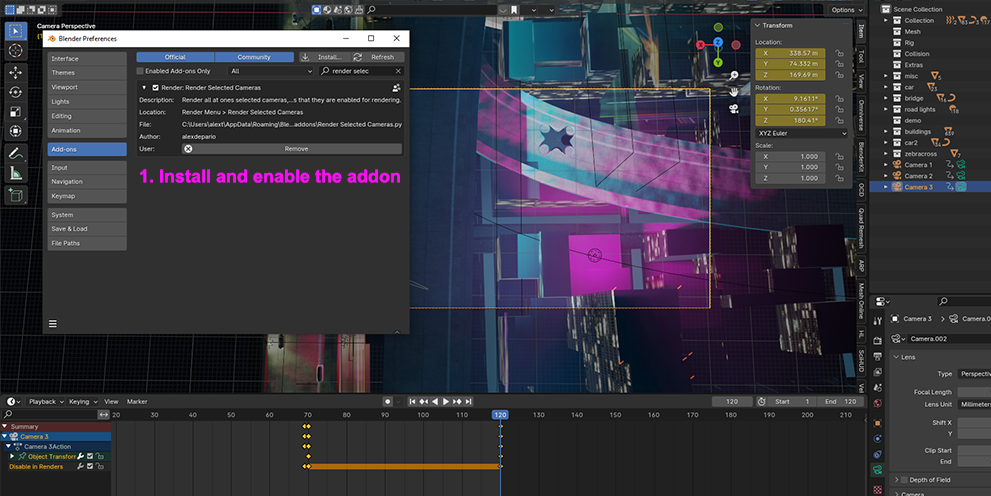
- Download the "render_selected_cameras.zip" file containing the add-on.
- Launch Blender.
- Go to
Edit>Preferences. - Click on the
Add-onstab. - Click the
Install...button and navigate to the location of the downloaded zip file. - Select the zip file and click
Install Add-on. - Enable the add-on by ticking the checkbox next to "Render Selected Cameras" in the add-ons list.
- Click
Save Preferencesto confirm the installation.
Usage
Accessing the Functionality
To use the Render Selected Cameras functionality, follow these steps:
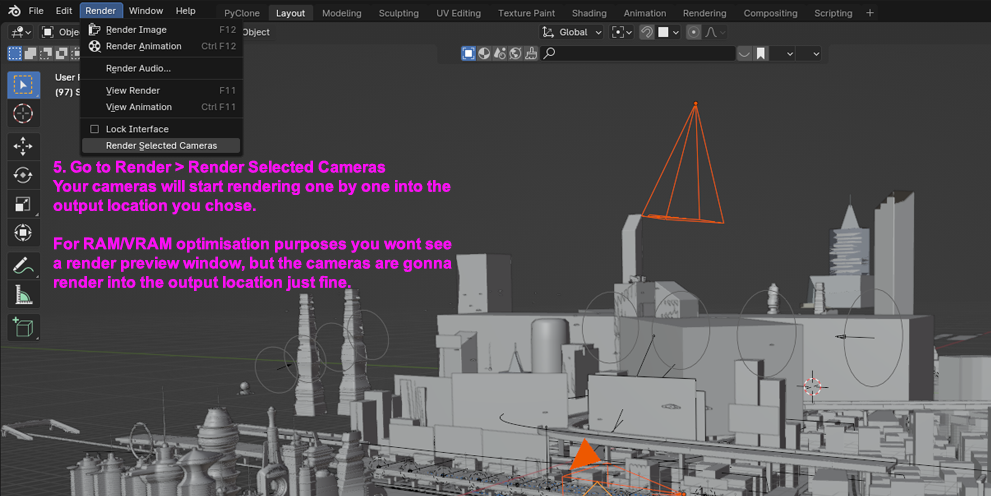
- Go to the
Rendermenu. - Select
Render Selected Cameras.
Functionality
The add-on performs the following actions:
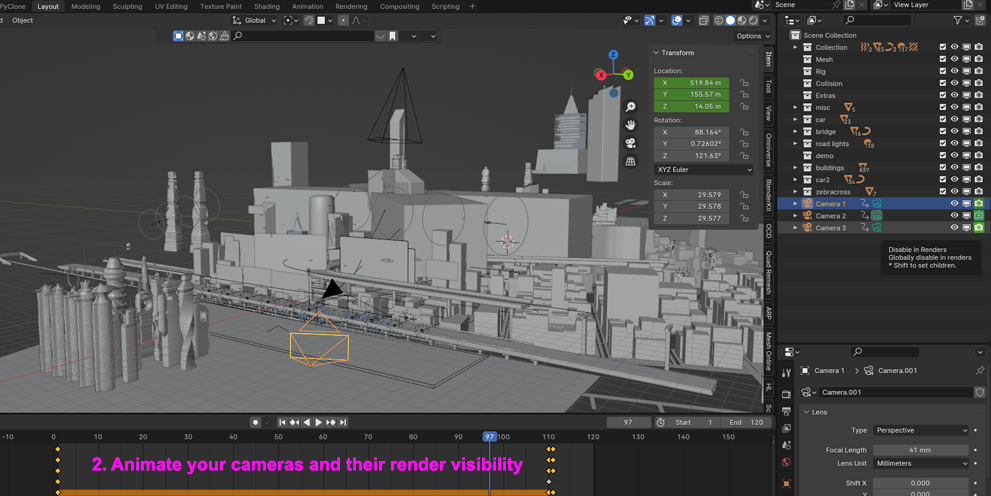
- Render Selected Cameras: Renders frames from all selected cameras simultaneously, considering the keyframes enabled for rendering.
Notes
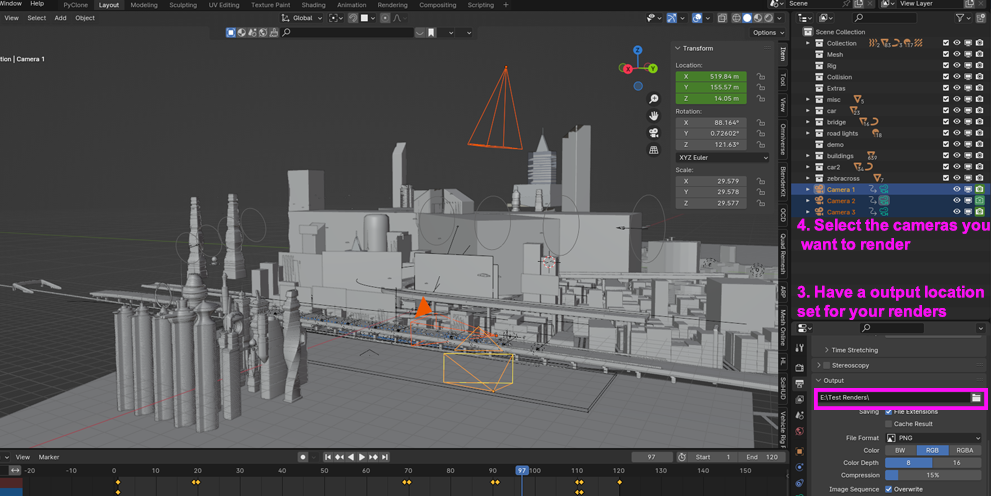
- Only cameras that are selected will be rendered.
- The output directory for rendered frames is determined by the user's chosen output directory in Blender's render settings.
Version Information
- Add-on Name: Render Selected Cameras
- Blender Compatibility: 2.80 and above
- Version: 1
With Render Selected Cameras, rendering frames from multiple cameras becomes effortless. Whether you're working on complex scenes or creating animations, this add-on simplifies the rendering process, allowing you to focus on your creative work without unnecessary hassle. Enjoy enhanced control and efficiency in Blender with Render Selected Cameras!
Render Negative Frames Addon Documentation
Introduction
Welcome to the Render Negative Frames addon for Blender! This documentation will guide you through the installation process and explain how to use the addon's various features to render image sequences from negative frames efficiently.
Installation
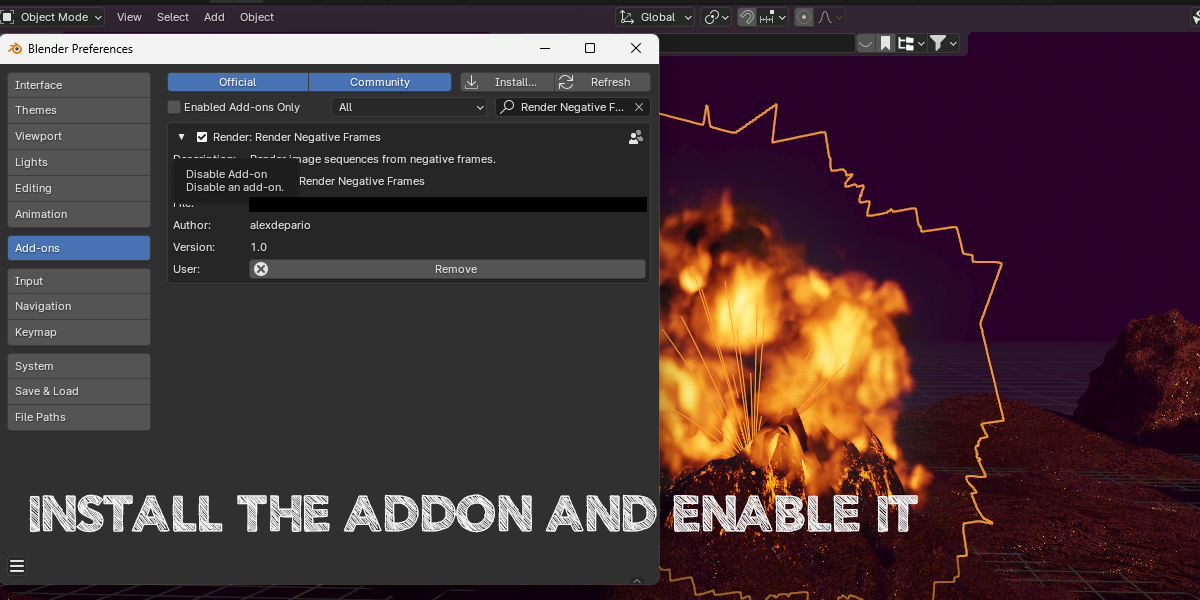
- Download the Addon: Obtain the Render Negative Frames addon file from a trusted source or creator.
- Open Blender: Launch Blender on your computer.
- Access Preferences: Go to Edit > Preferences from the top menu bar.
- Navigate to Add-ons: In the Preferences window, select the Add-ons tab.
- Install Addon: Click on the "Install..." button located at the top right corner.
- Select Addon File: Browse and select the Render Negative Frames addon file you downloaded.
- Enable Addon: Once selected, enable the addon by ticking the checkbox next to its name.
Usage
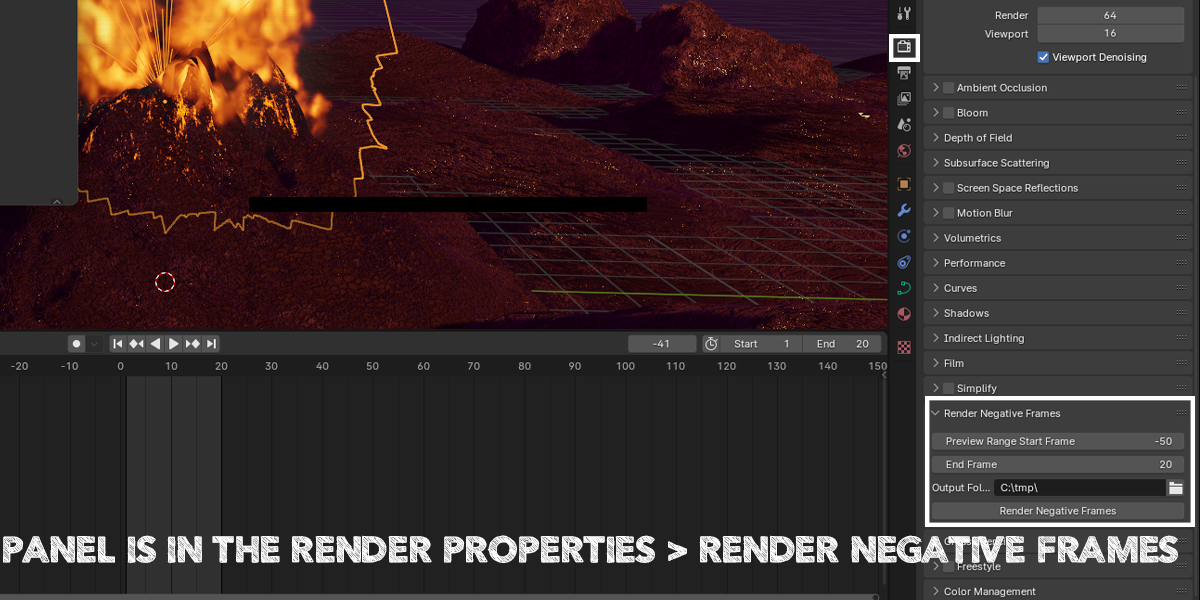
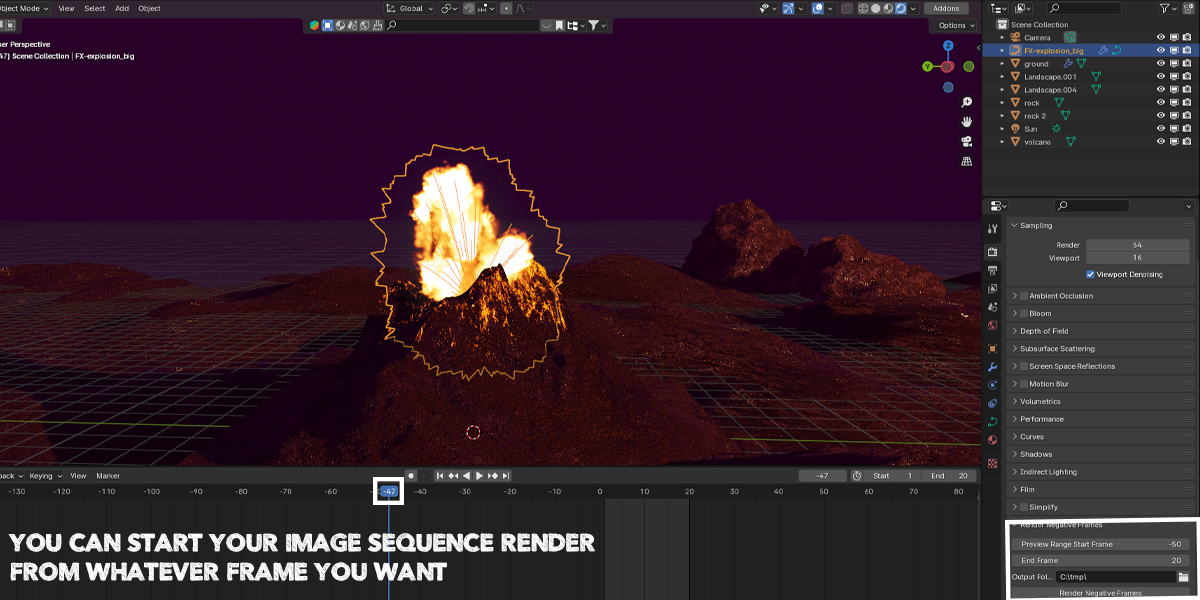
1. Access Render Negative Frames Panel
- Open Render Tab: Go to the Render tab in the Properties panel.
- Locate Render Negative Frames Panel: Scroll down to find the "Render Negative Frames" panel.
2. Set Rendering Parameters
- Frame Preview Start: Specify the starting frame for rendering the image sequence.
- Frame End: Set the ending frame for rendering the image sequence.
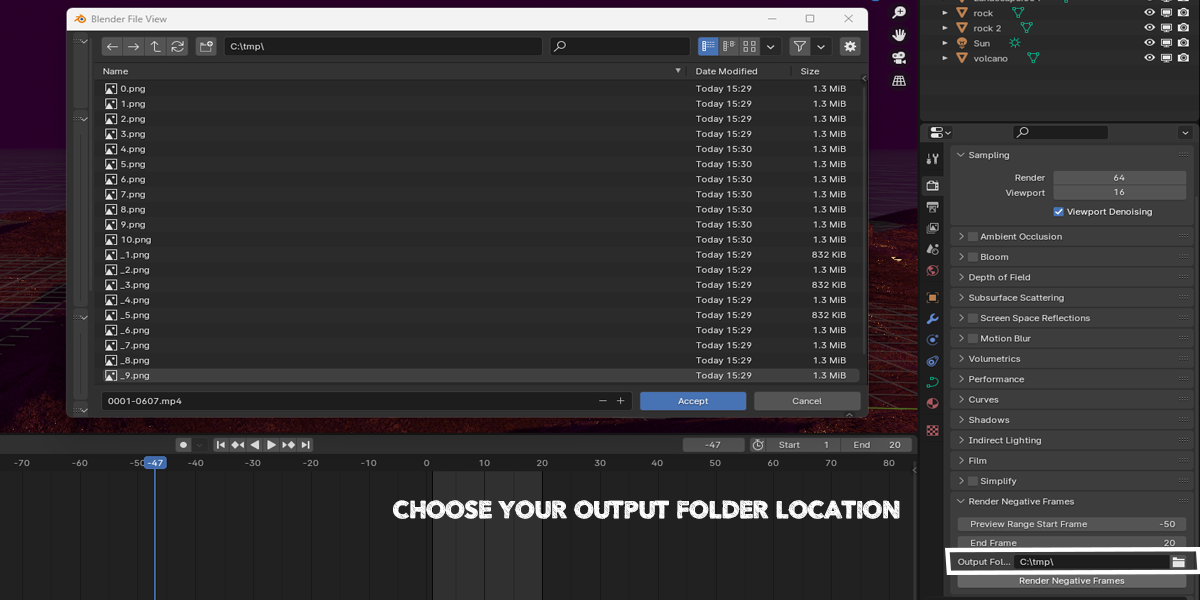
- Output Folder: Choose the output folder where the rendered images will be saved.
3. Render Negative Frames
- Click Render Button: Once all parameters are set, click the "Render Negative" button to start rendering the image sequence from negative frames.
Functionality
1. Smooth Rendering
Render image sequences from negative frames smoothly without interface lag, ensuring a seamless rendering experience.
2. Efficiency
Save time and effort by automating the rendering process for image sequences from negative frames, enhancing your productivity.
3. Seamless Integration
Integrates seamlessly into your Blender workflow, providing intuitive controls and functionality for rendering tasks.
Tips
- Optimize Render Settings: Adjust render settings such as resolution and sampling to optimize rendering speed and quality.
- Check Output Path: Double-check the output folder path to ensure that rendered images are saved in the correct location.
- Monitor Progress: Keep an eye on the rendering progress in the Blender interface to track the completion status.
Conclusion
Congratulations! You've learned how to use the Render Negative Frames addon in Blender to render image sequences from negative frames efficiently. Experiment with different settings and unleash your creativity in your projects. Enjoy a smoother rendering experience and boost your productivity with this invaluable addon.
Have questions about this product?
Login to message
| Dev Fund Contributor | |
| Published | 10 months ago |
| Software Version | 4.3, 4.2, 4.1, 4.0, 3.6, 3.5, 3.4, 3.3, 3.2, 3.1, 3.0 |
| License | GPL |