Procedural Sequin
 Stefano Bianchini
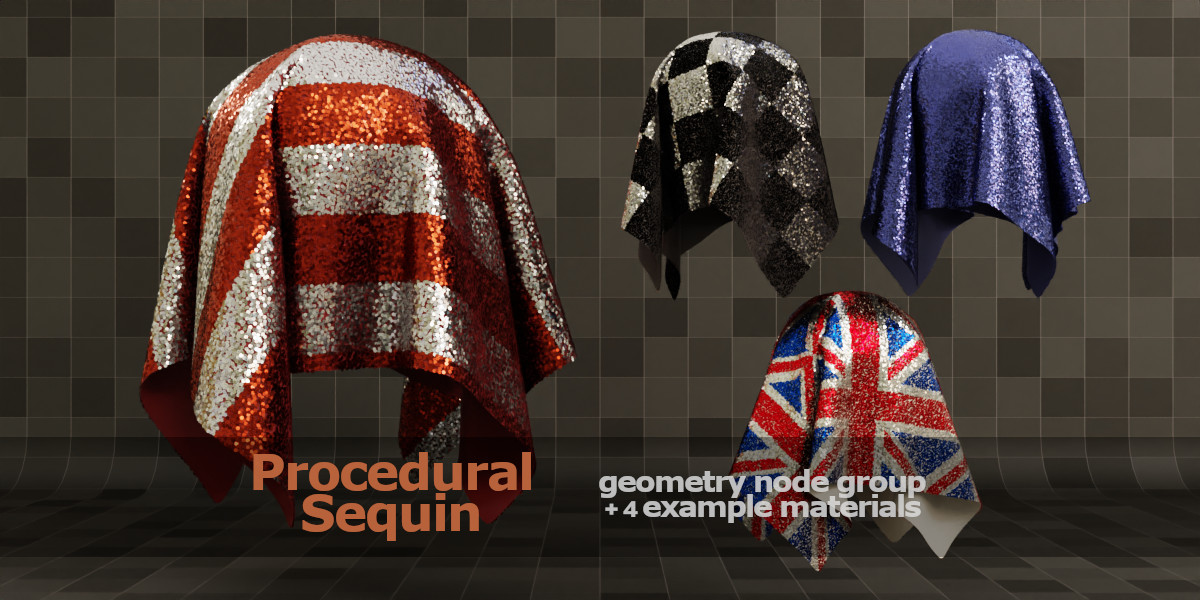


Introduction
Thank you for purchasing this product.
"SBAPPS Sequin" is a geometry node group that applies a sequin effect to a mesh.
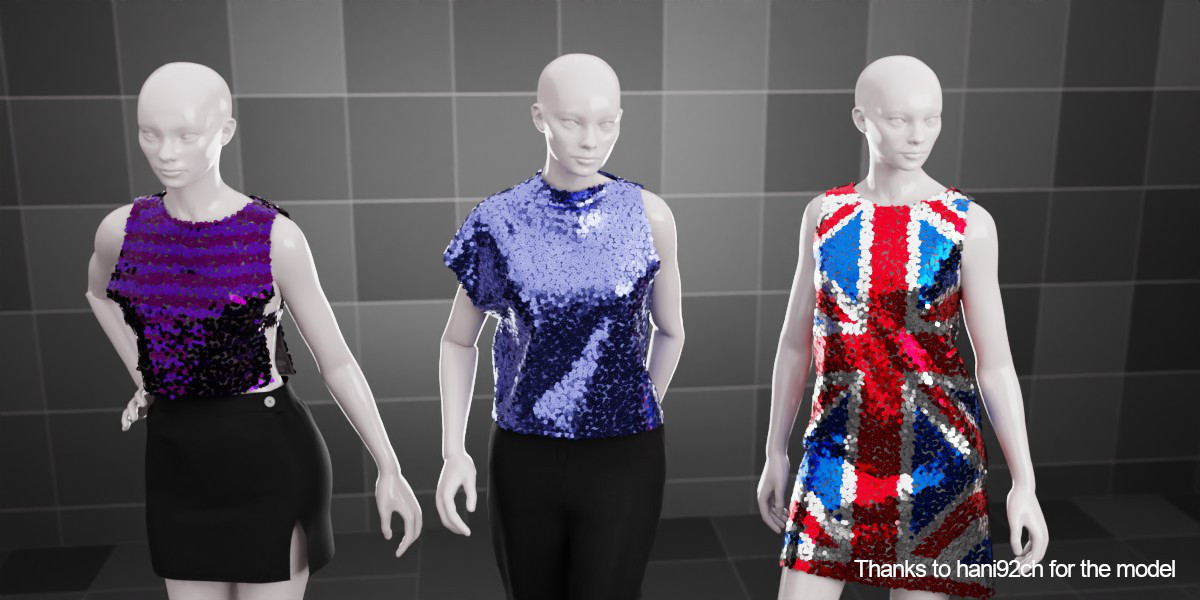
Particularly suitable when applied to a dress model or to a surface on which a cloth simulation has been applied.
What do you get
In the project you will find the modifier (geometry node group) called “SBAPPS Sequin”, four examples of meshes to which the modifier has been applied accompanied by as many example materials.
How to import/install it in your project
To use SBAPPS Sequin modifier within your project you can use the Append function.
Open your project and from the file menu choose the Append item, then browse through the files and open the "SBAPPS Sequin" project, open the NodeTree folder and select the SBAPPS Sequin item.
Now the modifier will be present in your project ready to be used (as described below)
In addition to the modifier itself, the default material (solid color material) will automatically be added to the project.
If you also want to use the other sample materials (described below) use the append function again by choosing the Material folder instead of the NodeTree folder.
How use it
The easiest way to apply the modifier to a mesh is to look for the "SBAPPS Sequin" item in the asset browser, select it and drag it onto the mesh to which you want to apply the effect.
Once this is done you will find in the object modifiers panel (accessible in the property editor in the tab marked by the icon), the "SBPASS Sequin" modifier.
From there you can modify its parameters (as described below)
Alternatively you can create the modifier by hand:
-
select the mesh on which you want to apply the sequin effect.
-
in the properties editor select the modifiers tab (indicated by the icon
 )
) -
open the “Add modifier” drop-down menu and choose the “Geometry Nodes” item
-
press the
 button and choose the item “SBAPPS Sequin”
Modifier parameters

Max density: it controls the maximum density of sequins applied to the surface.
Warning: if performance is an issue, don't raise this value too much (from 0 to 3)
Density factor: is a factor to control the final density of the sequins (it is multiplied by the maximum density to obtain the final density applied).
It can be a single constant value, but its purpose is to be assigned an attribute to control the density of the sequin throughout the surface.
To do this select the mesh and create for it a group of vertices called "Sequin Density”.
Once the vertex group has been created press the button  and from the drop-down list choose the "Sequin Density" attribute.

Now you can enter the weight paint mode to set the weight of "sequin density" for each vertex of the mesh and control the density of the sequin on the mesh surface.
For example if you want one part of the mesh without sequins (paint these vertices assigning a weight equal to 0) and the other part of the mesh with maximum density (set the weight of the vertices to 1)
Viewport density factor: it is used to control the density of the sequin displayed in the viewport.
The final density displayed in the viewport is the product of “Viewport density factor”, “max density” and “density factor”.
Keep this low if you have performance issues in the viewport.
In renders this parameter is ignored.
Sequin radius: is the radius in millimeters of the single sequin element.
Sequin hole radius: is the radius of the hole in the center of the sequin.
Sequin resolution: is the number of vertices of the sequin element.
Increase this value if you want to approximate a circular sequin.
Surface offset: is the offset from the center of the sequins and the surface of the mesh.
Direction variation: increase this value to randomize the orientation of sequin elements.
Hide the underlying geometry: check this flag to hide the underlying mesh showing only the sequins.
Material: the material to apply to the sequins, for more detail see below.
Sample materials
The project comes with 4 sample materials that can be applied to the sequin by selecting it in the "Material" parameter of the modifier.
There is also some fabric materials examples, intended to be applied to the underlying geometry.
Materials parameters are pretty self explanatory.
NB: all the materials and shaders (and obviously the geometry node) are compatible with both Cycle and Eevee.
"Sequin Solid color" material


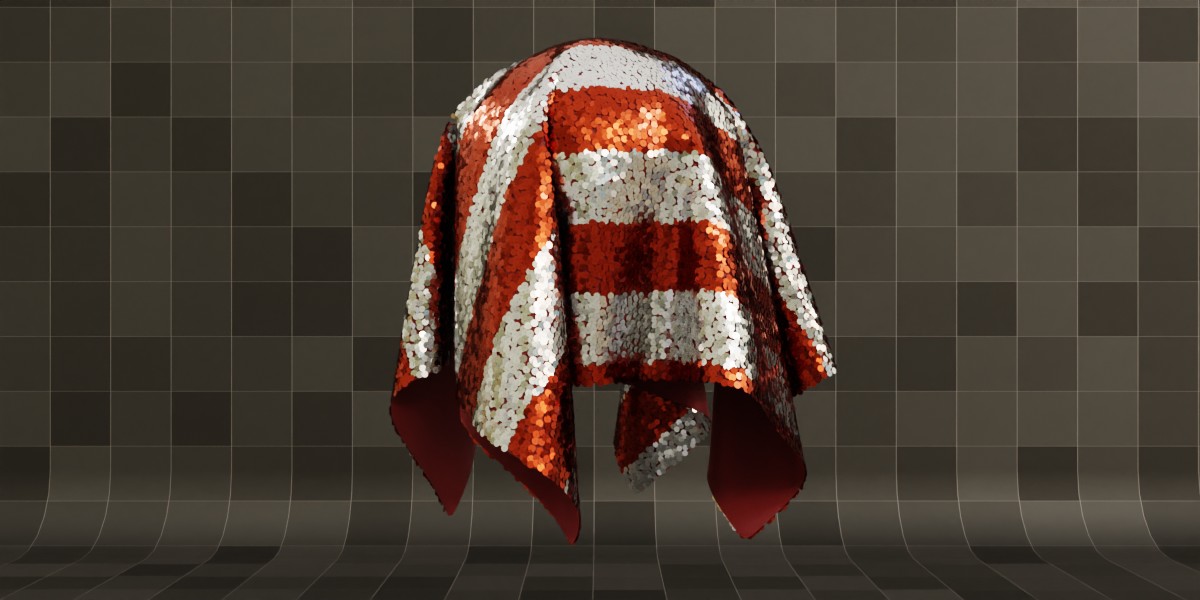
“Sequin Stripes” material


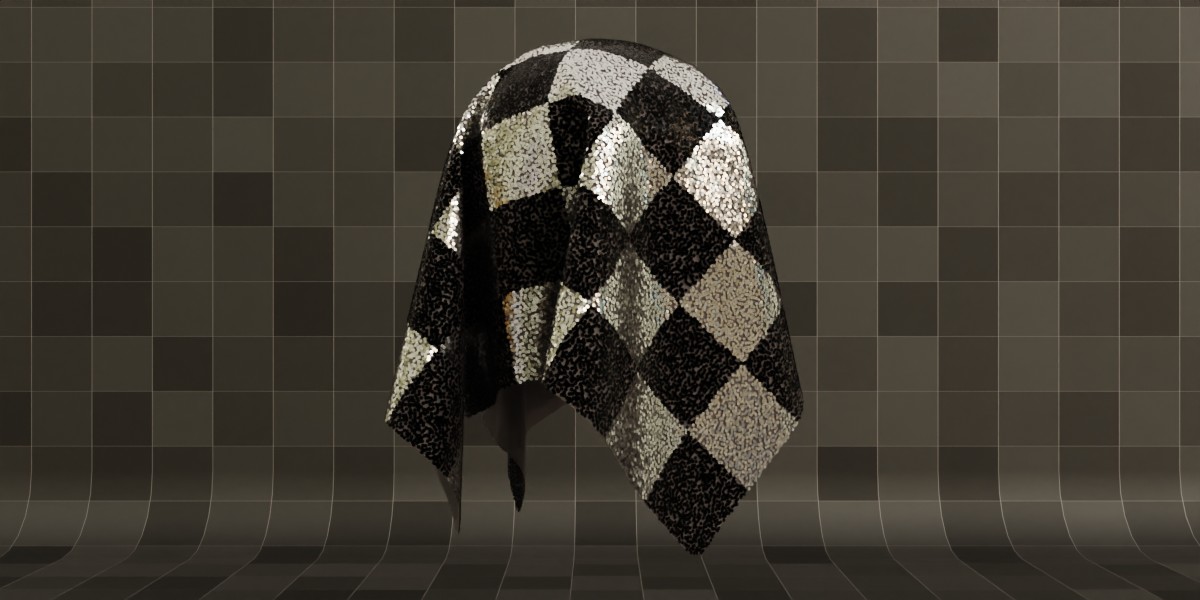
“Sequin Checker” material


"Sequin Union Jack” material (an example of image applied to the sequin)


“Fabric” material (intended to be applied to the underlying geometry)


Notes for creating a custom material
If you want to create your own shader/material to apply to the sequin, keep in mind to use the Vector output of the "Attribute" node as input vector of the textures with type = Instancer and name the name of the UV map of the mesh.
This way each sequin element will use the UV coordinate taken from the chosen map.

See for example the "Union Jack" material. For each sequin element the UV coordinate is determined by reading the "UVMap" map (using the "Attribute" node) this coordinate is used to sample the image of the "United-kingdom" node and determine the color to apply to the single sequin element.

Have questions about this product?
Login to message
| Sales | 30+ |
| Published | over 1 year ago |
| Software Version | 4.4, 4.3, 4.2, 4.1, 4.0, 3.6, 3.5 |
| License | Royalty Free |
Discover more products like this
sequin knit fashion glitter cloth sequin effect party fashion sequins procedural material fabric material Material glittering party vintage shirts fabric cloth simulation dress garments Sequin glittered Party-Cloth procedural texture procedural sequins geometry nodes vintage-clothes party_dress clothes Fashion & Costume Design garment wear