Paranormal Toon Shader: Light-Driven Npr For Cycles & Eevee
Note: The User Guide is formatted to be a PDF file, which is included with the download. Some minor formatting issues may appear when viewing the User Guide on the Blender Market website.
ParaNormal Toon Shader | User Guide
A collection of toon shaders for Cycles & Eevee with a
light-driven workflow powered by parallelized normals.
Shader v0.6.0
Basic Use: Customizing Base Materials 7
Customizing with Shader Nodes 17
How do I set up key light(s)? 18
How do I manage multiple key lights? 18
How do I set the light and shadow colors in materials? 19
How can I achieve a completely flat look, like classic cel shading? 19
How do I add outlines, halftone, and other stylized ink effects? 20
What color management settings should I use? 20
The Standard Approach: Color Quantization 21
The ParaNormal Approach: Normal Parallelization 21
ParaNormal Triplanar Shader 27
Basic RGB Toon Shader (Eevee) 30
Vector Visualization Shader 33
Support
If you have questions that were not covered in this User Guide or need assistance, please contact me through the support form on the Blender Market product page. I will make every effort to get back to you promptly.
Product Page: https://blendermarket.com/products/paranormal-toon-shader⧉
Use the “Ask a Question” button in the sidebar to open the support form.
For more detailed instructions on how to request support through Blender Market, please see Blender Market’s help page “How to Get Product Support”:
https://support.blendermarket.com/article/20-how-to-get-product-support⧉
Compatibility
This version of ParaNormal Toon Shader is compatible with Cycles & EEVEE for Blender 3.6-4.1, and Cycles for Blender 4.2. (“EEVEE Next” support is currently under review. See Known Issues.)
Getting Started
Installation
Log in to the platform where you purchased PNTS and download the zip file.
Unzip the folder contained in the zip file to a location of your choice.
In Blender, go to Edit > Preferences… > File Paths, and add the folder as an Asset Library⧉.
After following the steps above, all included assets should now be available in the Asset Browser⧉.
For more information about adding an Asset Library and using the Asset Browser, please follow the links above to the Blender Manual.
First Steps: Starter Scene
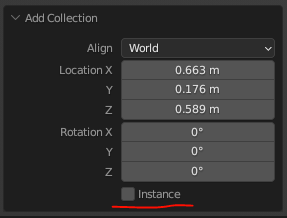
A great way to initially familiarize yourself with the shader is to use the included Starter Scene. You’ll find it in your Asset Browser⧉ under ParaNormal Toon Shader > Helpers. When placing it in your scene, be sure to uncheck the Instance option so that you can edit it.
The Starter Scene includes two key lights, a set of primitives with example materials that show each of the 3 main ParaNormal shader variants (Flat, Triplanar, and Curve), and a Light Palette that is preconfigured to use the included key lights.
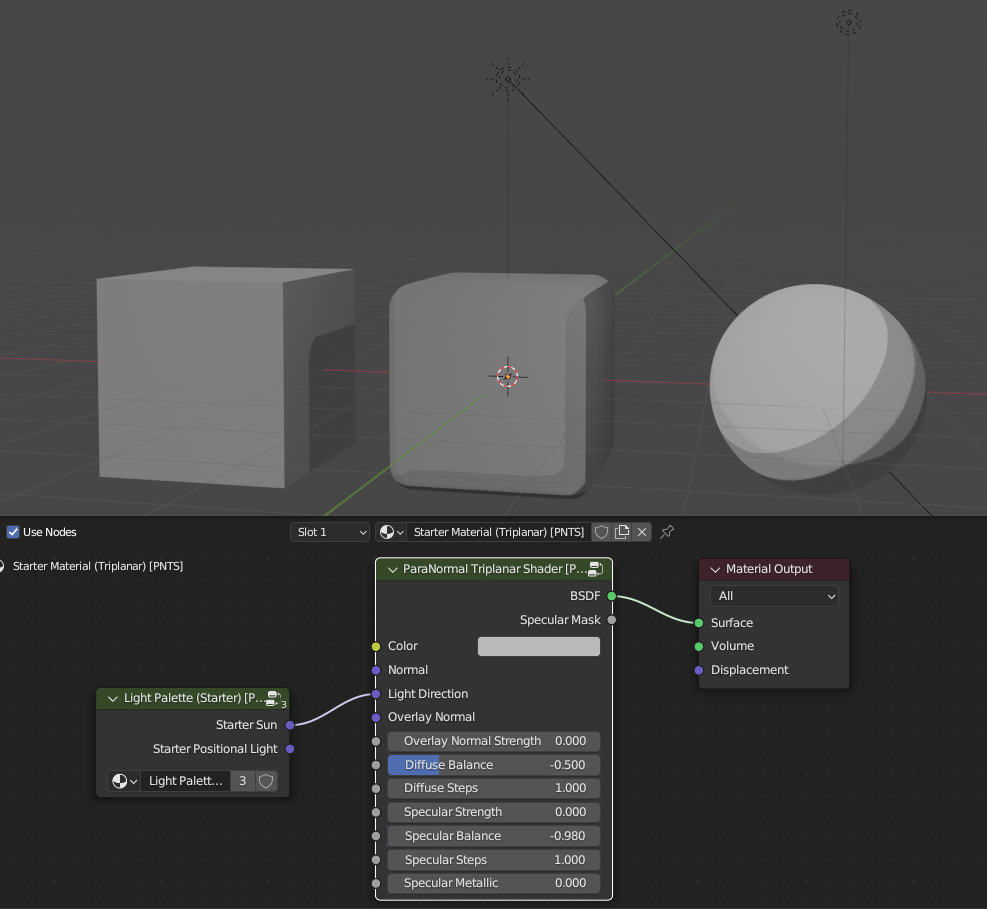
Since Key Light Setup has already been done, you can use this scene as a reference for how everything should be set up, or you can use it to skip over the setup for now and get right into experimenting with the shaders or even building your own scene.
You should probably start by choosing which key light you want to use. If you’re creating an outdoor scene, you probably want to use Starter Sun. The starter materials use the Starter Sun output from the Light Palette by default, but you may want to disable the Starter Positional Light in the outliner.
On the other hand, for an indoor scene, you’ll probably want to use the Starter Positional Light. In this case, you should connect the Starter Positional Light output from the Light Palette to the Light Direction input of the shaders in the starter materials. You may also want to disable the Starter Sun in the outliner.
Note that, unlike the materials in the Starter Scene, the base materials in the Asset Library come with an empty Light Palette. If you want to use them in the Starter Scene, you’ll need to copy & paste the Starter Scene’s Light Palette into the base materials.
Once you get comfortable working in the Starter Scene, you’ll want to move on to the next section.
Basic Use: Customizing Base Materials
The easiest way to use the included shaders is to:
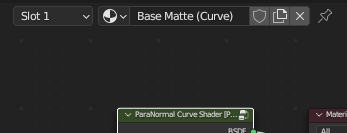
Choose the base material from the Asset Browser⧉ that is closest to your intended material, and drag it to an object in your scene. (For example, for a matte material like brick or skin, you would choose the Base Matte material. For a glossy material like ceramic or plastic, you would choose Base Gloss. For steel, gold, etc., you would choose Base Metal.)
Click the New Material button in the Shader Editor⧉ to make a new copy, and rename it appropriately for your intended material.
Set the color and other inputs as appropriate for your intended material. If desired, you can use texture maps here as you would for any standard material. (See Shaders for more information on the specific inputs available.)
Perform Key Light Setup, if you haven’t already.
When customizing materials, you’ll be using a diffuse/specular workflow. While modern PBR aiming for photorealism has moved away from this approach, it works very well for achieving light-driven stylized realism.
The diffuse/specular workflow makes it easy to achieve a look grounded in reality, which can be a powerful tool for stylized art. As renowned animator Hayao Miyazaki once said, “Anime may depict fictional worlds, but I nonetheless believe that at its core it must have a certain realism. Even if the world depicted is a lie, the trick is to make it seem as real as possible.”
While that’s certainly not the only approach to NPR, if you agree with Miyazaki’s philosophy, it will be helpful to familiarize yourself with how metal vs. dielectric materials interact with diffuse vs. specular light in real life. That is what I based the included shaders and base materials on. A primer on the physical properties of light is beyond the scope of this guide, but you should be able to find plenty of good information online.
Basic Use: Key Light Setup
The ParaNormal shaders achieve toon-style NPR shading by parallelizing the normals of the shaded surface relative to the direction to the main light source. In order to do that, 1) there needs to be a main light source in the scene, and 2) the shader needs a reference to that light source—or at least to be pointed in the right general direction.
While PNTS will function with most lighting scenarios, it will give the best results when there is a clear primary source of light. In photography and film, this is typically called a key light.
Pointing PNTS to your key light(s) is relatively simple and should only need to be done once for any given scene, but it is a necessary bit of setup when starting a new project. See below for details.
Using the Light Palette
The included base materials use a node called Light Palette. The Light Palette node is actually just an empty node group. You are intended to edit it to store references to the key light(s) in the scene (see below for details). (To edit a node group, select it in the Shader Editor⧉ and press the tab key.)
This is optional, but it is the recommended workflow to keep your light source(s) organized and to make it easy to change them later if necessary. Because each material needs a reference to its primary light source (key light), keeping these references in the Light Palette means that if changes are needed, you only have to make the change in one place.
Without a node group like the Light Palette, you could easily end up having to make changes to your key lights in every material individually. In a large scene with many materials, that would be a nightmare.
Positional Lights
In this context, a positional light is any object that emits light from its position. This includes Point and Spot lights, as well as Area lights or objects with emissive materials, provided they emit light from a relatively small area. (PNTS treats emissive materials the same as any other light source, but is of course subject to any limitations of the render engine you’ve selected.)
Add any positional light source to the scene.
Add a Coordinate Marker to the scene from the Asset Browser. With the Coordinate Marker selected:
Go to Constraint Properties.
Under the Copy Location constraint, pick the light source as the Target.
In your Light Palette node (or directly in a material if you prefer):
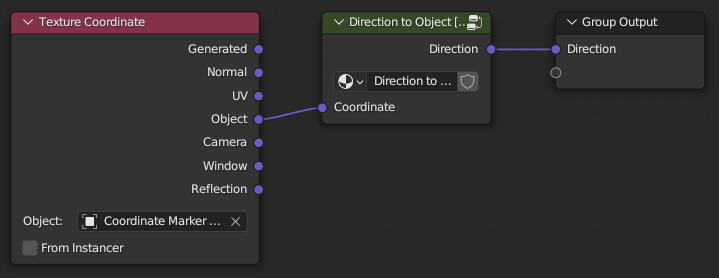
Add a Texture Coordinate⧉ node. Pick the Coordinate Marker in the Object field (at the bottom of the node).
Add a Direction to Object node from the Asset Browser.
Connect the Object output of the Texture Coordinate node to the Coordinate input of Direction to Object.
If using the Light Palette, connect the Direction output from Direction to Object to the Group Output node.
In your material, connect the Direction output from the Light Palette (or directly from Direction to Object) to the Light Direction input on any ParaNormal shader.
Positional Lights with Multiple Light Objects
For certain types of light fixtures, such as chandeliers, you might choose to use multiple positional Light objects. Since the shaders can only use one light reference at a time, if such a light fixture is acting as your key light, a simple solution is to place the Coordinate Marker in the center of the light fixture, rather than constraining it to a specific Light object.
Remember, Light Direction should point toward where the main light is coming from, but that doesn’t necessarily always have to be a literal Light object.

Sun Lights
Because Sun lights⧉ in Blender control the angle of sunlight globally, rather than emitting light from their position, they require a slightly different setup.
Add a Sun light to the scene.
In your Light Palette node (or directly in a material if you prefer):
Add a Direction to Sun node from the Asset Browser.
Click the pin button at the top of the Shader Editor. This pins your current material to keep it visible even if you select another object.
Select the Sun light in your viewport and open the sidebar (aka N-panel) to access the Sun’s transform.
For each axis under Rotation:
Right-click the Rotation axis in the sidebar and press N to Copy as New Driver.
Right-click the matching axis in the Direction to Sun node’s Rotation Drivers input and press P to Paste Driver.
When you are finished setting up the drivers, click the pin button at the top of the Shader Editor again to unpin your current material. This is necessary so you can work on other materials later.
If using the Light Palette, connect the Direction output from Direction to Sun to the Group Output node.
In your material, connect the Direction output from the Light Palette (or directly from Direction to Sun) to the Light Direction input on any ParaNormal shader.
Manual Light Direction
If lighting comes from a consistent direction throughout a large area, but not from a Sun light, the best option may be to set the light direction manually. This can be a useful technique when working with an HDRI, or when the overall light in the scene comes from many lights working in concert.
For example, in an office or hallway that is evenly lit by overhead fluorescent lights, the overall effect of the light isn’t coming from any one light fixture—it’s just coming from up. No matter where a character stands in such a space, the light will always be coming from directly above.
(In this example, the fluorescents could be using an emissive material, a single very large Area light, or a whole bunch of Point lights. It doesn’t really matter which.)
In your Light Palette node (or directly in a material if you prefer):
Add either a Combine XYZ⧉ node or a Normal⧉ node.
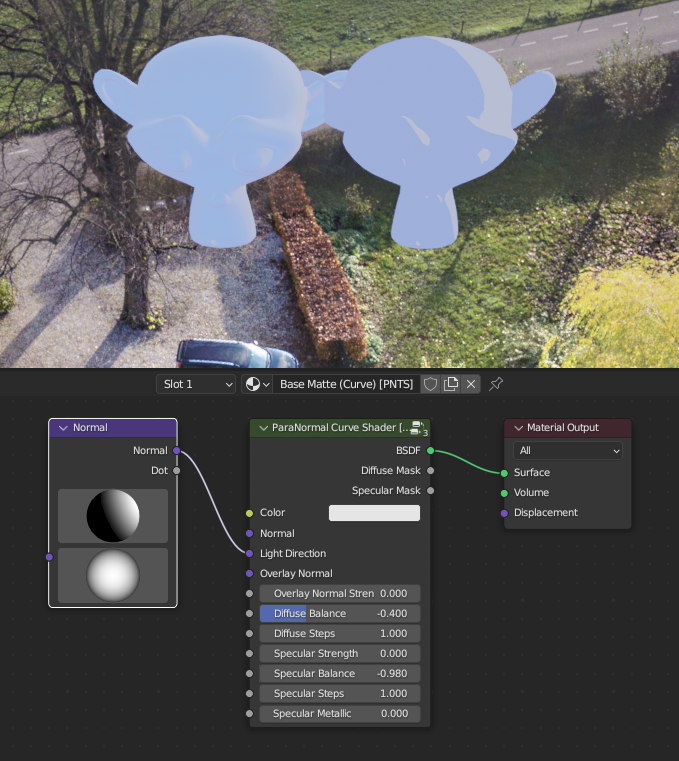
With Combine XYZ, you will directly enter the light direction as a normalized vector (XYZ numbers from -1 to 1). This allows you to precisely control the angle, but may require some familiarity with vector coordinates to understand how the numbers relate to the light direction.
With Normal, you will click and drag on the top orb to rotate it. The orb visually represents the light angle as if you are looking down at your object from above. The visual representation may make this option more intuitive for users who are less familiar with vector coordinates.
Adjust the angle of light until it is appropriate for your scene. If you’re not sure what the best angle is (for example, when using an HDRI), it may be useful to make a copy of your object and assign a default Blender shader to it. You can use the copy as a point of reference, and adjust your light direction until the light and shadowed areas in the ParaNormal shader are similar to the default shader.
If using the Light Palette, connect the Vector or Normal output from the node you’ve chosen to the Group Output node.
In your material, connect the Direction output from the Light Palette (or directly from the node) to the Light Direction input on any ParaNormal shader.
Switching Key Lights
More complicated scenes may consist of multiple areas with different key lights. There are a couple techniques that can be used to accommodate this.
Static objects that stay within the area of a single key light are generally pretty easy to deal with. If two objects would have the same material, but they will appear in the areas of different key lights, you can simply give them separate copies of that material, so that each can reference the correct key light.
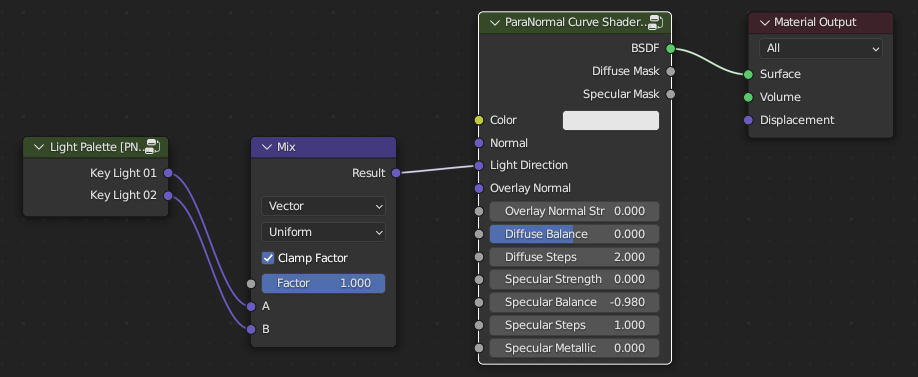
For animated objects that will move between different key lights, feed the output for each key light from the Light Palette into a Mix⧉ node set to Vector. You can then keyframe the Mix Factor to switch between key lights as needed.
If the material needs to switch between more than 2 key lights, use the Switchboard node instead.
Multiple Simultaneous Key Lights
Materials using PNTS can be affected by the light from any number of lights in the scene, but in general they will only have one key light at a time.
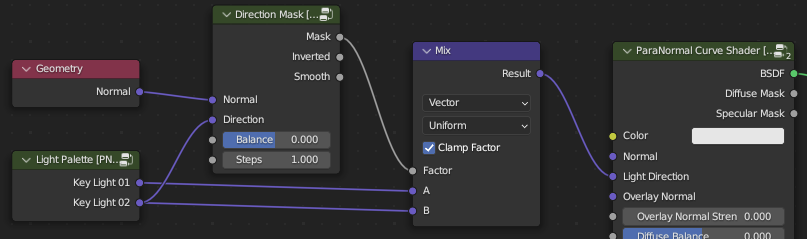
If you need to achieve a lighting effect where different parts of the same material are assigned to different key lights at the same time, this can be achieved by using a Mix node, similar to the procedure described under Switching Key Lights.
However, instead of keyframing, you would feed a mask into the Mix Factor to control which areas are assigned to which key light. There are many ways to generate masks in Blender, and the best option will depend on your specific lighting scenario. As an example, the image below demonstrates an approach using a Direction Mask.
Creating New Materials
In most cases, starting from a base material is the recommended way to create a material, but it’s useful to know how to create a new material from scratch.
In the Shader Editor⧉, click the New button in the header to create a new material.
Add a ParaNormal shader variant from the Asset Browser⧉, found under the ParaNormal Toon Shader > Shaders category. Choose a shader variant based on the type of surface the material will be applied to. See Shaders for details on each shader, but here is a brief overview of what each is typically best suited for:
Use ParaNormal Curve Shader for any curved surface. This shader generally produces the least lighting gradients, so it can also be used for flat surfaces if you prefer a look with minimal gradients.
Use ParaNormal Triplanar Shader for boxy objects with rounded bevels, or any geometric shape where you want to flatten the shading.
Use ParaNormal Flat Shader only for surfaces that are completely flat (i.e., planar faces). This shader does not alter normals, so it will produce the greatest lighting gradients and will show any curves that are present.
Use ParaNormal Uber Shader if you want access to as many features as possible in a single node. It also allows you to choose from the shading types above (flat, curve, or triplanar).
Add the Light Palette from the Asset Browser⧉, found under the ParaNormal Toon Shader > Nodes > Utility Nodes category.
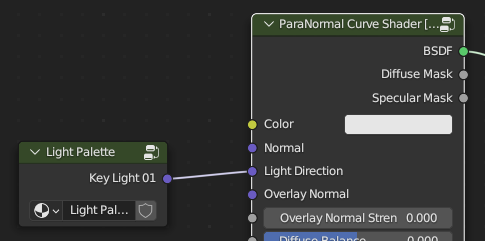
Connect one of the outputs from the Light Palette (“Key Light 01,” or another light source you have already added to the Light Palette) to the Light Direction input on the shader.
Perform Key Light Setup, if you haven’t already.
And that’s it for creating a basic material. From there, you would follow the process under Customizing Base Materials to further customize your new material.
Customizing with Shader Nodes

The included Shaders have been kept lean with a core set of base features to optimize performance. Additional features and stylization can be added using the Shader Nodes.
Though some included nodes are intended for advanced usage, many others have been designed to work like simple building blocks that can easily be chained together to achieve a custom look.
Once you’re comfortable with Customizing Base Materials and Creating New Materials, the next step is to review the Shader Nodes reference to familiarize yourself with the options available. Materials like ParaNOIRmal also provide good examples of real world use.
If you’re not a fan of nodes, or not quite ready to dive in yet, try ParaNormal Uber Shader. Unlike the other shaders, it was designed to pack as many options as possible into one shader. It can’t match the flexibility of building your own style from nodes, but it is very easy to use and provides quite a few options.
Frequently Asked Questions
How do I set up key light(s)?
See Key Light Setup.
How do I manage multiple key lights?
See Switching Key Lights and Multiple Simultaneous Key Lights. You might also be interested in Positional Lights with Multiple Light Objects.
How do I use an HDRI?
If you want to use an HDRI to provide fill light or ambient environment light to reduce the contrast of shadows, you can set up the HDRI normally and this will work as expected.
If you want to use an HDRI as a key light, see Manual Light Direction. Some HDRIs may give better results than others. In general, you want to have a clear primary light direction to get good results with toon shading.
How do I set the light and shadow colors in materials?
That’s the neat thing: You don’t.
While most toon shaders are based around an art direction focused workflow that requires manually setting the color and brightness of lit and shadowed areas in the materials, ParaNormal Toon Shader is based around the same fully light-driven workflow used for most other 3D production.
The lit parts of materials will naturally change brightness and color based on the intensity, proximity, and color of the primary light source (or “key light”).
The shadowed parts will change brightness and color based on the intensity and color of the indirect light in the environment, whether from the World shader or from other nearby light sources. (Remember: If rendering with Eevee, some forms of indirect light require baking an Irradiance Volume⧉.)
So when you want to affect the light and shadow colors, you won’t edit the material, you’ll edit the key light, World, and/or other lights. Just like you would with a “normal,” non-toon shader.
That said, if you want to achieve a particular look or special effect that requires tinting the areas facing toward (lit) or away from (shadowed) the key light, without changing the key light color, take a look at Duotone Color or ParaNormal Uber Shader.
How can I achieve a completely flat look, like classic cel shading?
Subtle gradients from light attenuation are an intended feature of PNTS, but classic cel shading is defined by completely flat blocks of color. Traditional toon shaders, including Basic RGB Toon Shader, will provide that look out of the box.
If you want to approximate this even flatter look, but still want the other benefits of ParaNormal’s light-driven workflow, using a Sun as the key light with no other lights, controlling shadow darkness with the World color, and rendering in Eevee should get pretty good results.
How do I add outlines, halftone, and other stylized ink effects?
Take a look at Customizing with Shader Nodes, then familiarize yourself with Add Ink: Halftone and Add Ink: Outline.
Note that shader outlines do have some limitations, and generally work best for special effects or as a supplement to another primary line art technique like Solidify⧉ inverted hulls or the grease pencil Line Art modifier⧉.
What color management settings should I use?
Whichever you prefer. Because PNTS is designed around Blender’s standard lighting workflow, it is color management agnostic.
Most of the promotional images were created using the Filmic view transform with Medium High Contrast. The AgX or Standard transforms can also look great, depending what you’re going for.
How It Works
What is a Toon Shader?
To understand what sets PNTS apart from standard toon shaders, it’s important to first understand what a toon shader is. The defining feature of toon shaders is what Wikipedia describes⧉ as a “characteristic ‘flat look’, where the shadows and highlights appear as blocks of color rather than being smoothly mixed in a gradient.”
The Standard Approach: Color Quantization
The standard approach to achieving that “flat look” is to use color quantization, where “conventional smooth lighting values are calculated for each pixel and then quantized to a small number of discrete shades.”
In Blender, the most common way to perform color quantization is using the Color Ramp node. This technique, by design, discards nearly all of the lighting data and generates something equivalent to a mask, where everything brighter than an arbitrary value is crushed into white, and everything darker is collapsed into black. (Of course, I’m simplifying this quite a bit for purposes of explanation, and details will vary depending on the specific shader.)
Afterward, there is no way to know what the original brightness was. Since any given pixel is either white or black, there’s no difference between being lit by a small candle flame or a blazing sun. Light intensity, including nuances like falloff and indirect light, and (in most cases) light color are typically completely discarded by this conversion, leaving only direction and range.
This is a useful approach for many NPR art styles, and it does have the advantage that it gives you absolute control over the precise final color of each zone. However, because so much light data is lost, you have to either stick to art styles where that doesn’t matter, or work around this limitation by manually recreating the lost lighting for each material. (For example, adjusting the color of every material based on time of day.)
The ParaNormal Approach: Normal Parallelization
PNTS does not use color quantization at all. Instead, it procedurally parallelizes the surface’s normals. In other words, it achieves a flat look by simply telling the render engine that the surface is flat.
Each shader variant handles this in a slightly different way, but ParaNormal Curve Shader is a great point of reference. It calculates the direction from the surface to the key light, and sets the surface’s normal—the direction the surface is facing—to point directly at the key light, sort of like a billboard.
When you have a flat surface aligned to a light source, the same amount of light hits the entire surface. That means the entire surface renders as a single block of color. It achieves a very similar result to color quantization, but via a fundamentally different method with some very different nuances.
Since no color quantization occurs, there’s no loss of lighting data. We’re not actually messing with the light at all—the light is behaving exactly as it always does, complete with intensity, falloff, indirect light, color, etc.
The result is the look of a toon shader, while using a traditional lighting workflow along the lines of what is typically used for realistic rendering. For example, where a typical toon shader might allow you to fake rim lighting by adding a “rim light” node to a material, with PNTS you would simply add an actual light to the scene and position it to provide rim lighting.
This comes with much the same trade-offs as realistic rendering. Rather than setting an absolute final color in the material that you have to manually change to simulate different lighting, you set a base color that interacts with the lighting in the scene in a natural, realistic way.
If you’re used to working with other toon shaders, this may take some getting used to. But if you’re experienced with realistic rendering and thinking in terms of cinematic lighting, this approach should feel very intuitive.
Shaders
ParaNormal shaders are best thought of as equivalent to built-in shaders like Diffuse BSDF, but optimized for creating cartoons and comics. By adjusting the properties or supplying your own maps, they can easily be used to create a wide variety of looks and materials.
All shaders are compatible with both Cycles & Eevee, unless tagged with a specific render engine.
Standard Sockets
ParaNormal shaders largely share a core set of standardized input & output sockets. Unless noted otherwise under an individual shader’s description, these standard sockets serve the same functions for each.
Inputs
Color (or Base Color): Defines the base color of the material, before lighting is applied.
Normal: Adds a normal map before the normals are parallelized. This primarily impacts the shape of the edge between zones, which can be an effective means of implying surface details. (Optional, defaults to geometry normals.)
Light Direction: A vector pointing in the direction of the key light. Typically you will connect either a Direction to Object or Direction to Sun node into this, but you can also connect a Combine XYZ⧉ node to manually set the direction. (See Using the Light Palette for additional recommendations on managing key lights.)
Override Normal: Blends an unfiltered normal map on top of the parallelized normals. Can be used to add additional shading and surface detail. (Optional.)
Override Normal Strength: Controls the intensity of the Overlay Normal. (Defaults to 0, no overlay.)
Diffuse Panel:
Balance: Adjusts the cut-off between light-facing and back-facing zones. Increase to enlarge the lit zone, decrease to enlarge the shadowed zone. (Defaults to 0, which is evenly balanced, and ranges from -1 to 1.)
Steps: Adjusts the number of steps between light and shadow. Defaults to 2, which provides lit, midtone, and shadowed areas. Decrease to 1 for a more traditional anime look (light and shadow only), or increase for multiple levels of midtones.
Blend: Adjusts the blending at the edges between steps, allowing for either a hard anime-style edge or a softer edge.
Specular Panel:
Strength: Controls the intensity of specular highlights to create glossy or metallic materials. (Defaults to 0, no specular highlights.)
Metallic: Selects glossy or metallic specular highlights. Glossy highlights are neutral (white), so they visually match the color of the light; metallic highlights are based on the Color input. (In real life, materials are either dielectric (fully off) or metal (fully on), not in between.)
Balance: Controls the size of specular highlights. (In real life, semi-gloss materials will have larger but less intense specular highlights, while very shiny materials will have smaller but more intense highlights.)
Steps: Adjusts the number of steps blending between specular highlight and no specular highlight. This can be used to create multiple levels of specular highlight (particularly useful for metallic objects). Defaults to 1, which provides simple, sharply defined highlights.
Blend: Adjusts the blending at the edges between steps, allowing for either a hard anime-style edge or a softer edge.
Outputs
BSDF (or Shader): Standard shader output. Plug this into Material Output or a Mix Shader node. (In Eevee, you can optionally feed this into a Shader to RGB⧉ node if you want to do additional tweaking using an RGB workflow.)
Diffuse Mask: The mask defining the lit & shadowed zones, including any stepped threshold. This can be used when mixing with other shaders, either to handle multiple light sources or for art direction purposes. (For example, giving the shadowed area a blue tint without altering the ambient light.)
Specular Mask: The mask defining the specular highlights, including any stepped threshold. This can be used when mixing with other shaders, either to handle multiple light sources or for art direction purposes.
ParaNormal Curve Shader
This is the core shader. It’s intended for use on all curved surfaces (including characters, organic objects, balls, columns, etc.), and can also work well on flat surfaces (depending on the look you're going for).
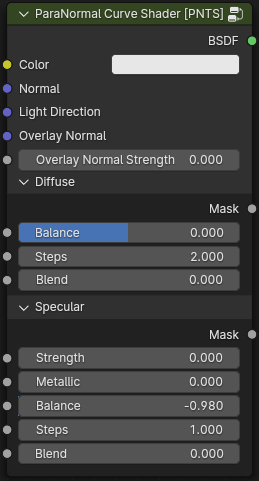
The key feature of this shader is creating zones of parallelized normals (“ParaNormalized”) by snapping them to two angles—facing toward the main light source (lit), or facing away (shadowed)—and blending between these zones using a stepped threshold. ParaNormalized zones are lit as if they’re flat, which creates sharply defined toon shading that naturally takes on the characteristics of the light in the environment.
See Standard Sockets for additional information.
Inputs
Color
Normal
Light Direction
Diffuse Panel
Specular Panel
Override Panel
Override Normal
Override Normal Strength
Override Back Shading Strength: Controls the intensity of the back-facing shading, giving some control over shadow intensity.
Outputs
BSDF
Diffuse Mask
Specular Mask
ParaNormal Flat Shader
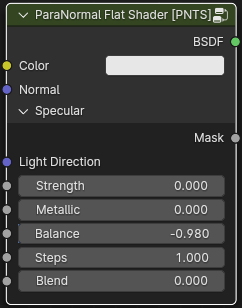
This is a basic shader intended for use only on completely flat surfaces. Since flat surfaces are, by definition, already flat, normal parallelization is skipped. This means these surfaces keep their existing normals, rather than facing directly toward the light source, allowing them to be shaded a little more realistically.
It is basically just Blender’s built-in Diffuse BSDF⧉ with the addition of ParaNormal’s Add Specular Highlights.
See Standard Sockets for additional information.
Inputs
Color
Normal: Accepts a standard normal map. This shader does not parallelize normals.
Light Direction
Specular Panel
Outputs
BSDF
Specular Mask
ParaNormal Triplanar Shader
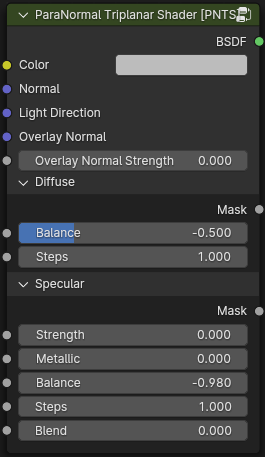
This is a specialized shader for boxy but rounded objects (such as cushions, furniture, beveled countertops, etc.), designed to address how light goes around beveled edges. Normals are snapped to the nearest axis (90° angle), with the snapping threshold adjusted by light angle. (That means it can also be used on angular objects to reduce the number of shading angles, producing an overall “flattening” effect loosely similar to a reduced color palette.)
Works very well when the light angle stays within the snapping range of a single axis (e.g., the light source stays generally above). Transitioning between axes also works pretty well, but does not look quite as smooth as I would like (e.g., the light source moving from above to in front).
See Standard Sockets for additional information.
Inputs
Color
Normal
Light Direction
Diffuse Panel
Steps: This serves a similar purpose for the Triplanar Shader as other ParaNormal shaders, but how it works is a little bit different. With the default setting of 1, normals are snapped to 90° angles. Increasing this value will snap to smaller increments (e.g., 2 will snap to 45° angles). However, currently increasing this value also disables the functionality that adjusts the snapping threshold by light angle.
Blend is not available for Diffuse on the Triplanar shader at this time.
Specular Panel
Override Panel
Override Normal
Override Normal Strength
Outputs
BSDF
Diffuse Mask
Specular Mask
ParaNormal Uber Shader
Most of the shaders are designed to be very lightweight, focusing on a core set of features with modular nodes available to add additional features only when needed.

This shader throws that philosophy out the window. This is a massive shader that combines as many features as possible into one node. If you want to maximize flexibility and performance, you can use the included modular shader nodes to do anything this does and more. But if you don’t like working with nodes or you just want to see a menu with as many options as possible combined in one place, this is the shader for you.
(Probably still very fast compared to any photorealistic shader, but expect this to have slower performance than the other toon shaders provided.)
See Standard Sockets for additional information.
Inputs
Base Color
Normal
Light Direction
Flat / Curve / Triplanar: Switch between the normal parallelization modes of each of the 3 core shader types detailed in this section.
Diffuse Panel
Specular Panel
Overlay
Front Color: Tints the base color of the material, before lighting is applied, for the portions of the surface facing toward the key light.
Front Color Strength: Controls how much of Front Color is mixed into Base Color for the affected areas. (Defaults to 0, no tint.)
Back Color: Tints the base color of the material, before lighting is applied, for the portions of the surface facing away from the key light.
Back Color Strength: Controls how much of Back Color is mixed into Base Color for the affected areas. (Defaults to 0, no tint.)
Normal Overlay (see Overlay Normal)
Normal Overlay Strength (see Overlay Normal Strength)
Outline
Strength: How strongly the outline is mixed into the base shader. Basically its opacity.
Threshold: Controls the outline’s thickness.
Color: Exactly what it sounds like.
Extra
Diffuse Opacity: Decrease to make the material transparent.
Specular Opacity: Decrease to make areas with specular reflections transparent. Keep this higher than Diffuse Opacity to emulate materials like glass.
Emission Color: The color of light emitted by the material. (Defaults to black, which emits no light.)
Emission Strength: The amount of light emitted by the material.
Basic RGB Toon Shader (Eevee)
This is a very basic implementation of the traditional Shader to RGB⧉ style of toon shader (which is not compatible with Cycles), roughly equivalent to what you would have after following a typical “how to make a toon shader for Blender” tutorial.
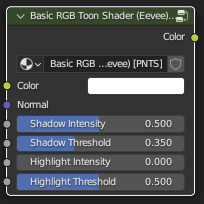
It allows defining a base color, and then generates a shadow map and a highlight map using color quantization, which are applied to darken and lighten areas of the base color, respectively. See the section on color quantization for more details on how this type of shader works.
It is mainly included here for reference, but feel free to use it if you find it useful.
Inputs
Color
Normal: This shader does not parallelize normals, so this behaves exactly as in any standard shader.
Shadow Intensity: How dark the shadows are.
Shadow Threshold: How dark an area has to be to be included in the shadow map.
Highlight Intensity: How bright the highlights are.
Highlight Threshold: How bright an area has to be to be included in the highlight map.
Outputs
Color: Because this shader is based on Shader to RGB, it outputs RGB color data. This can be further manipulated with other nodes that allow working with color, or plugged into the Material Output.
Separate Worlds Shader
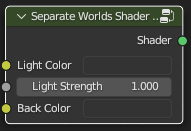
A basic World shader that supplies separate colors to the render background and the environment light, mainly intended for stylized effects.
Controlling the background and light separately allows you to, for example, render a character against a brightly colored background without washing out the shadows, or adjust the light level from an HDRI without changing the visual appearance of the HDRI in the background of the scene.
Inputs
Light Color: The color of the environment light.
Light Strength: The strength of the environment light.
Outputs
Shader
Unlit Shader
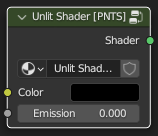
Directly outputs an unlit color, similar to the built-in Emission shader, but does not contribute light to the scene by default. Intended for line art and other ink-style effects.
Inputs
Color: The color that will be output. No lighting is applied.
Emission: The amount of indirect light contributed to the scene by the material. Set this to 1 for normal contribution; increase above 1 for a glowing/emissive effect. (Defaults to 0.)
Outputs
Shader
Vector Visualization Shader
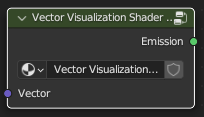
This is a utility shader intended for debugging purposes while working with shader nodes. Plug any vector into it and it will color the material using the Vector to Color node.
Inputs
Vector: A vector to visualize.
Outputs
Emission: Shows the vector converted to colors.
Materials
Currently, a handful of pre-made materials are included. This library will likely grow in the future.
Base Materials
The base materials are intended to be copied to new materials as a base to start from. When in doubt, Base Matte generally makes a good default starting point for most materials.
Base Matte
Base Semi-Gloss
Base Gloss
Base Metal
Base Glass
Style & FX Materials
Line Art (Inverted Hull)
A black material that is unlit, backface-culled, and casts no shadows. Everything you need when creating inverted hull line art with the Solidify⧉ modifier.
ParaNOIRmal
A stylized, high-contrast black & white material inspired by noir comics like Sin City. Provides a good example of how Duotone Color can be used to achieve stylized effects.
Shader Nodes
All shader nodes are compatible with both Cycles & Eevee, unless tagged with a specific render engine.
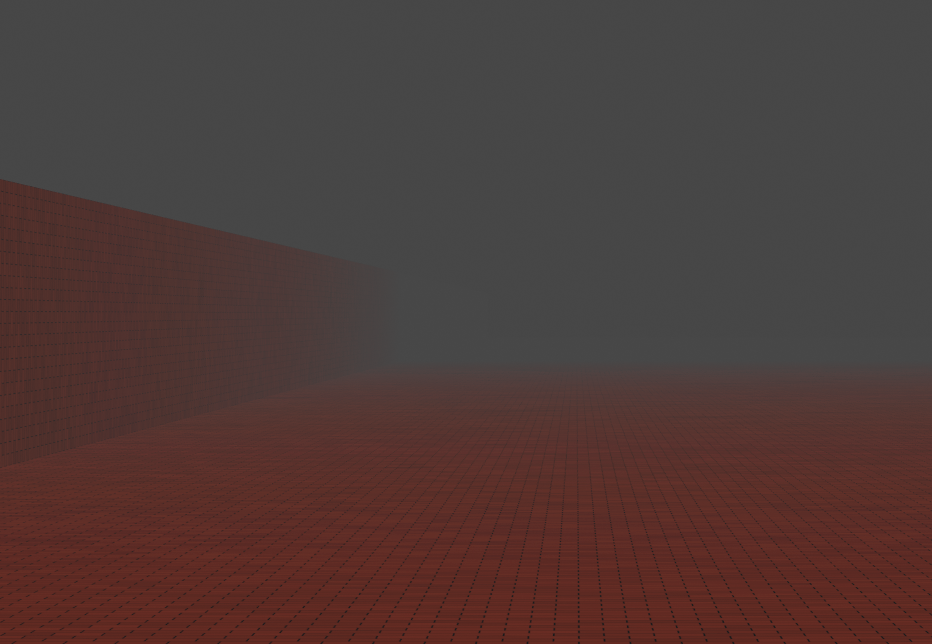
Add Distance Fog
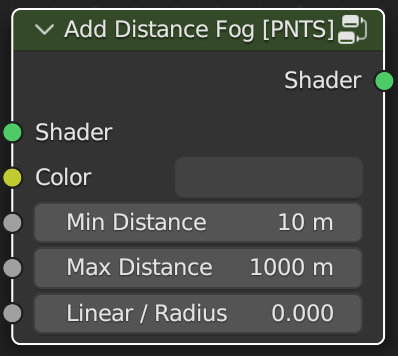
Adds an effect to make a shader appear to fade into fog the further away from the camera it gets.
Inputs
Shader
Color
Min Distance: The distance from the camera where the fog shader begins to fade in. (Default: 10m.)
Max Distance: The distance from the camera where the fog shader fully replaces the original shader. (Default: 1000m, which is the default clipping distance for Blender's camera.)
Linear / Radius: How the distance from the camera is calculated. “Linear” is relative to the camera plane, which results in fading to fog in a straight line across the rendered image. “Radius” is relative to the camera’s position point, which results in fading to fog in a way that appears to wrap around the viewer. (Default: Linear.)
Outputs
Shader
Add Ink: Halftone
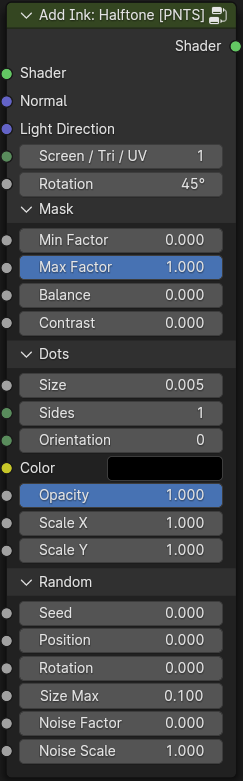
Adds halftone shading into a shader to darken shadowed areas, using the Unlit Shader to emulate the look of ink.
Inputs
Shader
Normal
Light Direction
Screen / Tri / UV: Choose from 3 mapping modes: Screen Space Mapping, Triplanar Mapping, or UV. (Default: Screen.)
Rotation: Control the angle of the halftone effect. (Default: 45°.)
Mask
Min Factor: Set a minimum amount of halftone to be added, even in light-facing areas. (Default: 0.)
Max Factor: Set a maximum amount of halftone to be added, even in areas facing away. (Defaults to 1, which appears as a solid color.)
Balance: Adjusts the cut-off between light-facing and back-facing zones. Increase to enlarge the lit zone, decrease to enlarge the shadowed zone. (Default: 0.)
Contrast: Adjusts the sharpness of the transition into halftoned areas. (Default: 0.)
Dots
Size: The maximum size of the dots that make up the halftone shading, as well as the space between them.
Sides: How many sides the dots will have. 1 is a circle, 2 is a spindle, 3 is a triangle, 4 is a square, and so on.
Orientation: For dots with multiple sides, whether a flat side or a corner should be aligned to the Y axis. Has no effect on circles.
Color
Opacity
Scale X: Stretch or squash the dot along the X axis. In addition to changing the proportions of the dot shape, if turned up high enough, the dots will run into each other and create a basic hatching effect.
Scale Y: Stretch or squash the dot along the Y axis. In addition to changing the proportions of the dot shape, if turned up high enough, the dots will run into each other and create a basic hatching effect.
Random
Seed: A number used to get different random outputs. (Default: 0.)
Random Position: How much to randomize the position of the dots. (Default: 0.)
Random Rotation: How much to randomize the rotation of the individual dots. The effect from this is not visible when using circles. (Default: 0.)
Random Size Max: The maximum amount that can be randomly added to the size of each dot. (Default: 0.)
Noise Factor: How much noise to mix into the shape of each dot.
Noise Scale: The scale of the noise texture mixed in by Noise Factor.
Outputs
Shader: The input shader with this effect added.
Add Ink: Outline

Adds an outline on top of a shader, using Unlit Shader to emulate the look of ink. This is a Fresnel-based effect, so it has the same limitations described under Fresnel Outline Mask.
Inputs
Shader
Normal
Threshold: Increases the thickness of the outline. (Default: 0.5.)
Color
Opacity: The opacity of the outline. Reduce this to allow some of the original shader to show through the lines. (Default: 1, fully opaque.)
Outputs
Shader: The input shader with this effect added.
Add Reflection

Adds realistic reflections to a shader. (If rendering in Eevee, this requires Screen Space Reflections to be enabled in Render Properties.)
Works great for flat surfaces like ballroom floors, bathroom mirrors, etc. Be aware that reflections distort along the physical shape of the mesh, so using this on curved objects may counteract attempts to make them look flat.
Using Planar Factor to Reduce Distortion
The Planar panel provides inputs that allow parallelizing the normals to face toward a chosen direction. This helps reduce distortion of the reflection caused by curved surfaces, but it has limitations.
Planar Factor works well to get cleaner reflections on an uneven surface that is still more or less flat, such as ocean waves. However, the physical shape of the mesh will still influence the reflection to some degree, and surfaces that stray too far from facing the Planar Normal will show undesirable artifacts.
Due to these limitations, Planar Factor is not very reliable for flattening the reflections on rounded objects like doorknobs, characters, etc. (Though it might work in some cases with very carefully selected camera angles.) For round objects, it will generally be necessary to either accept round reflections, or omit Add Reflection entirely.
Inputs
Shader
Mask: Limits where the effect will be added.
Roughness: Blurs the reflection, as in PBR. Default: 0 (no blur).
IOR: The strength of the reflection, as in PBR.
Planar:
Factor: How much to override the geometry normal with Planar Normal. Default: 0 (off).
Normal: The direction the Planar reflections should be facing. Default: Up.
Outputs
Shader: The input shader with this effect added.
Add Specular Highlights

Add specular highlights to the input color based on the light direction and the input specular properties. This is a core node used in most ParaNormal shaders. For details on its properties, see Standard Sockets.
Inputs
Color
Normal
Light Direction
Strength
Metallic
Balance
Steps
Blend
Outputs
Color: The input color with this effect added.
Mask: The mask defining where the specular highlights are added.
Blur Coordinates

Randomly scatters the Vector coordinates for a texture to create a “blurring” effect. The effect is a little noisy, but depending on the texture and your overall style, this may not be noticeable or may pass for a dithering effect. When noise is an issue, one option is to clean it up in the compositor using the Denoise⧉ node.
Inputs
Vector: The shading position, usually from a Texture Coordinate⧉ node.
Factor: How much to blur the texture.
Outputs
Vector: Filtered texture coordinate. Plug this into the Vector input of the texture you want to blur.
Cross Axes
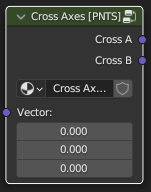
Given an input vector, returns two normalized vectors that cross it perpendicular to each other. In other words, if you input Y, this will give you reasonable values for X and Z.
Inputs
Vector: The input vector.
Outputs
Cross A: A normalized vector representing a cross-axis perpendicular to the input Vector (e.g., if the input Vector were Y, this might be X).
Cross A: A normalized vector representing a cross-axis perpendicular to both the input Vector and Cross A (e.g., if the input Vector were Y and Cross A were X, this might be Z).
Default Value
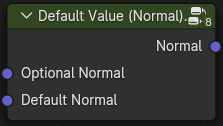
Fallback to a default input if no input is provided. Since Blender node groups have built-in support for static default values, the main purpose of this node is to default to another node that provides a dynamic value (e.g., Normal output from Geometry⧉, a mask node, etc.).
Internally, this works by having a built-in default value for the Optional input that is an illegal value for the input type. Since no valid input will ever have that value, this makes it possible to determine whether any input has been provided, and fallback to the Default input when there is none.
There are three variants: Color, Unsigned (for any unsigned number), and Normal.
Inputs
Optional: The primary input.
Default: A fallback input to use when no Optional input is provided.
Outputs
Vector: A normal vector. Input, if supplied; otherwise, Default.
Direction Mask

Generates a mask based on whether Normal is facing Direction at any given point.
This node is an important part of how the ParaNormal shaders work. It determines which points are facing the key light, and which aren’t. You’ll see Balance and Steps controls used by most shader variants.
Inputs
Normal: A normalized vector. Defaults to Geometry⧉ Normal.
Direction: A normalized vector to compare Normal to.
Balance: Adjusts how closely Normal has to match Direction to be masked. Increase to enlarge the masked zone, decrease to shrink it. (Defaults to 0, which is evenly balanced between masked/unmasked. Ranges from -1 to 1.)
Steps: Adjusts the number of steps blending between the mask fully on (facing Direction) and fully off (facing away). Defaults to 1, which provides only fully masked/unmasked.
Blend (see Standard Sockets)
Outputs
Mask: The final stepped mask.
Smooth: The original smooth mask.
Direction to Object

Get a normalized vector pointing to an object. See Positional Lights for additional details on usage.
Inputs
Coordinate: The Object output from a Texture Coordinate⧉ node.
Outputs
Direction: A normalized vector pointing to the object.
Direction to Sun
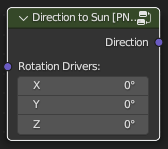
Get a normalized vector pointing toward the global light from a Sun light. See Sun Lights for detailed instructions on usage.
Inputs
Rotation Drivers: The XYZ fields for this input need to be assigned drivers pointing to the Sun object’s rotation.
Outputs
Direction: A normalized vector pointing toward the global light.
Duotone Color
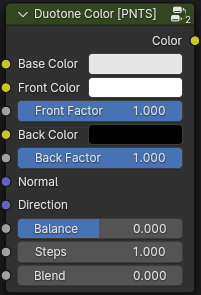
Mixes Front Color and Back Color into an input Color, based on whether each point on the surface is facing toward or away from Direction.
If Front and Back Factor are turned all the way up, they will completely replace the input Color and this can be used without one. At lower factors, this can be used to add subtle tints.
Inputs
Color: An input color to mix into.
Front Color: The color to add to areas facing toward Direction.
Front Factor: How much Front Color to add.
Back Color: The color to add to areas facing away from Direction.
Back Factor: How much Back Color to add.
Normal: A normalized vector. Defaults to Geometry⧉ Normal.
Direction: A normalized vector to compare Normal with to determine whether Front Color or Back Color should be applied.
Balance: The threshold between Front and Back Color.
Steps: Adjusts the number of steps to transition from Front to Back Color. Defaults to 1.
Blend (see Standard Sockets)
Outputs
Color: The input Color with Front and Back Colors mixed in.
Fresnel Outline Mask
A simple mask for generating outlines based on the angle between the surface normal and the viewing direction, which uses Blender’s Fresnel⧉ node under the hood. Fresnel-based effects can be a little tricky to work with, and there are better techniques available for your primary line art, but this node can be a great supplement to other line art techniques and works well for adding special effects such as fake rim lights.
In general, Fresnel-based effects work well on curved surfaces, but tend to cause undesirable artifacts the closer to flat a surface becomes. Getting good results when using this node on objects that have both curved and semi-flat areas—such as characters—may require some finesse.
Good results can usually be achieved by keeping the threshold value low, which provides a thin outline. If this is not sufficient to prevent artifacts on a particular mesh, or if a thicker outline is desired, it may be necessary to combine this with another masking technique (such as a hand-painted mask) to mask out the flatter areas of the mesh.
Inputs
Normal
Threshold: Increases the outline’s thickness.
Outputs
Mask: A value of 0 or 1, with 1 indicating the outline.
Halftone Mask
Procedurally generates a mask for adding halftone effects.
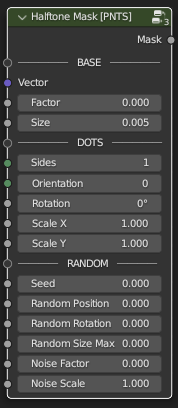
Inputs
Base
Vector
Factor: The size of each dot, relative to filling the space between dots.
Size: The distance between the dots.
Dots
Sides: How many sides the dots will have. 1 is a circle, 2 is a spindle, 3 is a triangle, 4 is a square, and so on.
Orientation: For dots with multiple sides, whether a flat side or a corner should be aligned to the Y axis. Has no effect on circles.
Rotation: The angle of each dot. The effect is not really visible on circles.
Scale X: Stretch or squash the dot along the X axis. In addition to changing the proportions of the dot shape, if turned up high enough, the dots will run into each other and create a basic hatching effect.
Scale Y: Stretch or squash the dot along the Y axis. In addition to changing the proportions of the dot shape, if turned up high enough, the dots will run into each other and create a basic hatching effect.
Random
Seed: A number used to get different random outputs. (Default: 0.)
Random Position: How much to randomize the position of the dots. (Default: 0.)
Random Rotation: How much to randomize the rotation of the individual dots. The effect from this is not visible when using circles. (Default: 0.)
Random Size Max: The maximum amount that can be randomly added to the size of each dot. (Default: 0.)
Noise Factor: How much noise to mix into the shape of each dot.
Noise Scale: The scale of the noise texture mixed in by Noise Factor.
Outputs
Mask: The value 1 for dots, 0 for the space between dots.
Light Palette

The Light Palette is an empty node group that you are intended to edit to store references to the key light(s) in the scene. See Using the Light Palette for detailed instructions.
Monk Skin Tone Scale

A quick palette based on a 10-shade scale of skin tones devised by Dr. Ellis Monk in order to improve the inclusivity of computer vision systems. Not really intended for use in art, but it’s a useful point of reference.
Inputs
Tone: The Monk Skin Tone Scale ranges from 1 (lightest) to 10 (darkest). (This node defaults to 5.)
Gamma: Adjusts the gamma to match a color space, or just to tweak the skin tone.
Outputs
Color: The selected skin tone.
Polar Coordinates

Maps X to the circumference around a circle, and Y to the distance from the centerpoint. Also supports repeating and mirroring coordinates, making it easy to create circular patterns and kaleidoscopic effects.
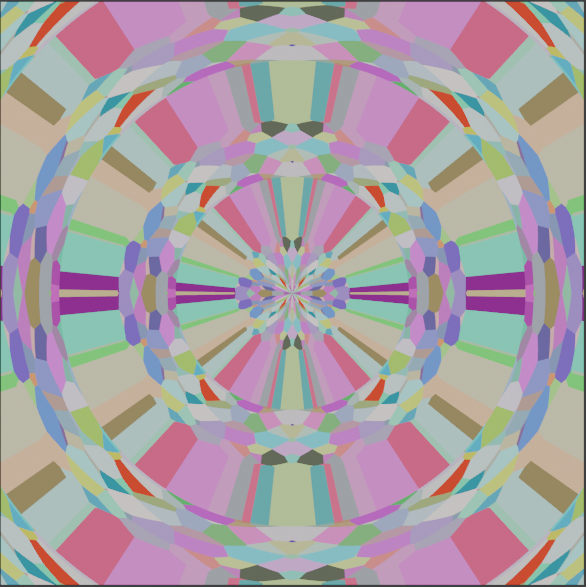
Inputs
Vector
Rotation
Scale X: Scale around the circumference. (Even numbers seem to provide the best results.) Default: 2.
Scale Y: Scale of the distance from the centerpoint. Default: 1.
Repeat Panel
Repeat X: Number of times to repeat the coordinates around the circumference. Default: 1.
Repeat Y: Coordinates will be repeated along the distance from the centerpoint. Default: Disabled.
Repeat Y Length: Distance between repetitions along the Y axis (when Repeat Y is enabled). Default: 1.
Mirror X: Repetitions along the X axis (if any) will be mirrored. Default: Disabled.
Mirror Y: Repetitions along the Y axis (if any) will be mirrored. Default: Disabled.
Outputs
Vector
Quick Mapping

Quick access to the most frequently useful coordinate and mapping options in one simplified node. It’s intended to replace both the Texture Coordinate⧉ and Mapping⧉ nodes for the majority of simple use cases.
Inputs
Screen / Tri / UV: Choose from 3 mapping modes: Screen Space Mapping, Triplanar Mapping, or UV. (Default: Screen.)
X: Offset the position of the texture on the X axis.
Y: Offset the position of the texture on the Y axis.
Rotation: Rotate the texture around its center.
Scale: Adjusts the scale of the texture.
Outputs
Coordinate: A texture coordinate vector.
Repeat Coordinates

A powerful tool for repeating portions of a texture using Voronoi mapping. Use this to filter the vector output from a Texture Coordinate⧉ node before feeding it into a texture.
Inputs
Vector
Seed: A number used to get different random outputs. (Default: 0.)
Tile
Repeat X: Toggles whether to repeat coordinates on the X axis.
Repeat Y: Toggles whether to repeat coordinates on the Y axis.
Size: The size of the repeating tiles.
Randomness: Blends between repeating in a grid or in a randomized pattern.
Image
Size: The size of the texture that appears within each tile.
Rotation: The rotation of the texture that appears within each tile.
Random Offset X: Randomly offsets the position of the texture on the X axis.
Random Offset Y: Randomly offsets the position of the texture on the Y axis.
Random Rotation: Randomized the rotation of the texture.
Random Size Max: The maximum amount that can be randomly added to the size of each texture.
Outputs
Vector
Round to Multiple

Rounds a value up or down to the nearest multiple of another number. This allows doing things like rounding to the nearest even number (multiple of 2), or what’s commonly referred to as the nearest “round” number (multiple of 5 or 10).
The built-in Math⧉ node provides a couple similar functions that may make this node appear redundant at first glance. One is Round, but that only rounds a fraction to an integer (e.g., <0.5 to 0 or >0.5 to 1). The other is Snap, which is very close, but only rounds down.
Inputs
Value: Literally any number.
Multiple: Another number to round to a multiple of.
Outputs
Value: The nearest multiple of Multiple to Value.
Round Vector to Increment
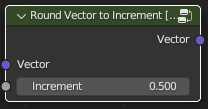
Rounds each element of the input Vector to the nearest multiple of Increment. When used on a normalized vector, this essentially restricts the valid vector angles, and snaps the vector to the nearest valid angle. When used on a location vector, this is essentially grid snap.
Inputs
Vector: The input vector.
Increment: Vector will be snapped to the nearest multiple of this number. Basically the distance between the snap points.
Outputs
Vector: The rounded vector.
Screen Space Mapping

This node can be used in place of Texture Coordinate⧉‘s Camera output to map a texture in two-dimensional screen space, instead of three-dimensional world space. This prevents distortion that can occur when using the Camera coordinates directly.
Inputs
Depth: Blends the third-dimension back into the coordinate system. A small value can reintroduce some sense of depth without noticeable distortion. When turned all the way up, this is just Camera coordinates. (Default: 0.)
Outputs
Vector
Shape Mask
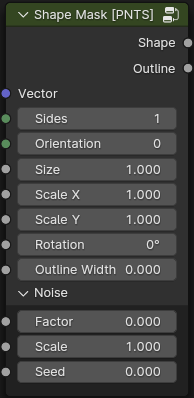
Procedurally generates a mask for a 2D shape primitive, and an optional mask for an outline around the shape.
Inputs
Vector: Shading coordinate.
Sides: Number of sides the shape has. 1 is a circle, 2 is a spindle, 3 or more results in standard polygonal shapes (triangle, square, etc.).
Orientation: Whether the shape’s sides or points are aligned to the coordinate axes. Default: 0 (sides).
Size: Size of the shape. Because scale can vary depending on texture mapping, the correlation between the number and visual size may vary. However, it is calibrated so that when in object coordinates at default scale, it is in Blender’s default units (meters).
Scale X: Scale the shape on the X axis. This is the actual scale of the shape, not of the mapping—e.g., increasing from 1 to 1.5 makes the shape 50% bigger.
Scale Y: Scale the shape on the Y axis. This is the actual scale of the shape, not of the mapping—e.g., increasing from 1 to 1.5 makes the shape 50% bigger.
Rotation: The shape’s rotation.
Outline Width: Width of the outline mask around the outside of the shape. Does not affect the shape mask. Default: 0.01.
Noise:
Noise Factor: How much noise to apply to distort the shape.
Noise Scale: Make the noise distortion effect larger or smaller.
Noise Seed: A seed for the noise. Change this to get different noise patterns.
Outputs
Shape: The shape mask. A value of 0 outside the shape, 1 inside.
Outline: The outline mask. A value of 1 for the outline, 0 everywhere else.
Smooth Normal
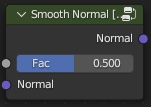
As the name suggests, the intention of this node is to smooth out a surface’s normals, which can be important to get cleaner toon shading.
In the current implementation, this blends between the actual geometry normals and the normals of a sphere centered on the object’s origin. It sort of works, but it’s not an ideal solution.
This node will probably be reworked in an upcoming version.
Inputs
Fac: The strength of the smoothing effect.
Normal: The input normal.
Outputs
Normal: The “smoothed” normal.
Softstep
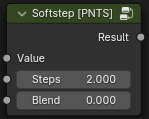
Maps a normalized value range to stepped values, with adjustable soft edges between steps.
Essentially a Map Range⧉ node with all From/To Min/Max inputs set to 0/1, Data Type set to Float, and Interpolation Type set to Stepped Linear. However, unlike Map Range with Stepped Linear interpolation, Softstep allows some blending between the steps for softer edges.
See Standard Sockets for more information.
Inputs
Value: The starting value, which should be in the range 0-1.
Steps
Blend
Outputs
Result: The mapped value.
Specular Mask

Generates a mask based on how specular light reflects off of a surface.
Inputs
Normal: A normalized vector.
Direction: A normalized vector representing where light is coming from.
Balance: Adjusts the threshold of which areas are masked. (Defaults to 0. Ranges from -1 to 1.)
Steps: Adjusts the number of steps blending between the mask fully on (specular highlights) and fully off (no highlights). Defaults to 1, which provides only fully masked/unmasked.
Blend (see Standard Sockets)
Outputs
Mask: The final stepped mask.
Switchboard x4 (Vector)
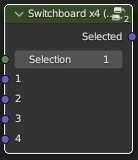
This node allows easily switching between up to 4 different vector inputs. Each vector input is numbered from 1-4. Simply set the Selection control to the input number you want to use.
Primarily intended for switching between multiple key lights, but undoubtedly has other uses.
Inputs
Selection: Which input to pass through, from 1 to 4.
1, 2, 3, 4: The input vectors to select from.
Outputs
Selected: The selected input vector.
To Absolute Axis
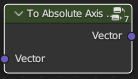
Snaps the input Vector to the nearest absolute axis (e.g., positive X, negative X, positive Y, etc.).
Inputs
Vector: Input vector.
Outputs
Vector: The normalized vector of the nearest absolute axis to the input.
To Closest Vector

Compare the input Vector with two vectors A & B, and snap it to whichever one is the closest match.
Inputs
Vector: Input vector.
A: A vector to compare to.
B: Another vector to compare to.
Outputs
Vector: Either A or B, depending which was the closest match for the input.
To Glass
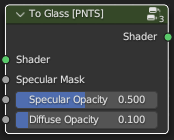
Filter a shader to make it transparent while preserving specular reflections. Designed for glass and similar materials.
Note that in Eevee transparency requires also setting the material’s Blend Mode⧉ appropriately.
Inputs
Shader: The input shader.
Specular Mask: A mask separating out the specular highlights. For ParaNormal shaders, this will typically be output from the shader being filtered.
Specular Opacity: The opacity for specular highlights.
Diffuse Opacity: The opacity of non-highlighted areas.
Outputs
Shader: The shader with transparency.
To Relative Axis
Similar to To Absolute Axis, but accepts an additional input representing a Forward vector (which you could think of as Y). It calculates valid cross-axes (i.e., X & Z) relative to Forward, then snaps the input Vector to the Forward-relative axis it’s closest to.
If you imagine a cube that’s been tilted so that its front quad faces in the direction of Forward, each of its other quads would face in the direction of one of the relative axes.
Inputs
Vector: The input vector.
Forward: A vector to calculate the axes relative to.
Outputs
Vector: The normalized vector of the nearest relative axis to the input.
To Relative Axis (Radial)

Like To Relative Axis, this accepts an input representing a Forward vector (which you could think of as Y), and calculates valid cross-axes (i.e., X & Z) relative to Forward, then snaps the input Vector to the Forward-relative axis it’s closest to. However, this node uses different thresholds for snapping to the forward and back directions in order to give the cut off a rounded shape.
If you imagine a cylinder that’s been tilted so that its top faces in the direction of Forward, its sides would roughly align to the relative cross-axes.
Inputs
Vector: The input vector.
Forward: A vector to calculate the axes relative to.
Forward Threshold: The cut off between snapping to Forward and snapping to the calculated X or Z axes.
Back Threshold: The cut off between snapping to backward and snapping to the calculated X or Z axes.
Outputs
Vector: The normalized vector of the nearest relative axis to the input.
To Weighted Axis
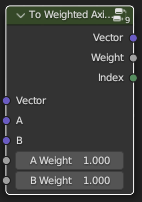
Compare the input Vector with two axes A & B, and snap the input to whichever one is the closest match after adjusting for their relative weights.
Inputs
Vector: Input vector.
A: An axis to compare to.
B: Another axis to compare to.
A Weight: The relative importance of A. If this is higher than B Weight, a larger range of input vectors will snap to A.
B Weight: The relative importance of B. If this is higher than A Weight, a larger range of input vectors will snap to B.
Outputs
Vector: The input vector, realigned to the closest of either positive/negative A or B, depending which was the closest match for the input after adjusting for weighting.
Triplanar Mapping
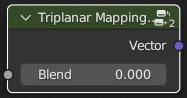
This node can be used in place of Texture Coordinate⧉ to project a texture onto an object from each of the XYZ axes. In many cases this can eliminate the need for UV mapping, reduce distortion, and help to create seamless texture coverage.
Inputs
Blend: How much to blend the seams between axes.
Outputs
Vector
Vector to Color

This utility node allows representing vectors visually as colors, which can be useful during shader development, especially when adjusting normals (which are vectors).
Vectors are collections of 3 numbers ranging from -1 to 1 (X, Y, Z). Colors are collections of 3 numbers ranging from 0 to 1 (R, G, B). This node remaps the numbers that make up a vector into the range that makes up colors, so that every axis has a unique color. (Without remapping, all vectors on the negative axes appear black.)
Inputs
Vector: The input vector.
Output
Color: A color representing the input Vector.
Helpers
Coordinate Marker
Marks a position in your scene in a way that can be easily referenced using the Texture Coordinate⧉ shader node.
When referencing an object directly, rotating or scaling the object impacts the coordinates, which is often undesirable. A Coordinate Marker copies the object’s position, but can’t be rotated or scaled, allowing you to get consistent coordinates.
Object coordinates can be used for many things in shaders, but you’ll often use them with the Direction to Object node.
Usage
Add a Coordinate Marker to the scene from the Asset Browser. Make sure you have the Coordinate Marker selected.
Go to Constraint Properties.
Under the Copy Location constraint, pick the object you want the coordinates of (usually a light) as the Target.
In the Shader Editor, you can now add a Texture Coordinate node and pick the Coordinate Marker in the Object field (at the bottom of the node).
Starter Scene
See First Steps: Starter Scene for details.
Reference Scenes
A number of reference scenes are included in the .blend file, which can serve as examples of basic usage for the included assets. To access the reference scenes, simply open the .blend file in Blender and click the “Reference Scenes” tab.
In the outliner, you’ll see a list of collections. Each collection contains a different reference scene. Simply enable/disable collections as needed and have a look around, paying particular attention to the Shader Editor⧉.
Known Issues
Blender 4.2:
Images may be noisy when rendering in EEVEE on Blender 4.2 (aka “EEVEE Next”). This issue is under review. Currently, the recommended workarounds are to either: use Blender 4.1, or use Cycles, or post-process the render with third-party denoising software.
Repeat Coordinates:
Image Rotation off-center when used in combination with Random Offset.
Shape Mask:
Scaling may cause the shape to suddenly stretch more than intended when crossing certain thresholds.
Triangle size is not consistent with other shapes.
License
Except where otherwise noted, all content included with this product is licensed for use only under the terms of the Blender Market Standard Royalty Free License. The license is available online at:
https://support.blendermarket.com/article/49-standard-royalty-free-license⧉
For your convenience, the terms of the license are reproduced below.
Choose a product version:
-
$39.99 Professional License
1 user. Freelancer, hobbyist, or single seat at a studio.
-
$99.99 Studio License
Unlimited users at a single studio.
| Sales | 200+ |
| Customer Ratings | 3 |
| Average Rating | |
| Dev Fund Contributor | |
| Published | about 1 year ago |
| Blender Version | 4.2, 4.1, 4.0, 3.6 |
| Render Engine Used | Cycles, Eevee, Freestyle |
| License | Royalty Free |
Have questions before purchasing?
Contact the Creator with your questions right now.
Login to Message