Node Editor Timeline
 Blender Add-ons


Installation
Download the correct version of the add-on for your blender version. The Blender version is always in the name of the add-on. If you cannot find your blender version, simply use the next lower version. For example, if you are using blender 4.4, but you can only find blender 4.3 in the downloads, this means that no updates were necessary for blender 4.4 and you can use the version for 4.3 for blender 4.4.
Leave the .zip file as it is. Do not unpack it!
Now you can simply put the .zip file into your open blender window. Confirm that you want to install it and that's it.
Here you can see it:
Uninstall
To uninstall the add-on, follow the steps in the following image:
Upgrade
If you want to install a new version of the add-on, uninstall the add-on first, restart blender and then install the new version of your add-on.
It is very important that you restart blender, otherwise there may be problems and crashes because various things are still saved in blender.
Nodes Distances
In the following pictures, the parameter is underlined in one color and then in the same color a marker in the node editor, which shows what the parameter is used for.


Minimum and maximum frames is responsible for the time distance between the timeline nodes. For example, if the minimum is 10 and the maximum is 20, a random value between 10 and 20 frames will be the duration between the timeline nodes.
If you do not want to have a random value, you can either simply enter the same value for minimum and maximum, or you can use markers as explained in the next point.
The “Nodes Distances” define the spatial distance of the nodes, i.e. how far apart the nodes should be in the Nod Editor.
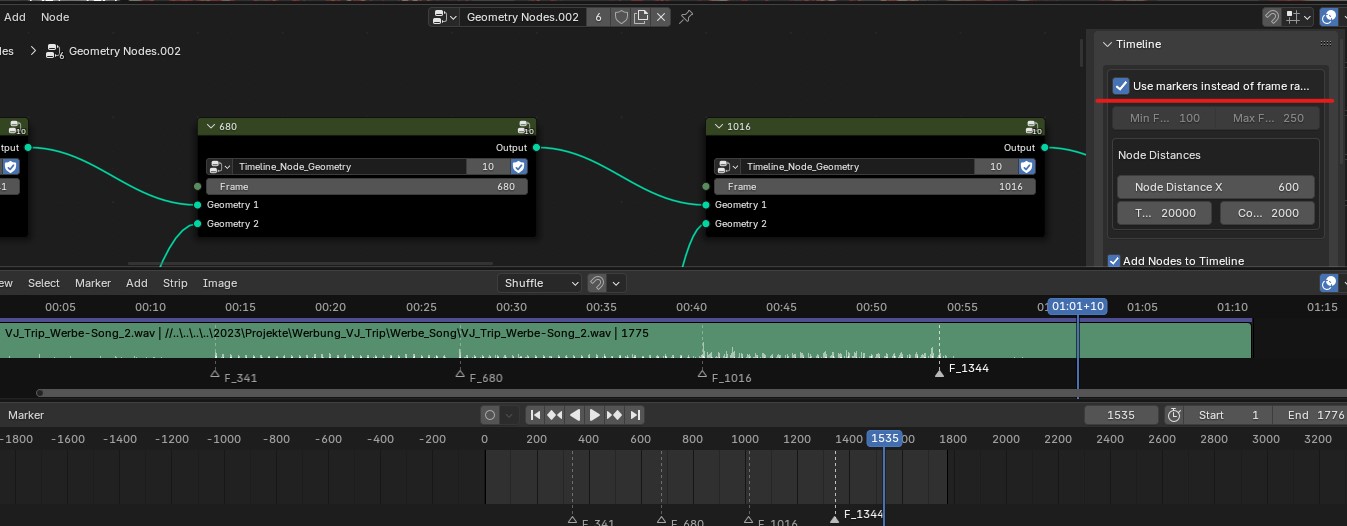
Activate “Use markers instead of frame range” so that your set markers are taken into account instead of a random frame number.
This is a great way to make videos so that every timeline you create has the same cuts. In addition, you can determine the rhythm of the cuts yourself, for example in a music video.
Timeline Types
Add Nodes to Timeline:
The node groups, which are located in the node editor, are duplicated and randomly attached to the timeline. This is a great feature if you want to make an audio visualizer for example. The advantage: You can give each node its own parameter settings.

Add Nodes to Timeline and Only Attach Nodes:
Nodes are not duplicated, which results in faster performance. In addition, you have fewer nodes to worry about.
The "Add Nodes to Timeline" option is disabled:
This creates an empty timeline. You can link your nodes yourself.

Timeline Options

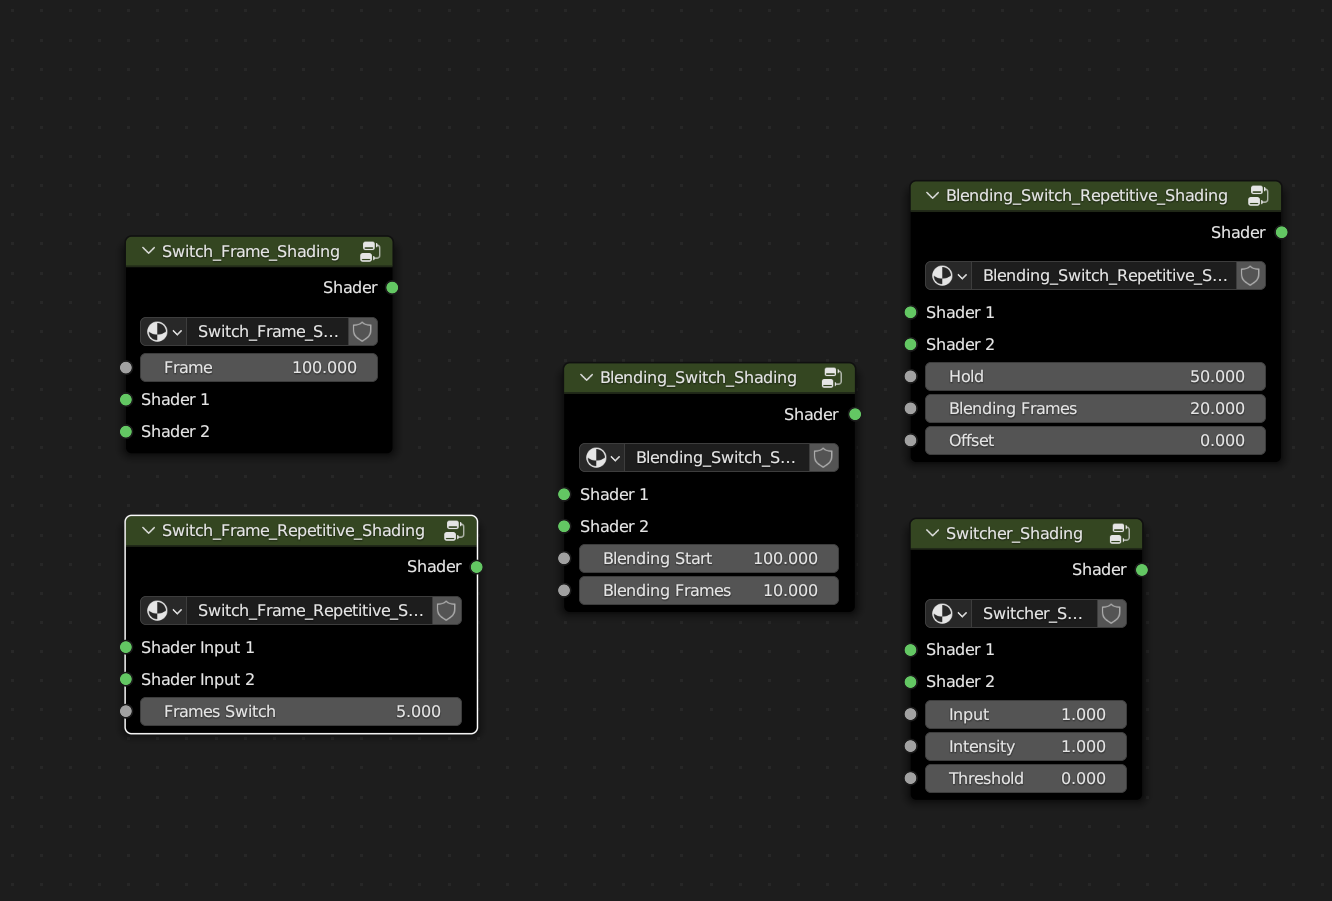
Switch Nodes
Frame Switch:
The frame at which input 1 is changed to input 2 can be specified.
Frame Switch Repetitive:
It can be specified after how many frames the input is changed. It is always changed back and forth between input 1 and input 2.
Blending Switch:
The start of the crossfade can be specified and how long it will be crossfaded.
This node is not present in the geometry nodes because geometry cannot be blended.

Blending Switch Repetitive:
You can specify how long Input 1 or Input 2 is held, how long it is then crossfaded, and an offset. It is continuously faded back and forth between input 1 and 2 with the entered parameters.
This node is not present in the geometry nodes because geometry cannot be blended.
Switcher:
This node was originally made to switch between inputs with music.
It mixes very well with the Audio Importer nodes.
The input is, for example, music, or frames, or whatever. The intensity multiplies the input if a very weak signal is used. And the Threshold specifies when to switch between the inputs. 
Performance Guide
If performance is slow, it's probably
due to Eevee's shading. Just switch the viewport shading to solid and
everything will run fine.
You can experiment with the Timeline Options. If "Highlight active Frame Switch Node" and "Mute Unused Shading Nodes" is set to inactive, the add-on does nothing. However, the switches still work. They are just no longer highlighted.
The more nodes there are, the harder blender has to work.
But to have massively less nodes, you can activate "Only Attach Nodes", so that the nodes are not duplicated, but only linked.
The
Node Editor always needs power, even if the Node Editor Timeline Add-on
is not active. To test if the performance is slow because of the
visible nodes, you can simply hide the nodes by selecting another object
or changing the screen.
The add-on only takes care of visible nodes
for the best performance. Unless there are timelines in the shading and
"Mute unused shading nodes" is active. However, this does not need much
power.
Have questions about this product?
Login to message
| Dev Fund Contributor | |
| Published | over 1 year ago |
| Software Version | 4.4, 4.3, 4.2, 4.1, 4.0, 3.6, 3.5, 3.4, 3.3 |
| License | GPL |
Discover more products like this
Shading Timeline Node Timeline Visualizer Geometry Nodes Timeline timeline bfcm23 Shader Timeline spring24 Compositing Timeline Node Editor Timeline