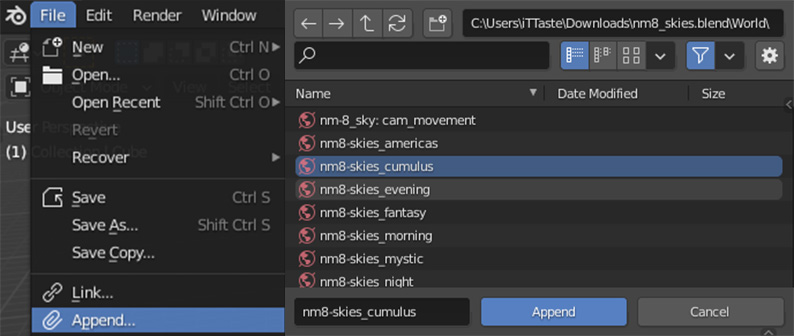
The Product contains two blend files from which you can append the world backgrounds: a file for Cycles and one file for Eevee.
Go to File/Append/ and locate the blendfile "nm8_skies.blend". Go to its "world" folder, to choose from the presets.


Once you appended the world-preset you can apply it to your scene in the world-panel of the properties window.

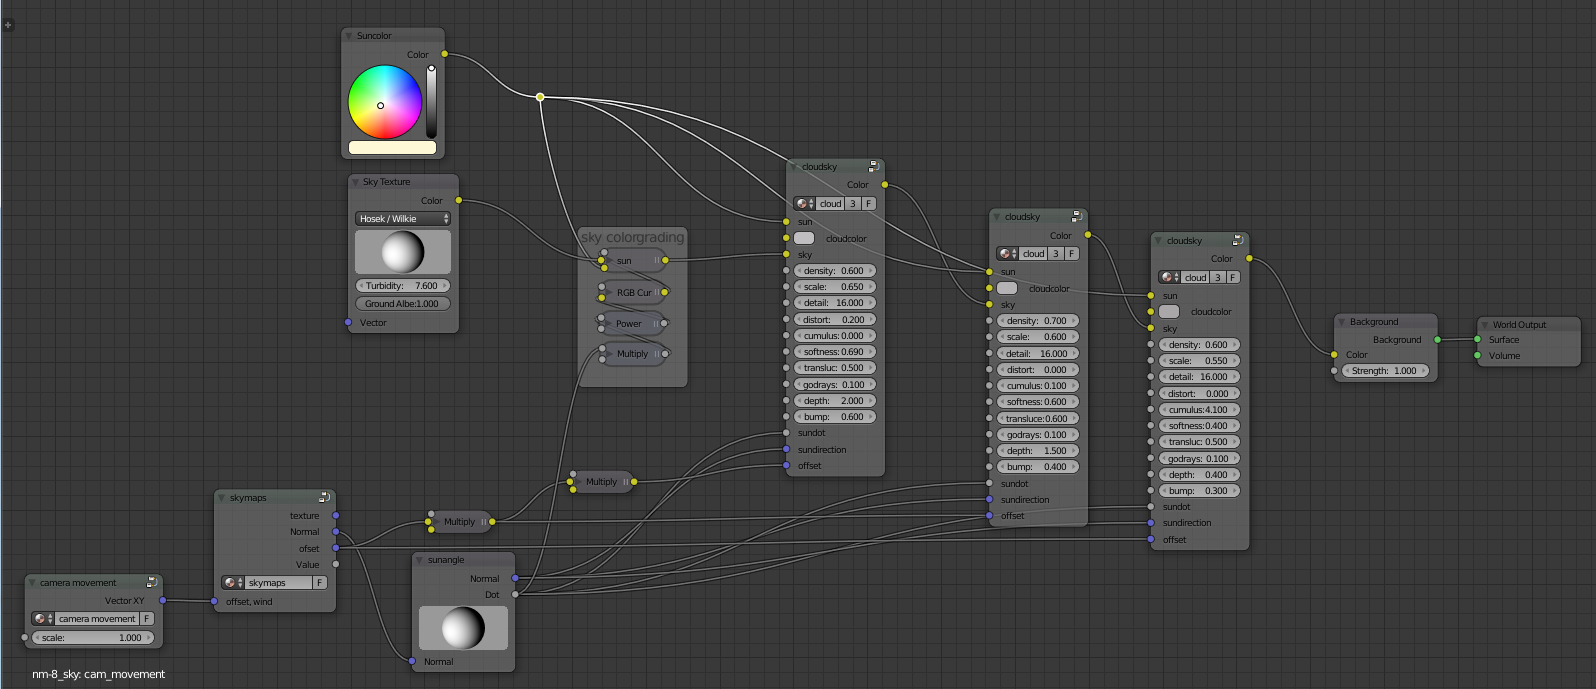
In the Nodeeditor Screenshot above you see three nodegroups. These are the three layers which you can color individually. Some presets combine these three into one simpler nodegroup with less parameters.
Lefthand side you see the camera-movement node which drives the offset for the clouds. So if oyu move your camera the background will react accordingly.
You can set the Sun-angle and Sky-normal in the nodes with the Spheres. Simply drag the sphere to rotate it. Left-right is the global x Axis, up-down is the global y axis.
All numerical Parameters are factors that work good in the range of 0-2. So high values like 50 for bump or cumulus will result in strange patterns. translucency of 20 would result in overexposed clouds... try to keep the values low if you're looking for a natural result.
Parameters of Cloud Nodegroups:
- suncolor (RGB)
- cloudcolor (RGB)
- skycolor (to plug in a skybackground)
- cumulus (how bulged shall the cloud get 0 = none, 1 = natural)
- translucency (light shining through the clouds 0 = none, 0.2 = natural)
- godrays (beams along sundirection 0 = none, 0.3= natural)
- depth (parallax distortion to thicken the cloudlayer 0=flat, 1=natural)
- bump (for more contrast in the shading 0 = flat shading, 0.2 = natural shading)
- offset ( XYZ Vectorinput for wind or movement of the clouds along the x and y axis. z axis serves as a random seed variation for the densitydsitribution)
- sunangle (XYZ Vectorinput defining the direction of sunlight
To render fast you can seperate the background on a renderlayer and use 1 sample per pixel to speed up rendertimes. This way you get a FullHD Image in a matter of seconds.


