Flaxtrax - Automated Camera Tracking
 Axel Olsson
Extra (Experiencing issues)
If you are experiencing issus or poblem with the addon try the following instructions:
1. Make sure that you have clicked on the "Recommended Settings" button to apply the most optimal settings. Highly recommend
2. Ensure that your frame count matches your image sequence frame count.
3. Make sure that you have enabled "Auto Focal Length" if you are not sure what focal length your footage was captured in.
4. Make sure that you have copied the correct sequence name. Just copy and paste the name from the movie clip data block.

5. Make sure that you have prefetched your footage to speed up the process. Also, ensure that you have adjusted your Memory Cache Limit in Blender.
6. The more frames and higher resolution you have, the longer it will take.
1. How do you install it?
After downloading the zip file, install it through the 'Add-ons' menu in Blender's properties (Do not unzip the zipped folder).
2. Where can you find it?
It's located in the side panel within the motion track area in Blender. For a detailed guide, refer to the tutorial video.
3. How do you use it?
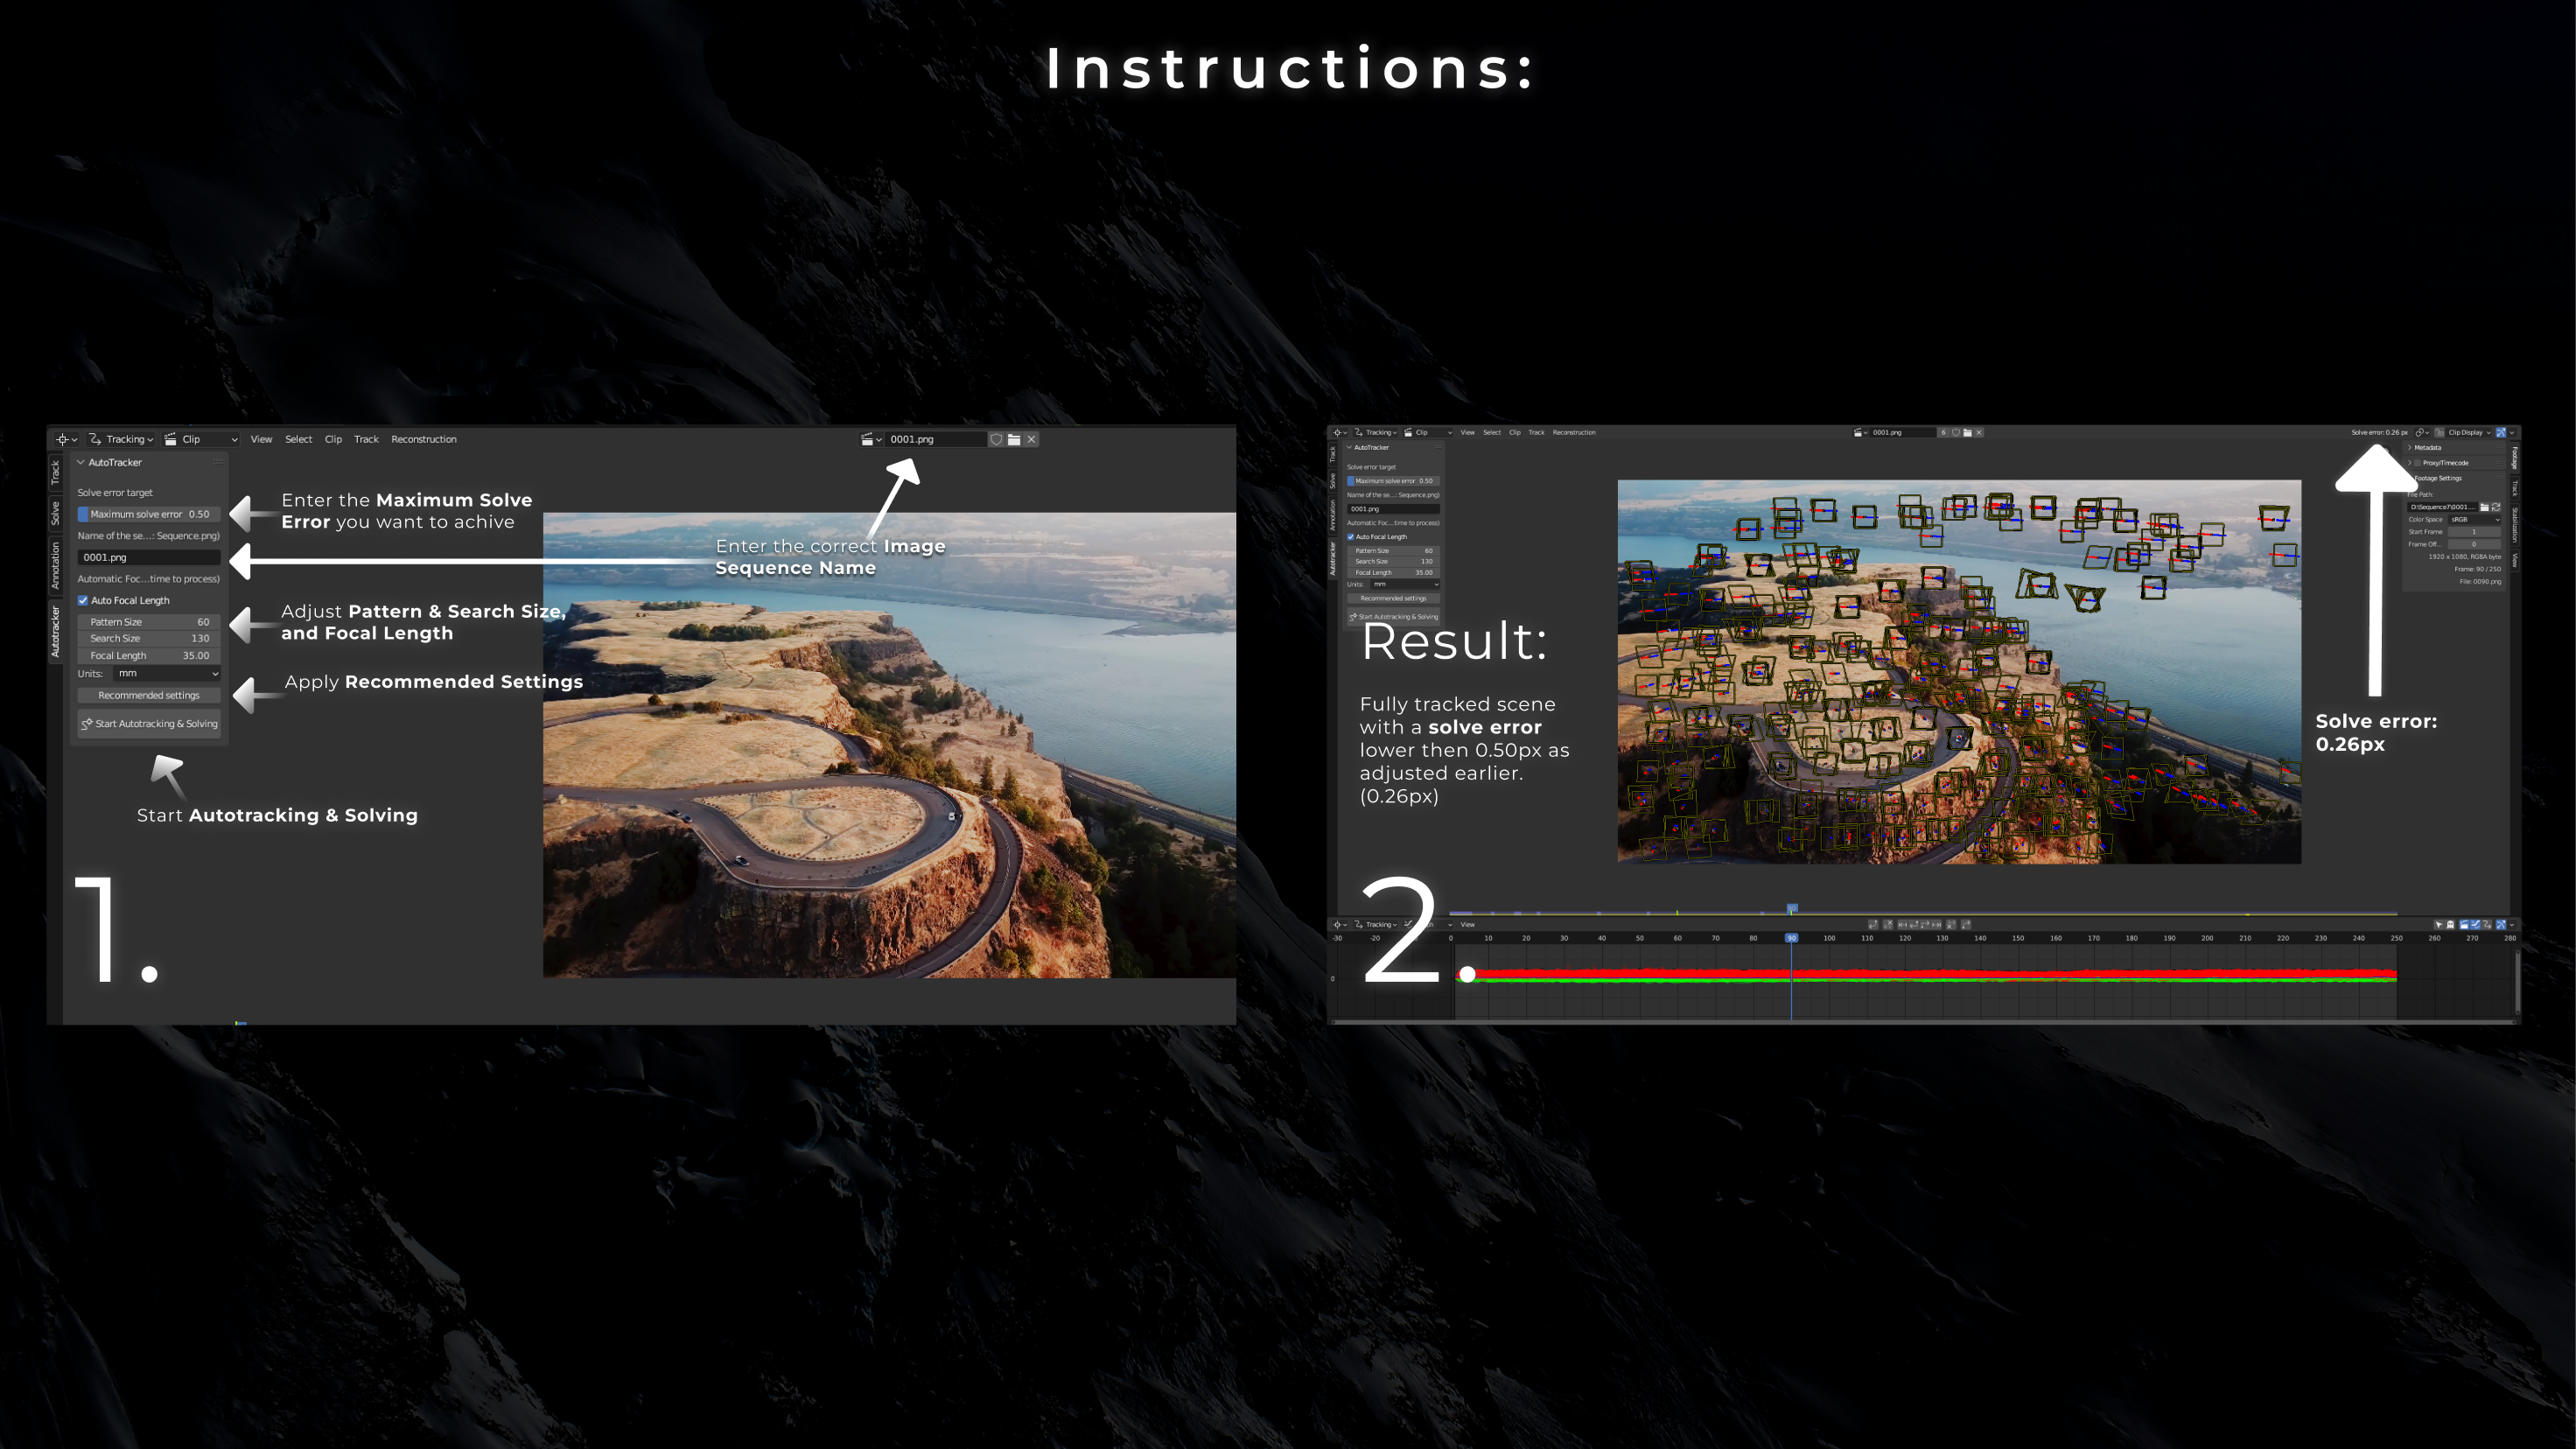
1. Set the pattern size and search size for the trackers. Recommended values are 60 for pattern size and 130 for search size, but these may vary based on your footage.
2. Specify a reasonably accurate focal length (within ±15).
3. Copy and paste the name of your sequence to inform the add-on which image sequence you wish to track.
4. Determine your desired target solve error.
5. Enable the "Auto Focal Length" to automatically find the correct focal length.
6. Finally, click on the 'Automatically Track Footage' button.
4. Details
4.1 Maximum solve error
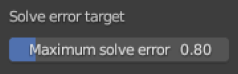
The first setting that appears when opening the addon is the 'Solve error target.' This is where you input the desired solve error. Be sure not to set an excessively low solve error, as it can lead to longer processing times and may result in a failed Autotrack. The achievable solve error largely depends on the quality of your footage, so ensure that your footage has low motion blur and is not overexposed. Having more details with high contrast in your footage will improve tracking results and reduce processing time. A track error under 1.00 px is considered good, under 0.50 is considered great but requires high-quality footage, and under 0.30 is considered excellent. Achieving a value under 0.30 takes more time and demands excellent tracking footage.
4.2 Name of the sequence 
In this input box, you need to copy and paste the image sequence name that represents your footage. In the Demo Video you can see how this should be correctly done. The name you input here will determine which footage will be tracked. I always recommend having the footage you want to track open in your view, as shown in the video."
4.3 Auto Focal Length 
This box determines if you want to activate the FlaxTrax Auto Focal Length finder. This function is currently capable of finding focal lengths ranging from 15 to 105 mm. I recommend turning this feature off and manually entering the correct focal length in the focal length tab if you know it.
4.4 Pattern Size, Search Size & Focal Length 
These three values depend highly on your footage properties, especially the amount of motion blur. If you have footage with a lot of motion blur, increase both the Pattern Size and the Search Size to increase your chances of a successful track. Be aware that higher numbers significantly increase processing time. If you are unsure about what values to use, I recommend enabling the 'Recommended settings' button. However, please note that enabling this option will change your focal length and the Auto Focal Length option.
The Focal Length is always recommended to be input in millimeters (mm). It's beneficial if you know your focal length, but if you don't, you can enable Auto Focal Length, and the focal length will be automatically adjusted, and the value you enter will be ignored.
4.5 Start Autotracking & Solving and Recommended settings 
The recommended settings are the ones I find to work well for most projects. However, if you happen to know the correct focal length, it's much better to enter it manually and leave the Auto Focal Length feature off to save time and achieve a lower solve error.
Once you've finished entering your correct settings, save your project. After that's done, click on the 'Start Autotracking & Solving' button. Don't be alarmed if Blender turns white and becomes unresponsive; this is supposed to happen. Now the processing has begun, and you just need to wait until Blender unfreezes. If everything went successfully, you should see trackers all over your footage and a solve error lower than the maximum solve error you entered.
Have questions about this product?
Login to message
| Sales | 1000+ |
| Rating | 24 ratings |
| Dev Fund Contributor | |
| Published | over 1 year ago |
| Software Version | 4.3, 4.2, 4.1, 4.0, 3.6 |
| Extension Type | Add-on |
| License | Royalty Free |
Discover more products like this
blender for vfx Flax Olsson Axel winter24 track cgi Trax automation addon flaxtrax Solving 2023 Motion Track VFX Axel Olsson automated Motion Tracking 3d-blender Camera Tracking