Fast Sculpt Assistant

Fast Sculpt Assistant
This addon makes using various sculpt operation easy in one key.
Remove tedious moving finger process across keyboard.
This is especially effective for pen tablet users.
While the number of shortcut buttons on the pen tab is limited, you will be able to sculpt without taking your left and right hands off the pen tablet as much as possible.
NOTE!!!!: In versions 2.0.3 and 2.0.2 of this add-on, the menu icons may not be displayed correctly (they may appear as pink squares).
In this case, I apologize for the inconvenience, but please use version 2.0.1.
I would also be very grateful if you could let me know the circumstances under which this occurred.
New feature creating measure in version1.8!!!
Installation
- download zip file, do not unzip it.
- go to Blender's user preference,open the Add-ons tab
- click Install and select the zip file.
- check the box next to its name to enable it.
How to use
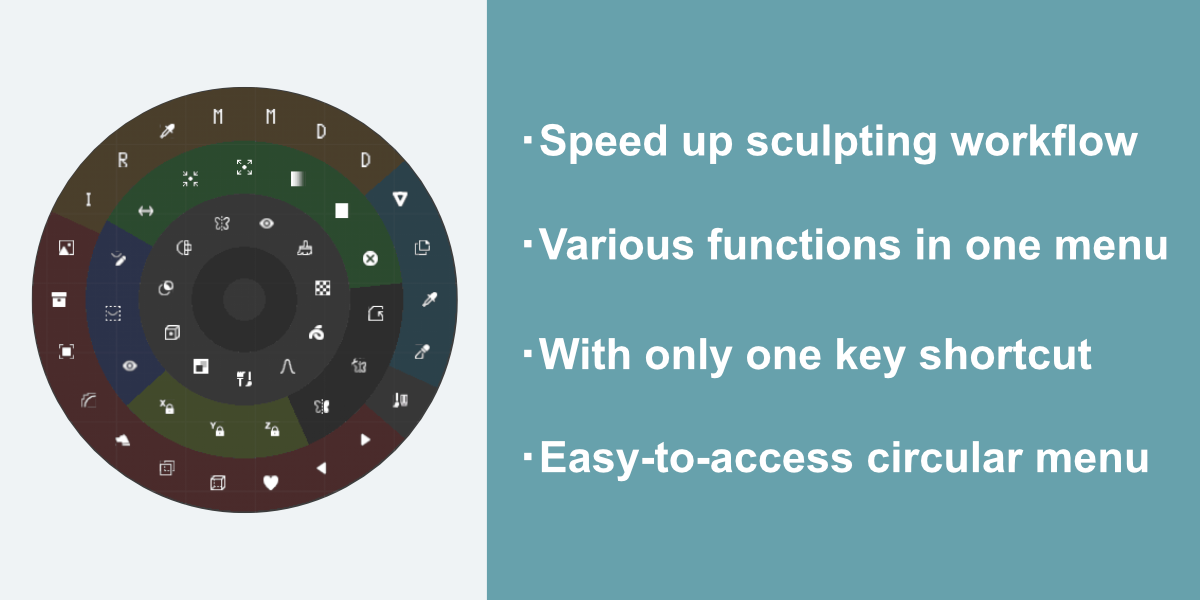
In sculpt mode, menu will open when you press "Shift + U" key (by default, you're able to change from preferences).
Press same key to close with do nothing.
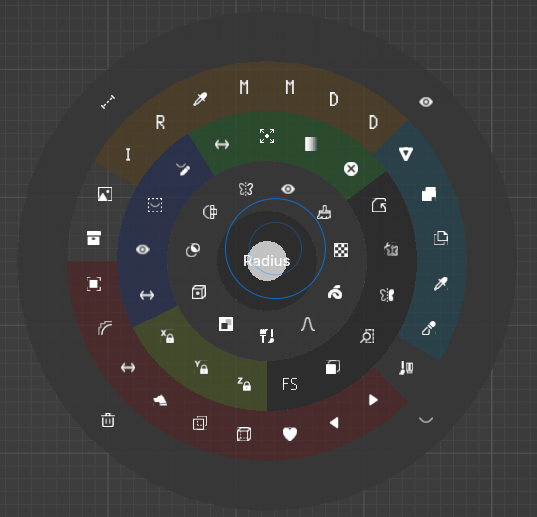
The menu is separated from some section as below.
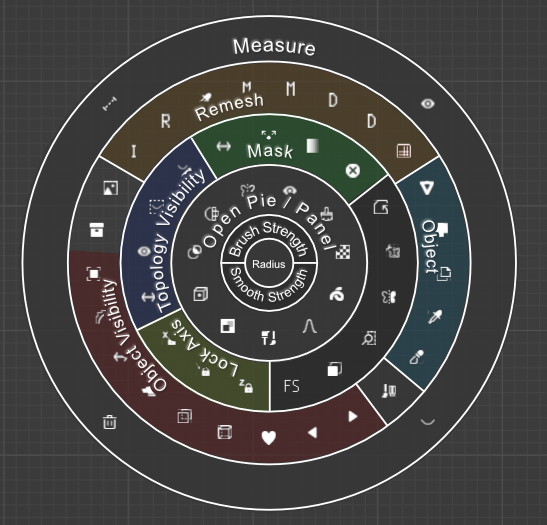
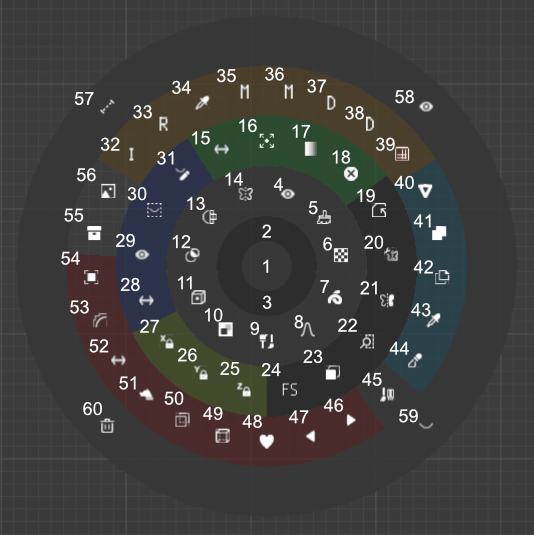
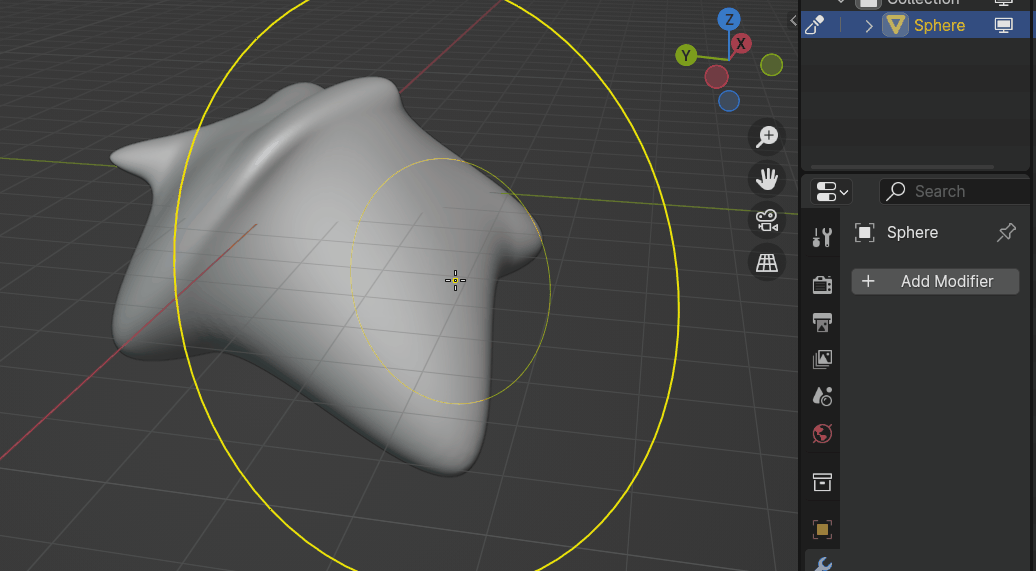
1: Change brush radius / 2: Change brush strength / 3: Change Smooth brush strength
4: Open view pie / 5: Open brush settings / 6: Open brush texture / 7 Open brush stroke / 8: Open brush falloff/ 9: Open brush context / 10: Open face sets pie / 11: Open set pivot pie / 12: Open auto masking pie / 13: Open remesh panel / 14: Open Symmetry Panel
15: Invert mask / 16: Grow and Shrink mask / 17: Smooth and Sharpen mask / 18: Clear mask
19: Save file / 20: Add mirror modifier / 21: Symmetrize / 22: Zoom Region / 23: Toggle Front Face Only / 24: Toggle Falloff Shape
25: Lock Z Axis / 26: Lock Y Axis / 27: Lock X Axise
28: Invert Visible / 29: Show all topology / 30: Hide topology by bounding box / 31: Hide topology by mask
32: Remesh with initial size(editable from preferences) / 33: Remesh / 34: Sample detail size and remesh / 35: Remesh with voxel size times multiplier2(editable from preferences) / 36: Remesh with voxel size times multiplier1(editable from preferences) / 37: Remesh with voxel size divided by multiplier1 / 38: Remesh with voxel size divided by multiplier2 / 39: Smart Multires
40: Create new primitive object(some paraneters are editable from preferences) / 41: Join Objects / 42: Make backup / 43: Transfer mode / 44: Switch mode
45: Toggle erase alpha
46: Next matcap / 47: Previous matcap / 48: Toggle favorite matcap / 49: Show or hide Wireframe of active object / 50: X-ray / 51: Toggle Silhouette / 52: Flip Matcap / 53: Toggle Shade Smooth / 54: Show or hide active object / 55: Show or hide collection set by UI / 56: Change opacity of images in collection set by UI
57: Create Measure / 58: Show All Measure / 59: Hide All Measure / 60: Delete All Measure
- Move the mouse to the right to Smooth/Grow, and to the left to Sharpen/Shrink.
- Confirm with left click, right click, enter key or Esc key.
- This operation cannot be canceled, so if you wish to do so, please undo after confirming.
- The amount of mouse movement to change the value can be changed from Preferences.

Then, automatically added multiresolution and shrinkwrap modifier.(Default subdivision of multiresolution is 2.)
If you are satisfied, you will apply shrinkwrap modifier. If not, subdvide more or redo with different voxel size before apply. It may be fast your Blender.

Creating base mesh from New Object panel
In New Object panel(press shortcut in Object Mode or select New Object after press shortcut in Sculpt Mode), the three items below are for creating a base mesh, the others are for adding primitive meshes.
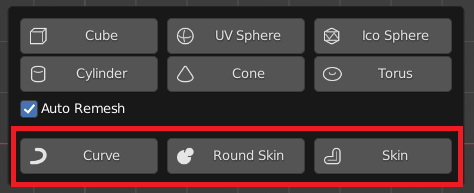
There are own UI for the three items for creating a base mesh in Edit Mode.
Curve
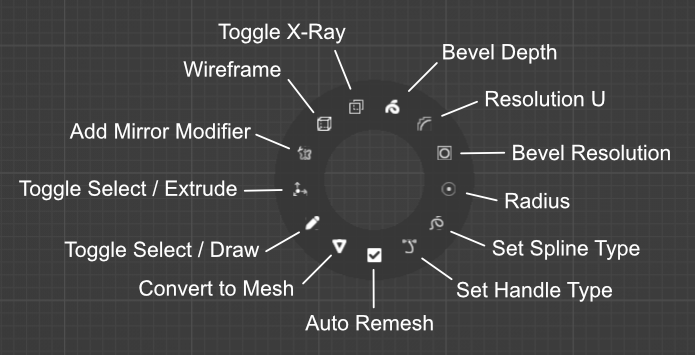
Round Skin
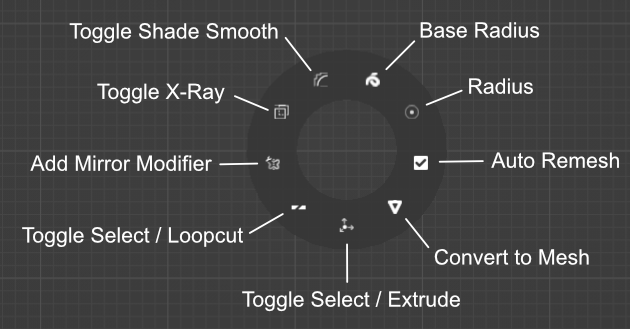
Skin

Settings
In preferences, there are some parameters.
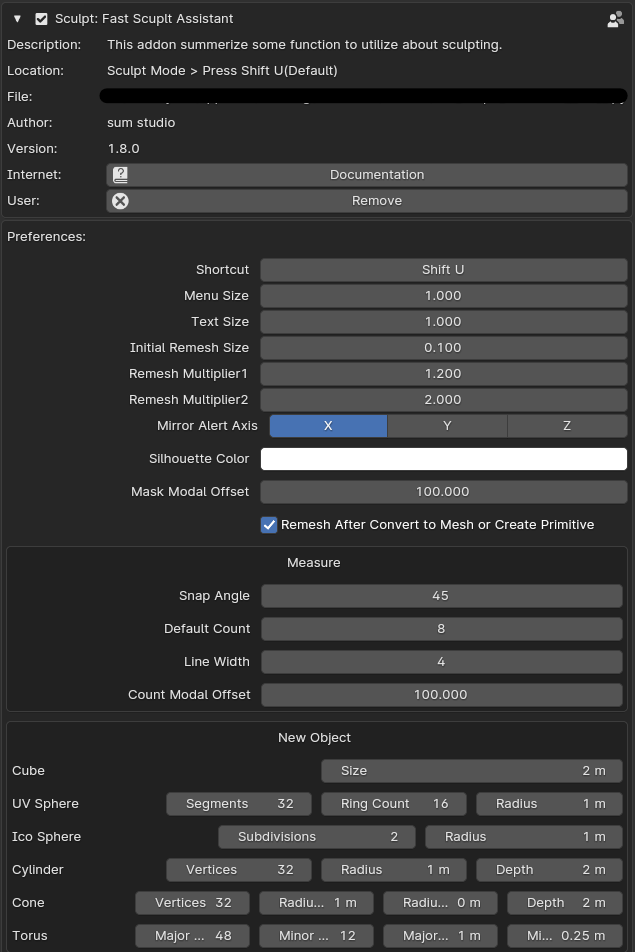
In sculpt mode, the following appears in the top header.
Mirror Alert Axis / Falloff Shape / Lock Axis / Front Face Only

Update
2.0.3 - Fixed bug of menu doesn't open in version 2.0.2.
2.0.2 - All icon images are now linked.
2.0.1 - Compatible with Blender 4.2
2.0.0 - Added menu for sculpt curves.
Added Multires function.
Fixed Radius display misalignment.
Fixed an issue where the function to change the matcap was unable to select an added matcap.
1.8.2 - Fixed small bug.
1.8.1 - Fixed bug when create round skin in Blender4.0 and over.
1.8.0 - Added measure functions.
Compatible with japanese.
Fixed bug when blender ui is not english.
From this version, it is compatible with Blender 3.1 or higher.
1.7.1 - Compatible with Blender 4.1.
1.7.0 - Added functions below.
Show "Front Face Only"
Invert Visible
Show Symmetrize Direction when mouse hovers over Symmetrize.
Ctrl-clicking Symmetrize now symmetrizes in the opposite direction.
1.6.0 - Added Join Objects / Zoom Region.
1.5.0 - Added Curve / Round Skin / Skin items to New Object to create base mesh.
Pressing a shortcut key in object mode now opens the New Object panel.
Change default shortcut key to "Shift + U".
1.4.0 - Added "Flip Matcap " function.
Mask grow / shrink and smooth / sharpen were integrated into each modal.
1.3.2 - Compatible with Blender 4.0.
1.3.1 - Remesh multiplier can now be set to a decimal.
1.3.0 - Added functions below.
Symmetrize
Lock each axis
Toggle silhouette
Toggle shade smooth
Menu and text size are now able to change.
1.2.1 - Fixed an issue where the symmetry panel was lagging.
1.2.0 - Added functions below.
Open symmetry panel
Change opacity of images in collection
1.1.0 - Added functions below.
Show / hide topology
Save file
Mask
Add mirror mod
Smooth strength
View buttons have been changed to view pie.
1.0.0 - First release
Author
| Sales | 100+ |
| Customer Ratings | 1 |
| Average Rating | |
| Published | about 1 year ago |
| Blender Version | 4.2, 4.1, 4.0, 3.6, 3.5, 3.4, 3.3, 3.2, 3.1 |
| License | GPL |
Have questions before purchasing?
Contact the Creator with your questions right now.
Login to Message