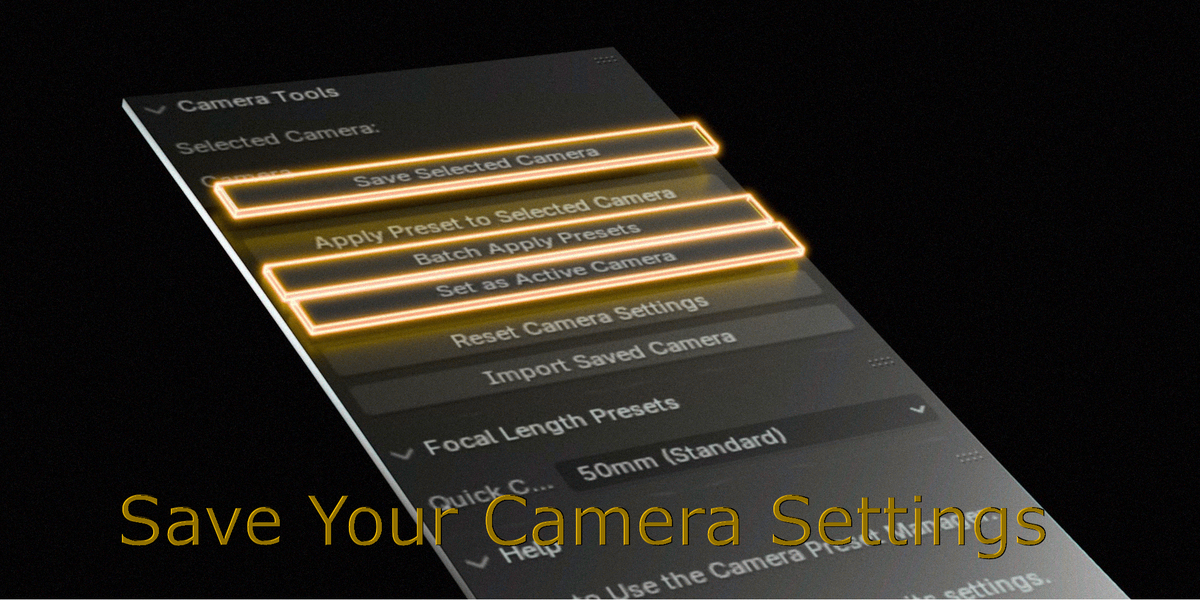
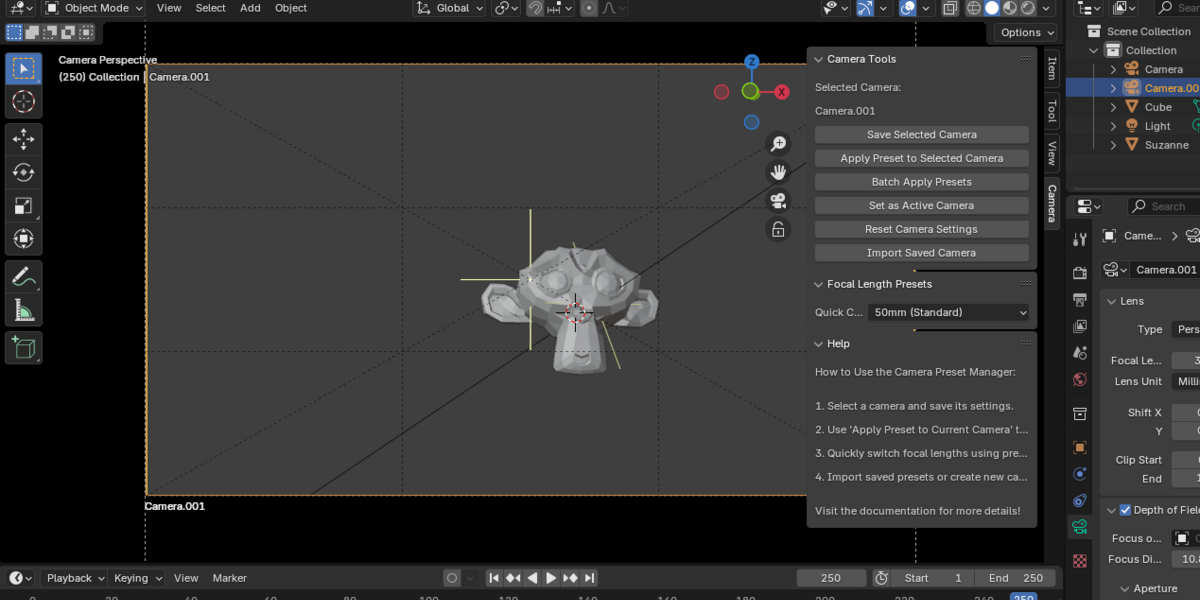
Enhanced Camera Tools - Goodbye To Constantly Setting The Same Camera Options
NOW IN STABLE RELEASE -- MORE FANTASTIC UPDATES COMING SOON!
You open Blender, and there it is—the default cube, staring back at you. You delete it without a second thought, ready to dive into your project. But as your scene grows, adjusting cameras quickly becomes just as repetitive as deleting that cube. Enter the Enhanced Camera Tools Addon, your solution to effortless camera workflows.
Designed for filmmakers, 3D artists, and animators, this addon lets you focus on your art, not the settings.
Save and load presets: No more manually recreating settings—just load, apply, and shoot.
Reset in a snap: Bring your camera back to default settings with a single click.
Quick adjustments: Modify focal lengths (from a handy list of presets), depth of field, and more, directly in the panel. (more coming soon!)
Streamlined setup: Apply consistent settings across multiple cameras and scenes.
Turn the tedious into intuitive and let your creativity shine. Whether you're crafting cinematic animations or photorealistic renders, this addon clears the path for your vision—leaving you free to make art worthy of the spotlight.
This addon is a one-time purchase. Meaning one you buy it, it is yours forever, all updates included for free!
6% of every purchase is donated to the Blender Dev Fund!
Installing the Addon
Download the Addon:
Save the addon file (enhanced_camera_tools.zip) to your computer.
Open Blender:
Launch Blender and go to Edit > Preferences.
Install the Addon:
Navigate to the Add-ons tab on the left.
Click Install… in the top-right corner.
Select the enhanced_camera_tools.zip file and click Install Add-on.
Enable the Addon:
Once installed, search for "Enhanced Camera Tools" in the add-ons list.
Check the box next to the addon to enable it.
Save Preferences:
Click Save Preferences (unless set to autosave) to ensure the addon is active every time you launch Blender.
How to Use the Addon
Main Features:
All tools are located in the Camera tab of the 3D View Sidebar (N-Panel). (Press N on your keyboard to hide/unhide the N-Panel).
Features and How to Use Them
1. Save Camera Presets
Purpose: Save the settings of a selected camera for reuse in the current or future projects.
-
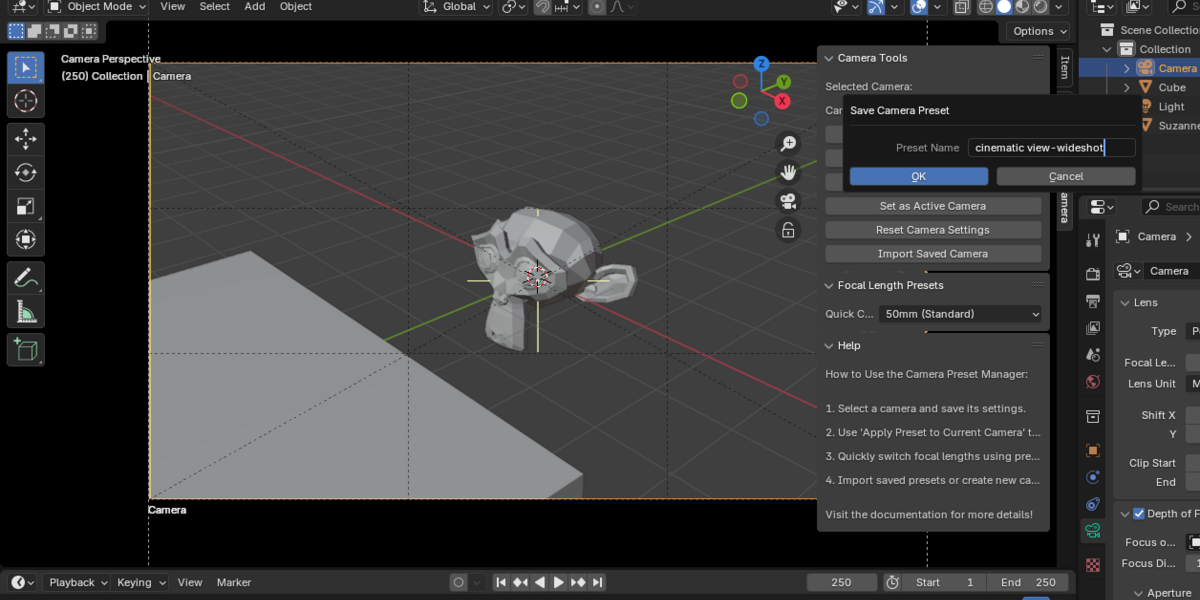
Steps:
- Select a camera in the viewport.
- Open the Camera Tools tab in the Sidebar.
- Click Save Selected Camera.
- Enter a name for the preset in the dialog box.
- Click OK to save the preset.
-
Saved Settings Include:
- Lens type, focal length, lens unit, shift, and clipping ranges.
- Depth of field settings (DOF, focus distance, aperture, etc.).
- Safe area and viewport display settings.
- Composition guides.
Purpose: Save the settings of a selected camera for reuse in the current or future projects.
Steps:
- Select a camera in the viewport.
- Open the Camera Tools tab in the Sidebar.
- Click Save Selected Camera.
- Enter a name for the preset in the dialog box.
- Click OK to save the preset.
Saved Settings Include:
- Lens type, focal length, lens unit, shift, and clipping ranges.
- Depth of field settings (DOF, focus distance, aperture, etc.).
- Safe area and viewport display settings.
- Composition guides.
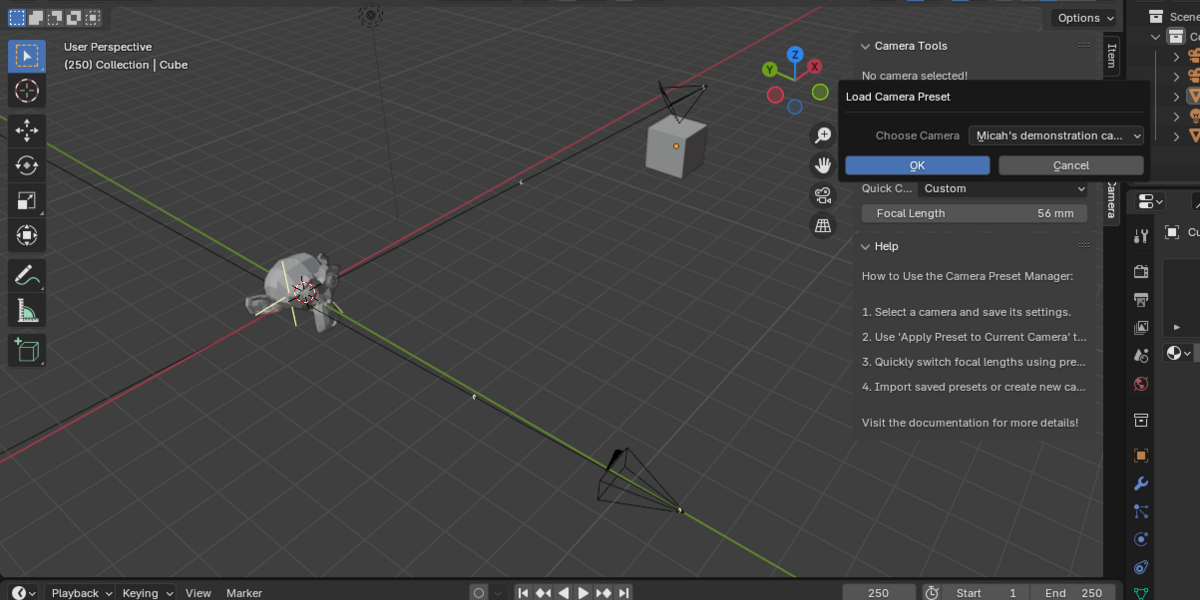
2. Load Camera Presets
-
Purpose: Create a new camera with settings from a saved preset.
-
Steps:
- Open the Camera Tools tab in the Sidebar.
- Click Import Saved Camera.
- Select a preset from the dropdown menu.
- Click OK, and a new camera with the preset settings will appear in the scene.
- Open the Camera Tools tab in the Sidebar.
- Click Import Saved Camera.
- Select a preset from the dropdown menu.
- Click OK, and a new camera with the preset settings will appear in the scene.
3. Apply Preset to Current Camera
-
Purpose: Apply a saved preset to an already selected camera without creating a new one.
-
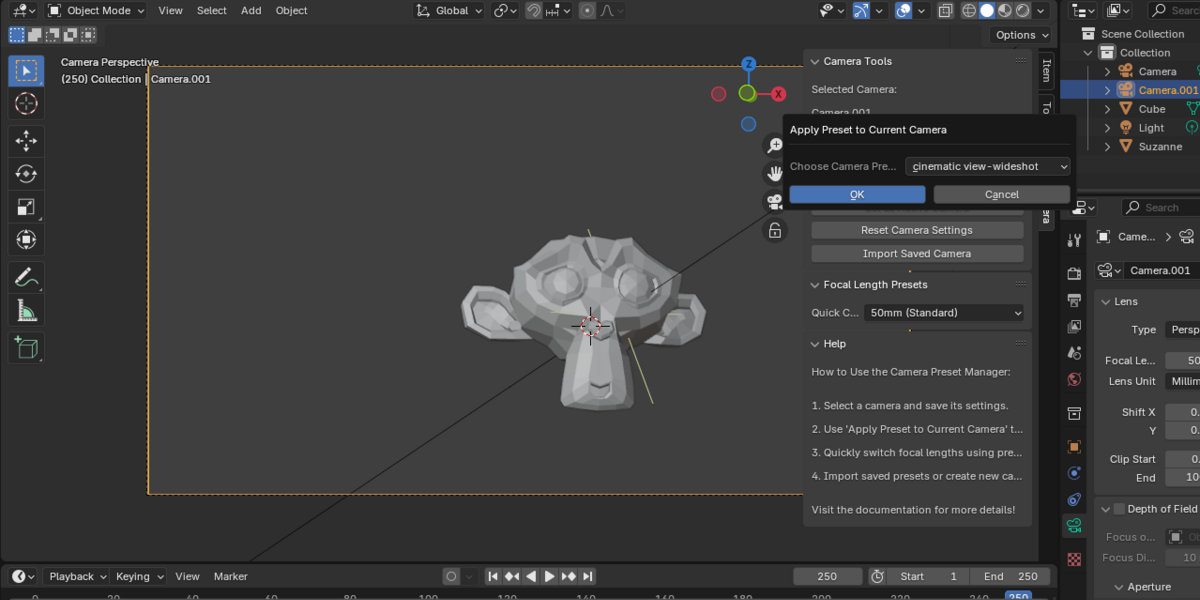
Steps:
- Select a camera in the viewport.
- Open the Camera Tools tab.
- Click Apply Preset to Selected Camera.
- Choose a preset from the dropdown menu and click OK.
- Select a camera in the viewport.
- Open the Camera Tools tab.
- Click Apply Preset to Selected Camera.
- Choose a preset from the dropdown menu and click OK.
4. Batch Apply Presets
-
Purpose: Apply a preset to multiple selected cameras simultaneously.
-
Steps:
- Select multiple cameras in the viewport.
- Open the Camera Tools tab.
- Click Batch Apply Presets.
- Select a preset and click OK.
- Select multiple cameras in the viewport.
- Open the Camera Tools tab.
- Click Batch Apply Presets.
- Select a preset and click OK.
5. Reset Camera Settings
Purpose: Reset the selected camera to Blender’s default settings.
-
Steps:
- Select a camera in the viewport.
- Open the Camera Tools tab.
- Click Reset Camera Settings.
-
Resets the Following:
- Focal length, lens type, clipping ranges, and shift.
- DOF settings, safe areas, viewport displays, and composition guides.
Purpose: Reset the selected camera to Blender’s default settings.
Steps:
- Select a camera in the viewport.
- Open the Camera Tools tab.
- Click Reset Camera Settings.
Resets the Following:
- Focal length, lens type, clipping ranges, and shift.
- DOF settings, safe areas, viewport displays, and composition guides.
6. Set Active Camera
-
Purpose: Make the currently selected camera the active camera for rendering.
-
Steps:
- Select a camera in the viewport.
- Open the Camera Tools tab.
- Click Set as Active Camera.
- Select a camera in the viewport.
- Open the Camera Tools tab.
- Click Set as Active Camera.
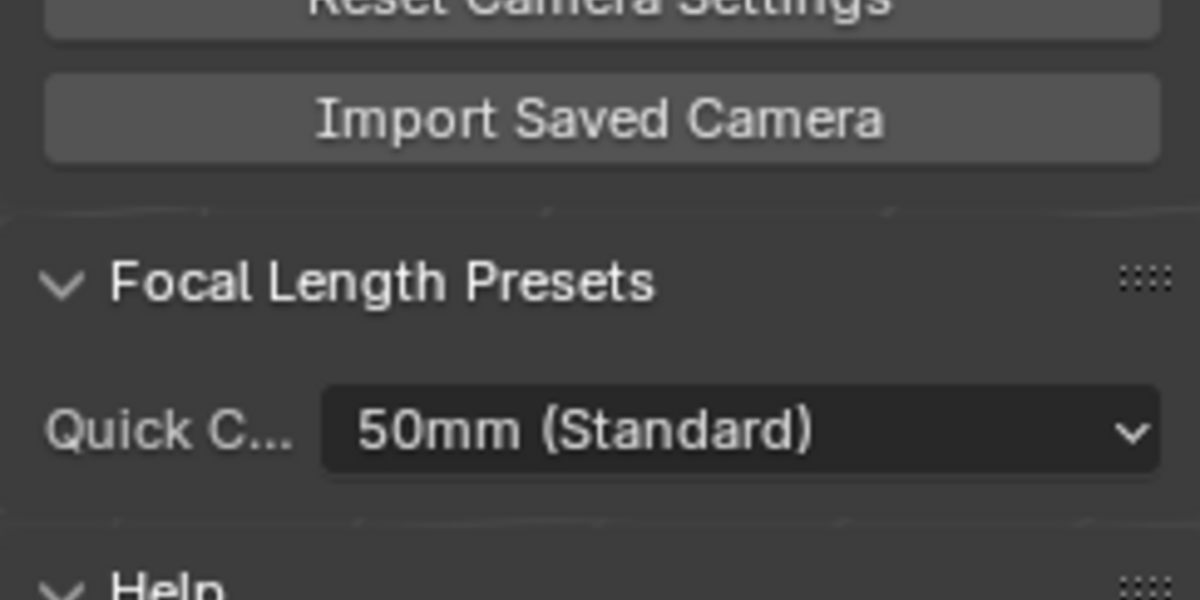
7. Focal Length Presets
-
Purpose: Quickly adjust the focal length of a camera using predefined presets.
-
Steps:
- Select a camera in the viewport.
- Open the Focal Length Presets tab in the Sidebar.
- Choose a focal length from the dropdown menu (e.g., 24mm, 50mm).
- If "Custom" is selected, adjust the focal length using the slider below.
- Select a camera in the viewport.
- Open the Focal Length Presets tab in the Sidebar.
- Choose a focal length from the dropdown menu (e.g., 24mm, 50mm).
- If "Custom" is selected, adjust the focal length using the slider below.
8. Depth of Field Visualization
-
Purpose: Enable or disable a visual guide for the focus plane.
-
Steps:
- Select a camera in the viewport.
- Open the Camera Tools tab.
- Enable Show DOF Guides to see the focus plane.
- Select a camera in the viewport.
- Open the Camera Tools tab.
- Enable Show DOF Guides to see the focus plane.
Advanced Usage
Customizing Focal Length Presets
- The focal length presets can be customized by editing the
FOCAL_LENGTH_PRESETS list in the addon code:
FOCAL_LENGTH_PRESETS list in the addon code:Sharing Presets
- Presets are stored in a JSON file (
camera_presets_v2.json) in Blender’s scripts directory.
- To share presets, copy this file to the appropriate scripts folder per that blender version.
camera_presets_v2.json) in Blender’s scripts directory.Troubleshooting
-
No Camera Selected:
- Many tools require a camera to be selected. If no camera is selected, use the Create Camera button.
-
Presets Not Found:
- Ensure presets have been saved and are stored in the JSON file.
- If the file is missing or corrupted, the addon will recreate it as empty.
Frequently Asked Questions
Where are presets saved?
Presets are stored in a JSON file located in Blender’s scripts folder. This ensures portability and easy backups. But the ability to choose the location for the JSON is coming soon to enhance customization.
Can I share presets between projects?
Yes! As long as you use the same Blender version. Meaning if you update Blender, copy the camera_presets_v#.json file to the appropriate scripts file with the new Blender download.
What happens if no camera is selected?
Many features prompt you to create or select a camera. Use the Create Camera button to quickly and easy add one if needed.
Can I customize focal length presets?
Yes. For now, you must edit the FOCAL_LENGTH_PRESETS list in the addon’s code to add or remove presets. However, future updates will make it so you can add and remove presets from within the panel in Blender.
Discover more products like this
load camera 3D camera tools Advanced camera save camera apply camera camera presets save camera settings add camera blender camera camera animation save camera presets
