 chris fast media
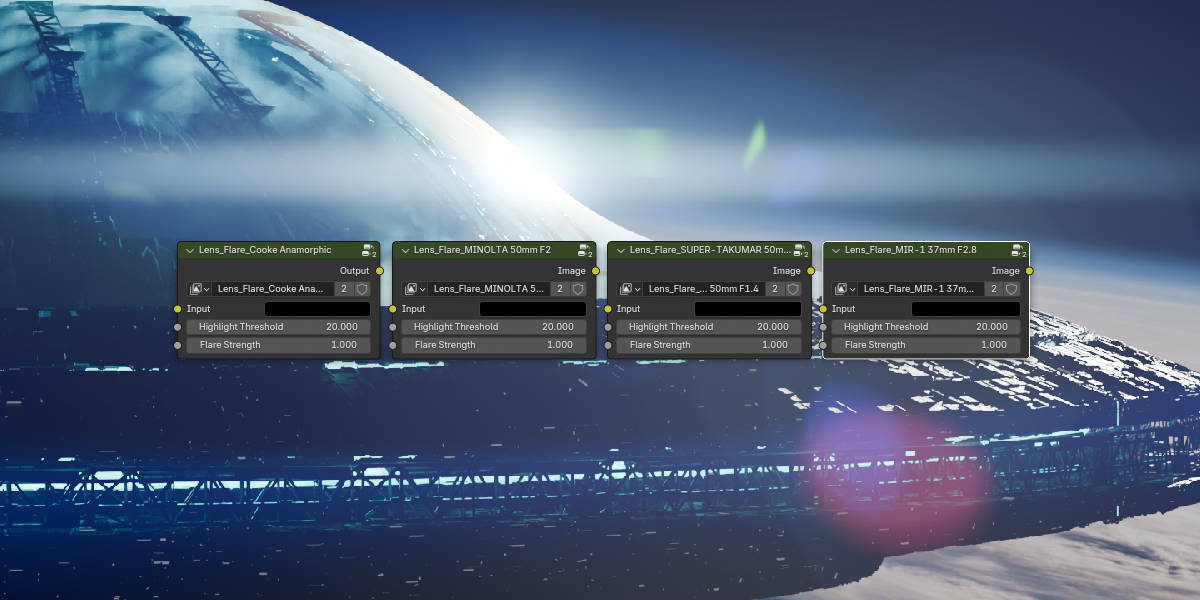


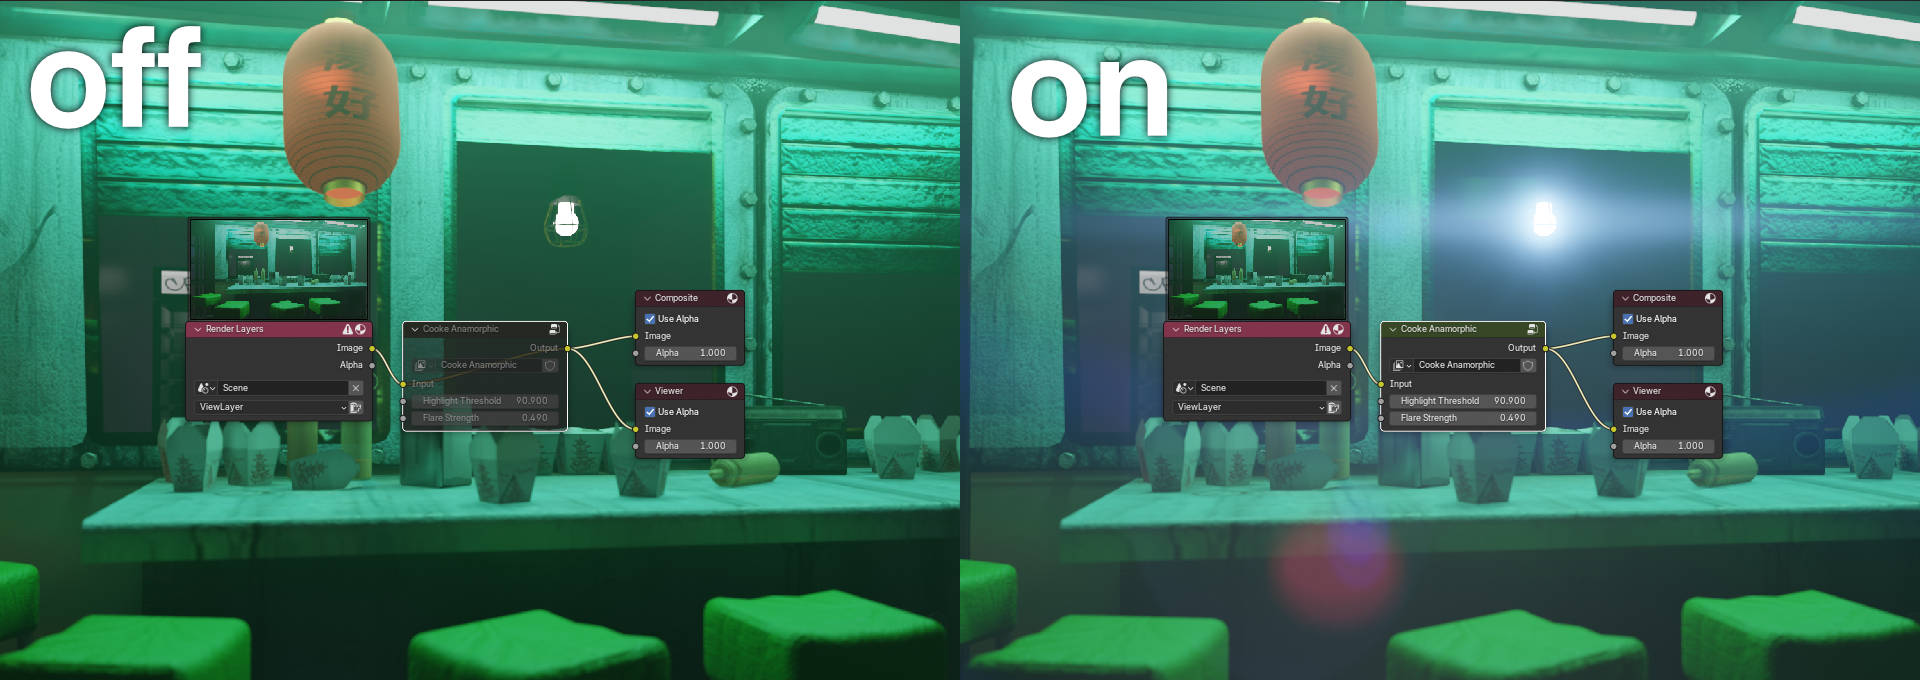
Easy Lens Flares is a real time drag-and-drop lens flare solution for Blender. It utilizes procedural techniques with the new GPU compositor released with Blender 4.2. Easy Lens Flares are great for users who want a cinematic look but are intimidated by the usual viewport solutions.
Features:
Simple two slider controls
Modelled off of real cinema lenses
Realistic roll-off when light is obscured
Doesn’t clutter up your scene with 3D objects; entirely compositor based
No tracking nor animating
Plays well with HDRIs
Works with Cycles and EEVEE
Works well in the viewport compositor
Just a single node group; no cluttering up the N-menu
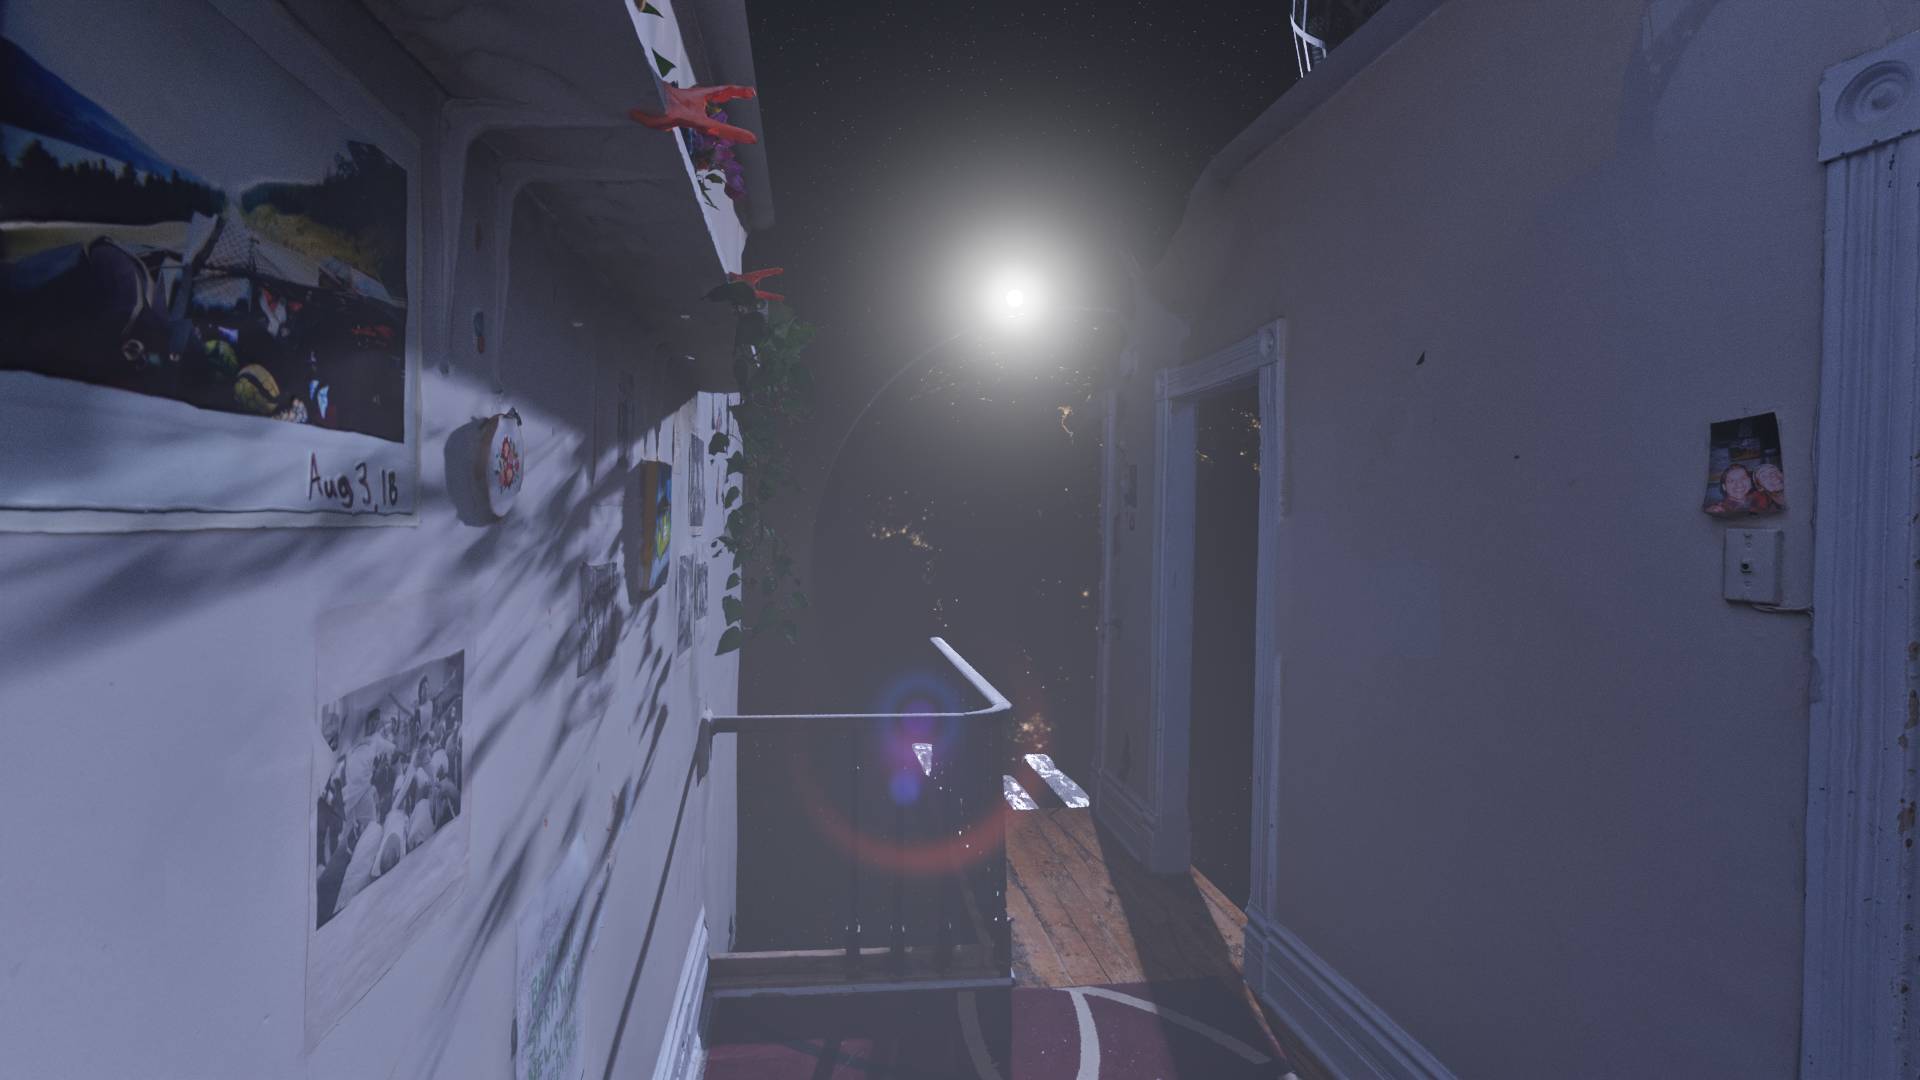
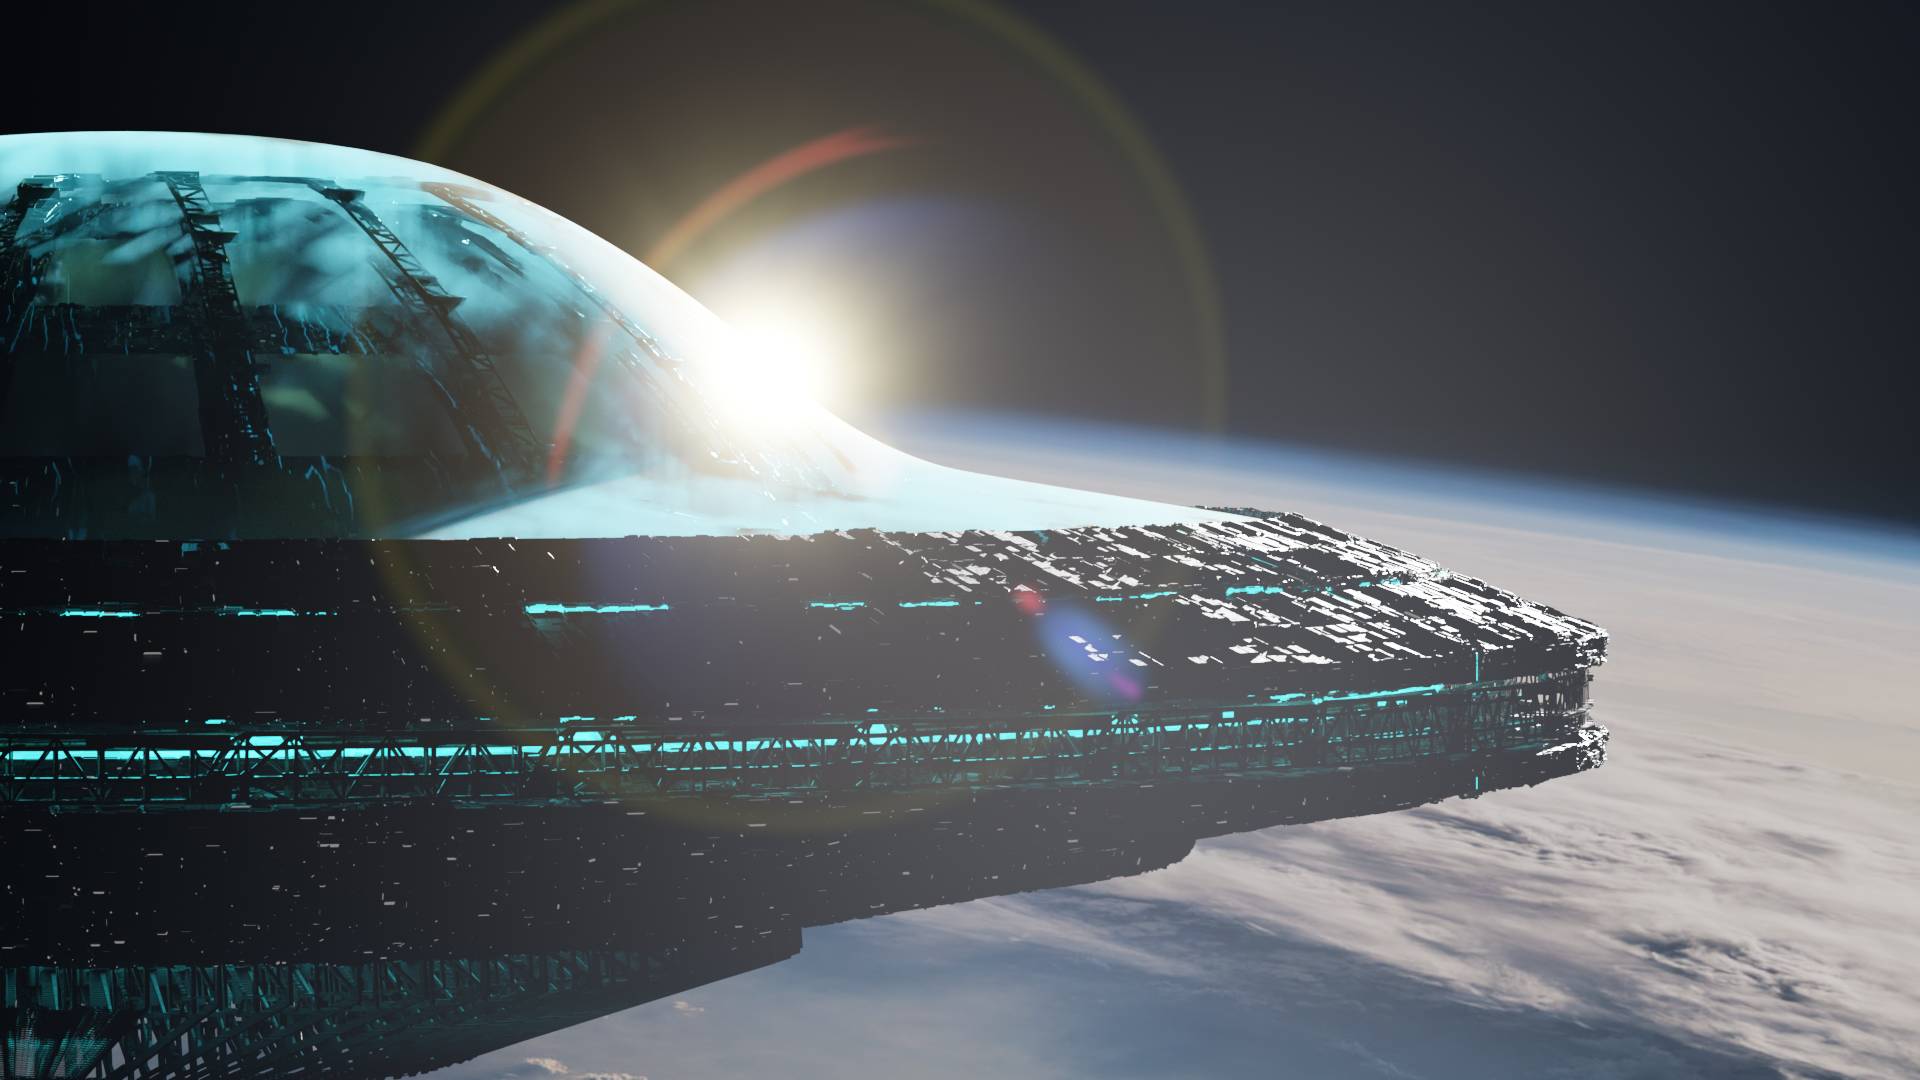
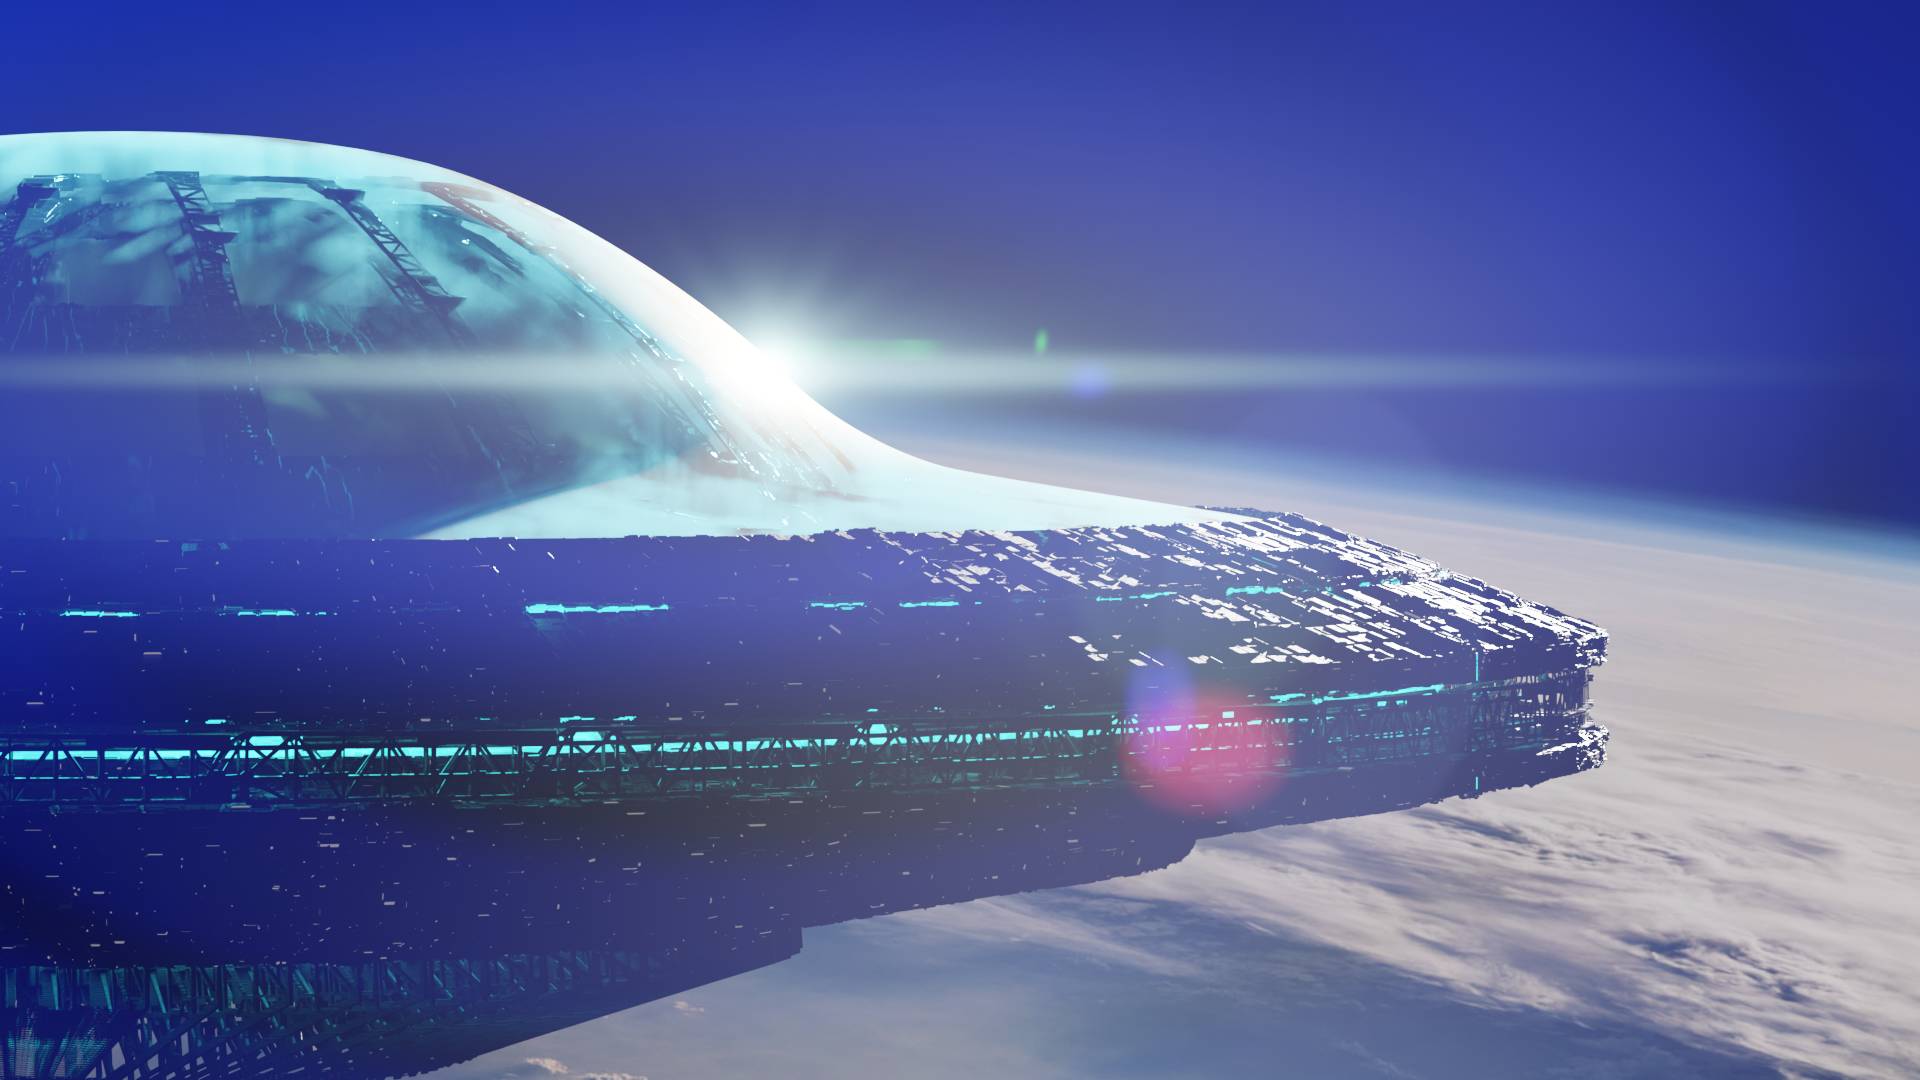
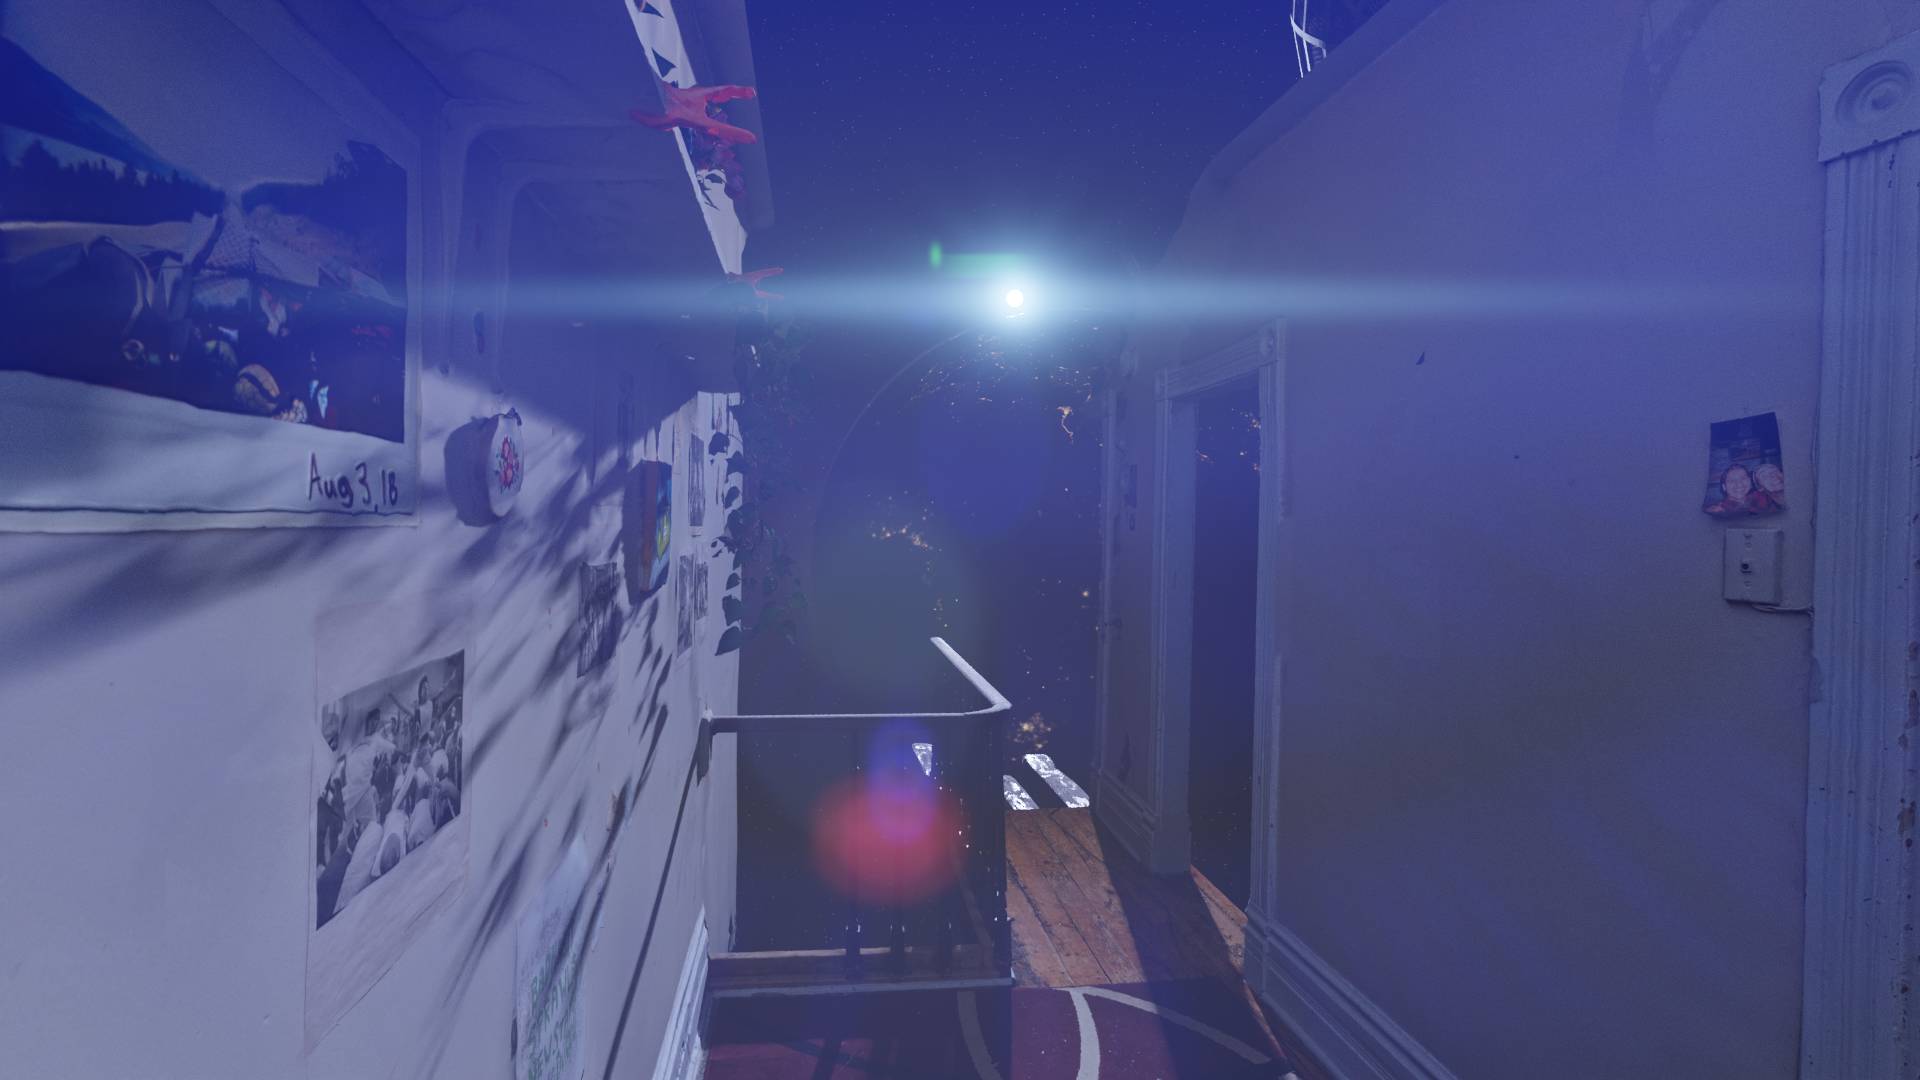
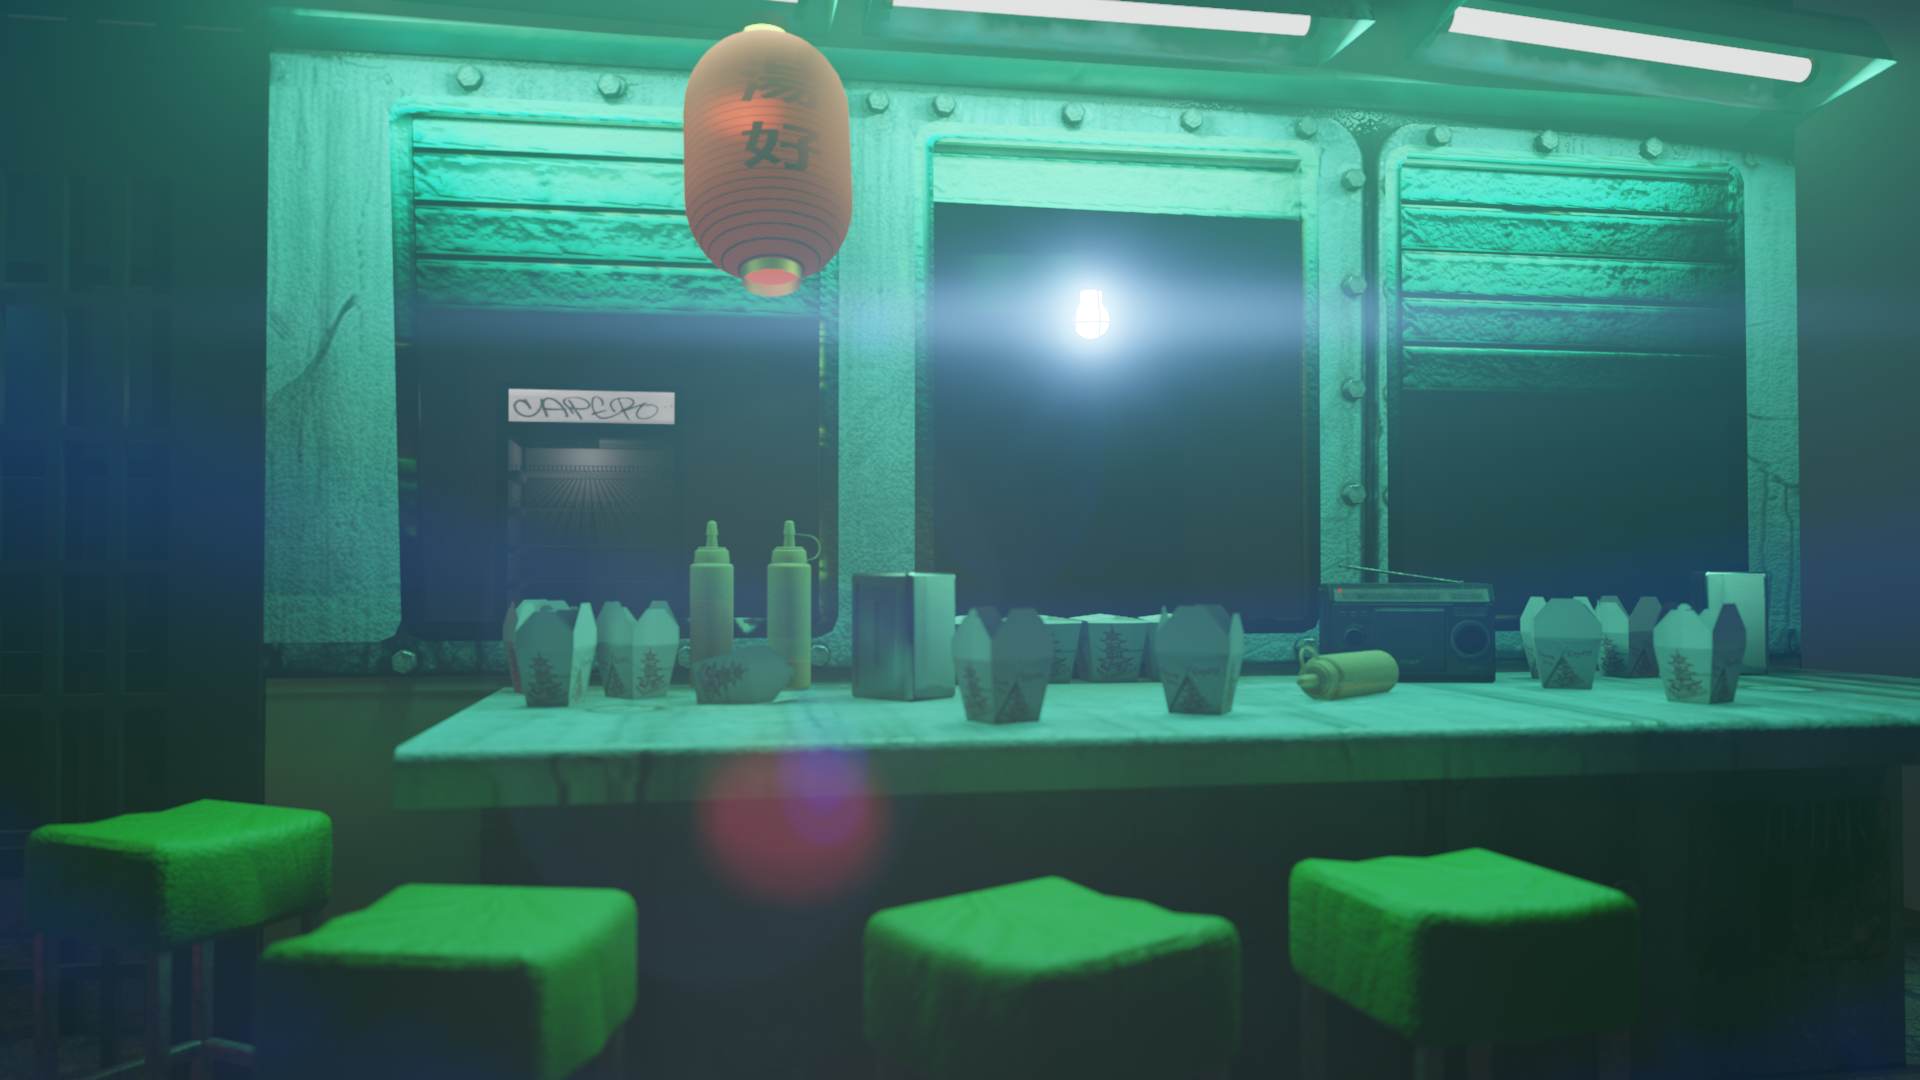
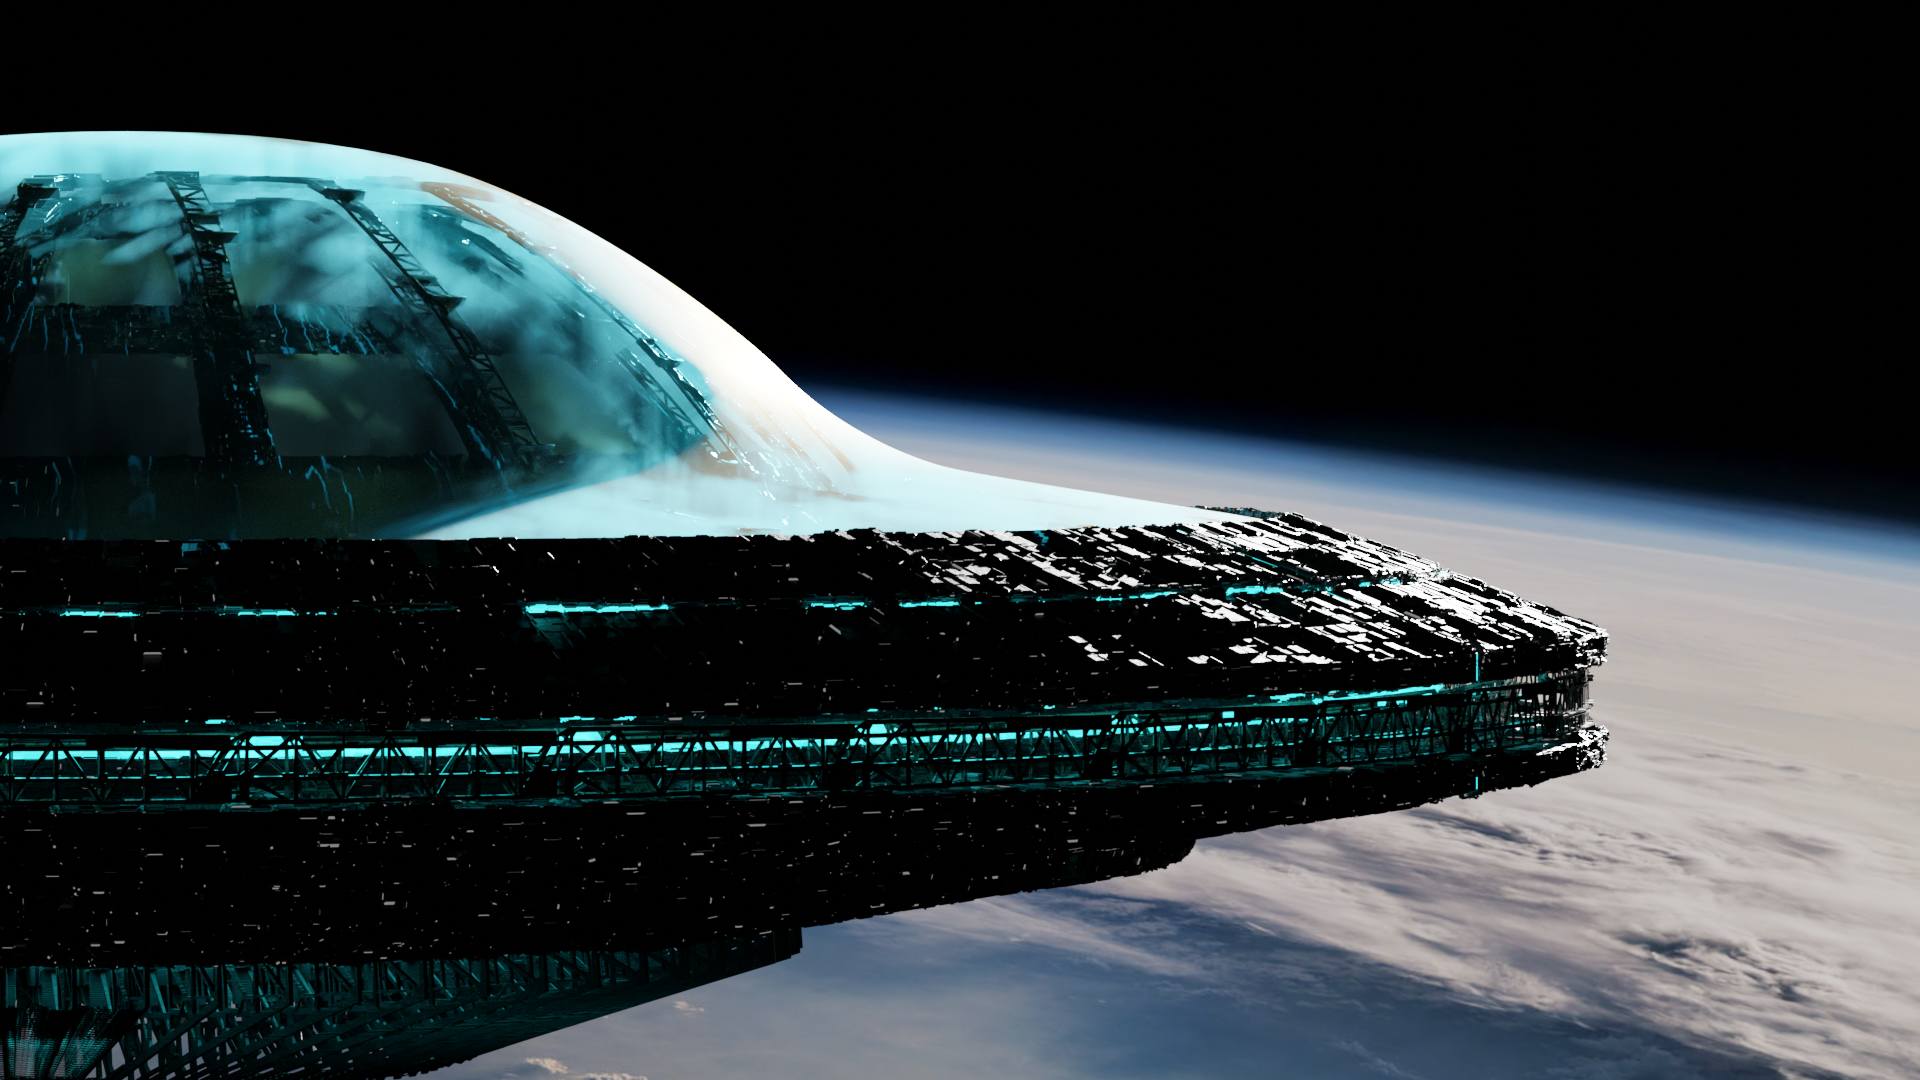
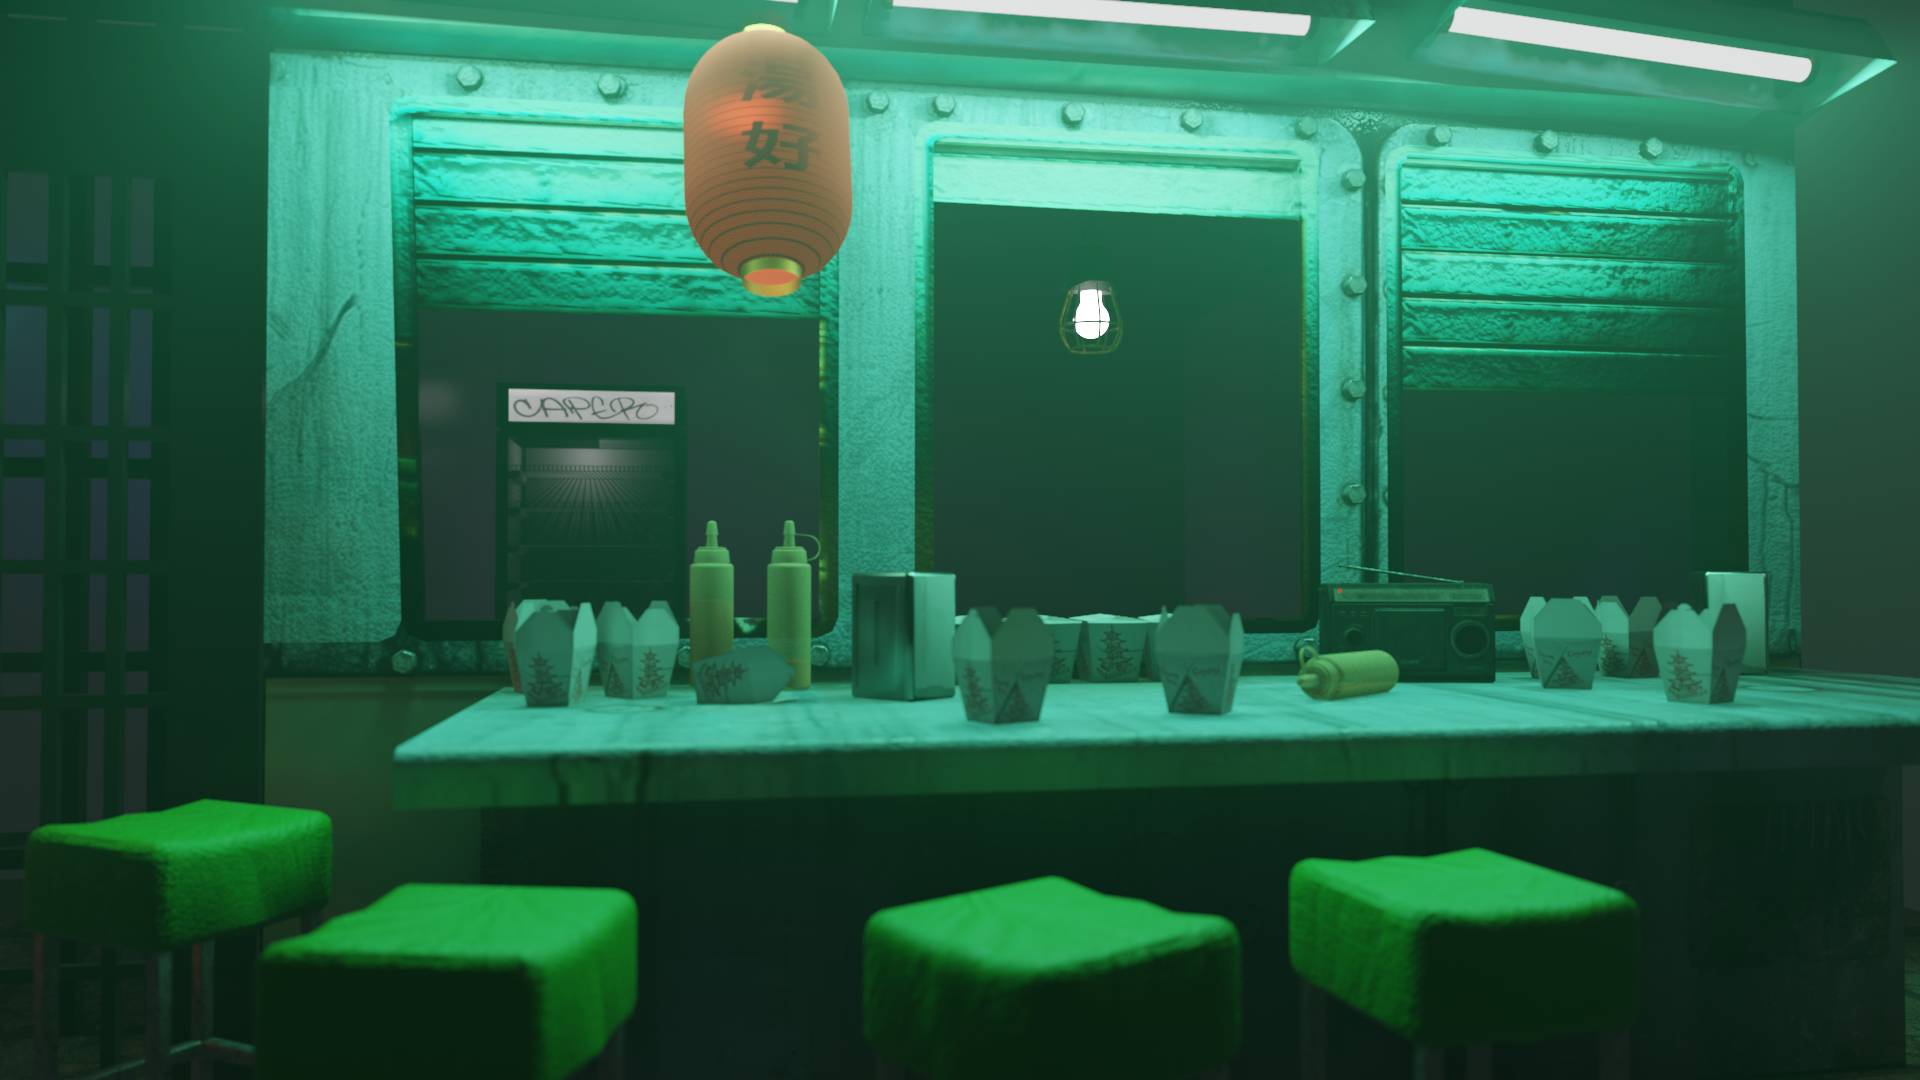
There are currently four lens flares which are all based off real cinema lenses. I used reference footage shot by pastamatt on youtube. The reference video I used can be found here. (Thanks pastamatt!)
Minolta 50mm f2

SUPER-TAKUMAR 50mm F1.4
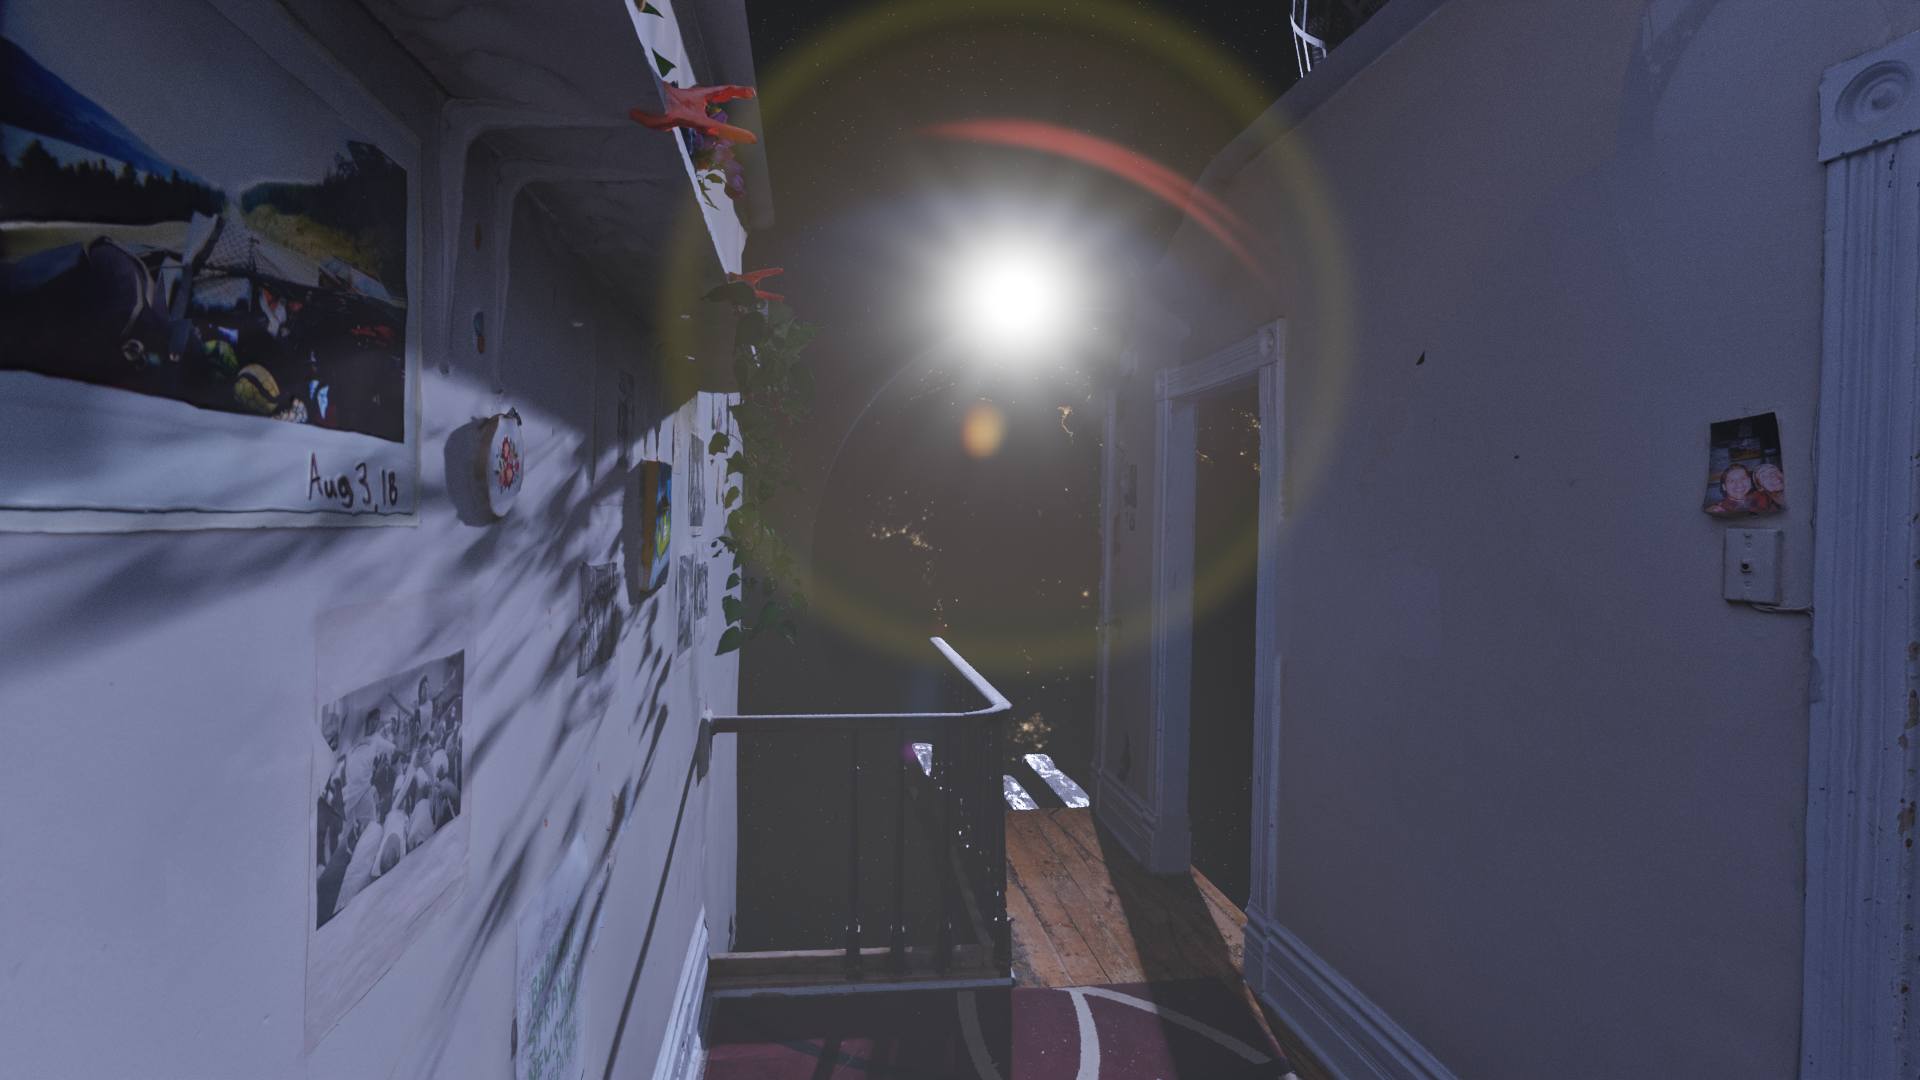
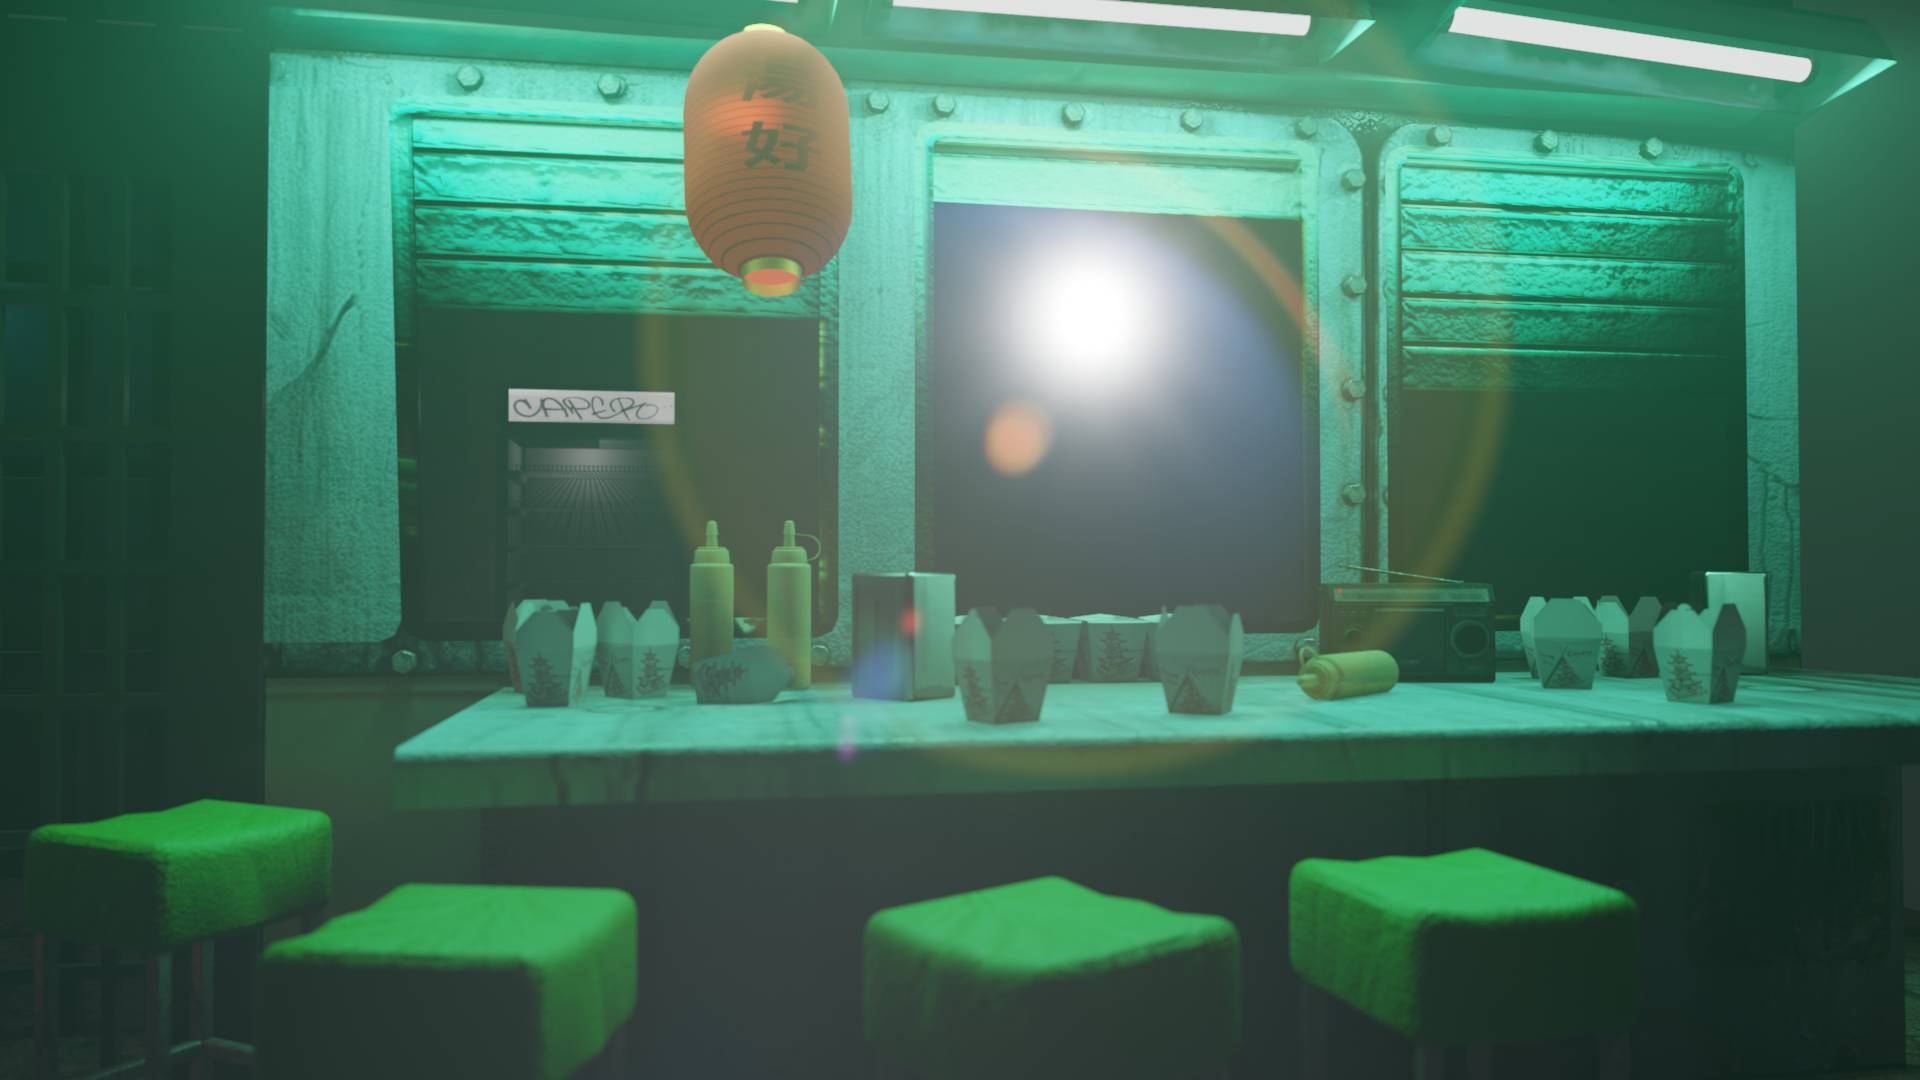
MIR-1 35mm F2.8

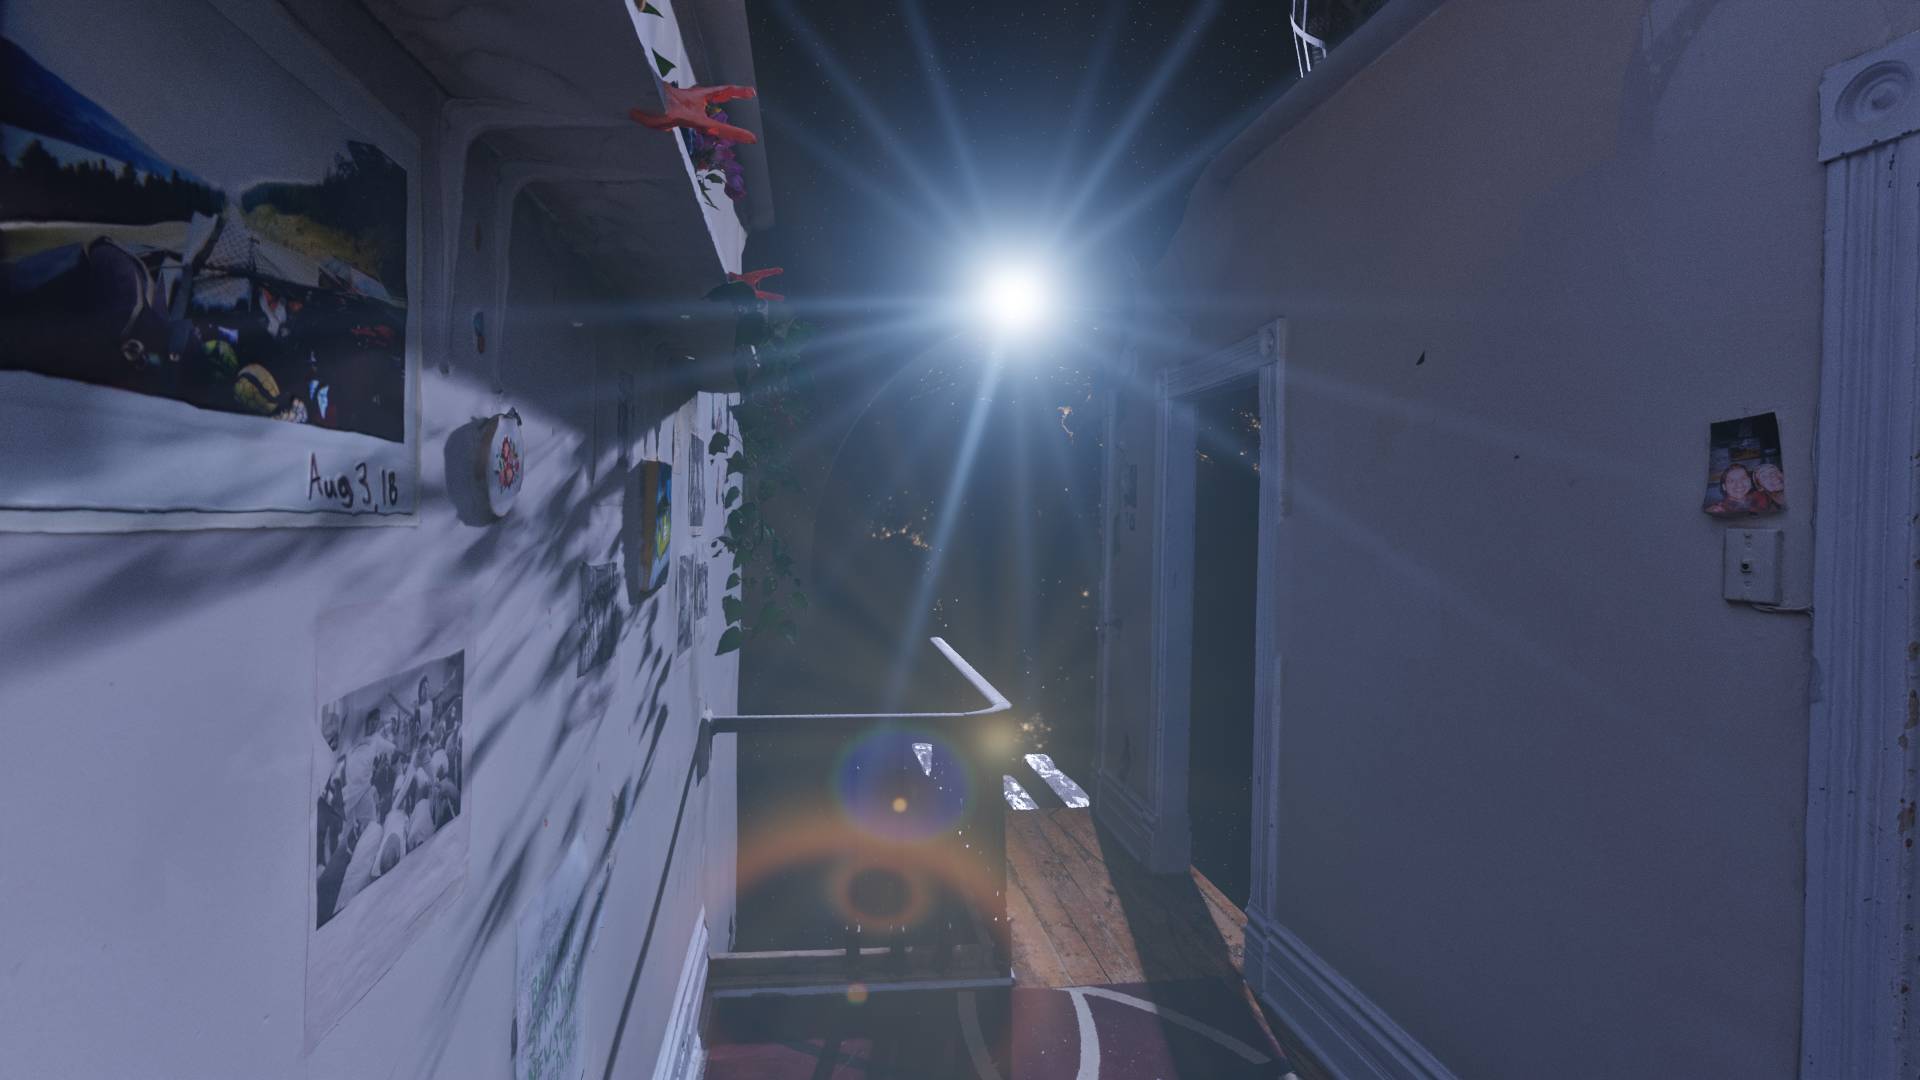
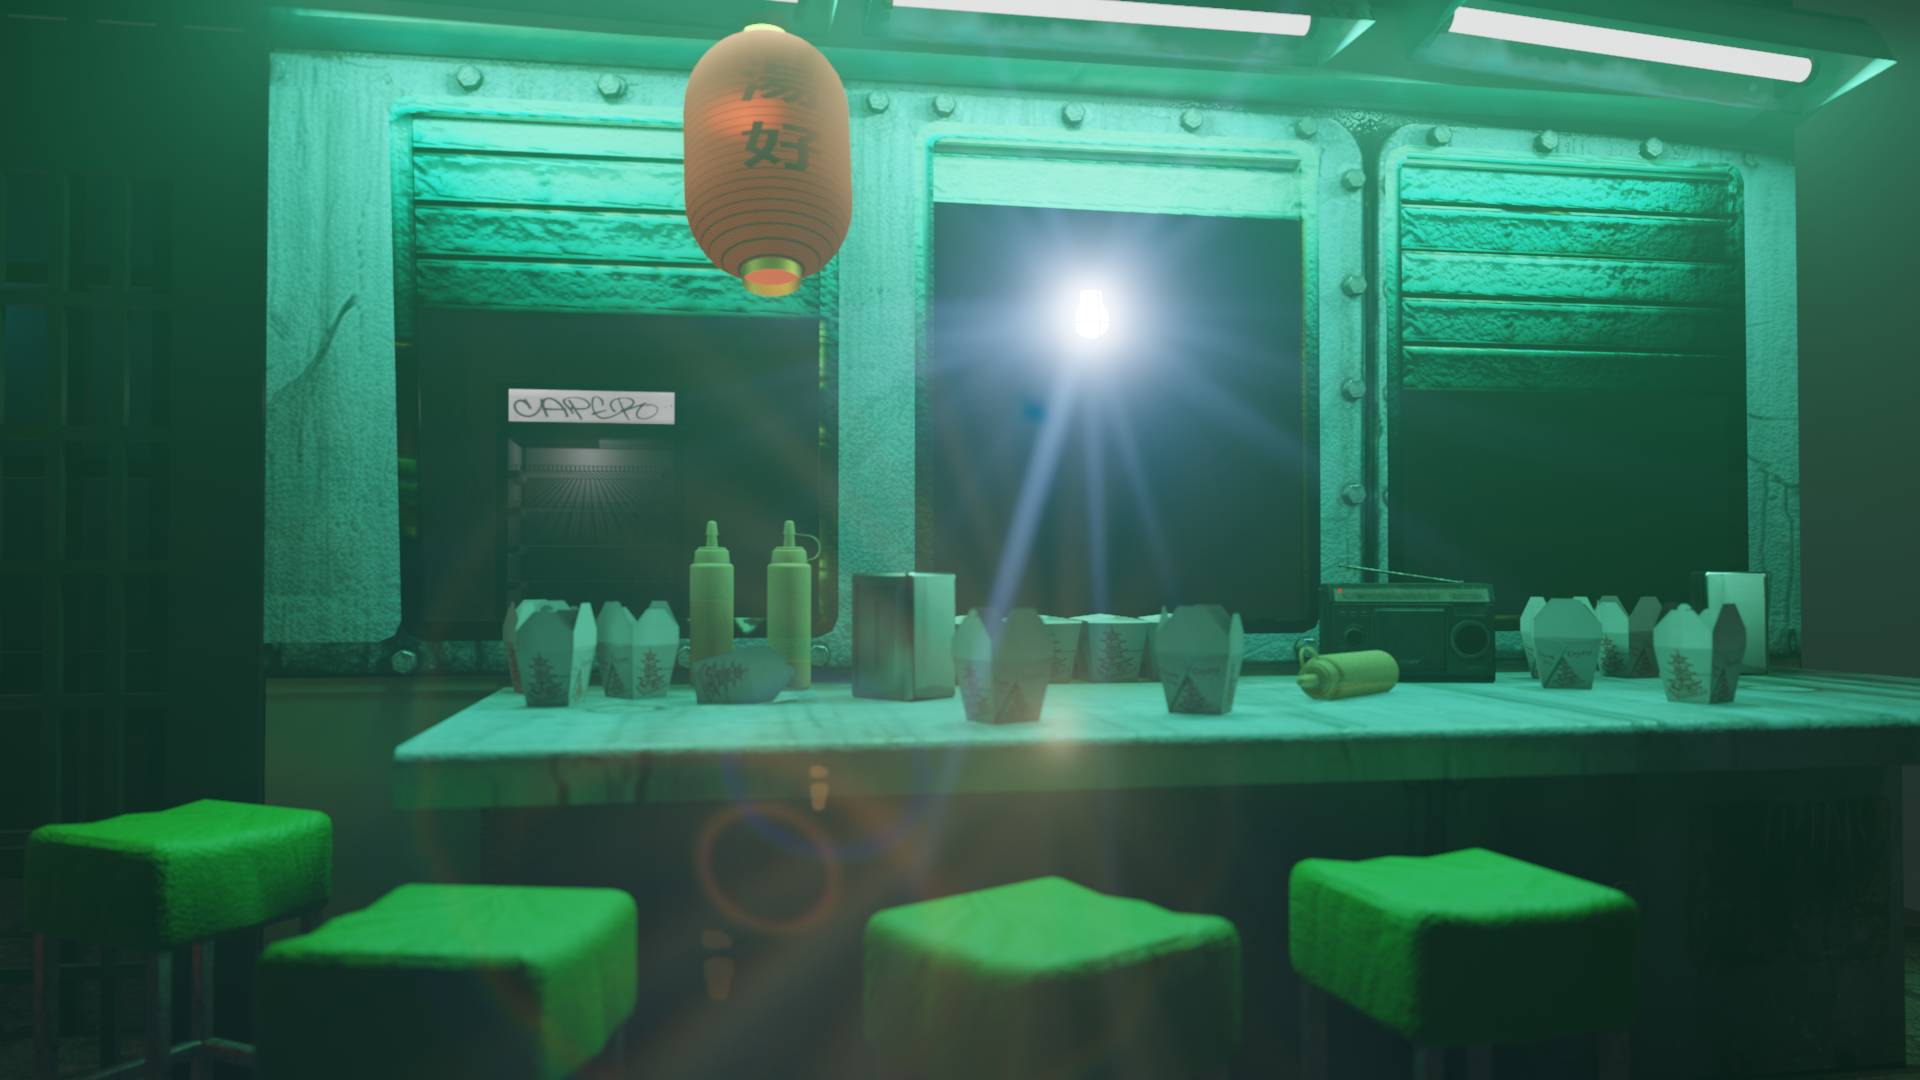
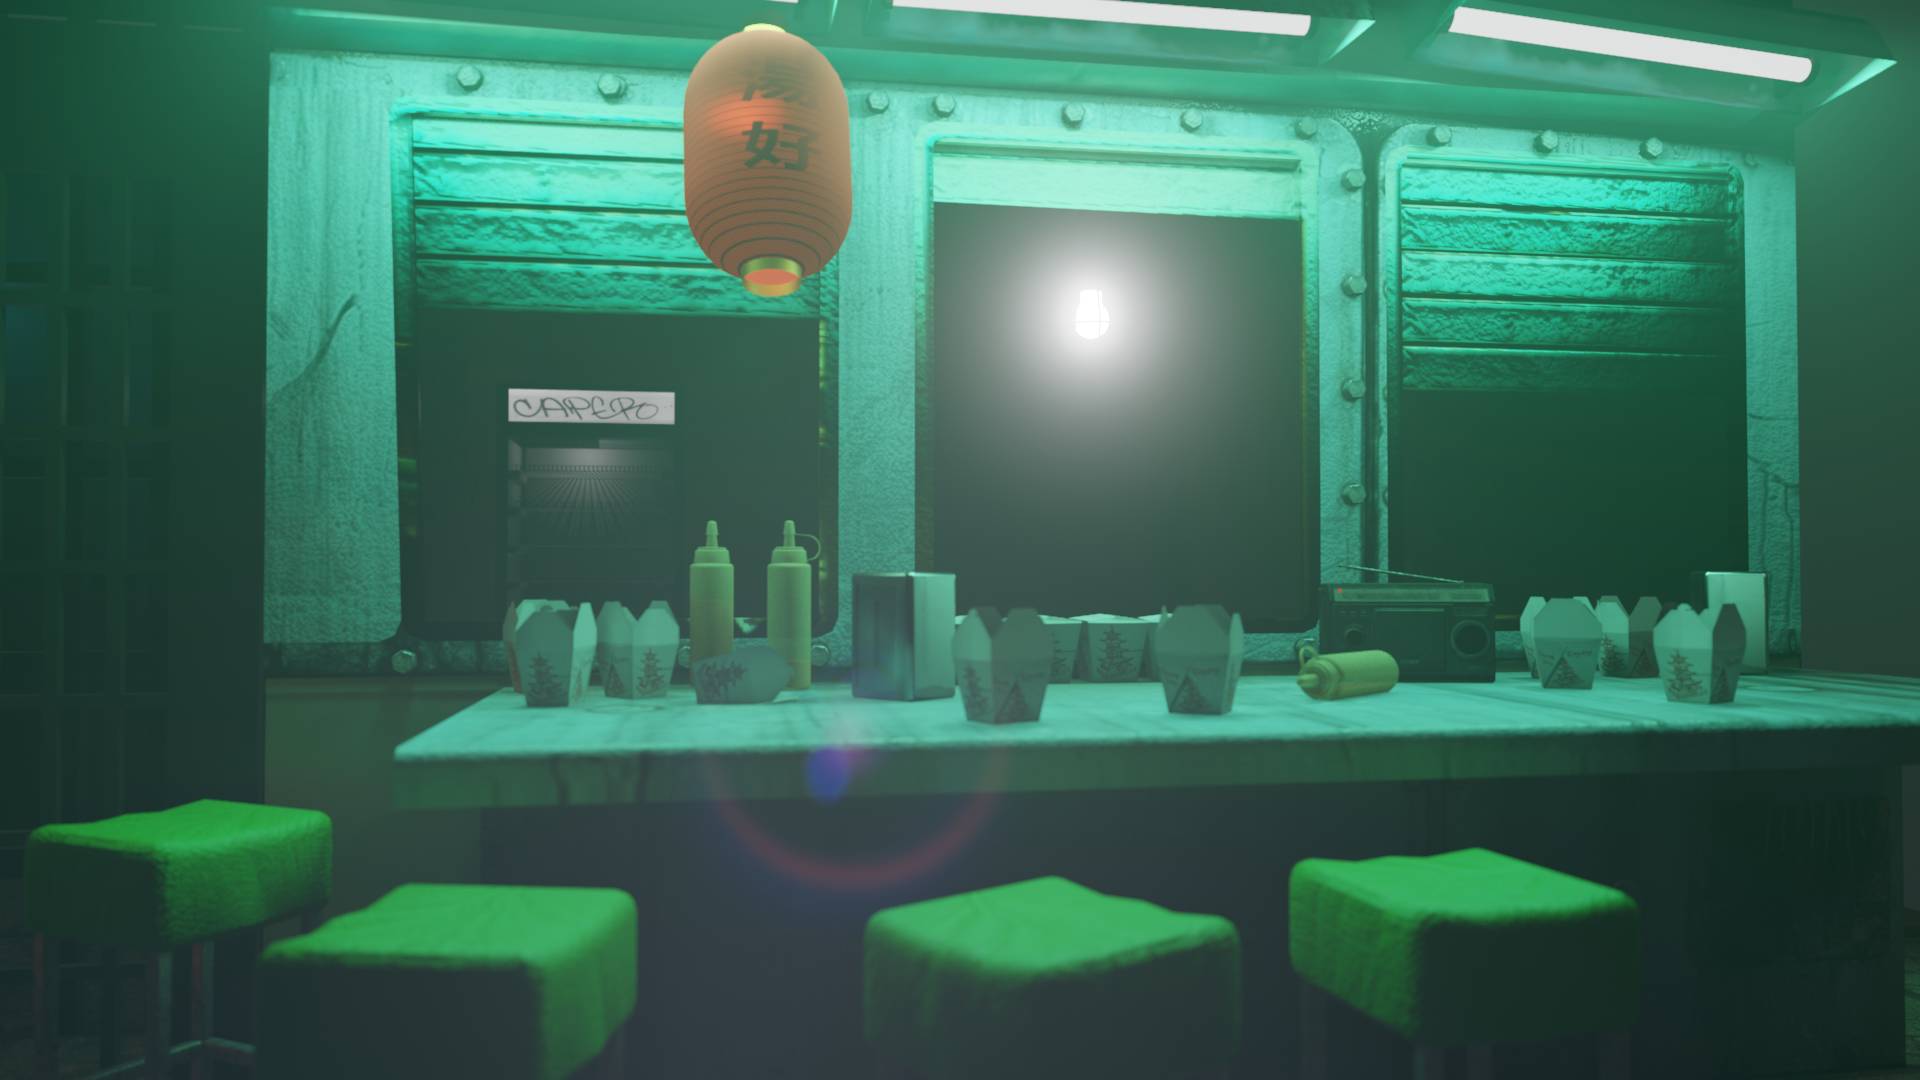
Cooke Anamorphic
And more to come!
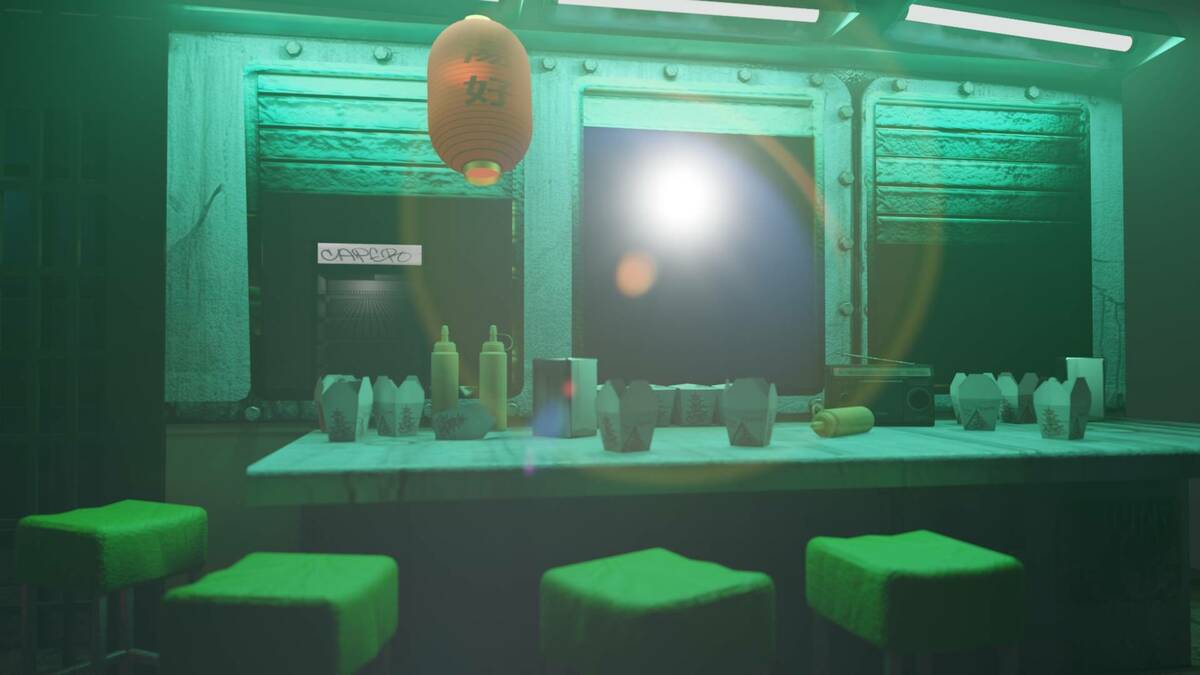
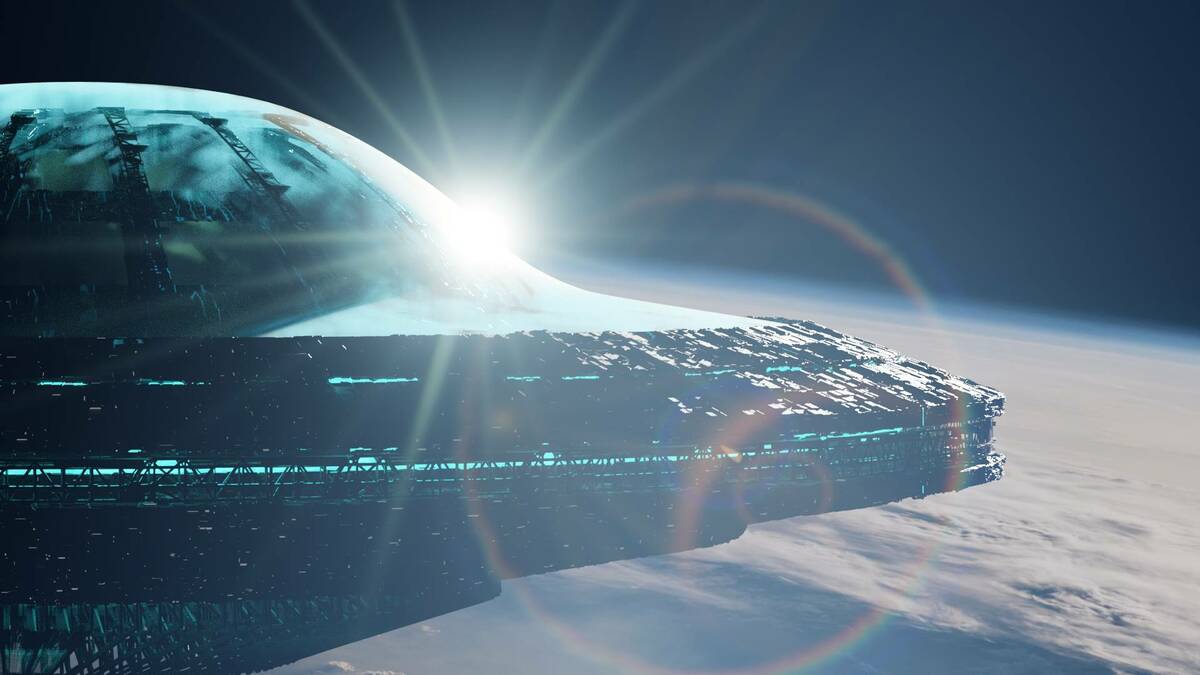
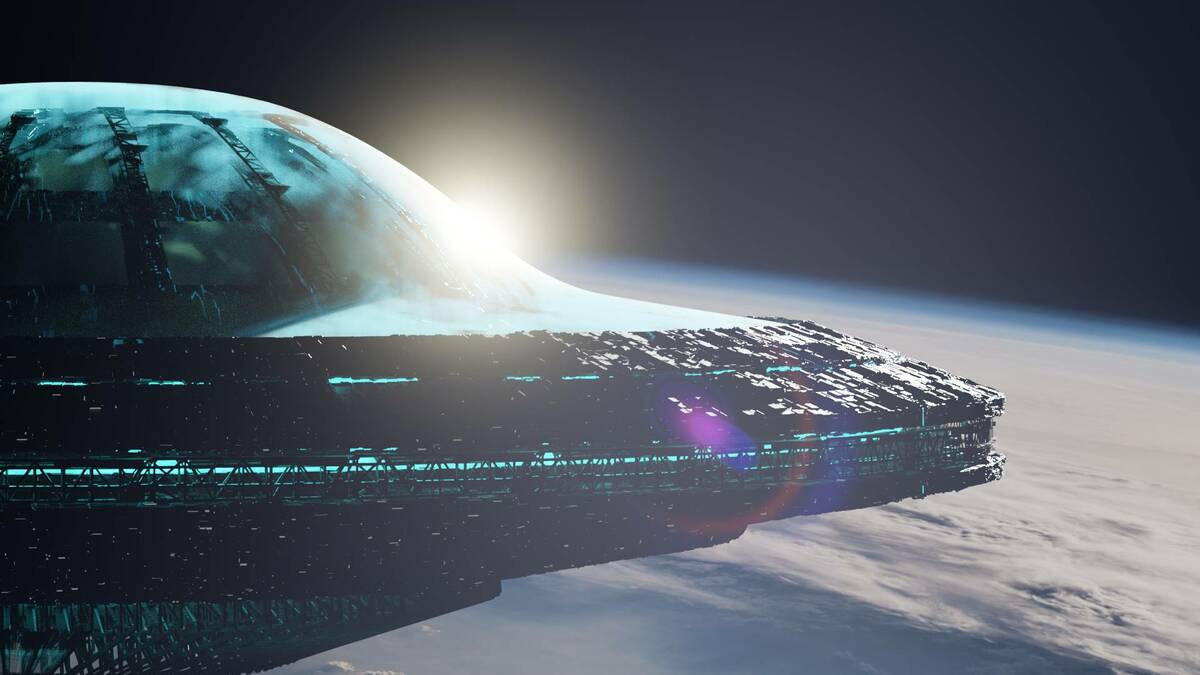
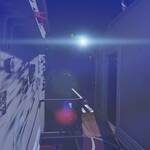
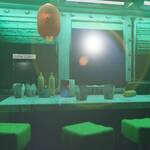
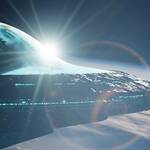
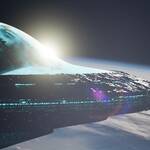
Here are the original renders for context:
How to Install:
Open your default blender scene
Click “File → Append”
Find “easy_lens_flares_x.blend” and double click
Find “NodeTree” and double click
Shift click to select all the nodes starting with lens_flare and click “Append”
OPTIONAL “File → Defaults → Save Startup File” if you want them accessible for every new project
Go to the compositing workspace and hit SHIFT+A to add, and under “Group” you should find the flares
Drop into your composite setup
In the compositor, press N to toggle the N menu. Under “Options” tab make sure your device is set to GPU
You’re good to go! Turn on your viewport compositor to see some flares in action
You can also append the node groups to scenes you’ve already made, just skip the step where you save as a default startup file.
Best Practices:
The lens flares need an emissive object in the scene to work. Since lights in Blender aren’t visible to the camera you’ll need to make an emissive object (like an icosphere), give it an emissive material of about 30 strength, and place it where the light in the scene is or would be. If you don’t want it to affect the lighting of the scene just go to the Object Properties tab and under “Ray Visibility” uncheck all the visibilities except for Camera.
You might need to toy with the strength of the emissive light and the sensitivity slider on the node. The size of the emissive object affects its brightness, so it can be a bit of a balancing act.
If you’re using lens flares with an HDRI make sure you choose and HDRI that makes sense. Pick one with a single bright point from a sun or lamp in the HDRI. You may need to crank the sensitivity slider on the lens flare node up to like 200 too since HDRIs have a very wide range.
You'll likely need to turn the default Flare Strength down. I have it set to 1 to show off the flares, but for actual renders they should be much more subtle to be realistic.
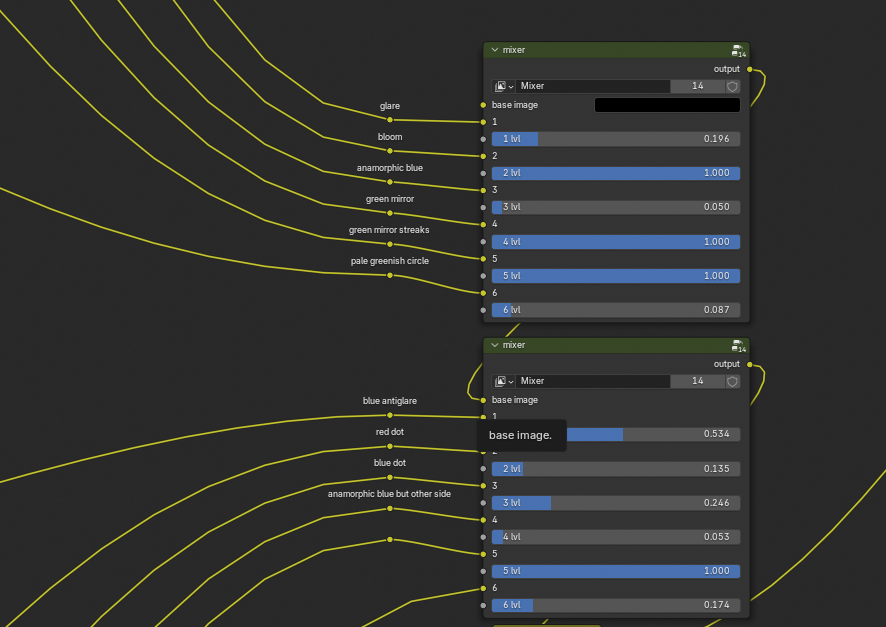
If you want to make adjustments to the individual elements of a flare click on the group and press TAB to enter it. At the end of the node group there will be “mixer” nodes. Play with those to adjust the levels.
Lens Flare Limitations:
Limited to screen space
Requires an emissive object in the scene
Behavior can be a bit unpredictable while changing distances.
Probably more; this is my first time doing this :P
Thanks everyone! I hope you enjoy :)
---
UPDATES:
Easy Lens Flares 1.1:
Changed all gaussian blurs to fast gaussian blurs which almost doubles performance.
Lowered Dispersion on a few lens distortion nodes.
Hooked up "halo small follows" which hadn't been fully implemented (oops).
No more "Scene Normalization" or "Highlight Key" nodes. I was trying to do a thing that became redundant so I replaced them with a simple 2 node setup. Removing these nodes prevents them from being appended to your blend file when appending lens flare node groups and also deepens the distance range where the lens flares look good.
However, getting rid of the Scene Normalization and Highlight Key nodes broke the smooth falloff when the highlight reached the edge of the frame. I implemented and scaling workaround to prevent increased values near the edges of the frame, which seems to be a feature of fast gaussian blur.
Added an output just for the lens flare.
Small changes to various lens flare elements.