Disintegration Fxs V1.1
Disintegration FXs | Documentation
Getting Started
Check out this video to learn all the basics of Disintegration FXs
Install Disintegration FXs
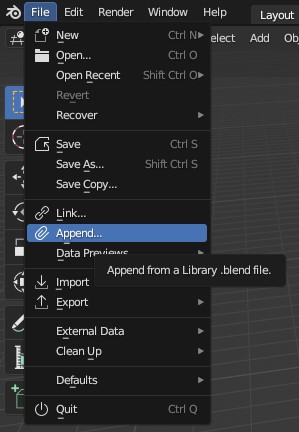
To use Disintegration FXs, you can use the legacy method of appending the template object.
Go to File>Append and locate the DisintegrationFXs .blend file. Select it. Go to Objects and select the required template object from there.
Or you can use the assets library(recommended).
For that put the Folder containing the Disintegration FXs .blend file and assets library catalog files in your desired location.
Then Go to Edit>Preferences and under File Paths, you can add a new library. Locate that folder from there.
Now go to Assets Browser window and select that library.
Refer to the Getting Started Tutorial to see this in action.
Guide Mesh and Still Mesh
Almost all the templates provided in Disintegration FXs, ask you for a few object inputs.
Guide Mesh and Still Mesh are two of them.
To disintegrate your animated character first, you have to turn it into a Guide mesh and a Still mesh.
For Guide mesh(Animated mesh) you can use your character mesh which has the armature modifier.
To create a Still mesh(non-Animated mesh), first, select your animated mesh and duplicate it. Keep it parented to the rig(armature).
Then while on the first frame of the animation, apply its armature modifier.
This will create a still mesh from it.
There Should not be any geometric difference between the two meshes. Both meshes should share exact same vertex count.
Controllers
Controllers are another common input in all of the effects. Here you have the option to choose two controllers. You can also use 1 controller if you want to.

For the controller you can simply use any object. But we strongly recommend using empty sphere.
Hit Shift+A, in the Add menu go to Empty>Sphere and add an empty sphere to the scene.
If any part of the mesh is inside this empty that part will be masked to disintegrate.
To create a disintegration animation all you have to do is animate the controller location and scale.
Here are some info about a few templates. These will give you an idea on how to use any of them.
Vanishing Mesh
Vanishing mesh makes the mesh disappear. It can be used in two ways, you can delete the mask geometry or make the masked area transparent from the shader.
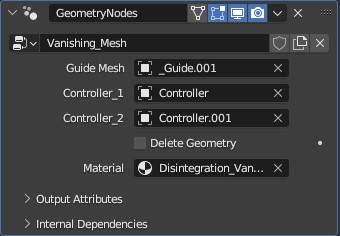
Here we also provide a basic material for vanishing. This contains two attributes you can use to enhance the material.
For example, you can use the Bluredmask attribute to add different variations to the edge of the mask.
If you’re not using the "delete geometry" option in the modifier, here you can use the Mask attribute for the alpha channel to make the masked area transparent.

Refer to the Getting Started Tutorial to see this in action.
If you want high res geometry when deleting the mesh, Duplicate your existing Guide mesh and add a subdivision surface modifier(Do not use the previous Guide Mesh because adding a subdivision modifier will change the vertex count between still and guide mesh). Use that as your guide mesh here.
Particles Only Disintegration
This will emit particles as the mesh disintegrate.

Density will control the amount of particles.
When you add this template it will add empty object to the scene along with the template.
This empty arrow will control the direction of the particles flow.
To use it correctly first, select the Direction empty go to Object Constraints and select either guide mesh/still mesh/armature or added template from the Track To constraint.

For the particles you can add your own objects as particles.
For that create your particles shapes and add them to a separate collection.
Select that collection from here.
Particle material,
For the particle material, you can use the existing particle’s material or grab the texture data from the character mesh using the provided template material.
Copy colour image texture from the character material and paste it here in the Disintegration_Particles material.
Use provided attribute(ParticlesUV) as the vector input of the texture.
Back in the modifier make sure to put the UVmap name of the character mesh.
Refer to the Getting Started Tutorial to see this in action.
I guess every other input are self-explanatory.
Dust Only Disintegration
Dust only is very similar to the previous template. Except this time it will create volume.
To change the volume color you can find an option inside the provided volume material.

Here are some tutorials regarding volumetric effects with geometry nodes.
Create Volumetric Portals In Blender With Simulation Nodes!
Collision Particles
When using Collision particles you have to add mesh objects to Ground input and Collision input.
You cannot leave them empty as they are essential to make the simulation work.
Ground offset will push the ground on its normals(happens inside geometry nodes, not visible in the viewport). This will be helpful to reduce the amount of particles that go through the ground mesh.
If you want the particles to collide with certain other mesh. Use it as a collision object.
If you desire to have no other collision then select some other object which is far away from the simulation area. You cannot leave this empty.
To improve the collision quality, You can follow these steps. (Only recommends if you know your way around in geometry nodes)
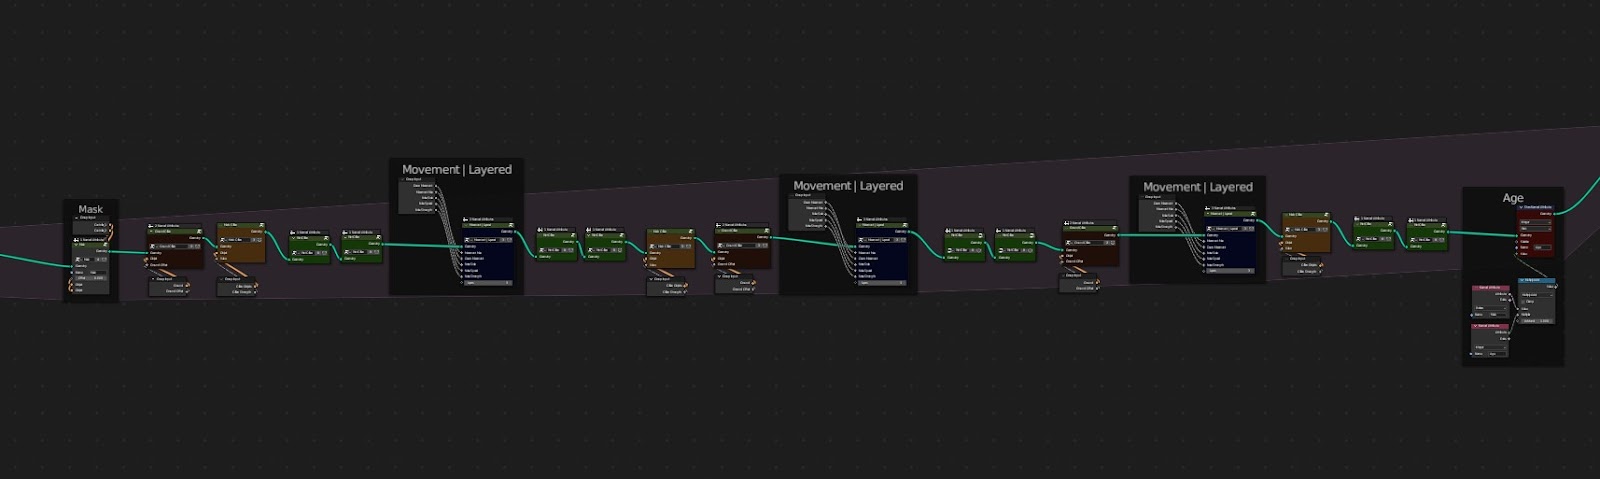
To improve ground collision duplicate the ground collision node group(brown) a few more times and put them between Mask frame and Age frame.
To improve Point collision duplicate the point collision node group(green) a few more times and put them between Mask frame and Age frame.
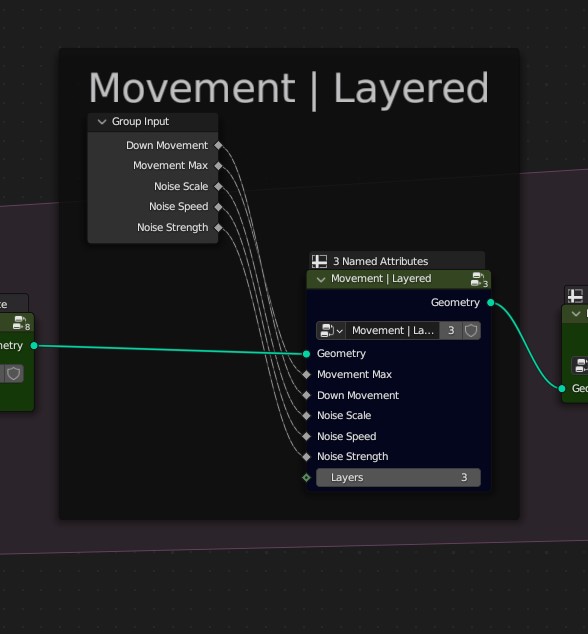
Then Duplicate layered movement node group a few more times like the previous ones.
Then in each node group put how many movement| Layered node groups you have in the setup in the layers input.
For example, if you have 4 groups then each node group’s Layers input should have 4. This will divide the movement within a frame giving collision calculations more chances to do their job.
In future releases(Blender 4.x) We are hoping to improve this and make it easier for every user.
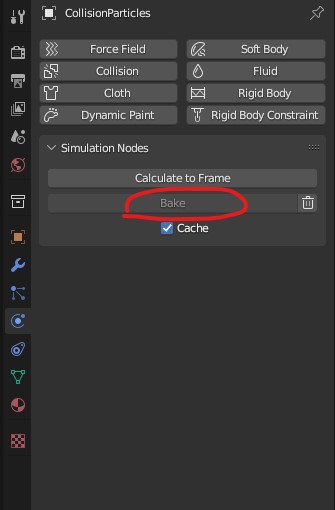
Baking the Simulation
Once you are done with the simulations before hitting render you have to bake it. Select the template asset and go to the physics tab and hit bake on the simulation nodes area.
Feel Free to Contact Us for any further questions and suggestions!
https://www.youtube.com/@hellfxlearn
https://www.instagram.com/hellfxstudio/
Don’t Forget to Check our Other Products!
Discover more products like this
assets for vfx exploded spring24 geometry node simulation 3d asset for vfx bfcm23 blender procedural winter24 blender modifier summer23 disintergrate disintegrator 3d animation simulation-nodes