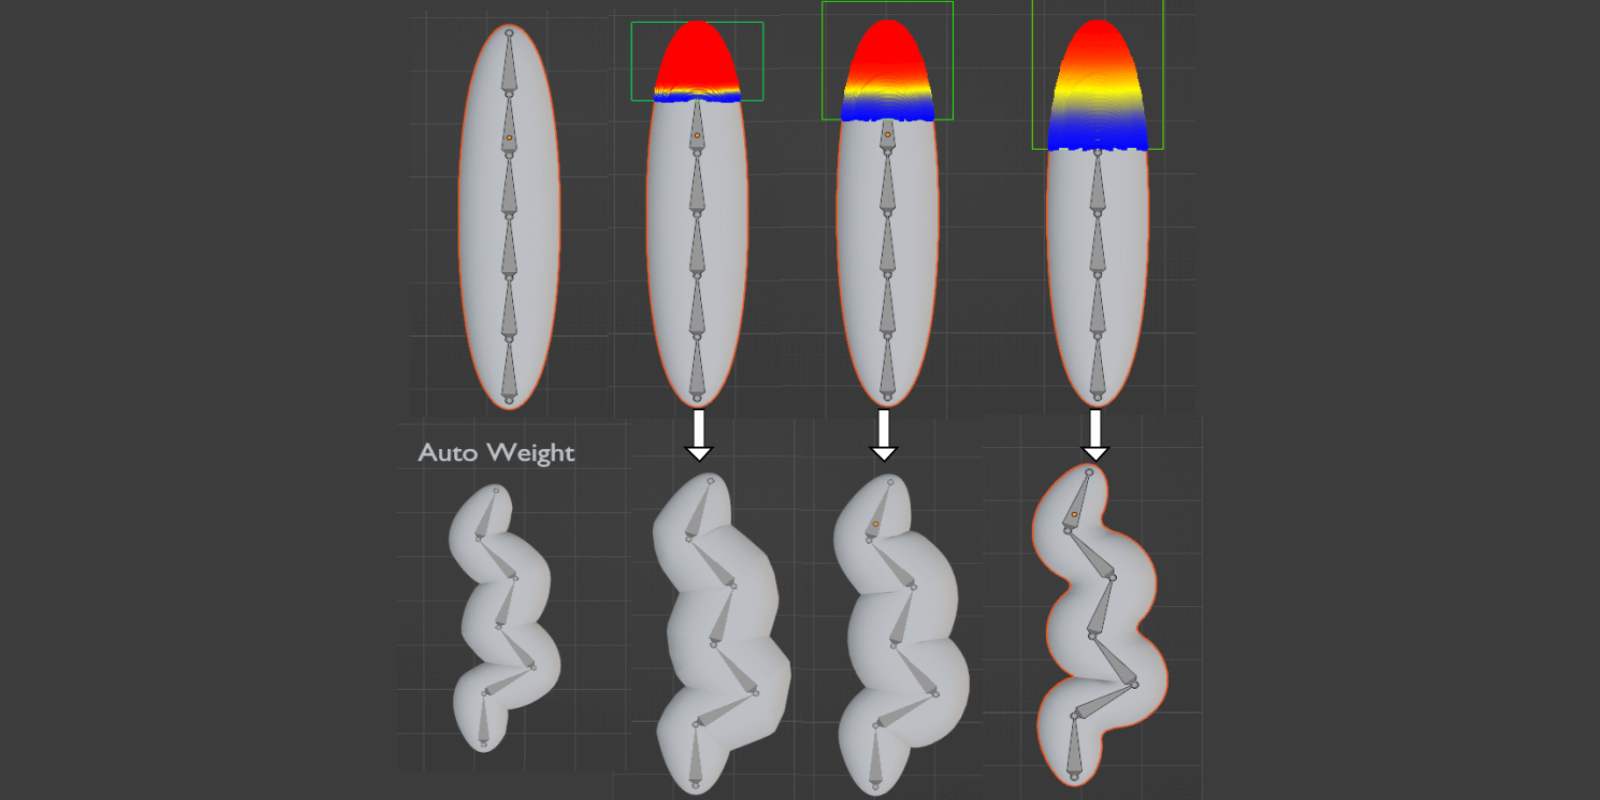
Easy Envelope - A Controllable Tool To Weighting/Skinning
Fast DEMO
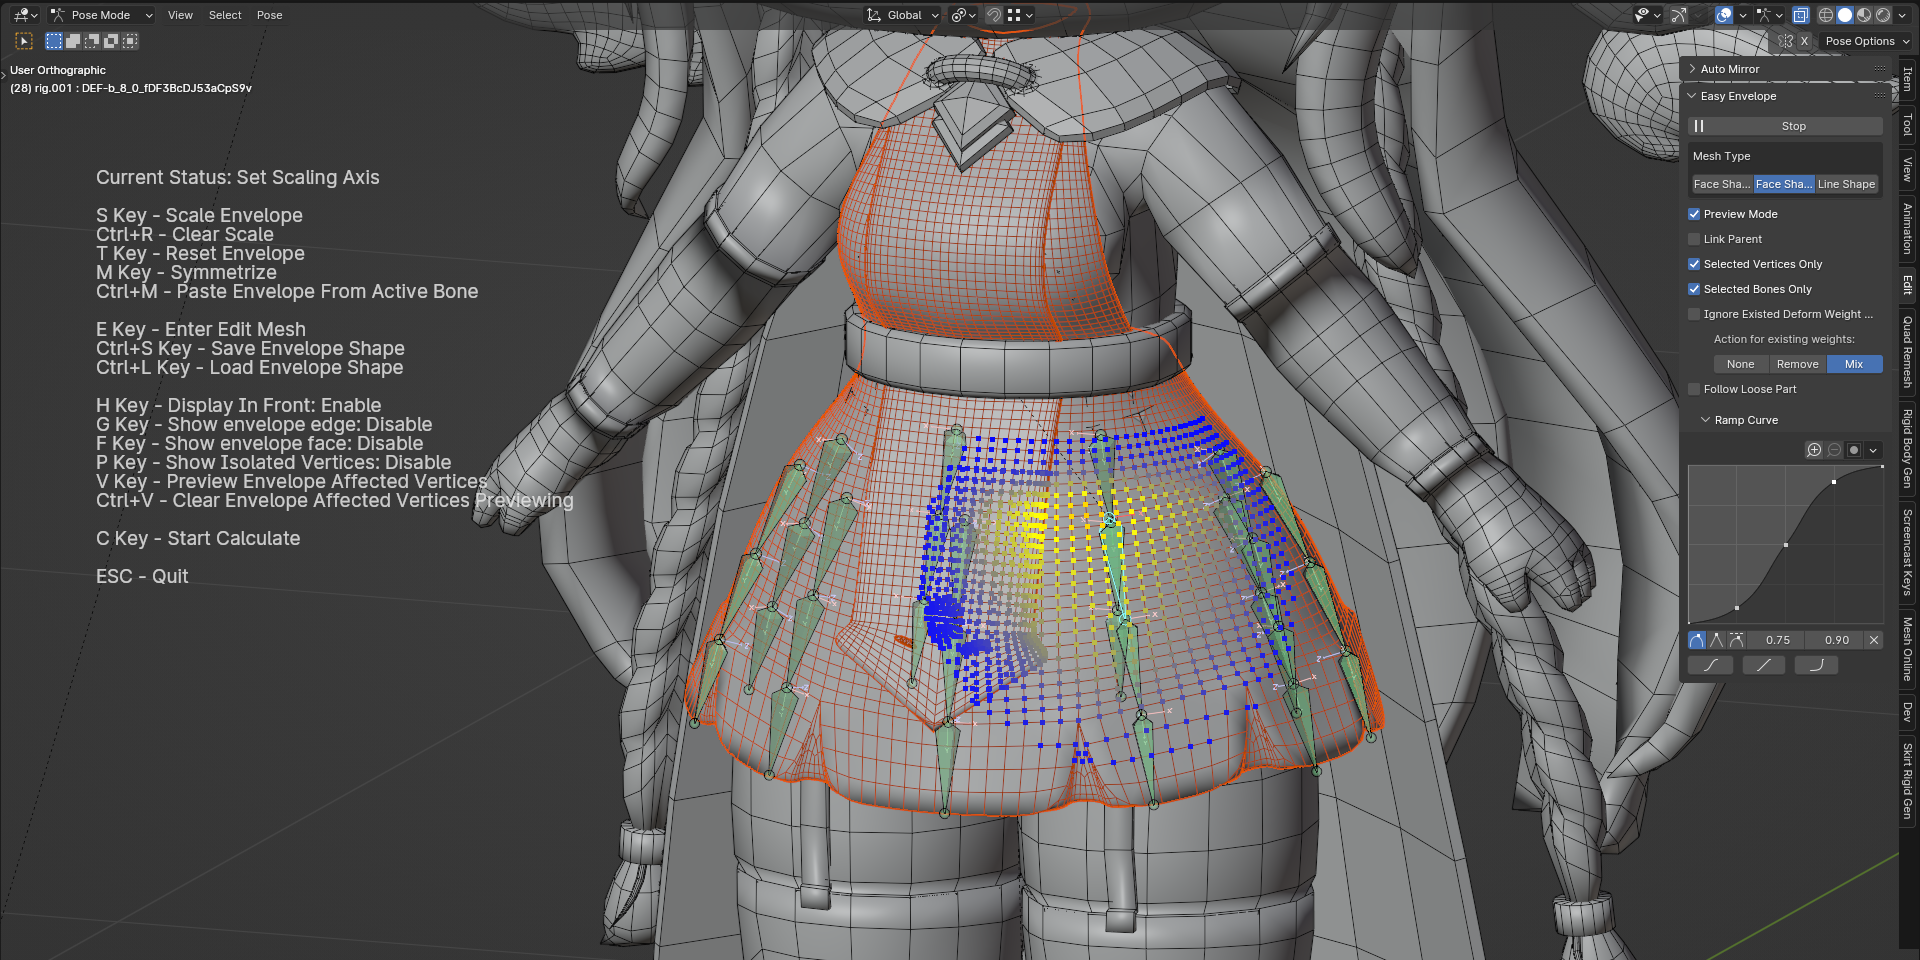
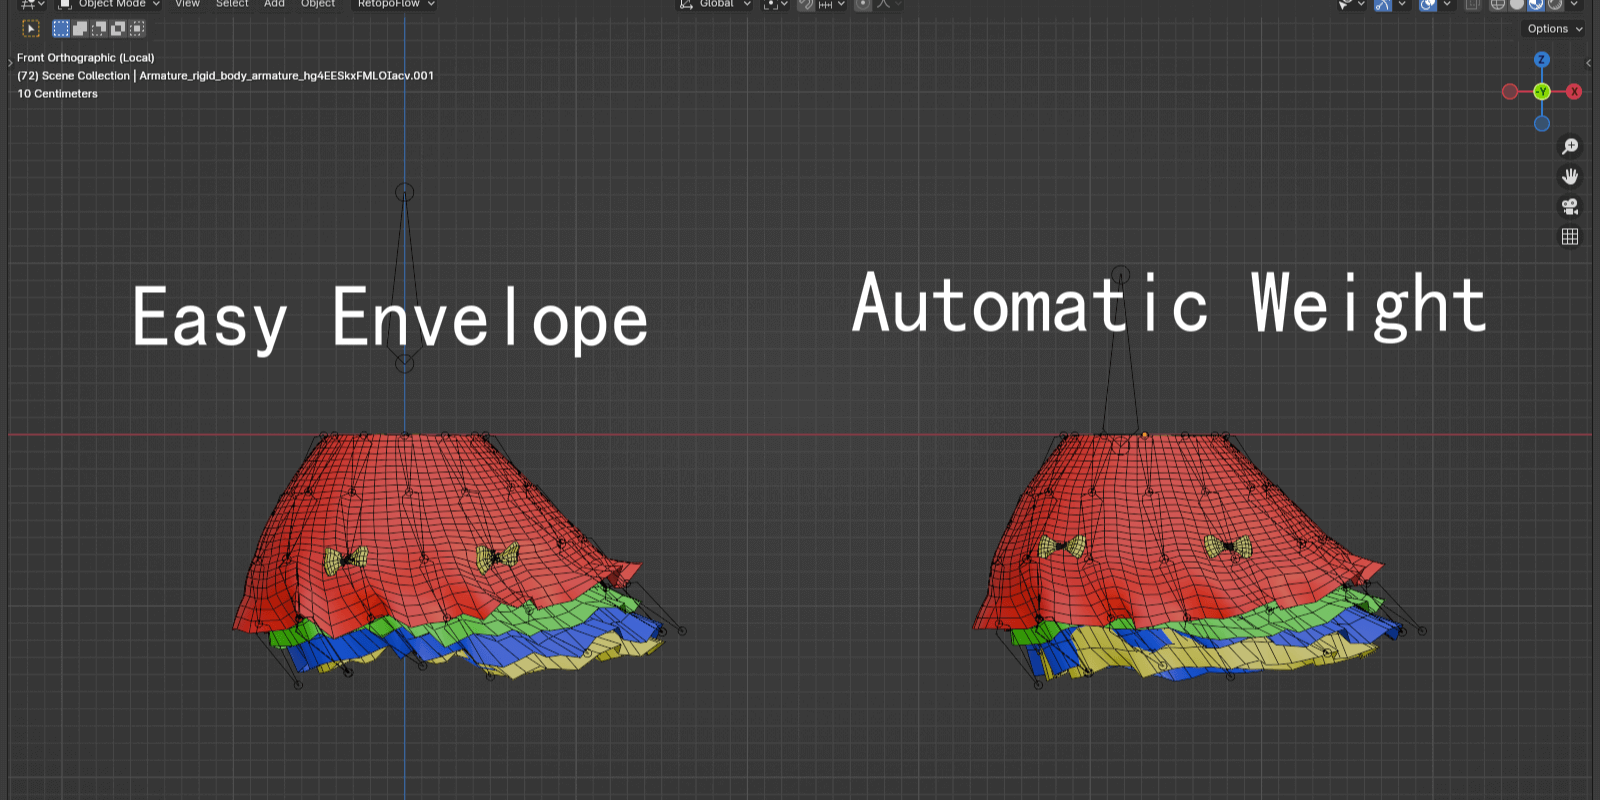
layered skirt weighting
Compared to automatic weighting, this method has less model interpenetration.
Video operation for this demo (Actually, you do not need to create complex shape like this video, just use sphere is good enough)
note that this addon only used for weighting, the physics result of this example is generated by rigid body simulation.
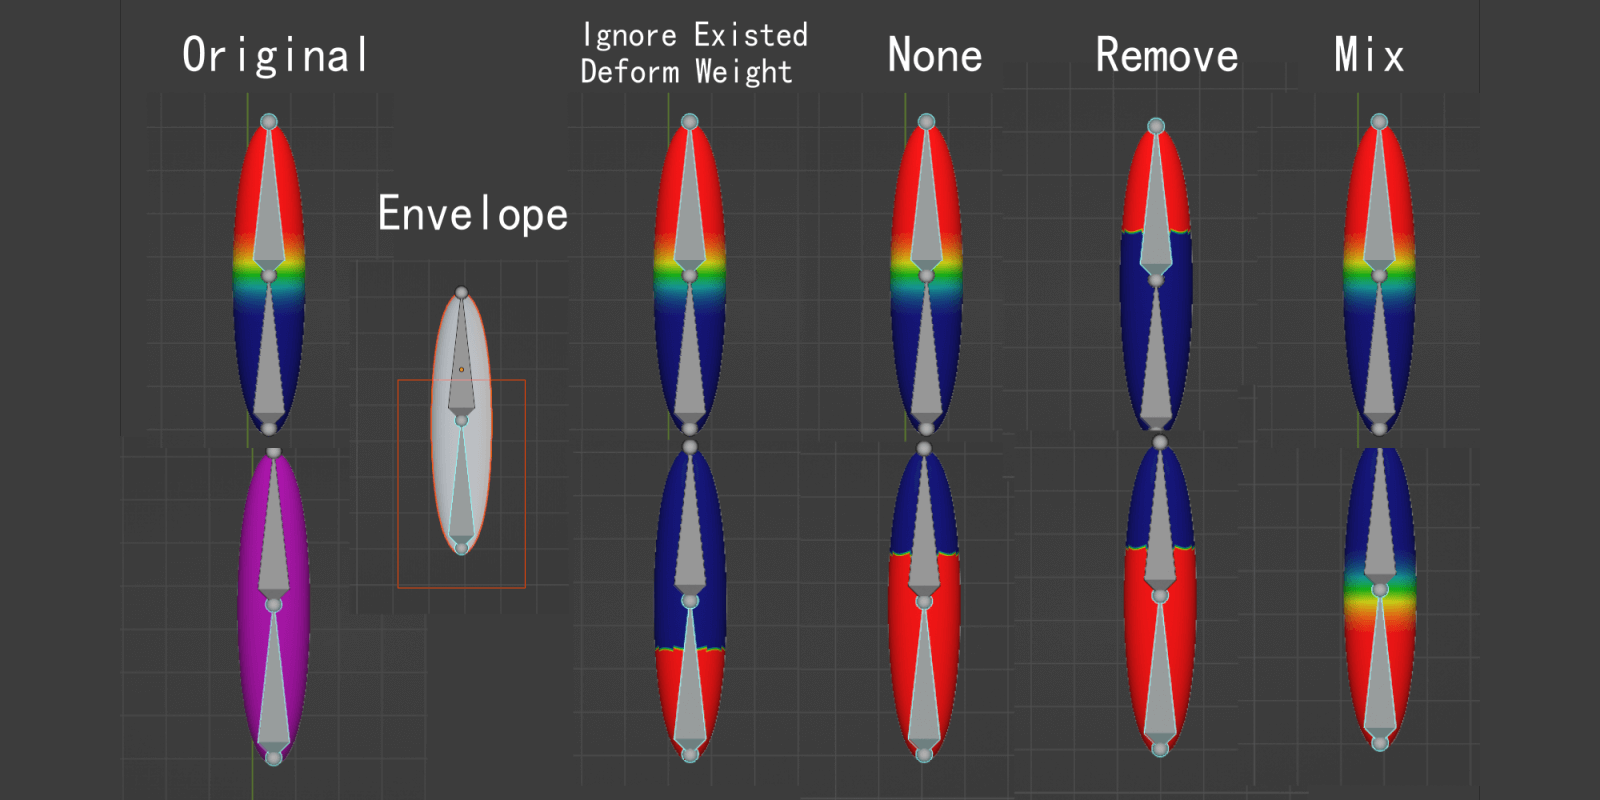
Weighting for a hair that has existing weight
You can use this addon to mix with existing weight without breaking it.(only work when the processed bones and the bones with weights in same armature)
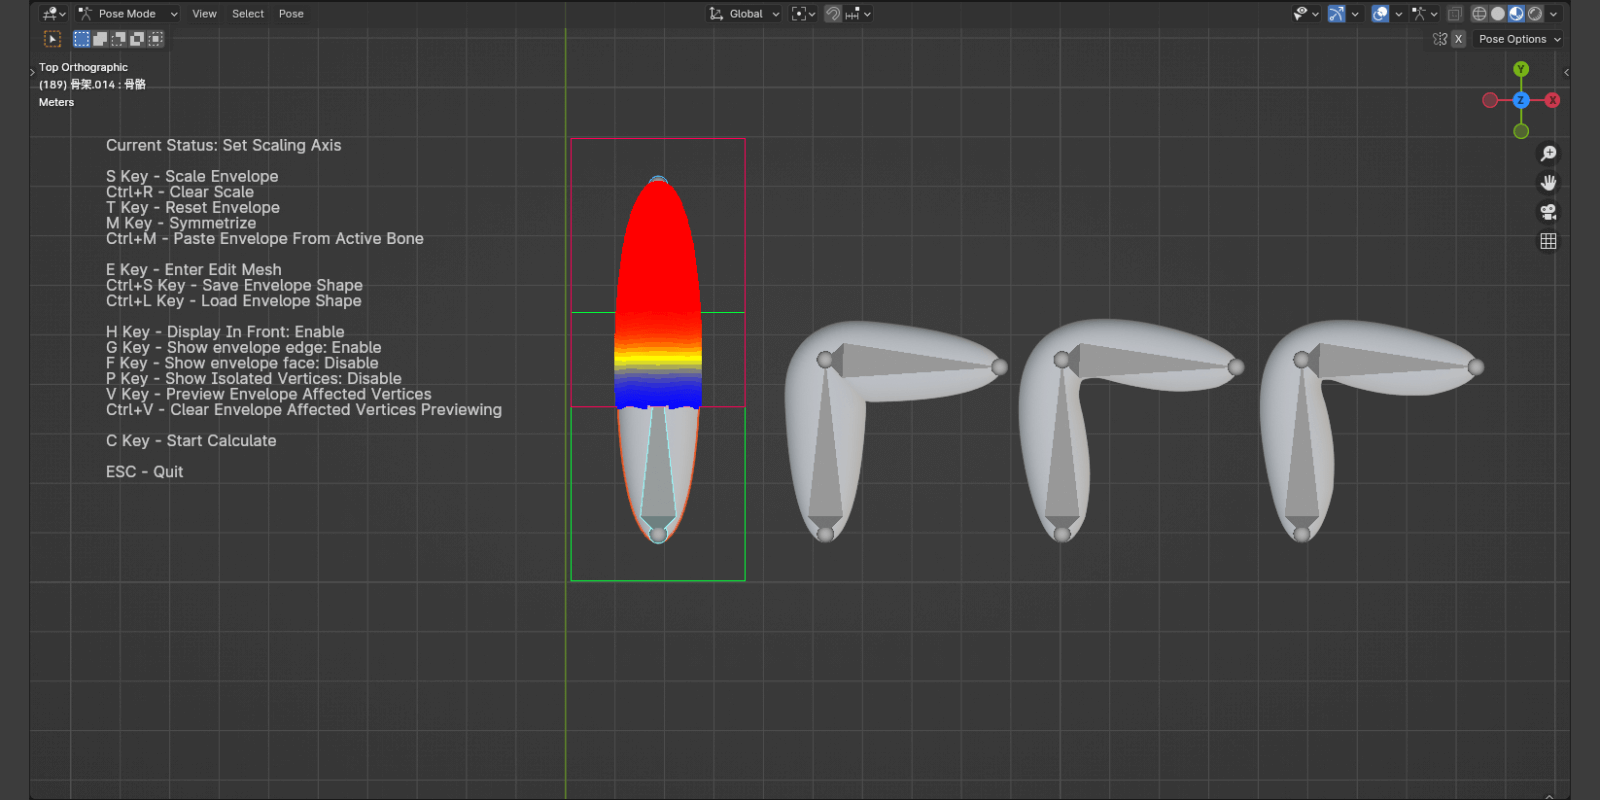
A Plane fold weighting
Using a different algorithm to get the weight result you want.
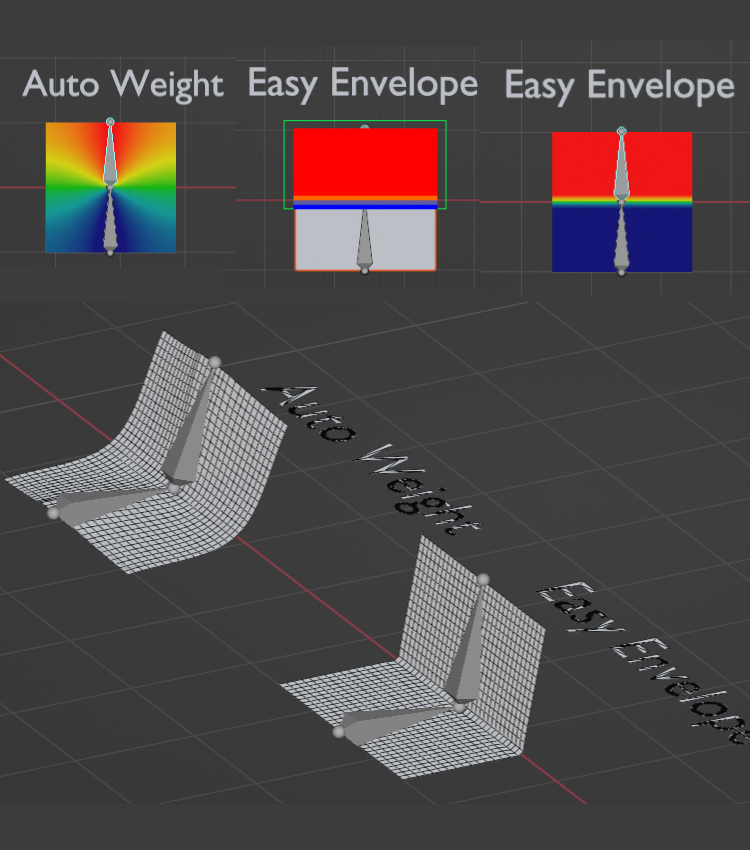
Introduction
When we use automatic weights, these automatic weight algorithms are unknown black boxes to us, and the vertices affected by each bone are uncontrollable, so in some cases some unsatisfactory results will occur. This addon uses Envelope weight binding, envelope weight is a weighting method that comes with Blender. The basic principle is that each bone has a cylinder-shaped envelope range. As long as it exists within this envelope range, the vertices within will be affected by the bone, and the intersecting part of the envelope is the part of the weight transition. Compared with the automatic weighted heat diffusion algorithm, this algorithm is more suitable for meshes with complex structures, such as multi-layer Lolita skirts. However, the built-in envelope binding function is relatively simple and cumbersome to operate and view. Therefore, this addon is expanded based on the envelope weight algorithm. It can customize the envelope range and view the envelope range conveniently in real time. vertices, and you can adjust the transition of weights between bones.
UI languages Supported : English, 中文, 日本語
Applicability of addon
Suitable situations, such as hems of clothes (parts that are not linked to human bones), cloaks, multi-layered skirts, hair composed of meshes, etc.
Unsuitable situations, complex biological binding such as human, human binding involves multiple bones, it is very cumbersome to manually specify the influence range of each bone, so Blender's heat diffusion algorithm is more suitable solution.
Why you need this addon?
①Feasibility. Some complex mesh can not be weighted by automatically weight, or some internal mesh your brush can not reach. This addon detect vertex by the range of its envelope. ②Consistency. Some seperated mesh, the heat diffusion algrithm may not deal with it well, this addon base on the distance to assign the weight to make sure the close vertex's weight is similar to keep the mesh consistent. (Notice: the seperated mesh you should assign a solid weight or as much gradient weight as possible, otherwise the animation will tear the mesh apart. Popular speaking just scale up the envelope.)
Basic Usage
①Select mesh object first, and then select armature object.
②Enter pose mode, you will see the start button on the N panel, click start button to enter the addon UI interface.
③Done the setting, and press "C" key to calculate the wetight, after calculation done, the weight will apply to the vertices.
Feature
You can view every envelope shape and its affected vertices.
You can edit your own envelope shape. You can also save the envelope as file and load it.

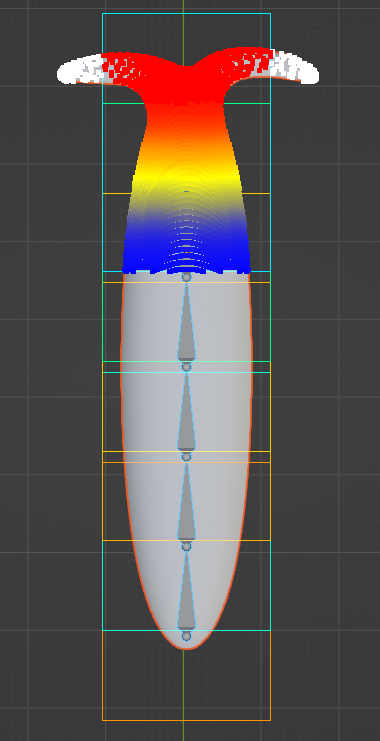
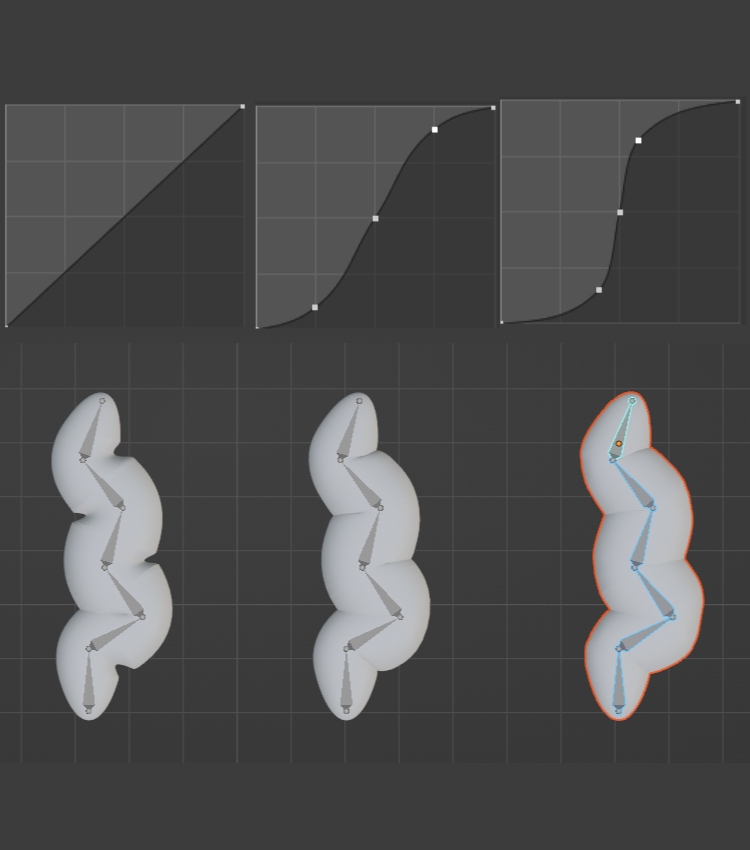
You can adjust the gradient curve to get your result
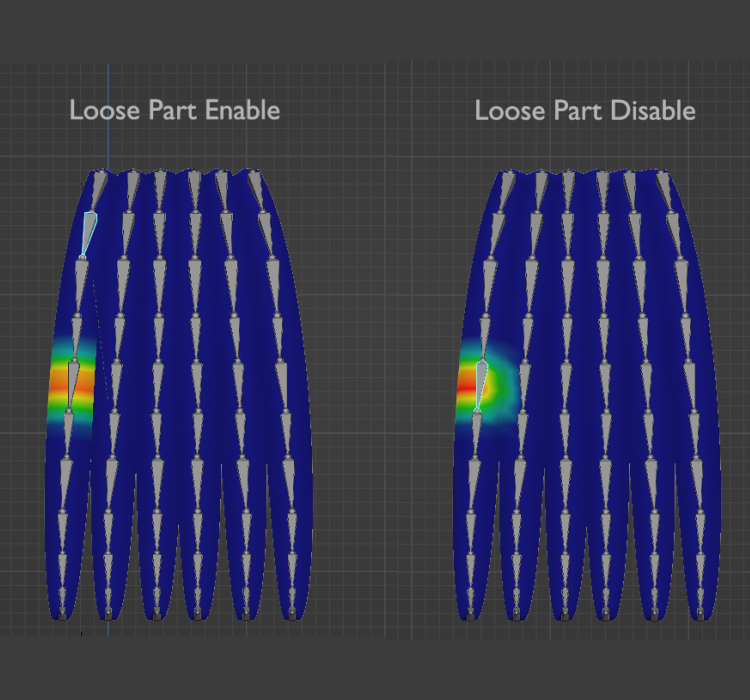
The "Loose Part" option makes a different result.
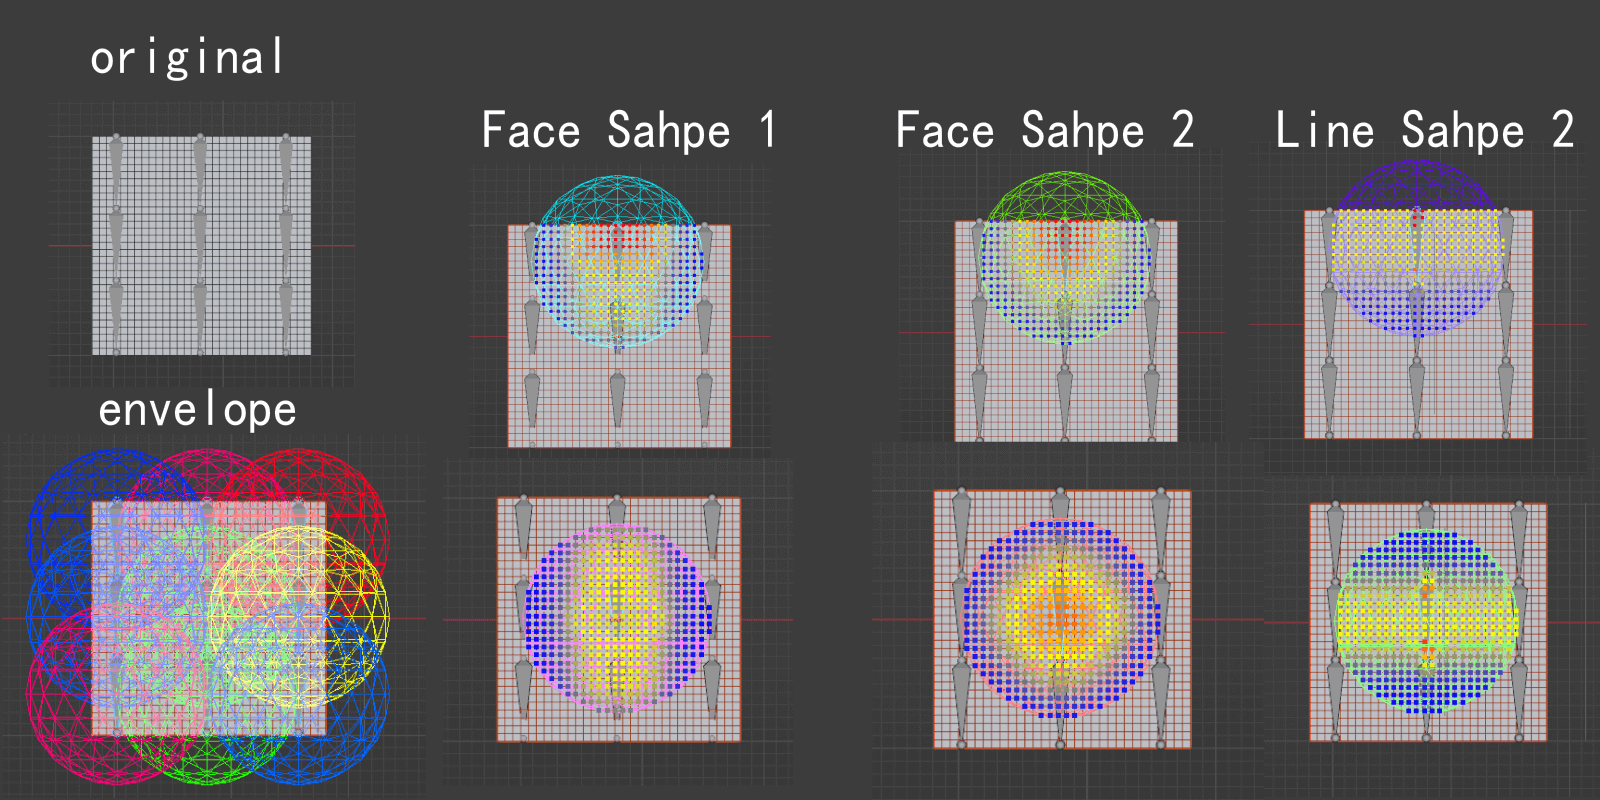
Different algorithm for different kind of mesh.(Example below using a sphere envelope to show different algorithm which display a different weight distribution)

