Blender Lod Generator Addon - Create And Use In Blender
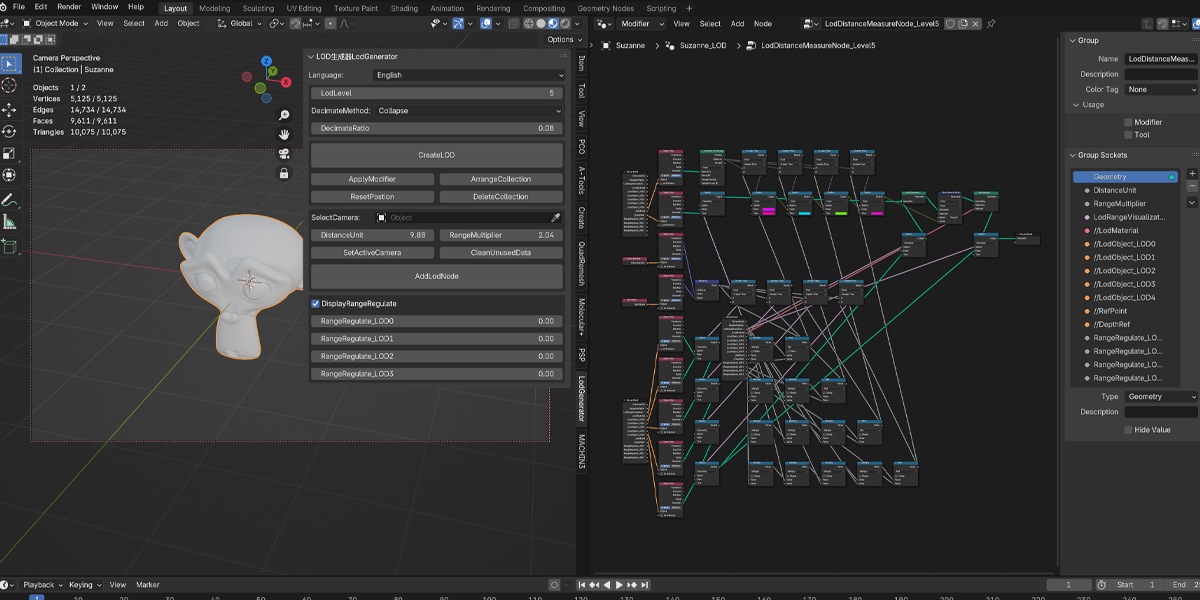
This is a plugin I created for quickly generating LODs in Blender. It can create a set of LODs based on existing high-resolution models and automatically switches LOD levels using the current camera. There's a visibility toggle to help determine the range for different LODs.
How to use it?
The whole process mainly includes two operations,
one is to create a LOD collection, the other is to create a geometric node which automatically switch LOD
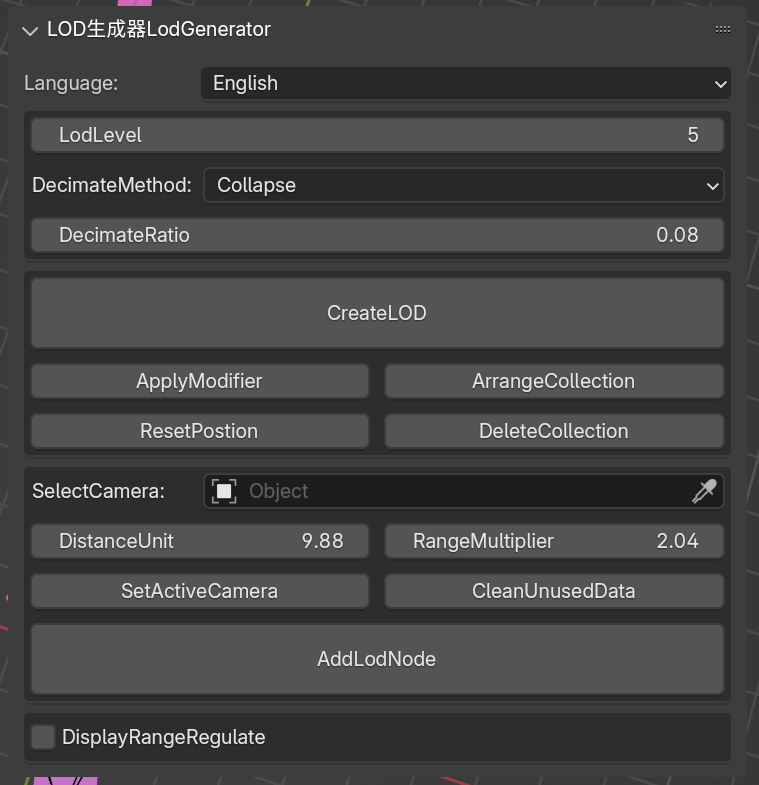
- After installing the plug-in, click N to bring up the menu
- Switch the language to English
- Click to select the high-polygon object as the active object
- Select the LOD level to be created
- Select the Decimate Modifier Method
- Select the Decimate Ratio
- Click Create LOD to create the LOD Collection
- Adjust the objects in the LOD Collection to ensure they meet your needs
- Select the camera in the scene
- After selecting the high-polygon object, click Add LOD Node
- Check LodRangeVisualization
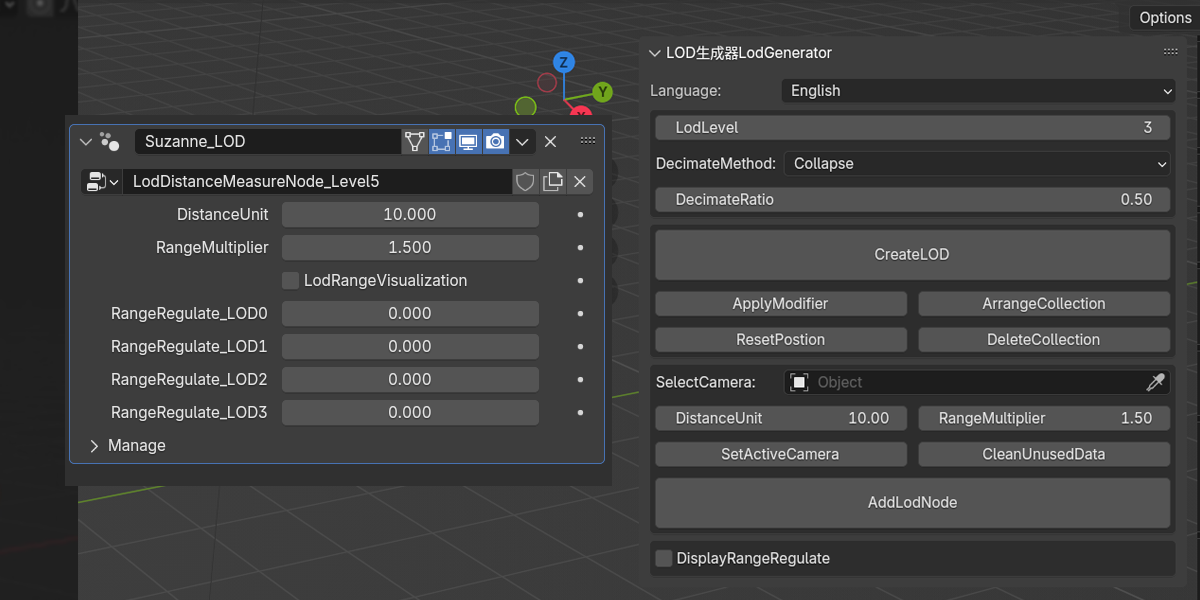
- Adjust the DistanceUnit and RangeMultiplier parameters in the geometry node to suit the scene
- Adjust RangeRegulate for different LODs to fine-tune the LOD range
- Uncheck LodRangeVisualization to restore the default material
Extra explanation of options
Instructions for operation in the UI
- Decimate Method
Because the plugin is based on giving different values to different LOD objects, the method here will be used uniformly for objects in the LOD collection.
- Decimate Ratio
The lower this value is set, the lower the ratio of faces retained between different lod objects.
- CreateLOD
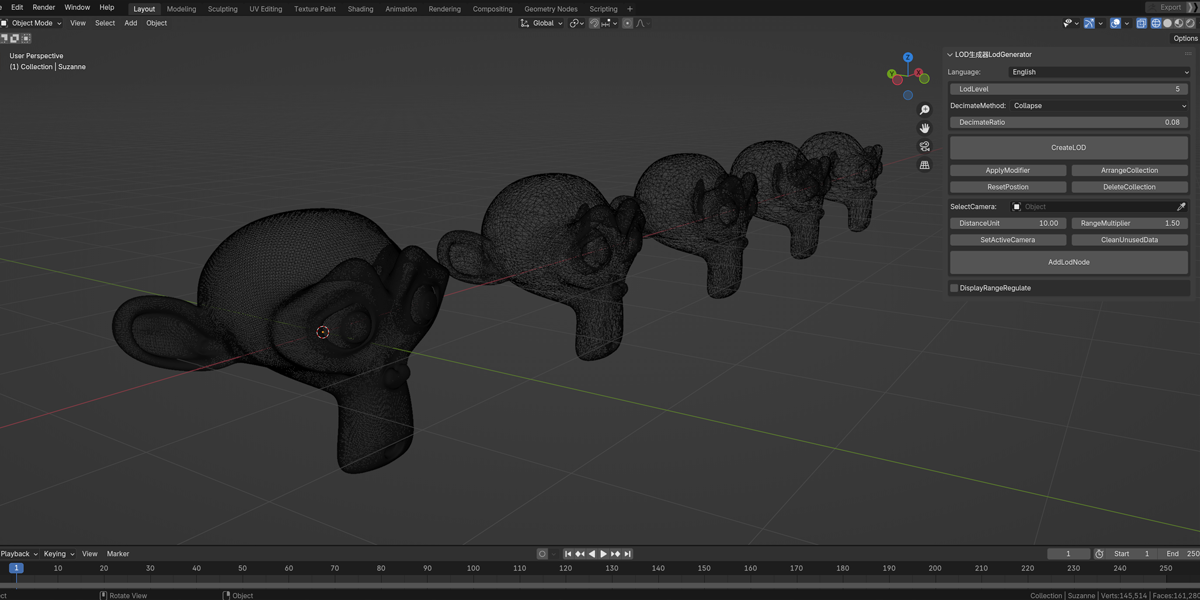
Select the high-polygon object first, then click this button. A collection named after this object will be automatically generated in the scene, and objects with the suffix LOD_0 will be automatically hidden. This object will be consistent with the original high-polygon object. If you need to modify a specific LOD object later, you can modify it in the collection.
- Apply Modifier
This operation requires the original high-polygon object to be selected first. Clicking the button will apply the modifiers of the objects in the collection named after the selected object. This operation is actually integrated into AddLodeNode. It is listed separately to facilitate additional operations and exports.
- Arrange Collection
This operation requires that you select the original high-polygon object first. Clicking the button will arrange the objects in the set named after the selected object along the X axis. This is mainly for the convenience of observing and comparing different LOD objects. This operation will be automatically applied in the previous operation CreateLOD. Here it is just to assist the Reset Position operation.
- Reset Position
This operation requires selecting all objects in the collection. Clicking the button will reset all objects to objects ending with LOD0. The overlap between objects makes it easier to observe the effect of Decimate on LOD.
- Delete Collection
Select the original high-polygon model and click the button. This will delete the collection named after the selected model.
- Select Camera
This checkbox will determine on which camera the plugin will use the reference plane.
When the selection box is empty, the plugin will automatically create a camera named after the object with the suffix _LodCamera, and align the 3D view to the camera.
When the selection box is empty, if there is an active camera in the scene, the plug-in will automatically select that camera as the selected camera.
- DistanceUnit & RangeMultiplier
One of these two parameters is used to adjust the base range of the first LOD, and the other is used to adjust the range multiples of subsequent LODs. After setting these two parameters in advance in the UI, the plug-in will automatically apply them to subsequent geometry nodes, which will facilitate the process of creating a large number of LODs.
- Set Active Camera
Set the camera selected in the Select camera box as the active camera.
- Clean Unused Data
When creating and deleting many LOD nodes or LOD collections, there is a very low probability that objects named LOD will be in memory, which will affect the plugin's judgment of creating links for LOD geometry nodes. Clicking this button can clear potential hidden dangers.
- Add Lod Node
After creating the LOD set, select the original high-polygon object and click Add Lod Node. The plugin will hide the LOD set named after the high-polygon object and create two child objects for the previously selected camera, with _DepthRef and _RefPoint as suffixes. At the same time, the selected high-polygon object will also automatically create a geometry node, which is used to automatically switch LOD according to the distance between the object and the camera.
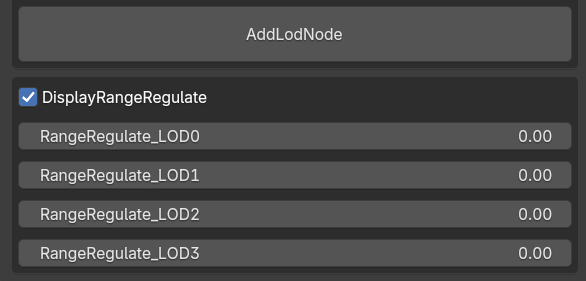
- DisplayRangeRegulate
After clicking CreateLOD and checking the checkbox, the parameters corresponding to the LOD range adjustment will appear in the UI. These parameters will be automatically applied to the generated geometry nodes later. This is to facilitate the subsequent batch processing process.
Geometry Node Operation Instructions
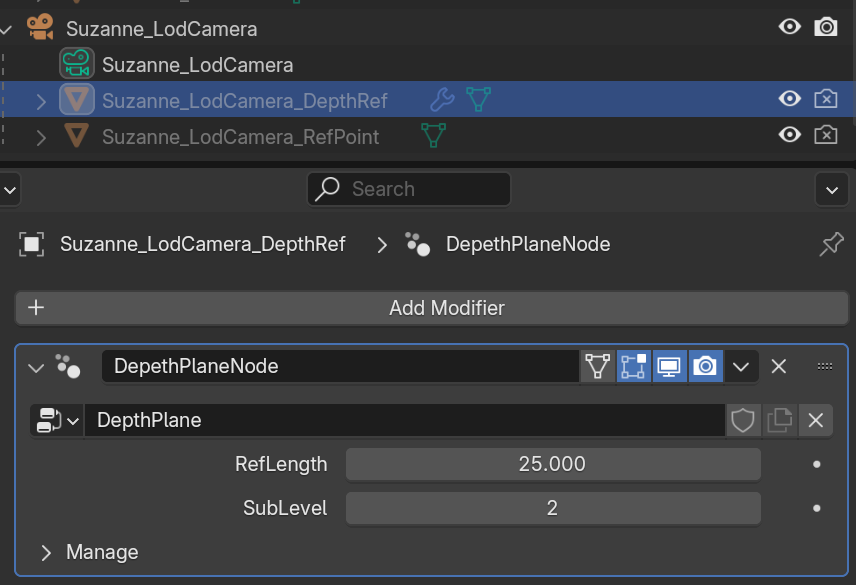
{Camera}_DepthRef
- RefLength
This determines the length of your reference plane and should be adjusted according to the actual proportions of the scene.
- SubLevel
This determines the subdivision ratio of the generated reference plane. The higher the level, the clearer the edge of the color band. This parameter is generally not required to be too high.
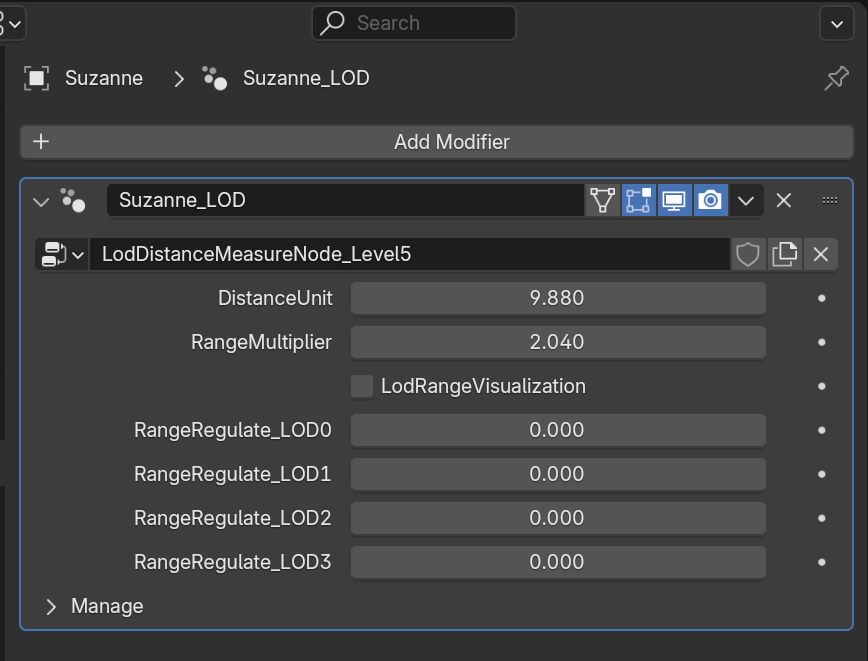
{Object}_LOD
- DistanceUnit & RangeMultiplier
As mentioned above
- LodRangeVisualization
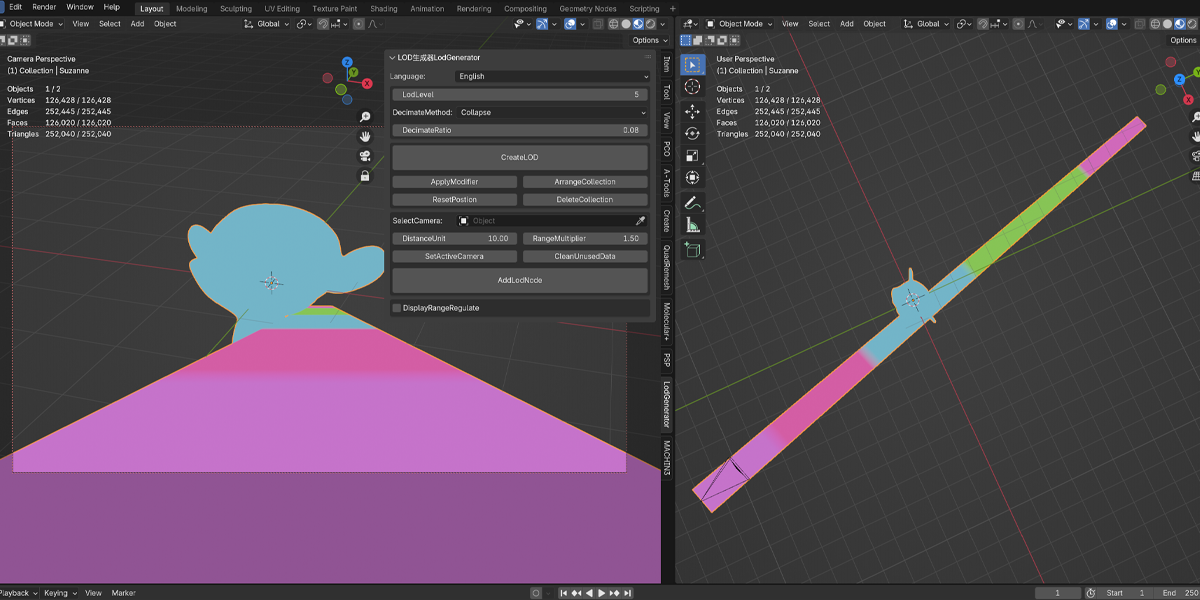
When this option is checked, change the viewport mode to render mode or material preview mode, and you can see reference planes with different color bands in the camera view. Different color bands represent different LOD levels. At this time, the selected high-polygon model will also be automatically set to the LOD range color. By adjusting the previous DistanceUnit & RangeMultiplier, you can optimize the approximate ratio of LOD, and then adjust the subsequent RangeRegulate to fine-tune different LOD ranges.
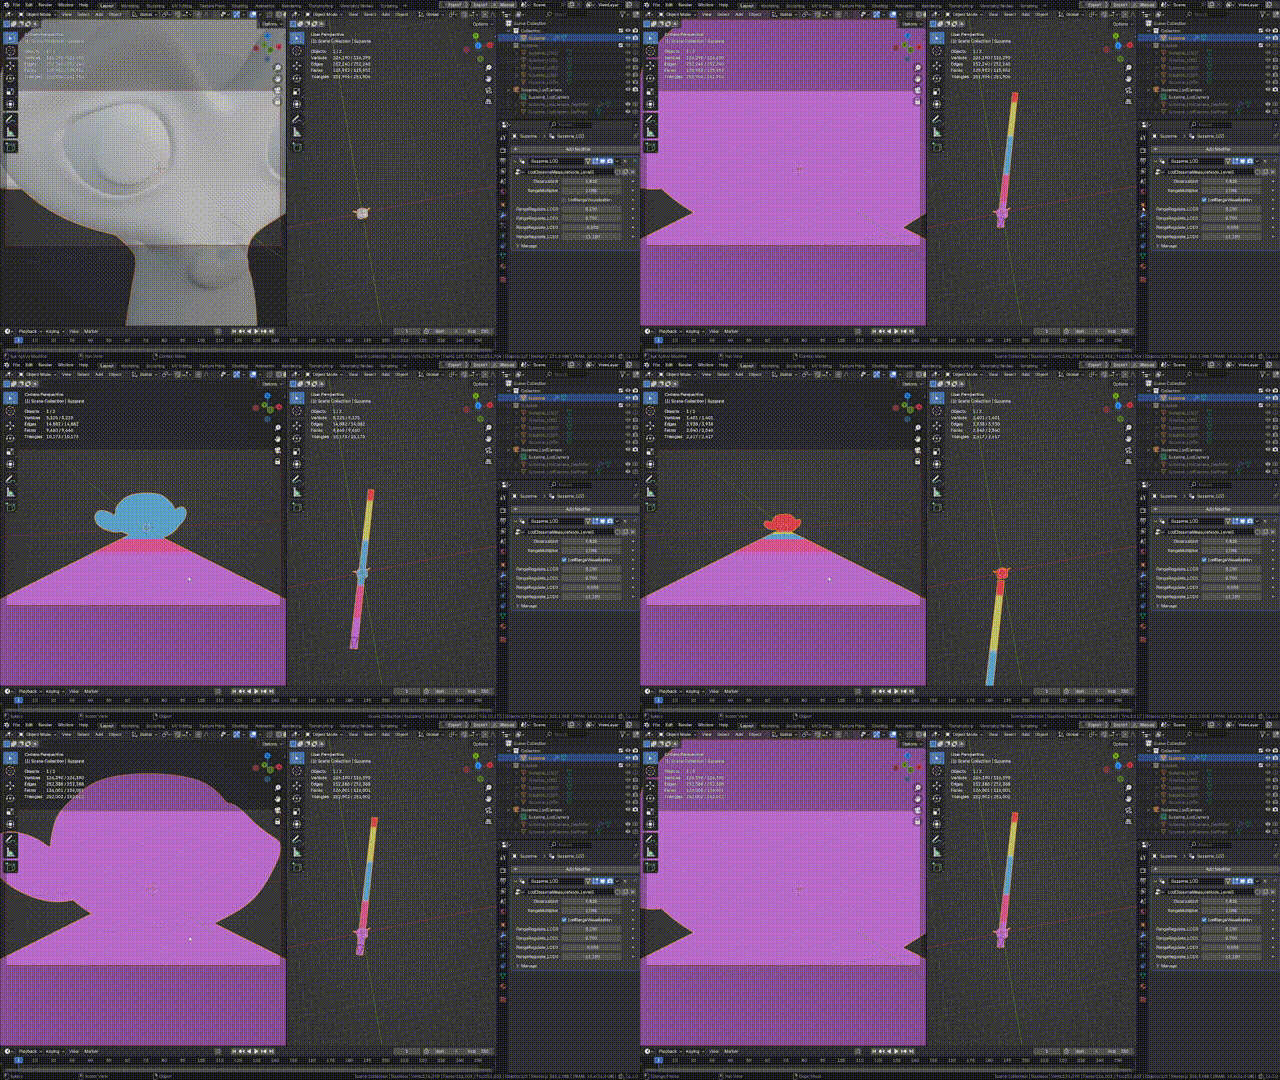
- Range Regulate
As mentioned above
If you have any questions about use, please feel free to ask me
| Published | 22 days ago |
| Blender Version | 4.2, 4.1, 4.0 |
| Extension Type | Legacy Add-on |
| License | GPL |
Have questions before purchasing?
Contact the Creator with your questions right now.
Login to Message